It was 11:47 PM on a random Tuesday in mid-October, and I had a very specific, almost ridiculous craving for something chocolatey, crunchy, and creepy. I didn’t have the energy for a layered cake or the patience for fancy piping, but I had a package of Oreos, a box of instant pudding, and a bag of gummy worms staring at me from the pantry. The idea arrived like a sugar-fueled lightning bolt—dirt cups. Not just any dirt cups, but the absolute best Halloween Oreo Dirt Cups with Gummy Worms that would make any grown adult giggle like a kid at a costume parade. Honestly, it was one of those moments where you’re half-asleep, covered in a fine dust of crushed cookie, and you just know you’ve stumbled onto something magical. Maybe you’ve been there, standing in your kitchen at an ungodly hour, wondering if you’ve lost your mind or just found the perfect party dessert. Let me tell you, it was the latter. The best part? I didn’t have to wait until morning to taste test. I mean, it’s a dirt cup—it’s supposed to be messy and fun. That late-night experiment turned into my go-to Halloween showstopper, and I keep making it because it’s the one dessert that disappears before the punch bowl is even half empty.
Why You’ll Love This Recipe
I’ve tested this recipe about six times in the last two years, tweaking the pudding-to-cream ratio and the ideal Oreo crumb texture. What I landed on is a dirt cup that’s creamy, crunchy, and just the right amount of spooky. This isn’t just another dessert—it’s the one that gets people talking at your Halloween party.
- Quick & Easy: Comes together in under 20 minutes of active prep. No baking, no stress. Perfect for when you’re scrambling the night before the big bash.
- Simple Ingredients: You probably have most of this in your pantry right now. Oreos, milk, instant pudding, cream cheese, and gummy worms. That’s it.
- Perfect for Halloween Parties: These little cups are a total crowd-pleaser. Kids love digging for worms, and adults love the nostalgic, no-fuss treat.
- Crowd-Pleaser: I’ve brought these to three different Halloween gatherings, and every single time, someone asks for the recipe. They’re always the first thing to run out.
- Unbelievably Delicious: The texture combo is next-level. Silky pudding meets crunchy Oreo crumb, all topped with a surprise gummy worm hiding inside. It’s comfort food with a side of spooky fun.
What makes this recipe different from the rest? It’s the cream cheese. I blend a little softened cream cheese into the pudding mixture, and it gives the filling a rich, almost cheesecake-like creaminess that regular pudding just can’t match. It’s my secret weapon, and once you try it, you won’t go back.
This recipe isn’t just good—it’s the kind that makes you close your eyes after the first bite. It’s Halloween dessert reimagined: faster, creamier, and with the same soul-soothing satisfaction as a full-on cake. Perfect for impressing guests without breaking a sweat.
What Ingredients You Will Need
This recipe uses simple, store-bought ingredients to deliver big flavor and spooky fun. Here’s what you’ll need to grab from the grocery store.
- For the “Dirt” (Oreo Crumb):
- 24 Oreo cookies (regular or Double Stuf—both work great)
- 2 tablespoons unsalted butter, melted (optional, for extra crunch)
- For the Creamy Filling:
- 1 (3.9 oz) box instant chocolate pudding mix (I prefer Jell-O brand for the best texture)
- 1 ½ cups cold whole milk (2% works too, but whole milk makes it richer)
- 4 oz cream cheese, softened to room temperature
- ¼ cup powdered sugar
- 1 teaspoon vanilla extract
- 1 (8 oz) tub Cool Whip, thawed (or homemade whipped cream if you’re feeling fancy)
- For the Spooky Decorations:
- 1 cup gummy worms (I like the sour ones for an extra tangy surprise)
- Optional: candy eyeballs, gummy spiders, or crushed graham crackers for extra texture
A few ingredient notes from my kitchen to yours. I always recommend using full-fat cream cheese for the filling. The low-fat version can get a little watery and won’t give you that silky smooth texture. For the Oreos, I’ve tested this with both regular and Double Stuf, and honestly, the Double Stuf version makes a slightly sweeter crumb. If you’re using regular Oreos, you might want to add an extra tablespoon of melted butter to the crumb mixture to help it stick together.
For the pudding, instant is non-negotiable here. Cook-and-serve pudding won’t set up properly in this recipe and will leave you with a soupy mess. Trust me on that one—I learned the hard way. If you need a dairy-free option, swap the milk for oat milk or almond milk and use a dairy-free cream cheese. The texture will be slightly less rich, but it still works beautifully.
Equipment Needed
You don’t need any fancy gadgets for this recipe. Here’s what I use every time I make these dirt cups.
- Food processor or Ziploc bag + rolling pin: For crushing the Oreos into fine crumbs. I prefer the food processor because it gives a more even texture, but a Ziploc bag and a rolling pin work in a pinch. Just make sure the bag is sealed tight—I once had a crumb explosion all over my kitchen floor.
- Electric hand mixer or stand mixer: For beating the cream cheese until smooth. A whisk and some elbow grease work too, but your arm will thank you for using a mixer.
- 6 to 8 small cups or jars: Clear plastic cups are perfect for Halloween because you can see the layers. I use 8-ounce cups, but any small glass jar or even a mason jar works.
- Mixing bowls: One large bowl for the pudding mixture and one medium bowl for the Oreo crumbs.
- Spatula: For folding in the Cool Whip and scraping every last bit of filling into the cups.
- Measuring cups and spoons: Standard set for the milk and vanilla.
If you’re making these for a big party, I recommend buying a set of clear plastic cups from the dollar store. They’re cheap, disposable, and guests can grab them easily. No one wants to wash dishes at a Halloween party.
Preparation Method
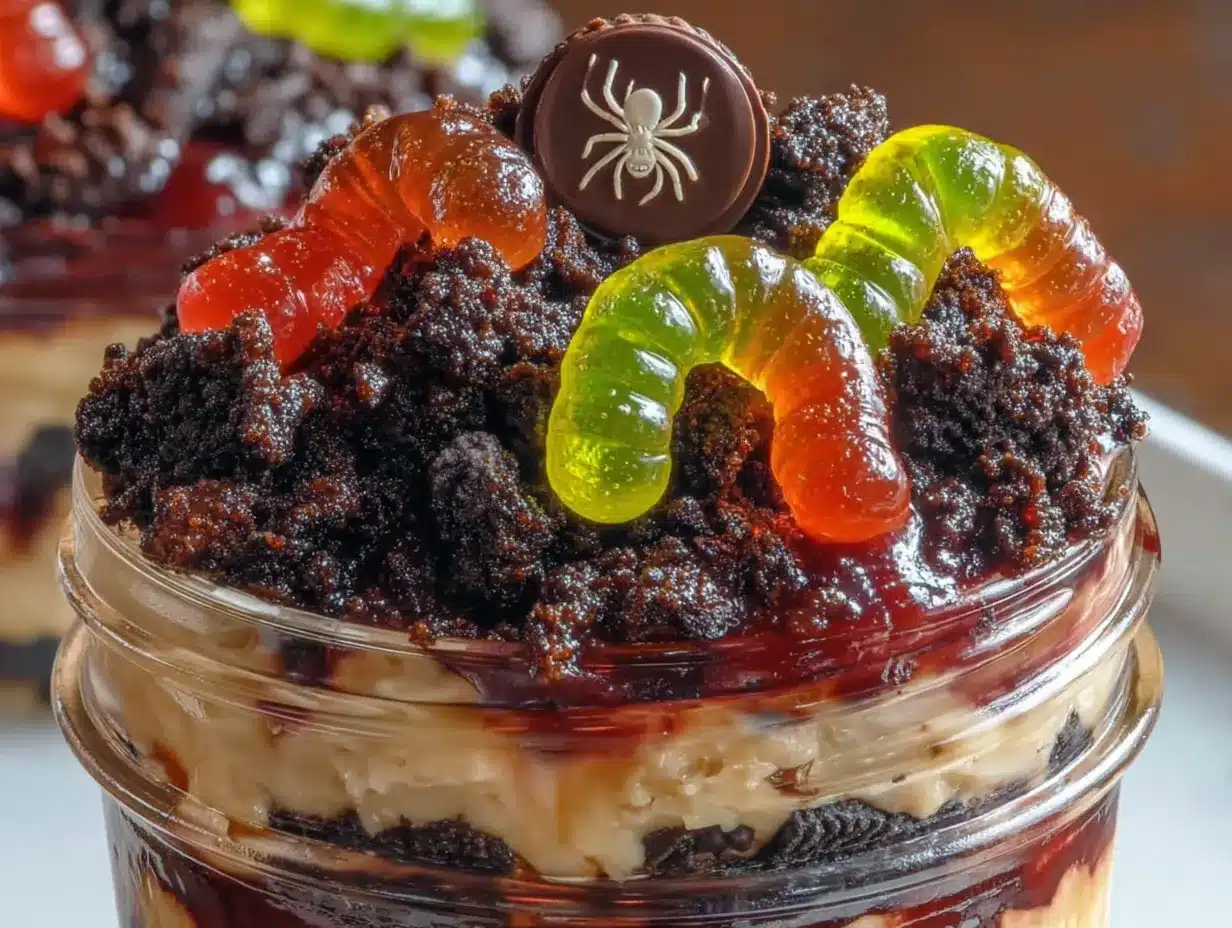
Let me walk you through this step by step. It’s easier than you think, and the result is always worth it.
- Crush the Oreos: Place all 24 Oreos in a food processor and pulse until you get a fine crumb. You want it to look like dark, rich soil—some slightly bigger pieces are okay, but try to get it mostly uniform. If you’re using a Ziploc bag, seal it tight and crush with a rolling pin. Set the crumbs aside in a medium bowl. If you’re using the melted butter, stir it into the crumbs now for a slightly crunchier texture.
- Make the pudding base: In a large mixing bowl, whisk together the instant chocolate pudding mix and 1 ½ cups cold milk. Whisk for about 2 minutes until it starts to thicken. Set it aside for 5 minutes to let it set up completely. You’ll know it’s ready when it holds a soft peak.
- Cream the cream cheese: In a separate bowl, beat the softened cream cheese with an electric mixer until it’s smooth and fluffy, about 1-2 minutes. Add the powdered sugar and vanilla extract, and beat again until fully combined. Scrape down the sides of the bowl with a spatula.
- Combine the fillings: Gently fold the cream cheese mixture into the chocolate pudding. Use a spatula and stir until it’s just combined—don’t overmix or you’ll deflate the pudding. The mixture should be thick and creamy.
- Fold in the Cool Whip: Add the thawed Cool Whip to the pudding-cream cheese mixture. Fold it in gently using a spatula, making sure there are no white streaks left. This step is what makes the filling light and airy. It should look like a mousse at this point.
- Layer the cups: Grab your cups or jars. Start with a layer of Oreo crumb at the bottom—about 2 tablespoons per cup. Then add a generous layer of the creamy filling—about ¼ cup. Repeat with another layer of crumbs, then another layer of filling. End with a final thick layer of Oreo crumbs on top. You want it to look like a little cup of dirt.
- Add the worms: Press a few gummy worms into the top layer of crumbs so they look like they’re crawling out of the dirt. I like to arrange them at different angles—some half-buried, some fully sticking out. It adds to the creepy effect.
- Chill: Place the cups in the refrigerator for at least 1 hour before serving. This allows the filling to set up completely and the flavors to meld together. If you’re making these for a party, you can prep them a day in advance—they actually taste better the next day.
A quick sensory cue for you: when you’re folding in the Cool Whip, the mixture should feel light and almost cloud-like. The Oreo crumbs should be dark and slightly sandy. And when you press a gummy worm into the top, you should feel a little resistance from the crumb layer—that’s how you know it’s thick enough.
Cooking Tips & Techniques
I’ve made these dirt cups about a dozen times now, and I’ve picked up a few tricks along the way. Here’s what I wish someone had told me before my first attempt.
Don’t skip the cream cheese. I know it seems like an extra step, but it’s the secret to that rich, almost cheesecake-like texture. The first time I made these without it, the filling was too thin and didn’t hold up well. The cream cheese adds body and a tangy depth that balances the sweetness of the Oreos.
Let the pudding set fully. I made the mistake of rushing this step once, and my filling was runny. Give it the full 5 minutes after whisking. You should see it thicken noticeably. If it still looks liquidy after 5 minutes, give it another 2-3 minutes.
Crush the Oreos in batches. If you’re using a food processor, don’t overload it. Work in two batches if needed. Overcrowding leads to uneven crumbs, and you’ll end up with some giant chunks and some powder. Aim for a uniform, sandy texture.
Use room temperature cream cheese. Cold cream cheese doesn’t blend smoothly and will leave you with lumps. Let it sit on the counter for 30 minutes before you start. If you’re in a hurry, you can microwave it for 10-15 seconds, but be careful not to melt it.
Make extra crumbs. I always crush an extra 4-5 Oreos and keep them in a small bowl. Sometimes you need a little more for the top layer, and it’s nice to have a backup. Plus, you can use the extra crumbs to sprinkle on top of the cups right before serving for a fresh, crunchy finish.
Variations & Adaptations
This recipe is super flexible, and I’ve tried a few different versions depending on the occasion. Here are some of my favorites.
Peanut Butter Dirt Cups: Add ¼ cup of creamy peanut butter to the cream cheese mixture before folding in the Cool Whip. It adds a nutty richness that pairs perfectly with the chocolate. My brother-in-law requests this version every Halloween.
Vegan Dirt Cups: Use dairy-free cream cheese, oat milk, and a vegan Cool Whip alternative. The Oreos are actually vegan-friendly, so you’re good there. The texture will be slightly less creamy, but it’s still delicious. I tested this for a friend’s vegan Halloween party, and no one noticed the difference.
Gluten-Free Dirt Cups: Swap the regular Oreos for gluten-free chocolate sandwich cookies. There are a few good brands out there, and they crush up just like the real thing. Everything else in the recipe is gluten-free.
Pumpkin Spice Dirt Cups: For a fall twist, add ¼ cup of pumpkin puree and 1 teaspoon of pumpkin pie spice to the cream cheese mixture. It gives the filling a warm, seasonal flavor that’s perfect for a Halloween-Thanksgiving crossover party.
Extra Spooky Version: Add a few drops of green or orange food coloring to the filling for a more festive look. You can also top the cups with candy eyeballs, gummy spiders, or crushed chocolate graham crackers for extra texture.
Serving & Storage Suggestions
These dirt cups are best served cold, straight from the fridge. I like to take them out about 10 minutes before serving so they soften slightly, but that’s personal preference. The gummy worms are more fun when they’re chilled and a little chewy.
For presentation, I arrange the cups on a large platter or tray lined with black or orange napkins. You can add a few extra gummy worms scattered around the platter for a creepy-crawly effect. If you’re feeling extra festive, stick a small plastic spider or bat on the side of each cup.
These pair perfectly with a hot apple cider or a pumpkin spice latte for the adults. For the kids, serve them with a glass of milk or a fun Halloween punch.
Storage: Cover the cups with plastic wrap or a lid and store them in the refrigerator for up to 3 days. The Oreo crumbs will soften slightly over time, but the flavor actually gets better as the filling sets. I don’t recommend freezing these—the texture gets weird when thawed.
Reheating: These are meant to be served cold, so no reheating needed. If you’re making them a day ahead, just add the gummy worms right before serving so they stay chewy and don’t get too soft.
Nutritional Information & Benefits
Let’s be real—this is a treat, not a health food. But here’s the approximate nutritional breakdown per serving (based on 8 servings).
| Nutrient | Amount per Serving |
|---|---|
| Calories | 345 |
| Total Fat | 18g |
| Saturated Fat | 10g |
| Carbohydrates | 44g |
| Sugar | 32g |
| Protein | 5g |
| Calcium | 80mg |
While this isn’t a health-conscious dessert, there are a few small benefits. The cream cheese adds a bit of calcium and protein, and the dark chocolate in the Oreos contains some antioxidants. Plus, the gummy worms are fat-free—if you want to focus on the positives.
For dietary considerations, this recipe contains dairy and gluten. It can be made vegan or gluten-free using the substitutions mentioned above. If you’re watching your sugar intake, you can use sugar-free pudding mix and a sugar-free Cool Whip alternative.
I believe in balance—Halloween is one night a year, and these dirt cups are worth every single calorie. Enjoy them guilt-free and have fun with the presentation.
Conclusion
These Best Halloween Oreo Dirt Cups with Gummy Worms are the kind of dessert that makes you feel like a kid again. They’re fun, easy, and guaranteed to be the hit of your Halloween party. Whether you’re hosting a big bash or just making a spooky treat for your family, this recipe delivers every single time.
I love how customizable these are—you can make them vegan, gluten-free, or add your own creepy decorations. Don’t be afraid to experiment. That’s the beauty of a no-bake dessert: there’s no risk, only reward.
I’d love to hear how yours turn out! Drop a comment below and let me know what variations you tried. Did you add extra gummy worms? Did you use a different cookie? Share your photos and tag me on social media—I can’t wait to see your spooky creations. Happy Halloween, and happy snacking!
Frequently Asked Questions
Can I make these dirt cups ahead of time?
Absolutely! You can make them up to 2 days in advance. Just wait to add the gummy worms until right before serving so they stay chewy and don’t get too soft.
Can I use homemade whipped cream instead of Cool Whip?
Yes, you can. Whip 1 cup of heavy cream with 2 tablespoons of powdered sugar until stiff peaks form, then fold it into the pudding mixture. It will be slightly less stable, but it tastes amazing.
How many cups does this recipe make?
This recipe makes 6 to 8 cups, depending on the size of your cups. I usually get 8 cups when using 8-ounce cups.
Can I use a different type of cookie?
Sure! You can use chocolate wafer cookies, graham crackers, or even crushed pretzels for a salty-sweet twist. Just make sure the texture is similar to Oreo crumbs.
How do I keep the gummy worms from getting soggy?
Add the gummy worms right before serving. If you’re making the cups ahead, store the worms separately and press them into the dirt layer just before you’re ready to serve.
Pin This Recipe!
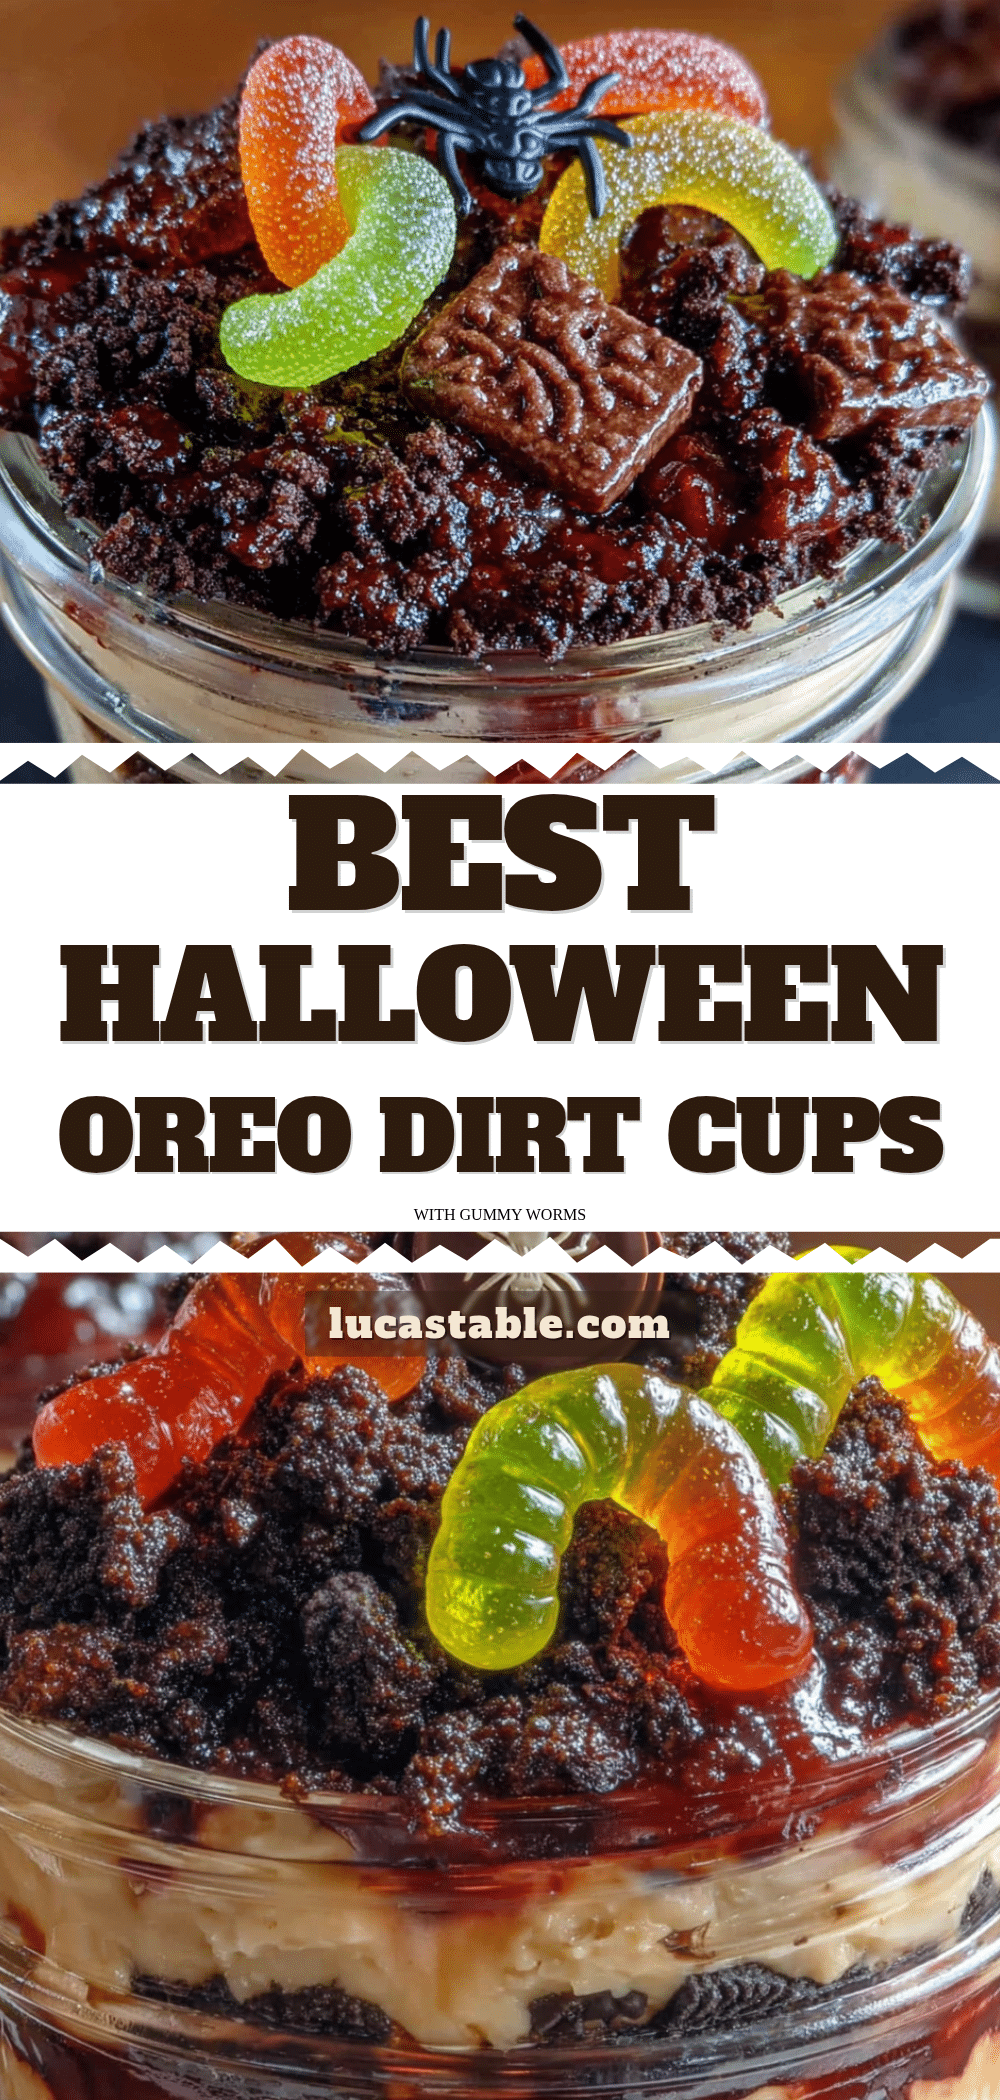
Best Halloween Dirt Cups with Gummy Worms
These no-bake Halloween Oreo Dirt Cups with Gummy Worms are creamy, crunchy, and spooky fun. Made with a secret cream cheese filling, they’re the perfect crowd-pleasing dessert for any Halloween party.
- Prep Time: 20 minutes
- Cook Time: 0 minutes
- Total Time: 1 hour 20 minutes (including chilling)
- Yield: 8 servings 1x
- Category: Dessert
- Cuisine: American
Ingredients
- 24 Oreo cookies (regular or Double Stuf)
- 2 tablespoons unsalted butter, melted (optional, for extra crunch)
- 1 (3.9 oz) box instant chocolate pudding mix (preferably Jell-O brand)
- 1 ½ cups cold whole milk (2% works too)
- 4 oz cream cheese, softened to room temperature
- ¼ cup powdered sugar
- 1 teaspoon vanilla extract
- 1 (8 oz) tub Cool Whip, thawed (or homemade whipped cream)
- 1 cup gummy worms (sour ones recommended)
- Optional: candy eyeballs, gummy spiders, or crushed graham crackers for extra texture
Instructions
- Crush the Oreos: Place all 24 Oreos in a food processor and pulse until you get a fine crumb. Set aside in a medium bowl. If using melted butter, stir it into the crumbs now.
- Make the pudding base: In a large mixing bowl, whisk together the instant chocolate pudding mix and 1 ½ cups cold milk. Whisk for about 2 minutes until it starts to thicken. Set aside for 5 minutes to let it set up completely.
- Cream the cream cheese: In a separate bowl, beat the softened cream cheese with an electric mixer until smooth and fluffy, about 1-2 minutes. Add the powdered sugar and vanilla extract, and beat again until fully combined.
- Combine the fillings: Gently fold the cream cheese mixture into the chocolate pudding using a spatula until just combined.
- Fold in the Cool Whip: Add the thawed Cool Whip to the pudding-cream cheese mixture and fold gently until no white streaks remain.
- Layer the cups: Start with a layer of Oreo crumb at the bottom (about 2 tablespoons per cup). Add a generous layer of the creamy filling (about ¼ cup). Repeat with another layer of crumbs, then another layer of filling. End with a final thick layer of Oreo crumbs on top.
- Add the worms: Press a few gummy worms into the top layer of crumbs so they look like they’re crawling out of the dirt.
- Chill: Place the cups in the refrigerator for at least 1 hour before serving. Can be made a day in advance.
Notes
Don’t skip the cream cheese—it gives the filling a rich, cheesecake-like texture. Let the pudding set fully before combining. Use room temperature cream cheese for smooth blending. Make extra Oreo crumbs for topping. Add gummy worms just before serving to keep them chewy.
Nutrition
- Serving Size: 1 cup
- Calories: 345
- Sugar: 32
- Sodium: 320
- Fat: 18
- Saturated Fat: 10
- Carbohydrates: 44
- Fiber: 1
- Protein: 5
Keywords: Halloween dirt cups, Oreo dirt cups, gummy worms, no-bake dessert, Halloween dessert, chocolate pudding cups


