This was supposed to be a simple, last-minute garlic bread. My mother-in-law was due in twenty minutes, the turkey was resting, and I realized I had completely forgotten to pick up a baguette. I grabbed the wrong flour—bread flour instead of all-purpose—and my yeast was older than I remembered. The power was on, but my brain certainly wasn’t. I was already sweating through my nice blouse, muttering about how this holiday dinner was going to be a disaster. What came out of that oven was nothing like the plan—and better. Honestly, it was one of those moments where you just stare at the pan, wondering if you accidentally tapped into some kind of culinary magic.
That first focaccia was lopsided, a little too brown on one edge, and absolutely perfect. The rosemary had toasted into these little fragrant crystals, the olive oil had pooled in the dimples, and the crust was this incredible golden crunch. My husband walked in, grabbed a piece before I could stop him, and just stood there chewing with his eyes closed. My mother-in-law, who is famously hard to impress, asked for the recipe before she even took off her coat. I mean, let me tell you, that never happens. Maybe you’ve been there—that moment when a kitchen panic turns into a happy little accident that becomes your signature dish.
I’ve made this focaccia for every holiday gathering since. It is the first thing to disappear from the table, even before the mashed potatoes. There is something about the combination of flaky sea salt, fragrant rosemary, and that pillowy, olive-oil-soaked bread that just feels like a celebration. It is the kind of recipe that makes you look like you spent hours in the kitchen when you really just threw it together between peeling potatoes and checking on the ham. This is the bread that steals the show, and I am not even a little bit sorry about it.
Why You Will Love This Recipe
Let me tell you why this rosemary focaccia is going to become your new holiday secret weapon. It is not just another bread recipe—it is the bread recipe that makes people think you took a professional baking class when you really just followed a few simple steps. I have tested this version at least a dozen times, tweaking the hydration and the proofing times until it was absolutely foolproof for a busy host.
- Quick & Easy: This comes together in under one hour, start to finish. No overnight rises, no complicated folds. Perfect for when you realize at 3 PM that you need a show-stopping side for a 5 PM dinner.
- Simple Ingredients: You likely have everything in your pantry right now. Flour, yeast, olive oil, salt, rosemary, and water. That is it. No fancy grocery trips required.
- Perfect for Holiday Hosting: This is the bread that makes your holiday table look complete. It is rustic, beautiful, and impressive without being fussy. Your guests will think you slaved away for hours.
- Crowd-Pleaser: I have served this to groups of picky eaters, gluten-free friends (I made a separate version for them), and serious foodies. It gets rave reviews every single time.
- Unbelievably Delicious: The texture is what gets everyone. That crispy, almost crackly exterior gives way to a soft, airy, olive-oil-soaked interior. It is the kind of bread you eat with nothing but your hands because you cannot wait for a plate.
What makes this version different from the rest? It is the technique of creating a very wet dough and using a generous amount of high-quality olive oil. This is not a dry, bready focaccia. This is the kind that leaves a little oil on your fingers and makes you reach for just one more piece. It is comfort food reimagined—faster, easier, but with the same soul-soothing satisfaction. Perfect for impressing your guests without stress, or turning a simple holiday meal into something memorable.
What Ingredients You Will Need
This recipe uses simple, wholesome ingredients to deliver that signature focaccia texture and flavor. Most of these are pantry staples, which is exactly what you want when you are hosting a big holiday meal and your brain is already full of timetables and side dish recipes.
- For the dough:
- 4 cups (500g) bread flour (I recommend King Arthur Flour for best texture, but any good bread flour works)
- 2 teaspoons (7g) active dry yeast or instant yeast (if using active dry, you will need to proof it first)
- 2 teaspoons (12g) fine sea salt
- 1 ¾ cups (415ml) warm water (about 105°F-110°F—warm but not hot to the touch)
- ¼ cup (60ml) extra-virgin olive oil, plus more for the pan (use a good quality one here, it makes a difference)
- For the topping:
- 3 tablespoons (45ml) extra-virgin olive oil, for drizzling
- 2 tablespoons fresh rosemary, chopped (or 1 tablespoon dried rosemary—fresh is better for holidays)
- 1 ½ teaspoons flaky sea salt (like Maldon—do not skip this, it is the star)
- Optional: fresh cracked black pepper, a pinch of red pepper flakes for heat
A few notes from my kitchen to yours. The bread flour is important here because it has a higher protein content, which gives the focaccia that chewy, satisfying texture. If you only have all-purpose flour, you can use it, but the crumb will be a little softer and less structured. I have done it in a pinch, and it still works—it just is not quite as show-stopping. For the olive oil, do not use the cheap stuff. This is a recipe where the oil is a primary flavor, so use something you would actually enjoy dipping bread into. I personally love a good California or Italian extra-virgin olive oil for this. For the rosemary, fresh is definitely best for a holiday table, but dried works fine if that is what you have. Just crush it a little between your fingers before sprinkling to release the oils. If you need a dairy-free option, this recipe is naturally dairy-free, so you are good to go. For a gluten-free version, use a good 1-to-1 gluten-free flour blend, but expect a slightly different texture—still delicious, just not as airy.
Equipment Needed
You do not need a lot of fancy equipment for this, which is part of why I love it for holiday hosting when my kitchen is already a disaster zone.
- A large mixing bowl (I use my trusty ceramic bowl, but glass or stainless steel works fine)
- A 9×13-inch baking pan (metal is best for even browning, but glass works too—if using glass, reduce oven temp by 25°F)
- Parchment paper (optional but helpful for easy cleanup)
- A kitchen scale (I highly recommend this for accuracy, but measuring cups work)
- A wooden spoon or dough whisk
- Plastic wrap or a clean kitchen towel
- A sharp knife or bench scraper for scoring
If you do not have a 9×13 pan, you can use a 10-inch cast iron skillet for a round focaccia—it looks gorgeous on a holiday table. Just adjust the baking time slightly, checking at the 20-minute mark. I actually prefer the cast iron version sometimes because the edges get extra crispy. For the dough, you can absolutely mix it by hand, which is what I usually do. It is a wet dough, so it is easier to just use a spoon than to deal with a stand mixer and a dough hook that gets all gummed up. If you do use a stand mixer, use the dough hook on low speed for about 5 minutes.
Preparation Method
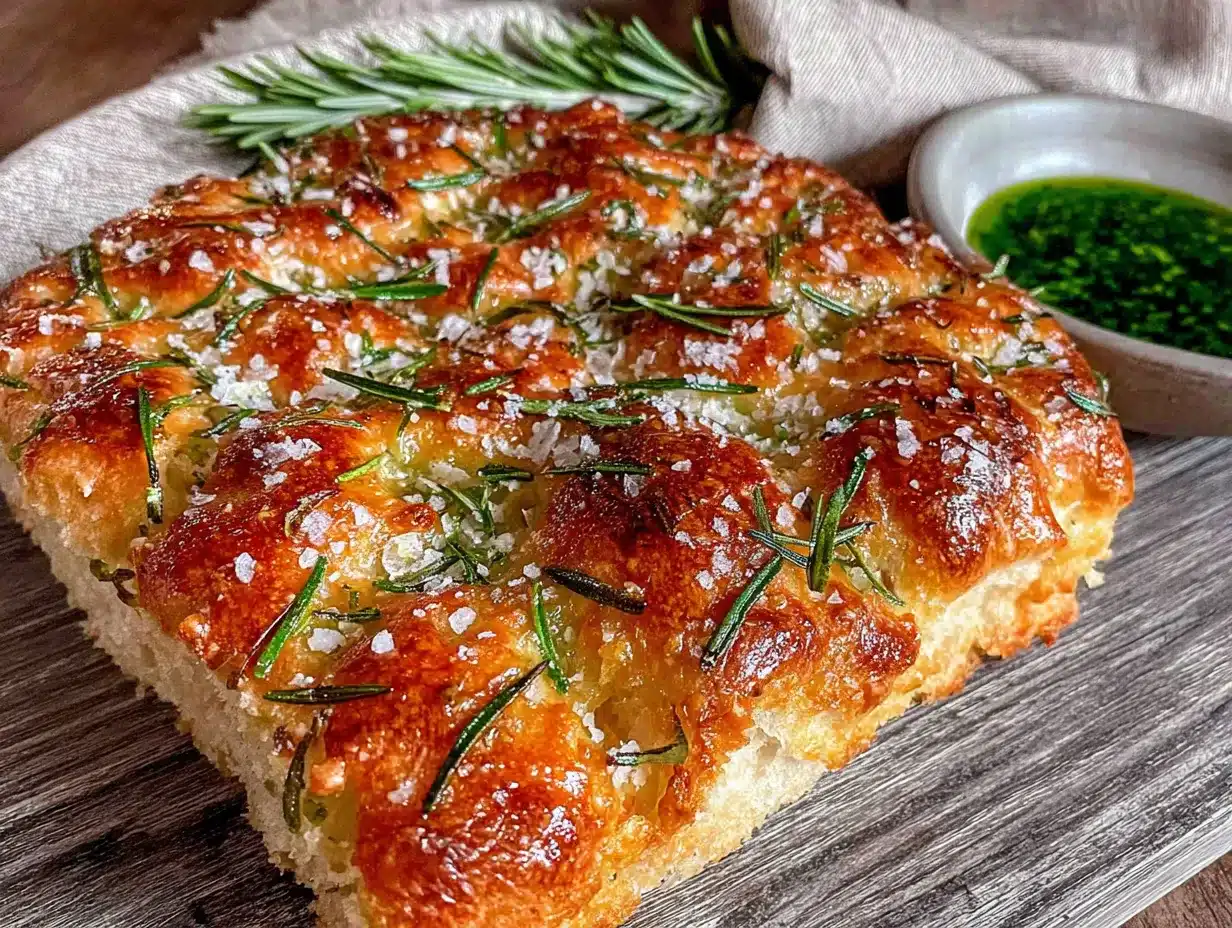
Alright, let us get to the good part. This is where the magic happens. Follow these steps, and you will have a focaccia that will have your guests fighting over the last piece.
- Proof the yeast (if using active dry): In your large mixing bowl, combine the warm water and a pinch of sugar or honey. Sprinkle the yeast on top and let it sit for 5-10 minutes until it is foamy. If it does not foam, your yeast might be dead—start over with fresh yeast. If using instant yeast, you can skip this step and just mix it with the flour.
- Mix the dough: Add the flour and salt to the bowl with the yeast mixture (or just the water if using instant yeast). Pour in the ¼ cup of olive oil. Stir with a wooden spoon or dough whisk until a shaggy, sticky dough forms. It will look very wet and loose—do not panic, that is exactly what you want. This high hydration is the secret to that airy, holey texture.
- First rest (the lazy fold): Cover the bowl with plastic wrap or a damp towel and let it rest for 10 minutes. After the rest, wet your hands slightly (so the dough does not stick) and fold the dough over itself a few times—just grab an edge, stretch it up, and fold it over the center. Do this 4-5 times around the bowl. This replaces the need for kneading and develops the gluten without effort. Cover and let it rest for another 10 minutes, then repeat the folding process one more time.
- Bulk fermentation: Cover the bowl tightly and let the dough rise in a warm place for 30-40 minutes, or until it has doubled in size. If your kitchen is cold, I like to put the bowl in the oven with just the light on—it creates a perfect warm environment. Do not turn the oven on!
- Prepare the pan: While the dough rises, pour about 2-3 tablespoons of olive oil into your 9×13 baking pan. Use your fingers to spread it all over the bottom and up the sides. This is not just for greasing—it is going to fry the bottom of the focaccia and give it that incredible crispy crust.
- Transfer and stretch: Gently scrape the risen dough into the oiled pan. It will be very soft and bubbly. Do not punch it down—just let it fall into the pan. Using oiled fingers, gently stretch and press the dough to fill the pan. If it resists, let it rest for 5 minutes and then stretch again. It should cover the entire bottom of the pan.
- Second rise: Cover the pan with plastic wrap and let the dough rise again for 15-20 minutes. It should puff up and look pillowy. While it rises, preheat your oven to 425°F (220°C).
- Dimple and top: This is the fun part. Drizzle the remaining 3 tablespoons of olive oil over the top of the dough. Then, using your fingertips, press deep dimples all over the surface of the dough—go all the way down to the bottom of the pan. Do not be shy about this. The dimples are what catch the oil and create those crispy, caramelized pockets. Sprinkle the chopped rosemary and flaky sea salt evenly over the top. Add a crack of black pepper if you like.
- Bake: Place the pan on the middle rack of your preheated oven. Bake for 20-25 minutes, or until the focaccia is deep golden brown on top and sounds hollow when you tap the bottom. The edges should be crispy and dark. Every oven is different, so start checking at 20 minutes.
- Cool and serve: Let the focaccia cool in the pan for 5 minutes, then transfer it to a wire rack (or just a cutting board). If you leave it in the pan too long, the bottom will get soggy from the steam. Let it cool for at least 10 minutes before slicing—I know it is hard to wait, but it needs to set. Serve warm or at room temperature.
A sensory cue for you: when it is done, the kitchen should smell like a fancy Italian bakery. The top should be a beautiful golden brown with darker spots where the oil pooled. The rosemary will look like little green jewels scattered across the surface. When you tap the bottom, it should sound like you are knocking on a hollow door.
Cooking Tips & Techniques
I have made this focaccia more times than I can count, and I have learned a few things the hard way. Let me save you from my mistakes.
The biggest mistake people make is using too little oil. Do not skimp on it. The oil is not just for flavor—it is what creates that crispy, almost fried bottom crust. I have had batches where I was trying to be healthy and used less oil, and the result was a dry, sad focaccia. Never again. Be generous with it, especially in the pan.
Another common issue is not letting the dough rise enough. A good focaccia needs that airy, open crumb, and that comes from proper fermentation. If your kitchen is cold, find a warm spot. I have put the bowl on top of my refrigerator before, or near a sunny window. In the winter, I sometimes preheat my oven to 170°F, turn it off, and then put the dough inside with the door slightly ajar. That warm environment is a game-changer.
For the dimpling step, do not be gentle. I used to poke lightly, thinking I would deflate the dough. But you actually want to deflate it a little—that is what creates the texture. Press your fingers all the way down to the bottom of the pan. The dough will spring back a bit, but those deep indentations will fill with oil and become those delicious crispy spots. Trust me on this one.
Timing is everything when you are hosting. Here is my strategy: I make the dough and do the first rise while I am prepping other dishes. Then I do the second rise while the turkey is resting or the ham is finishing. By the time I need to pop it in the oven, everything else is almost ready. It bakes in the time it takes me to set the table and open a bottle of wine. Perfect multitasking.
Variations & Adaptations
Once you have mastered the basic recipe, the possibilities are endless. Here are a few variations I have tried and loved.
- Herb and Garlic Focaccia: Add 3-4 cloves of thinly sliced garlic to the topping along with the rosemary. You can also mix in some fresh thyme or oregano. I made this for a Thanksgiving potluck once, and someone asked if they could take the whole pan home.
- Cheese and Sun-Dried Tomato: Before the second rise, press some halved cherry tomatoes or chopped sun-dried tomatoes into the dough. Sprinkle with grated Parmesan or crumbled feta before baking. This version is amazing served alongside a big holiday salad.
- Everything Bagel Focaccia: Skip the rosemary and top the dough with everything bagel seasoning (sesame seeds, poppy seeds, dried garlic, dried onion, salt). This is my go-to for brunch gatherings or when I am serving it with soup.
- Gluten-Free Version: Use a good 1-to-1 gluten-free flour blend. The dough will be more like a batter, so do not expect to stretch it the same way. Just pour it into the pan and let it rise. The texture is denser but still delicious. I have a gluten-sensitive friend who requests this every year.
- Sweet Focaccia: For a dessert twist, skip the salt and rosemary. Instead, top the dough with a mixture of brown sugar, cinnamon, and chopped pecans. Drizzle with a little honey before baking. Serve it warm with coffee—it is incredible.
Serving & Storage Suggestions
This focaccia is best served warm, straight from the oven, when the crust is at its crispiest and the interior is still pillowy soft. But it is also fantastic at room temperature, which makes it perfect for a holiday buffet or potluck where people are grazing.
For presentation, I like to transfer the whole focaccia to a wooden cutting board or a large platter. I drizzle it with a little extra olive oil and sprinkle on some fresh rosemary for color. Sometimes I put a small bowl of good olive oil and balsamic vinegar next to it for dipping. It looks rustic and beautiful, like something from a fancy restaurant.
This bread pairs beautifully with almost any holiday main dish. It is perfect for sopping up gravy, soaking up the juices from a roast, or just eating on its own with a little butter. I also love serving it alongside a big winter salad with pomegranate seeds and goat cheese. For drinks, it goes wonderfully with a crisp white wine like Sauvignon Blanc or a light red like Pinot Noir.
For storage, wrap the cooled focaccia tightly in foil or plastic wrap and keep it at room temperature for up to 2 days. Do not refrigerate it—the fridge will dry it out and make it stale. To reheat, pop it in a 350°F oven for 5-7 minutes, or until it is warm and the crust crisps back up. You can also reheat individual slices in a toaster oven or even a dry skillet. I do not recommend microwaving it, as it will become rubbery.
You can also freeze this focaccia. Wrap it tightly in foil, then place it in a freezer bag. It will keep for up to 3 months. To serve, thaw it at room temperature, then reheat in a 350°F oven for about 10 minutes. The flavor is still fantastic, and it is a lifesaver when you need bread in a hurry.
Nutritional Information & Benefits
While this is definitely a treat for the holiday table, it does have some redeeming qualities. The olive oil is rich in healthy monounsaturated fats and antioxidants, which are good for heart health. Rosemary is packed with antioxidants and has anti-inflammatory properties. Plus, bread made with a long fermentation process is easier to digest than quick breads.
Here is the estimated nutritional information per serving (1/8 of the recipe):
- Calories: 280
- Fat: 14g
- Carbohydrates: 34g
- Protein: 6g
- Fiber: 2g
- Sugar: 0g
- Sodium: 480mg
Please note that these are estimates and will vary based on the exact ingredients and brands you use. For a lower-sodium version, reduce the flaky sea salt on top. For a lower-fat version, you can reduce the olive oil, but honestly, that is what makes it so good. It is a holiday—live a little!
Conclusion
This rosemary focaccia has become my absolute favorite thing to bring to the holiday table. It is the recipe that started as a complete accident and turned into a family tradition. Every time I make it, I think back to that panicked afternoon with the wrong flour and the too-old yeast, and I smile. It reminds me that sometimes the best things in life come from our biggest mistakes.
I really hope you give this a try for your next holiday gathering. Do not be afraid to make it your own—add your favorite herbs, throw in some cheese, or keep it classic. The beauty of this recipe is that it is forgiving and adaptable. And trust me, when you pull that golden, fragrant pan out of the oven and your guests start oohing and aahing, you will feel like a rockstar.
I would love to hear how it turns out for you! Drop a comment below and let me know what variations you tried, or tag me in your photos on social media. Happy baking, and happy holidays!
Frequently Asked Questions
Can I make this focaccia ahead of time?
Yes! You can bake it a day ahead and reheat it in a 350°F oven for about 10 minutes before serving. The crust will crisp right back up. You can also freeze it for up to 3 months.
Why is my focaccia dense and not airy?
This usually happens for one of two reasons: your yeast was old or dead, or you did not let it rise long enough. Make sure your yeast is fresh and your kitchen is warm enough for proper fermentation.
Can I use dried rosemary instead of fresh?
Absolutely. Use about half the amount (1 tablespoon instead of 2), and crush it between your fingers before sprinkling to release the oils. The flavor will be slightly less bright, but it still works great.
What is the best way to reheat leftover focaccia?
The best method is in the oven at 350°F for 5-7 minutes. A toaster oven works well too. Avoid the microwave, as it will make the bread rubbery and soggy.
Can I make this recipe in a cast iron skillet?
Yes, a 10-inch cast iron skillet works beautifully. The edges get extra crispy. Just adjust the baking time slightly, checking at the 20-minute mark. It also looks gorgeous for serving right at the table.
Pin This Recipe!
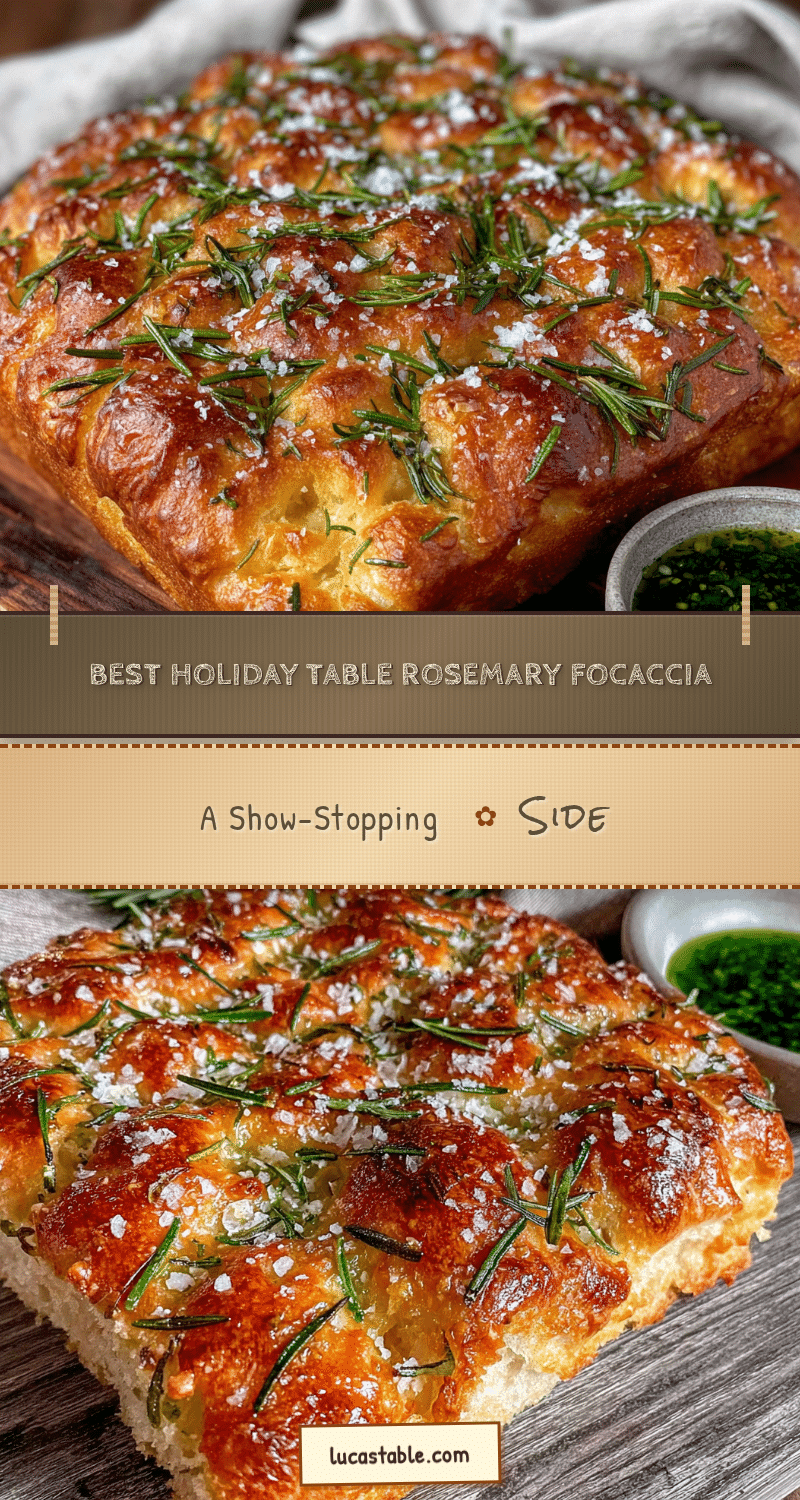
Best Holiday Rosemary Focaccia: Easy 1-Hour Showstopper
This easy, one-hour rosemary focaccia is a holiday showstopper with a crispy, olive-oil-soaked crust and pillowy interior. Perfect for last-minute hosting, it uses simple pantry ingredients and delivers incredible flavor.
- Prep Time: 15 minutes
- Cook Time: 25 minutes
- Total Time: 1 hour
- Yield: 8 servings 1x
- Category: Bread
- Cuisine: Italian
Ingredients
- 4 cups (500g) bread flour (e.g., King Arthur Flour)
- 2 teaspoons (7g) active dry yeast or instant yeast
- 2 teaspoons (12g) fine sea salt
- 1 ¾ cups (415ml) warm water (105°F-110°F)
- ¼ cup (60ml) extra-virgin olive oil, plus more for the pan
- 3 tablespoons (45ml) extra-virgin olive oil, for drizzling
- 2 tablespoons fresh rosemary, chopped (or 1 tablespoon dried rosemary)
- 1 ½ teaspoons flaky sea salt (e.g., Maldon)
- Optional: fresh cracked black pepper, a pinch of red pepper flakes
Instructions
- Proof the yeast (if using active dry): In a large mixing bowl, combine warm water and a pinch of sugar or honey. Sprinkle yeast on top and let sit for 5-10 minutes until foamy. If using instant yeast, skip this step and mix with flour.
- Mix the dough: Add flour, salt, and ¼ cup olive oil to the yeast mixture (or water if using instant yeast). Stir with a wooden spoon until a shaggy, sticky dough forms.
- First rest (the lazy fold): Cover the bowl and let rest for 10 minutes. Wet your hands, then fold the dough over itself 4-5 times. Cover and rest another 10 minutes, then repeat the folding.
- Bulk fermentation: Cover tightly and let rise in a warm place for 30-40 minutes, until doubled in size.
- Prepare the pan: Pour 2-3 tablespoons olive oil into a 9×13-inch baking pan and spread over bottom and sides.
- Transfer and stretch: Gently scrape the risen dough into the oiled pan. Using oiled fingers, stretch and press to fill the pan. Let rest 5 minutes if it resists.
- Second rise: Cover with plastic wrap and let rise for 15-20 minutes until puffy. Meanwhile, preheat oven to 425°F (220°C).
- Dimple and top: Drizzle remaining 3 tablespoons olive oil over dough. Use fingertips to press deep dimples all over the surface. Sprinkle with rosemary and flaky sea salt. Add black pepper if desired.
- Bake: Place pan on middle rack and bake for 20-25 minutes, until deep golden brown and hollow-sounding when tapped on the bottom.
- Cool and serve: Let cool in pan for 5 minutes, then transfer to a wire rack. Cool at least 10 minutes before slicing. Serve warm or at room temperature.
Notes
Use high-quality olive oil for best flavor. Bread flour gives a chewier texture; all-purpose can be substituted but yields a softer crumb. For gluten-free, use a 1-to-1 gluten-free flour blend. Do not refrigerate leftovers; store at room temperature for up to 2 days. Reheat in a 350°F oven for 5-7 minutes.
Nutrition
- Serving Size: 1/8 of recipe
- Calories: 280
- Sodium: 480
- Fat: 14
- Saturated Fat: 2
- Carbohydrates: 34
- Fiber: 2
- Protein: 6
Keywords: focaccia, rosemary bread, holiday bread, easy bread recipe, one-hour bread, Italian bread, party bread


