The first whisper of summer always smells like strawberries to me. Not just any strawberries, but the ones my grandmother would bring in from her garden, still warm from the sun, their juice already staining the brown paper bag. I can see her hands now, rough from gardening, carefully hulling each one while I sat on the counter, swinging my legs. She’d hand me a slice, and I’d eat it right there, the sweetness so intense it almost hurt. That was the beginning of every summer meal, and it always ended the same way: with a plate of classic strawberry shortcake with homemade biscuits.
I’ve made a lot of versions over the years. I’ve tried the sponge cake kind, the angel food kind, even a shortcut version with store-bought cookies when I was in a real pinch. But nothing, and I mean nothing, compares to the one with those buttery, flaky, slightly sweet homemade biscuits. It’s the perfect vehicle for all that juicy, macerated fruit and a cloud of whipped cream. It’s not fancy, but it’s honest. It’s the dessert that says summer is here to stay.
So, if you’ve been looking for a way to capture that feeling, that perfect bite of sweet, tart, creamy, and buttery all at once, you’ve found it. This isn’t just a recipe; it’s a memory you can bake yourself. And honestly, it’s easier than you think to get those biscuits just right.
Why You’ll Love This Recipe
This is the kind of dessert that makes people close their eyes when they take the first bite. It’s a moment of pure, uncomplicated joy. And the best part? It’s surprisingly simple to pull off, even on a busy weeknight or a lazy Sunday afternoon.
- Quick & Easy: From start to finish, you can have these biscuits on the table in about 30 minutes. The berries just need a little time to get juicy while you bake, making this a perfect last-minute treat.
- Simple Ingredients: You probably already have most of what you need in your pantry. No weird specialty items or trips to three different stores. Just flour, butter, cream, sugar, and the best strawberries you can find.
- Perfect for Summer Gatherings: This is the ultimate dessert for a backyard BBQ, a Fourth of July party, or a simple family dinner. It feels special without making you feel like you’re chained to the stove.
- Crowd-Pleaser: I’ve yet to meet someone who doesn’t love a good strawberry shortcake. It’s a classic for a reason. Kids love the sweet berries and cream, and adults appreciate the buttery, not-too-sweet biscuit.
- Unbelievably Delicious: The contrast between the warm, flaky biscuit, the cold, macerated strawberries, and the light, airy whipped cream is pure magic. It’s the kind of texture and flavor combo that defines comfort food.
This recipe is different because it focuses on the biscuit. So many versions use a dry, cake-like base, but here, we’re making a tender, almost scone-like biscuit that holds up perfectly to all that juicy goodness. It’s a technique I’ve perfected over years of trial and error (and a few tears over soggy biscuits). Trust me, this is the one.
What Ingredients You Will Need
This recipe uses simple, wholesome ingredients to deliver big flavor. The magic is in the quality of your ingredients and a few key techniques. Here’s what you’ll need to grab from your pantry and fridge.
For the Macerated Strawberries
- 1 pound fresh strawberries, hulled and sliced – This is about one standard carton. Look for berries that are deep red, fragrant, and firm but not hard. If they smell like strawberries, they’ll taste like strawberries. In the middle of winter, you can use frozen, but fresh is really where it’s at for this.
- 1/4 cup granulated sugar – The sugar draws out the natural juices from the berries, creating that gorgeous syrup. You can adjust this based on how sweet your berries are.
- 1 tablespoon fresh lemon juice – This isn’t just for flavor; a little acid balances the sweetness and helps the berries release their juices faster. Don’t skip it!
For the Homemade Biscuits
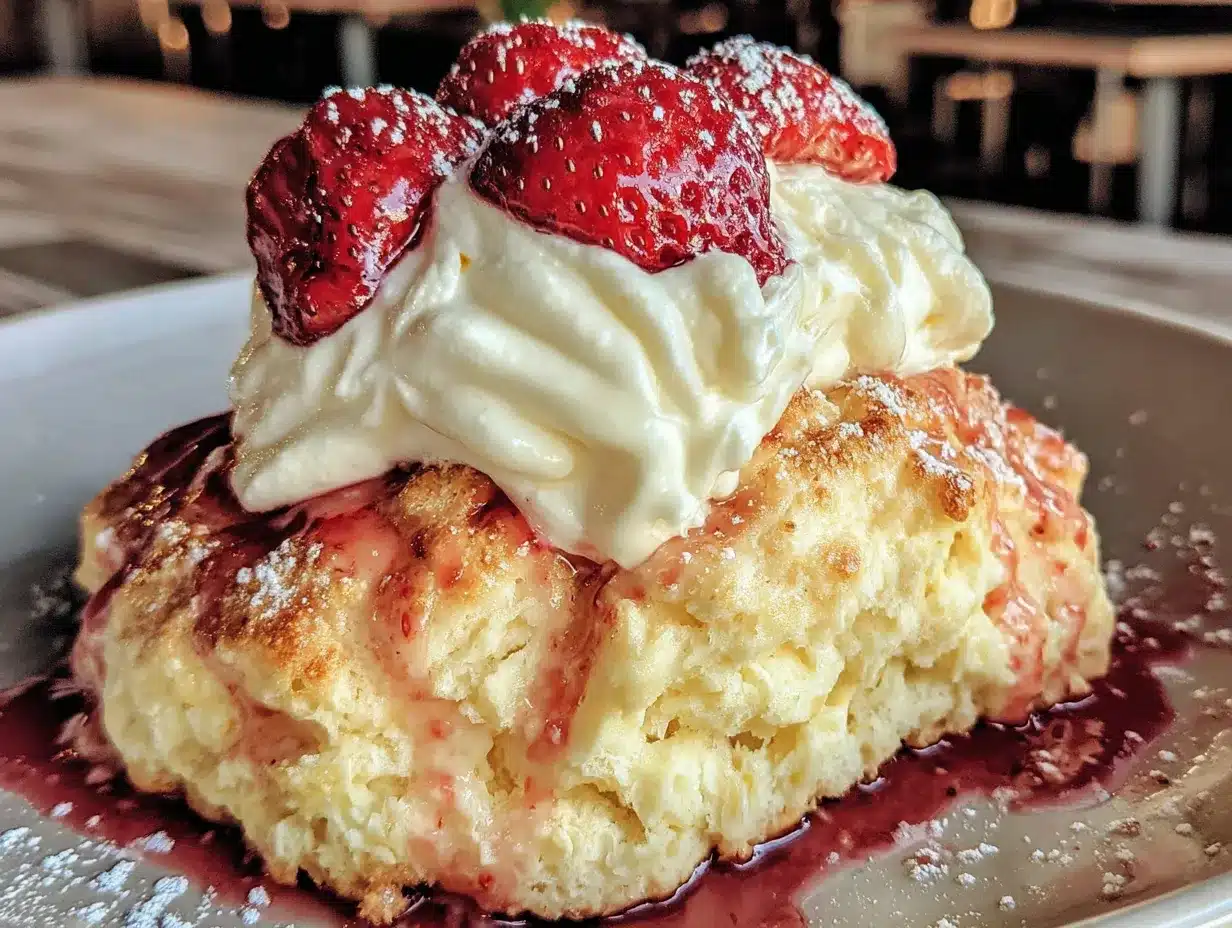
- 2 cups all-purpose flour – I use unbleached all-purpose flour. It gives the biscuits the perfect structure. For a lighter biscuit, you can swap in 1/2 cup of cake flour.
- 1/4 cup granulated sugar – Just enough to make the biscuits slightly sweet, but not so much that they become cookies. They’re a canvas for the berries and cream.
- 1 tablespoon baking powder – Make sure it’s fresh! This is what gives the biscuits their lift. If your baking powder is old, your biscuits will be sad little hockey pucks.
- 1/2 teaspoon salt – Salt is crucial for balancing the sweetness and enhancing the buttery flavor. I prefer fine sea salt for baking.
- 6 tablespoons cold unsalted butter, cut into small cubes – This is non-negotiable. The butter must be cold. When it melts in the oven, it creates steam, which makes the biscuits flaky. I like to pop my cubed butter in the freezer for 10 minutes before I start.
- 3/4 cup cold heavy cream – Plus a little extra for brushing the tops. Heavy cream gives the biscuits a rich, tender crumb that milk just can’t match. It’s the secret to a truly decadent biscuit. I like to use a brand like Vermont Creamery for its high butterfat content.
- 1 teaspoon vanilla extract – A little vanilla in the dough rounds out the flavors beautifully. It’s a small touch that makes a big difference.
- Turbinado or coarse sugar, for sprinkling – This is optional, but it gives the tops a lovely, crunchy sparkle. It’s a nice little textural surprise.
For the Whipped Cream
- 1 cup cold heavy cream – Again, cold is key. For the best results, chill your bowl and whisk attachment in the freezer for 15 minutes before you start.
- 2 tablespoons powdered sugar – Powdered sugar dissolves more easily into the cream than granulated sugar, giving you a silky, smooth texture.
- 1/2 teaspoon vanilla extract – Or the seeds from half a vanilla bean, if you’re feeling fancy. Pure vanilla extract is a must here; the imitation stuff has a weird, chemical aftertaste.
Equipment Needed
You don’t need a ton of fancy gadgets to make these biscuits, which is one of the reasons I love this recipe. Here’s what you’ll need to have on hand.
- Baking sheet – A standard half-sheet pan works perfectly. Line it with parchment paper for easy cleanup.
- Large mixing bowls – You’ll need one for the strawberries, one for the dry ingredients, and one for the whipped cream.
- Pastry cutter or two forks – To cut the cold butter into the flour. You can also use your fingertips, but work quickly so the butter doesn’t warm up. A pastry cutter is my favorite tool for this job.
- 2-inch or 2.5-inch round biscuit cutter – A sharp-edged cutter is important. Don’t twist it when you cut; just press straight down. Twisting seals the edges and prevents the biscuits from rising properly.
- Box grater or food processor – If you don’t have a pastry cutter, you can freeze your butter and grate it directly into the flour using a box grater. It’s a game-changer for even distribution! A food processor works too, but be careful not to over-process.
- Pastry brush – For brushing the tops of the biscuits with cream before baking. A silicone one is easy to clean.
- Electric mixer or whisk – For whipping the cream. A hand mixer or a stand mixer with the whisk attachment makes it easy, but a good old-fashioned whisk and some elbow grease works wonders, too.
Preparation Method
Alright, let’s get baking! This process is straightforward, but a few key steps make all the difference. Follow these closely, and you’ll have perfect biscuits every time.
- Macerate the strawberries. In a medium bowl, combine the sliced strawberries, 1/4 cup of granulated sugar, and the lemon juice. Gently toss everything together until the sugar starts to dissolve. Set the bowl aside. Let the berries sit for at least 20-30 minutes while you make the biscuits. They’ll release their beautiful red juice and become incredibly soft and flavorful. Give them a stir every now and then.
- Preheat your oven. Set your oven to 425°F (220°C). A hot oven is crucial for getting those biscuits to rise tall and get golden brown. Line your baking sheet with parchment paper.
- Mix the dry ingredients. In a large bowl, whisk together the 2 cups of all-purpose flour, 1/4 cup of granulated sugar, 1 tablespoon of baking powder, and 1/2 teaspoon of salt. Make sure the baking powder is evenly distributed.
- Cut in the cold butter. Add the cold, cubed butter to the flour mixture. Using a pastry cutter, two forks, or your fingertips, work the butter into the flour until the mixture looks like coarse meal with pea-sized pieces of butter still visible. This is the most important step. Those little chunks of butter are what create the flaky layers. Don’t overwork it! If the mixture starts to look like wet sand, you’ve gone too far.
- Add the wet ingredients. Make a well in the center of the flour-butter mixture. Pour in the 3/4 cup of cold heavy cream and 1 teaspoon of vanilla extract. Stir with a fork or a rubber spatula just until the dough comes together. It will look a bit shaggy and there might be some dry bits at the bottom of the bowl. That’s exactly what you want. Over-mixing will make the biscuits tough.
- Bring the dough together. Turn the shaggy dough out onto a lightly floured surface. Gently bring it together with your hands, kneading it just 2 or 3 times, until it forms a cohesive ball. Pat the dough into a 1-inch thick rectangle. Don’t use a rolling pin; your hands are gentler.
- Cut the biscuits. Dip your biscuit cutter in flour to prevent sticking. Press it straight down into the dough—do not twist! Twisting seals the edges and prevents the biscuits from rising. Cut the biscuits as close together as possible to minimize re-rolling scraps. You should get about 6-8 biscuits from this dough. If you need to re-roll the scraps, gently press them together and cut again, but remember, the second batch won’t be as tender.
- Bake the biscuits. Place the biscuits on your prepared baking sheet, spacing them about 2 inches apart. Brush the tops with a little extra heavy cream and sprinkle generously with turbinado or coarse sugar. Bake for 12-15 minutes, or until the biscuits are golden brown on top and have risen beautifully. The bottoms should be lightly browned as well.
- Make the whipped cream. While the biscuits are baking, make the whipped cream. In a chilled bowl, combine the 1 cup of cold heavy cream, 2 tablespoons of powdered sugar, and 1/2 teaspoon of vanilla extract. Beat with an electric mixer on medium-high speed (or whisk vigorously by hand) until soft peaks form. This means when you lift the whisk, the cream holds a soft, droopy peak. Be careful not to over-whip, or you’ll end up with butter!
- Assemble and serve. Let the biscuits cool on the baking sheet for just a couple of minutes. To serve, split a warm biscuit in half. Spoon a generous amount of the macerated strawberries and their juices over the bottom half. Add a big dollop of whipped cream, then place the top half of the biscuit on. Finish with another spoonful of berries and a final cloud of cream. Serve immediately!
Cooking Tips & Techniques
I’ve made this classic strawberry shortcake with homemade biscuits more times than I can count, and I’ve learned a few things the hard way. Here are my best tips to make sure your first (or hundredth) batch is perfect.
- Cold ingredients are your best friend. I cannot stress this enough. The butter and cream need to be cold. If your kitchen is warm, pop the flour and butter mixture in the fridge for 10 minutes before you add the cream. Cold fat creates steam in the oven, which creates flaky layers. Warm fat just melts into the dough, making it dense.
- Don’t overwork the dough. This is the most common mistake. The more you handle biscuit dough, the more gluten develops, and the tougher the biscuits become. Mix until just combined, and knead as little as possible. A shaggy dough is a good dough.
- Use a sharp biscuit cutter. A sharp, clean cut is essential. When you twist the cutter, you “seal” the edges of the dough, which prevents the biscuit from rising to its full potential. Press straight down and lift straight up. It’s a small detail that makes a huge difference.
- Let the berries sit. The maceration time isn’t just for flavor. It creates a beautiful, syrupy juice that soaks into the warm biscuit. Don’t rush this step. If you’re in a hurry, you can gently mash a few of the berries to help them release their juices faster.
- Bake on a lined sheet. Parchment paper or a silicone baking mat provides a little insulation on the bottom of the biscuits, preventing them from burning before the tops are golden. It also makes cleanup a breeze.
- Don’t skip the sugar sprinkle. That crunchy top is my favorite part. The turbinado sugar adds a delightful textural contrast to the soft biscuit and creamy filling. It’s a simple touch that makes the dessert feel extra special.
Variations & Adaptations
This recipe is a beautiful starting point, but it’s also incredibly flexible. Here are a few ways I’ve adapted it over the years to suit different tastes and occasions.
- Mixed Berry Shortcake: Feeling bold? Swap half the strawberries for fresh blueberries, raspberries, or sliced blackberries. A mix of berries is beautiful and adds a lovely complexity of flavors. It’s perfect for a Fourth of July spread.
- Gluten-Free Option: You can easily make this gluten-free. Simply substitute the all-purpose flour with a high-quality 1-to-1 gluten-free baking flour blend (one that contains xanthan gum). The texture will be slightly more delicate, but still delicious. I’ve had great luck with the King Arthur Measure for Measure blend.
- Balsamic Strawberry Shortcake: For a more sophisticated, adult twist, add a tablespoon of good aged balsamic vinegar to the strawberries along with the sugar and lemon juice. The balsamic vinegar enhances the berry flavor in a way that’s truly magical. A few cracks of black pepper on top before serving takes it over the top.
- Drop Biscuit Method: If you don’t have a biscuit cutter or just want an even more rustic look, you can make drop biscuits. Increase the heavy cream to 1 cup. Instead of patting out the dough, just drop large spoonfuls of the sticky dough onto your baking sheet. They won’t be as tall or perfectly round, but they’ll be just as delicious.
- Dairy-Free Adaptation: Use a high-quality vegan butter that comes in stick form (like Miyoko’s) and a full-fat canned coconut cream for the biscuits. Whipped coconut cream makes a fantastic dairy-free topping. Just chill the can of coconut cream overnight and scoop out the solid white part to whip.
Serving & Storage Suggestions
This dessert is best enjoyed immediately, while the biscuits are still warm and the cream is cold. But sometimes, you have leftovers (or you want to plan ahead). Here’s how to handle it.
Serving: I love to serve these in shallow bowls so none of the beautiful strawberry juice goes to waste. Each person gets one biscuit, split open, with a generous amount of berries and cream. A fresh mint sprig on top is a lovely, optional garnish. This dessert pairs beautifully with a glass of cold, sweet iced tea or a crisp, dry rosé for the adults.
Storage: The biggest enemy of leftover shortcake is a soggy biscuit. Never assemble the shortcakes ahead of time. Store the components separately.
- Biscuits: Store the baked, cooled biscuits in an airtight container at room temperature for up to 2 days. To refresh them, pop them in a 300°F (150°C) oven for 5 minutes.
- Macerated Strawberries: Keep them in a sealed container in the refrigerator for up to 3 days. The juices will become even more concentrated and delicious.
- Whipped Cream: Fresh whipped cream is best used immediately. You can store it in the fridge for a few hours, but it will start to deflate. If you need to make it ahead, you can stabilize it by adding a tablespoon of instant vanilla pudding mix while whipping.
Reheating: The best way to bring leftover biscuits back to life is in the oven or toaster oven. A quick 5-minute reheat at 350°F (175°C) will make them warm and flaky again. Please, for the love of all things good, do not microwave them. Microwaving will make them tough and rubbery.
Nutritional Information & Benefits
Let’s be honest, this is a dessert, and it’s meant to be a treat. But it’s made with real, whole ingredients, and that counts for something. The nutritional values below are an estimate for one assembled shortcake.
Estimated Nutritional Value (per serving): Calories: 450-550 | Fat: 30g | Carbohydrates: 55g | Protein: 6g | Fiber: 3g | Sugar: 30g
- Strawberries: These little gems are packed with Vitamin C, antioxidants, and fiber. They’re one of the few fruits that are relatively low in sugar, making them a fantastic choice for a sweet treat.
- Calcium: The heavy cream and butter provide a good dose of calcium, which is essential for strong bones and teeth.
- Dietary Considerations: This recipe is vegetarian. It can be made gluten-free and dairy-free with the substitutions listed above. It is not suitable for a vegan or low-carb diet without significant modifications.
- Potential Allergens: This recipe contains wheat (gluten) and dairy (milk).
I believe in balance. A dessert like this, made from scratch with love and fresh ingredients, is a wonderful part of a joyful life. It’s not an everyday food, but it’s a perfect celebration of summer’s bounty.
Conclusion
This classic strawberry shortcake with homemade biscuits is more than just a dessert. It’s a little piece of summer that you can create in your own kitchen. Those tender, buttery biscuits, the bursting, juicy strawberries, and the cloud-like whipped cream—it’s a combination that’s simple, honest, and utterly perfect.
I hope you give this recipe a try and make it your own. Maybe you’ll add a little extra lemon zest to the berries, or you’ll discover that you love the balsamic twist as much as I do. That’s the beauty of a great base recipe—it’s a canvas for your own creativity.
When you make it, I’d love to hear how it turns out. Did you try a different berry? Did your family fight over the last biscuit? Drop a comment below and let me know! And if you loved this, you might also enjoy a simple zesty lemon chicken for a savory summer meal, or a quick creamy tuna pasta for an easy weeknight dinner. Happy baking, friends!
Frequently Asked Questions
Can I use frozen strawberries instead of fresh?
You can, but fresh strawberries are really best for this recipe. Frozen berries release a lot of water when they thaw, which can make your shortcake a bit watery and less flavorful. If you must use frozen, let them thaw completely in a colander set over a bowl to catch the excess liquid, then proceed with the maceration step.
Why didn’t my biscuits rise?
This is usually a sign of one of two things: your baking powder is old, or you overworked the dough. Check the expiration date on your baking powder. To test if it’s still active, put a teaspoon of it in a small bowl of hot water. If it fizzes vigorously, it’s good to go. Also, remember to handle the dough gently and don’t twist your biscuit cutter!
Can I make the biscuits ahead of time?
Absolutely! You can prepare the biscuit dough, cut out the biscuits, and place them on a parchment-lined baking sheet. Cover them tightly with plastic wrap and refrigerate for up to 24 hours. You can even freeze them on the sheet, then transfer the frozen biscuits to a freezer bag for up to 3 months. Bake from frozen, adding a few extra minutes to the baking time.
How do I make stabilized whipped cream?
If you need your whipped cream to hold its shape for several hours, you can stabilize it. The easiest way is to add 1 tablespoon of instant vanilla pudding mix (or unflavored gelatin dissolved in a little water) to the cream before whipping. It will stay perfectly fluffy and pipable without deflating.
Can I use a different type of flour for the biscuits?
Yes, you can experiment. For a lighter, more tender biscuit, you can substitute up to half of the all-purpose flour with cake flour. For a whole wheat version, you can use up to half whole wheat pastry flour, but the biscuits will be denser and heartier. Avoid using coconut flour or almond flour as they require completely different liquid ratios.
Pin This Recipe!
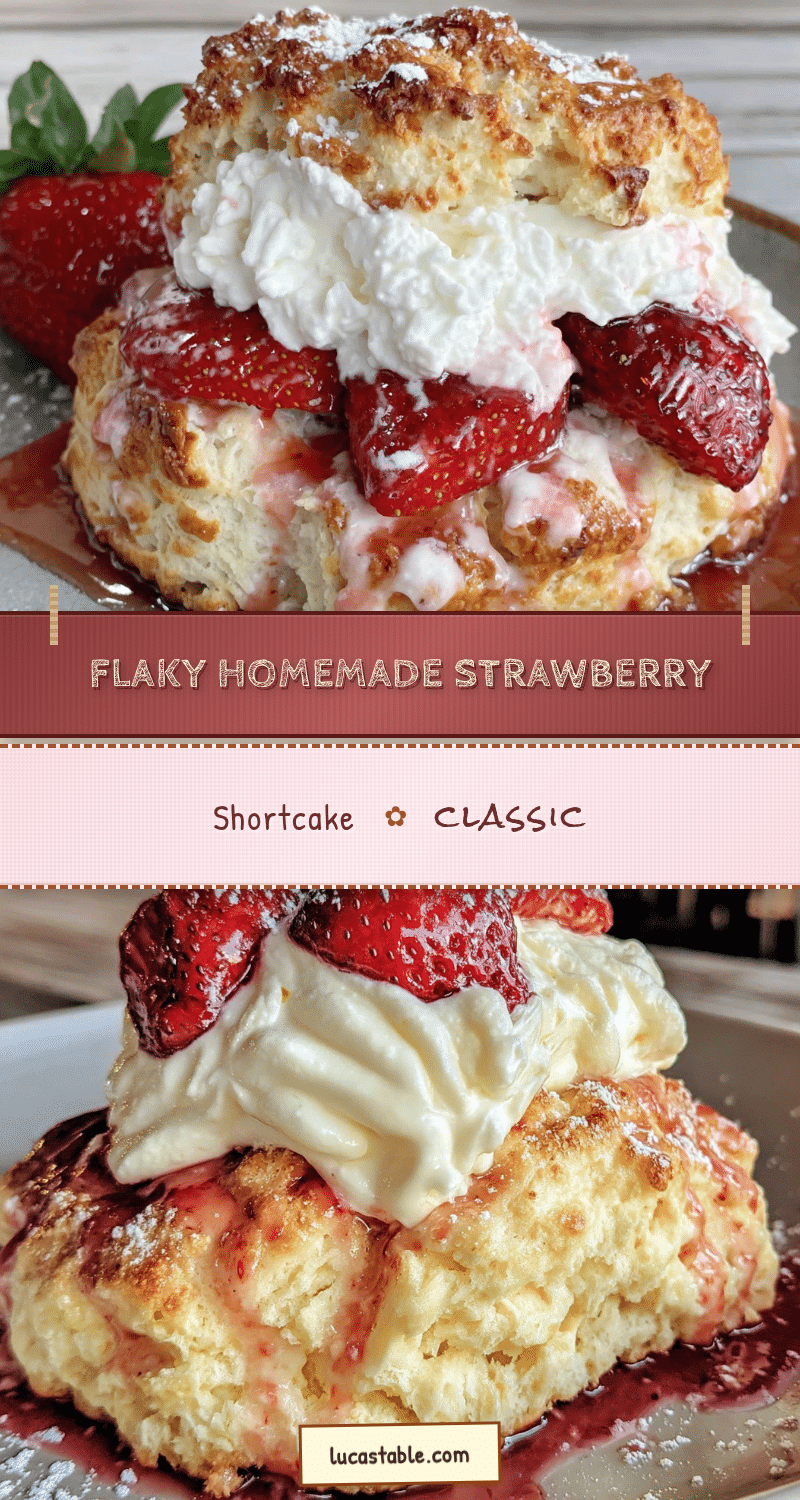
Classic Strawberry Shortcake: Easy Homemade Biscuit Recipe
This classic strawberry shortcake features tender, buttery homemade biscuits topped with juicy macerated strawberries and a cloud of whipped cream. It’s a simple, honest dessert that captures the essence of summer.
- Prep Time: 20 minutes
- Cook Time: 15 minutes
- Total Time: 35 minutes
- Yield: 6-8 servings 1x
- Category: Dessert
- Cuisine: American
Ingredients
- 1 pound fresh strawberries, hulled and sliced
- 1/4 cup granulated sugar
- 1 tablespoon fresh lemon juice
- 2 cups all-purpose flour
- 1/4 cup granulated sugar
- 1 tablespoon baking powder
- 1/2 teaspoon salt
- 6 tablespoons cold unsalted butter, cut into small cubes
- 3/4 cup cold heavy cream
- 1 teaspoon vanilla extract
- Turbinado or coarse sugar, for sprinkling
- 1 cup cold heavy cream
- 2 tablespoons powdered sugar
- 1/2 teaspoon vanilla extract
Instructions
- Macerate the strawberries: In a medium bowl, combine the sliced strawberries, 1/4 cup of granulated sugar, and the lemon juice. Gently toss everything together until the sugar starts to dissolve. Set the bowl aside. Let the berries sit for at least 20-30 minutes while you make the biscuits. They’ll release their beautiful red juice and become incredibly soft and flavorful. Give them a stir every now and then.
- Preheat your oven: Set your oven to 425°F (220°C). A hot oven is crucial for getting those biscuits to rise tall and get golden brown. Line your baking sheet with parchment paper.
- Mix the dry ingredients: In a large bowl, whisk together the 2 cups of all-purpose flour, 1/4 cup of granulated sugar, 1 tablespoon of baking powder, and 1/2 teaspoon of salt. Make sure the baking powder is evenly distributed.
- Cut in the cold butter: Add the cold, cubed butter to the flour mixture. Using a pastry cutter, two forks, or your fingertips, work the butter into the flour until the mixture looks like coarse meal with pea-sized pieces of butter still visible. This is the most important step. Those little chunks of butter are what create the flaky layers. Don’t overwork it! If the mixture starts to look like wet sand, you’ve gone too far.
- Add the wet ingredients: Make a well in the center of the flour-butter mixture. Pour in the 3/4 cup of cold heavy cream and 1 teaspoon of vanilla extract. Stir with a fork or a rubber spatula just until the dough comes together. It will look a bit shaggy and there might be some dry bits at the bottom of the bowl. That’s exactly what you want. Over-mixing will make the biscuits tough.
- Bring the dough together: Turn the shaggy dough out onto a lightly floured surface. Gently bring it together with your hands, kneading it just 2 or 3 times, until it forms a cohesive ball. Pat the dough into a 1-inch thick rectangle. Don’t use a rolling pin; your hands are gentler.
- Cut the biscuits: Dip your biscuit cutter in flour to prevent sticking. Press it straight down into the dough—do not twist! Twisting seals the edges and prevents the biscuits from rising. Cut the biscuits as close together as possible to minimize re-rolling scraps. You should get about 6-8 biscuits from this dough. If you need to re-roll the scraps, gently press them together and cut again, but remember, the second batch won’t be as tender.
- Bake the biscuits: Place the biscuits on your prepared baking sheet, spacing them about 2 inches apart. Brush the tops with a little extra heavy cream and sprinkle generously with turbinado or coarse sugar. Bake for 12-15 minutes, or until the biscuits are golden brown on top and have risen beautifully. The bottoms should be lightly browned as well.
- Make the whipped cream: While the biscuits are baking, make the whipped cream. In a chilled bowl, combine the 1 cup of cold heavy cream, 2 tablespoons of powdered sugar, and 1/2 teaspoon of vanilla extract. Beat with an electric mixer on medium-high speed (or whisk vigorously by hand) until soft peaks form. This means when you lift the whisk, the cream holds a soft, droopy peak. Be careful not to over-whip, or you’ll end up with butter!
- Assemble and serve: Let the biscuits cool on the baking sheet for just a couple of minutes. To serve, split a warm biscuit in half. Spoon a generous amount of the macerated strawberries and their juices over the bottom half. Add a big dollop of whipped cream, then place the top half of the biscuit on. Finish with another spoonful of berries and a final cloud of cream. Serve immediately!
Notes
Cold ingredients are crucial for flaky biscuits. Do not overwork the dough. Use a sharp biscuit cutter and press straight down without twisting. Let the berries macerate for at least 20-30 minutes. Bake on a lined sheet. Don’t skip the sugar sprinkle on top. Store components separately to avoid soggy biscuits.
Nutrition
- Serving Size: 1 assembled shortcak
- Calories: 450550
- Sugar: 30
- Sodium: 350
- Fat: 30
- Saturated Fat: 18
- Carbohydrates: 55
- Fiber: 3
- Protein: 6
Keywords: strawberry shortcake, homemade biscuits, summer dessert, easy dessert, strawberry recipe, biscuit recipe


