I wasn’t expecting party planning advice from my accountant, Mr. Henderson, but there I was, standing in line at the post office, listening to him describe exactly how to make these Halloween popcorn balls with candy eyes. It was a random Tuesday in early October, and I was clutching a package of vintage Halloween napkins I’d just bought online. Mr. Henderson—who I’d only ever seen in pressed khakis and sensible loafers—noticed my spiderweb-patterned package and lit up like a kid on Christmas morning.
“You know,” he said, shifting his stack of manila envelopes from one arm to the other, “my wife and I have been making popcorn balls for our grandkids’ Halloween party for twenty years now. But last year, we added these little candy eyes to them. Honestly, I think the kids liked the eyes more than the candy.” He laughed, and I found myself completely charmed by the image of this buttoned-up accountant covered in sticky marshmallow goo, pressing tiny plastic-looking eyes into popcorn balls.
He scribbled the basic idea on the back of a deposit slip—I still have it somewhere in my recipe binder. The original version was simple: popcorn, marshmallows, butter, and those creepy little candy eyes you find at craft stores. But over the years, I’ve tweaked it, tested it, and made a glorious mess of my kitchen more times than I care to admit. Maybe you’ve been there too—standing over a hot stove, wondering if the marshmallow mixture is supposed to look like a science experiment gone wrong. (Spoiler: it is, and it’ll turn out fine.)
What makes these Halloween popcorn balls special isn’t just the googly-eyed charm. It’s the way they bring people together. I mean, there’s something about a bowl of popcorn transformed into a sticky, sweet, slightly ridiculous monster face that makes everyone smile. Even my notoriously picky nephew, who usually just wants the candy, asked for seconds. That’s when I knew this recipe was a keeper.
Why You’ll Love This Recipe
Let me tell you—these Halloween popcorn balls are the kind of treat that makes you feel like a kitchen wizard without actually needing to be one. I’ve tested this recipe about seven times (my family has been very patient, bless them), and I can confidently say it works every single time.
- Quick & Easy: You’re looking at about 30 minutes from start to finish. That’s less time than it takes to watch a spooky cartoon with the kids. Perfect for those “I forgot about the class party tomorrow” moments.
- Simple Ingredients: Popcorn, marshmallows, butter, and candy eyes. That’s it. No weird specialty items that require a trip to three different stores. You probably have most of this stuff already.
- Perfect for Halloween Parties: Whether it’s a classroom celebration, a neighborhood gathering, or just a cozy movie night at home, these little monsters steal the show. They’re portable, mess-free (well, mostly), and utterly adorable.
- Crowd-Pleaser: I’ve watched adults sneak these into their pockets at parties. Kids adore them. Even the “I don’t like sweets” crowd usually caves when they see those silly little eyes staring back at them.
- Unbelievably Delicious: The texture is this perfect combination of crunchy popcorn and soft, chewy marshmallow. The candy eyes add a tiny burst of sweetness. It’s comfort food that happens to look like it escaped from a cartoon.
What makes this recipe different from all the other popcorn ball recipes out there? It’s the ratio, honestly. I spent a lot of time figuring out the perfect marshmallow-to-popcorn balance. Too much marshmallow and you get a sticky mess that’s impossible to shape. Too little and your popcorn balls fall apart like a haunted house in a windstorm. This version? It’s just right—sturdy enough to hold together, but soft enough to bite into without breaking a tooth.
And honestly? There’s something deeply satisfying about making these. It’s the kind of recipe that connects you to childhood memories—maybe your own, maybe the ones you’re creating with your kids right now. When you press those candy eyes into the warm popcorn ball and watch a silly monster face come to life, you can’t help but smile. That’s the magic of it.
What Ingredients You Will Need
This recipe uses simple, wholesome ingredients that come together to create something truly special. No fancy equipment required, no obscure pantry items. Just good, honest ingredients that work together beautifully.
- Popcorn (10 cups, popped): About ½ cup of unpopped kernels will give you the right amount. I prefer using Orville Redenbacher’s for its consistent popping and fluffy texture. You can use air-popped, microwave, or stovetop popcorn—just make sure it’s plain, unsalted, and free of any butter flavoring. Day-old popcorn actually works better here because it’s slightly stale and holds up better to the sticky marshmallow coating. (Yes, I learned that the hard way after using fresh, hot popcorn and ending up with a soggy mess.)
- Unsalted Butter (¼ cup, or 4 tablespoons): Salted butter works in a pinch, but unsalted gives you more control over the final flavor. I always use Kerrygold for its rich, creamy taste. The butter adds richness and helps the marshmallows melt smoothly without burning.
- Mini Marshmallows (10 ounces, or about 4 cups): Full-size marshmallows work too, but mini ones melt faster and more evenly. I’ve tested this with Jet-Puffed and Kraft—both work great. Avoid generic store brands, as they sometimes have a weird texture when melted. The marshmallows are the glue that holds everything together, so don’t skimp here.
- Vanilla Extract (1 teaspoon): Pure vanilla extract adds warmth and depth. Imitation vanilla is fine if that’s what you have, but pure vanilla really does make a difference. (I once forgot the vanilla entirely, and the popcorn balls tasted flat and one-dimensional. Don’t make my mistake.)
- Salt (¼ teaspoon): A tiny pinch of salt balances the sweetness beautifully. Use fine sea salt or table salt—coarse salt won’t dissolve properly. This is one of those small details that separates good popcorn balls from great ones.
- Candy Eyes (about 24-30 pieces): These are the star of the show! You can find them at craft stores like Michaels or Joann, or order them online. Look for the edible kind made from sugar and cornstarch—they come in various sizes, but I prefer the medium-sized ones (about ½ inch) for the best “monster” look. You’ll need 2-3 eyes per popcorn ball, depending on how many faces you want to create.
- Optional Add-ins:
- Orange food coloring (a few drops): For a spooky Halloween twist, add a drop or two to the marshmallow mixture. It gives the popcorn balls a subtle orange tint that’s perfect for the season.
- Black gel icing: For drawing mouths, eyebrows, or other spooky details on your monsters. I use Wilton brand—it’s easy to control and dries quickly.
- Edible glitter or sprinkles: A light dusting makes these look extra magical. Just sprinkle them on while the marshmallow coating is still sticky.
- Mini chocolate chips: Press a few into the popcorn balls for “warts” or “warts” or just extra chocolatey goodness.
Substitution Guidance: Need a dairy-free version? Use vegan butter and vegan marshmallows (yes, they exist—Dandies brand makes excellent ones). For a gluten-free option, this recipe is naturally gluten-free as long as your popcorn and marshmallows are certified gluten-free. (Most are, but always check labels.) If you can’t find candy eyes, you can use mini chocolate chips or M&M’s instead—they won’t look as spooky, but they’ll still taste amazing.
Equipment Needed
You don’t need a fancy kitchen to make these Halloween popcorn balls. Here’s what you’ll need:
- Large mixing bowl (at least 6-quart capacity): You need room to toss the popcorn with the marshmallow mixture without spilling it everywhere. I use a stainless steel bowl because it doesn’t retain heat, but glass or ceramic works too.
- Large pot or Dutch oven (4-5 quart): For melting the marshmallows. A heavy-bottomed pot distributes heat evenly and prevents scorching. Non-stick is ideal for easy cleanup.
- Rubber spatula or wooden spoon: For stirring the marshmallow mixture. A silicone spatula is my go-to because it scrapes the sides of the pot cleanly. Wooden spoils work too, but they can absorb flavors over time.
- Parchment paper or wax paper: Essential for shaping the popcorn balls without them sticking to everything. I line a baking sheet with parchment paper and place the formed popcorn balls on it to set.
- Measuring cups and spoons: For accurate measurements. Popcorn is forgiving, but the marshmallow-to-popcorn ratio matters.
- Butter or cooking spray: For greasing your hands. Trust me on this—you do not want to shape popcorn balls with bare, ungreased hands. You’ll end up with a sticky, marshmallow-covered mess that’s impossible to wash off. (Ask me how I know.)
- Optional: Kitchen scale: For weighing marshmallows if you buy them in bulk. Not strictly necessary, but helpful for consistency.
Budget-Friendly Alternatives: No large mixing bowl? Use a clean, dry stockpot or even a cardboard box lined with parchment paper. No rubber spatula? A wooden spoon works fine—just be gentle to avoid crushing the popcorn. The most important tool is your hands (greased, of course), so don’t stress about having the “right” equipment.
Preparation Method
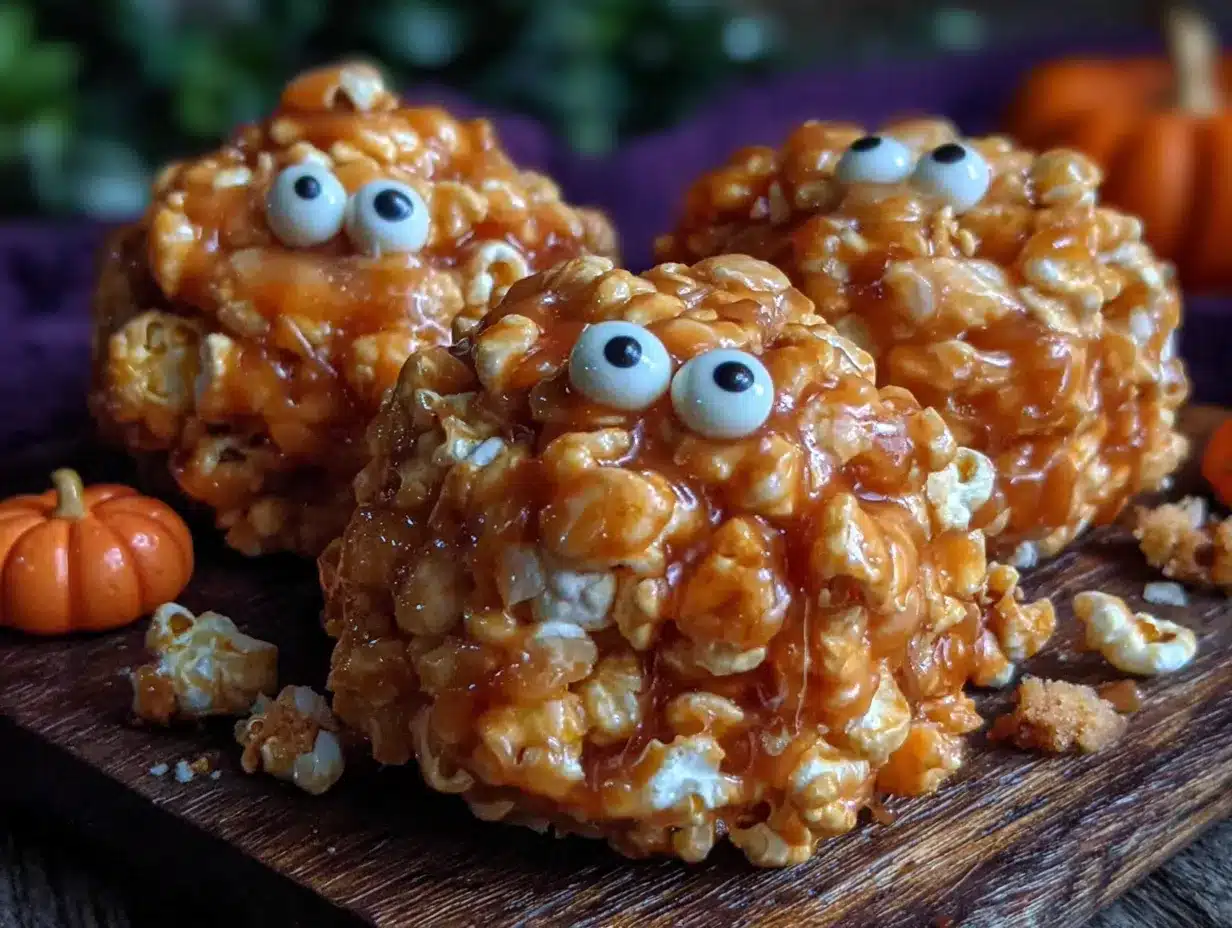
Alright, let’s make some monster popcorn balls! I’ve broken this down into clear steps, with all the little tips I’ve learned from years of making these.
Step 1: Pop the Popcorn (5 minutes)
Pop ½ cup of unpopped kernels using your preferred method. I use an air popper because it’s quick and doesn’t add any oil, but microwave popcorn works too—just make sure it’s plain and unsalted. You should end up with about 10 cups of popped popcorn. Spread it out on a large baking sheet and pick out any unpopped kernels. (Trust me, biting into a hard kernel is not a fun Halloween surprise.) Let the popcorn cool completely—this takes about 10 minutes. Warm popcorn will make the marshmallow coating soggy, and nobody wants that.
Step 2: Prepare Your Workspace (5 minutes)
Line a large baking sheet with parchment paper or wax paper. Lightly grease your hands with butter or cooking spray—I keep a small bowl of melted butter nearby to reapply as needed. Set out your candy eyes and any other decorations so they’re within easy reach. Once the marshmallow mixture is ready, you’ll need to work quickly, so having everything organized beforehand is crucial. (I learned this the hard way when I was frantically searching for candy eyes while the marshmallow mixture hardened into an unworkable blob.)
Step 3: Melt the Marshmallows (5 minutes)
In a large pot over medium-low heat, melt ¼ cup of unsalted butter. Once the butter is fully melted, add 10 ounces of mini marshmallows. Stir constantly with a rubber spatula or wooden spoon. The key here is low and slow—high heat will scorch the marshmallows and give them a burnt, bitter taste. As the marshmallows begin to melt, they’ll look like a gooey, stretchy mess. That’s normal. Keep stirring until the mixture is completely smooth and uniform. This usually takes about 4-5 minutes. Remove the pot from the heat and stir in 1 teaspoon of vanilla extract and ¼ teaspoon of salt. If you’re using orange food coloring, add a drop or two now and stir until evenly distributed.
Step 4: Combine Popcorn and Marshmallow Mixture (2 minutes)
Pour the marshmallow mixture over the cooled popcorn in the large mixing bowl. Use your rubber spatula to gently fold everything together. Work from the bottom up, making sure every piece of popcorn gets coated. Don’t stir too aggressively—you want the popcorn to stay intact, not break into tiny pieces. The mixture will be hot and sticky, so be careful. If you’re adding any sprinkles or edible glitter, sprinkle them in now while the coating is still tacky.
Step 5: Shape the Popcorn Balls (10 minutes)
Here’s where the magic happens. While the mixture is still warm (but not too hot to handle), lightly grease your hands with butter or cooking spray. Scoop up about ½ cup of the popcorn mixture and gently shape it into a ball. Don’t squeeze too hard—you want the ball to hold together, not become a dense, compact brick. A light, gentle touch is key. Place the formed popcorn ball on the prepared baking sheet. Repeat with the remaining mixture. You should get about 8-10 popcorn balls, depending on size.
Step 6: Add the Candy Eyes (5 minutes)
While the popcorn balls are still warm and slightly tacky, press 2-3 candy eyes into each one to create silly monster faces. You can arrange them symmetrically for a cute look, or haphazardly for a more chaotic monster vibe. If you’re using black gel icing, now’s the time to draw mouths, eyebrows, or other spooky details. Work quickly—the popcorn balls set up fast. If the marshmallow coating hardens before you’re done, you can microwave the popcorn balls for 5-10 seconds to soften them slightly.
Step 7: Let Them Set (10 minutes)
Allow the popcorn balls to cool completely at room temperature. This usually takes about 10-15 minutes. The marshmallow coating will firm up as it cools, giving the popcorn balls their signature chewy texture. Don’t rush this step—if you try to move them too soon, they might fall apart. Once fully set, they’re ready to serve or store.
Troubleshooting Tips:
- If the marshmallow mixture is too thick to coat the popcorn evenly, add a teaspoon of water and stir. This loosens it up without diluting the flavor.
- If the popcorn balls are too sticky to shape, let the mixture cool for 2-3 minutes before trying again. It should still be warm, just not scalding.
- If the popcorn balls fall apart, you didn’t use enough marshmallow mixture. Next time, add a bit more marshmallow or use slightly less popcorn. You can also try pressing the mixture together more firmly (but still gently).
Cooking Tips & Techniques
Over the years, I’ve made plenty of mistakes with these popcorn balls. Let me save you some trouble with these hard-earned tips.
Use Day-Old Popcorn: Freshly popped popcorn is too moist and will make the marshmallow coating soggy. Pop your popcorn the day before and leave it uncovered on the counter overnight. The slightly stale texture holds up much better to the sticky coating. (I learned this after making two batches in one afternoon—the first one was a sad, soggy disaster.)
Don’t Overheat the Marshmallows: This is the most common mistake I see. Marshmallows are basically sugar and gelatin, and they burn easily. Keep the heat on medium-low and stir constantly. If you see any browning, you’ve gone too far. Burnt marshmallows taste bitter and ruin the whole batch. Trust me, I’ve been there—it’s not a good look.
Work Quickly, But Carefully: The marshmallow mixture sets up fast, so you need to move efficiently. But don’t rush to the point of burning your hands. If the mixture is too hot to handle, let it cool for a minute or two. I keep a bowl of ice water nearby to dip my fingers in if things get too sticky.
Grease Everything: Your hands, the baking sheet, the spatula—if it touches the marshmallow mixture, grease it. I use butter because it adds flavor, but cooking spray works too. Just don’t use olive oil or coconut oil—they have strong flavors that can clash with the sweetness.
Make Them Uniform: For consistent results, use a measuring cup to scoop the popcorn mixture. I use a ½-cup measure, lightly greased, to ensure each popcorn ball is the same size. This also helps with even setting and makes them look more professional.
Timing and Multitasking: Here’s my strategy: pop the popcorn first, then prepare your workspace while it cools. Melt the marshmallows last, right before you’re ready to combine and shape. This way, everything comes together seamlessly, and you’re not rushing to shape a hardening mixture.
Variations & Adaptations
One of the best things about this recipe is how adaptable it is. Here are some of my favorite variations:
Chocolate Lover’s Version: Melt ½ cup of chocolate chips with the marshmallows for a rich, chocolatey coating. I use semi-sweet chips for a balanced flavor, but milk chocolate works too. The candy eyes look especially fun against the dark chocolate background—like little monsters peeking out of the darkness.
Spicy Pumpkin Twist: Add 1 teaspoon of pumpkin pie spice and ½ teaspoon of cinnamon to the marshmallow mixture. The warm spices pair beautifully with the sweet popcorn. For an extra festive touch, use orange and black sprinkles. This version is perfect for fall gatherings or Thanksgiving treat tables.
Vegan-Friendly Option: Use vegan butter (like Earth Balance) and vegan marshmallows (like Dandies). The texture is slightly different—a bit less stretchy—but the flavor is still fantastic. I tested this for a friend with dietary restrictions, and honestly, I couldn’t tell the difference.
Nutty Monster Mash: Add ½ cup of chopped peanuts, almonds, or pecans to the popcorn mixture before adding the marshmallow coating. The crunch adds a wonderful texture contrast. Just be mindful of nut allergies if you’re serving these at a party.
Microwave Method: In a pinch, you can melt the marshmallows in the microwave. Combine the butter and marshmallows in a microwave-safe bowl and heat in 30-second intervals, stirring between each, until smooth. It’s faster, but you have less control over the temperature. I prefer the stovetop method for consistent results.
Personal Variation I’ve Tried: Last Halloween, I added a few drops of peppermint extract to the marshmallow mixture and topped the popcorn balls with crushed candy canes. The combination of sweet marshmallow, cool peppermint, and crunchy candy was absolutely divine. It’s become my go-to for Christmas parties now.
Serving & Storage Suggestions
Serving Temperature: These popcorn balls are best served at room temperature. If you’ve stored them in the refrigerator, let them sit out for 10-15 minutes before serving. The marshmallow coating softens slightly, making them easier to bite into.
Presentation Ideas: Arrange the popcorn balls on a platter lined with festive napkins or parchment paper. For a Halloween party, I like to place them in a large glass bowl or on a cake stand—the pop of color from the candy eyes is so fun. You can also wrap each popcorn ball in clear cellophane bags tied with orange and black ribbon for party favors.
Complementary Dishes: These popcorn balls pair beautifully with warm apple cider, hot chocolate, or pumpkin spice lattes. For a full Halloween spread, serve them alongside caramel apples, pumpkin muffins, or a bowl of candy corn. They’re also great as a sweet ending to a chili or soup dinner.
Storage Instructions: Store popcorn balls in an airtight container at room temperature for up to 3 days. Layer them between sheets of parchment paper to prevent sticking. Do not refrigerate—the cold will make the marshmallow coating hard and chewy. For longer storage, you can freeze them for up to 2 months. Wrap each popcorn ball individually in plastic wrap, then place them in a freezer-safe bag. Thaw at room temperature for about 30 minutes before serving.
Reheating Tips: If your popcorn balls have become too hard, microwave them for 5-10 seconds. This softens the marshmallow coating and makes them chewy again. Just be careful not to overheat—they can become sticky and lose their shape.
Flavor Development: These popcorn balls actually taste better the next day. The flavors meld together as they sit, and the marshmallow coating develops a lovely chewy texture. I often make them a day ahead for parties—they’re always a hit.
Nutritional Information & Benefits
While these Halloween popcorn balls are definitely a treat, they do offer some surprising nutritional benefits. Here’s a rough breakdown per serving (1 popcorn ball):
| Nutrient | Amount |
|---|---|
| Calories | 180-200 |
| Total Fat | 6g |
| Saturated Fat | 3.5g |
| Carbohydrates | 32g |
| Sugar | 18g |
| Fiber | 1g |
| Protein | 2g |
| Sodium | 95mg |
Health Benefits of Key Ingredients: Popcorn is a whole grain, meaning it contains fiber that supports digestive health. It’s also naturally low in calories when air-popped (the marshmallow coating is where the calories come from). The butter adds a small amount of vitamin A, which is important for eye health. And while the candy eyes are mostly sugar, they’re used in such small amounts that they don’t significantly impact the nutritional profile.
Dietary Considerations: This recipe is naturally gluten-free (check your marshmallow brand to be sure). It can be made vegan with simple substitutions. It’s also nut-free, making it a safe option for school parties where nut allergies are a concern.
Potential Allergens: This recipe contains dairy (butter) and may contain traces of soy (depending on your marshmallow brand). The candy eyes are typically made from sugar and cornstarch, but always check the label for potential allergens.
From a personal wellness perspective, I believe in balance. These popcorn balls are a fun, festive treat that brings joy to Halloween celebrations. Enjoy them in moderation as part of a balanced diet. Life’s too short not to have a little monster-faced fun sometimes!
Conclusion
These Halloween popcorn balls with candy eyes are more than just a recipe—they’re a memory in the making. They’re the kind of treat that makes kids giggle and adults feel like kids again. The combination of crunchy popcorn, chewy marshmallow, and those silly little eyes is pure comfort food magic.
I love this recipe because it’s forgiving, adaptable, and endlessly fun. You can make them as simple or as elaborate as you want. Go wild with decorations, or keep it classic with just the candy eyes. Either way, you’ll end up with something that brings smiles to faces.
So go ahead—embrace the mess, get your hands sticky, and create some monster-faced magic. And when you do, I’d love to hear about it! Leave a comment below sharing your favorite variation, tag me in your photos, or tell me about the funniest monster face you created. Your kitchen adventures inspire me every day.
Happy Halloween, and happy cooking! May your popcorn balls be perfectly chewy, your candy eyes perfectly googly, and your memories perfectly sweet.
Frequently Asked Questions
Can I use microwave popcorn for this recipe?
Yes, you can! Just make sure it’s plain, unsalted, and free of any butter flavoring. The added oils and flavors in pre-buttered popcorn can affect the texture and taste of the final product.
How do I keep the popcorn balls from falling apart?
The key is the right marshmallow-to-popcorn ratio. Make sure you’re using enough marshmallow mixture to coat every piece of popcorn. Also, shape the balls while the mixture is still warm—it’s more pliable and will hold together better as it cools.
Can I make these ahead of time?
Absolutely! These popcorn balls actually taste better the next day. Store them in an airtight container at room temperature for up to 3 days, or freeze them for up to 2 months.
Are these safe for kids with nut allergies?
Yes, this recipe is naturally nut-free. Just be sure to check the labels on your marshmallows and candy eyes to ensure they weren’t processed in a facility that handles nuts.
Can I use different types of candy for the eyes?
Of course! Mini chocolate chips, M&M’s, or even small candies like Skittles work great. The candy eyes are just for fun—feel free to get creative with whatever you have on hand.
Pin This Recipe!
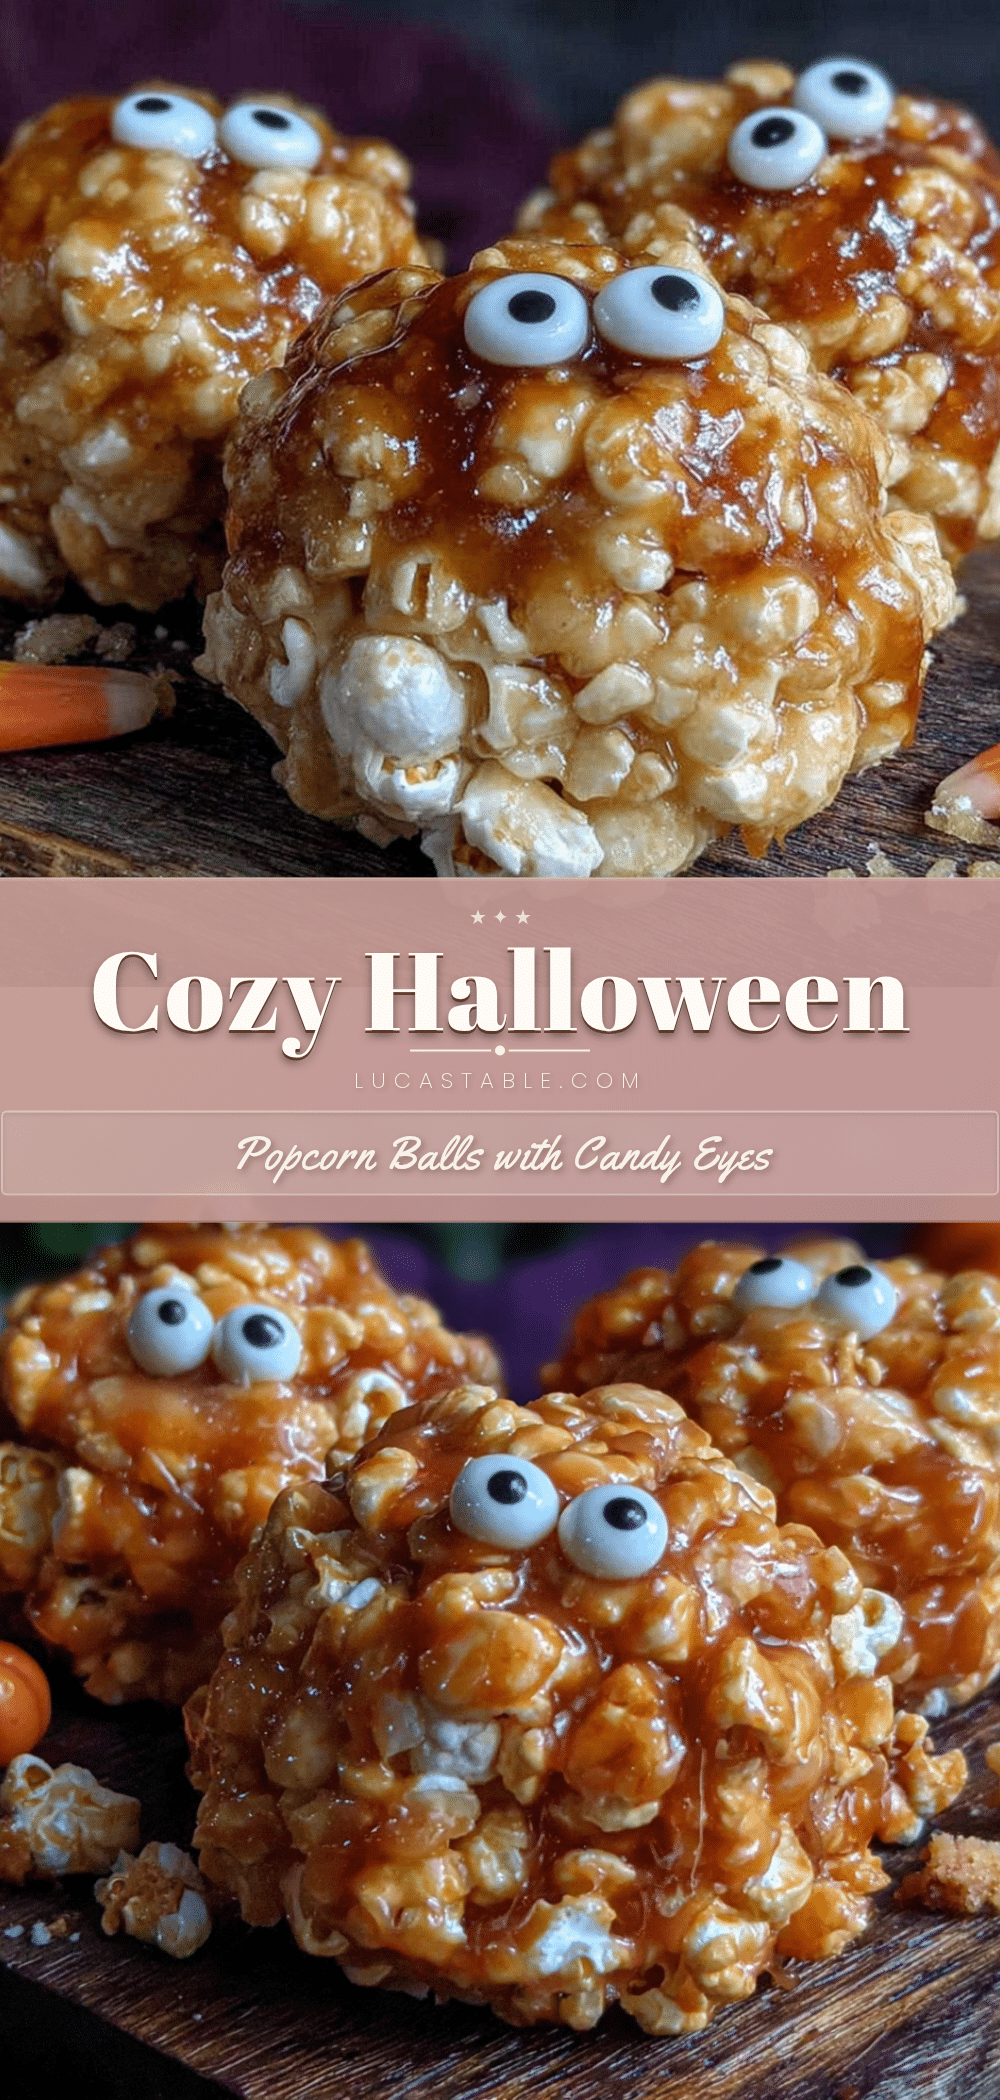
Cozy Halloween Popcorn Balls with Candy Eyes: Easy 30-Minute Recipe
These Halloween popcorn balls with candy eyes are a quick and easy treat that brings people together. Made with simple ingredients like popcorn, marshmallows, and butter, they’re perfect for parties and guaranteed to make everyone smile.
- Prep Time: 15 minutes
- Cook Time: 10 minutes
- Total Time: 30 minutes
- Yield: 8-10 servings
- Category: Dessert
- Cuisine: American
Ingredients
- Popcorn (10 cups, popped) – about ½ cup unpopped kernels
- Unsalted butter (¼ cup, or 4 tablespoons)
- Mini marshmallows (10 ounces, or about 4 cups)
- Vanilla extract (1 teaspoon)
- Salt (¼ teaspoon)
- Candy eyes (about 24-30 pieces)
- Optional: Orange food coloring (a few drops)
- Optional: Black gel icing
- Optional: Edible glitter or sprinkles
- Optional: Mini chocolate chips
Instructions
- Pop the popcorn: Pop ½ cup of unpopped kernels using your preferred method. Spread on a baking sheet, remove unpopped kernels, and let cool completely (about 10 minutes).
- Prepare your workspace: Line a large baking sheet with parchment paper. Lightly grease your hands with butter or cooking spray. Set out candy eyes and decorations.
- Melt the marshmallows: In a large pot over medium-low heat, melt ¼ cup unsalted butter. Add 10 ounces mini marshmallows and stir constantly until smooth (4-5 minutes). Remove from heat and stir in 1 teaspoon vanilla extract and ¼ teaspoon salt. Add orange food coloring if desired.
- Combine popcorn and marshmallow mixture: Pour marshmallow mixture over cooled popcorn in a large bowl. Gently fold until every piece is coated. Add sprinkles or glitter if using.
- Shape the popcorn balls: While mixture is warm, grease hands and scoop about ½ cup of mixture. Gently shape into a ball without squeezing too hard. Place on prepared baking sheet. Repeat to make 8-10 balls.
- Add the candy eyes: While popcorn balls are still warm and tacky, press 2-3 candy eyes into each. Use black gel icing to draw mouths or other details if desired.
- Let them set: Allow popcorn balls to cool completely at room temperature (10-15 minutes) until firm.
Notes
Use day-old popcorn for best texture. Do not overheat marshmallows. Work quickly but carefully. Grease everything that touches the marshmallow mixture. For uniform balls, use a ½-cup measuring cup. If mixture is too thick, add a teaspoon of water. If too sticky, let cool 2-3 minutes before shaping. Store in airtight container at room temperature for up to 3 days or freeze for up to 2 months.
Nutrition
- Serving Size: 1 popcorn ball
- Calories: 180200
- Sugar: 18
- Sodium: 95
- Fat: 6
- Saturated Fat: 3.5
- Carbohydrates: 32
- Fiber: 1
- Protein: 2
Keywords: Halloween popcorn balls, candy eyes, easy recipe, 30-minute, popcorn treats, monster popcorn balls, Halloween party snacks


