It was 11:47 PM on a grey, drizzly Tuesday, and I was hit with a craving so specific it was almost embarrassing. I wanted the smoky, sizzling magic of restaurant fajitas, but I didn’t have a cast-iron skillet that could handle the heat, and frankly, the thought of standing over a stovetop and making a mess felt exhausting. I was tired. You know that kind of bone-deep, mid-week tired where even chopping an onion feels like a monumental task? That was me. I did have a sad-looking bell pepper, a lone chicken breast, and a half-empty jar of my favorite salsa. The idea that arrived, right there in the quiet of my dimly lit kitchen, was almost too simple: why not just throw it all on a sheet pan? I mean, a sheet pan is basically a giant, low-sided skillet, right? I tossed the chicken and peppers with some oil and spices, slid the pan into a hot oven, and waited. Twenty minutes later, I was pulling out the most gloriously caramelized, effortlessly perfect chicken fajitas I had ever made. No smoke alarm, no greasy stovetop, and honestly, the best flavor I’d gotten from a weeknight dinner in months. This recipe stayed with me because it proved that sometimes, the most comforting meals come from the least fussy methods. Maybe you’ve been there, staring into your fridge, wanting something amazing but having zero energy left to fight for it. This one is for those nights.
Why You’ll Love This Recipe
Let me tell you, this isn’t just another weeknight dinner. I’ve tested this method more times than I can count, tweaking the spice blend and the oven temperature to get that perfect char without drying out the chicken. It’s the kind of recipe that makes you look like a kitchen hero with almost zero effort.
- Quick & Easy: From fridge to table in under 30 minutes. It’s faster than delivery and way more satisfying.
- Simple Ingredients: You probably have most of these pantry staples right now. No fancy grocery store trips required.
- Perfect for Cozy Nights: This is the ultimate comfort food for a rainy Tuesday, a lazy Sunday, or any time you need a warm, satisfying hug in a tortilla.
- Crowd-Pleaser: I’ve served these to picky kids and foodie friends, and the sheet pan always comes back empty. It’s a guaranteed hit.
- Unbelievably Delicious: The high heat of the oven concentrates the flavors, creating a smoky, slightly charred exterior on the chicken and peppers that you just can’t get from a skillet. It’s next-level comfort food.
What makes this recipe different from the rest? It’s the technique. By roasting everything on a single sheet pan, you get that beautiful caramelization without any of the fuss. The chicken stays perfectly juicy because it’s surrounded by the moisture from the peppers and onions. This isn’t just another version of fajitas—it’s my best version. It’s the one that makes you close your eyes after the first bite, the one that turns a simple meal into something memorable without the stress.
What Ingredients You Will Need
This recipe uses simple, wholesome ingredients to deliver bold flavor and satisfying texture without the fuss. Most of these are pantry staples, making it a perfect go-to for busy weeknights.
- For the Chicken & Vegetables:
- 1 ½ pounds boneless, skinless chicken breasts or thighs, sliced into ½-inch strips (thighs are more forgiving and stay juicier)
- 3 large bell peppers, any color, sliced into ½-inch strips (I like a mix of red, yellow, and orange for sweetness)
- 1 large red onion, halved and sliced into ½-inch wedges
- 3 tablespoons olive oil or avocado oil
- For the Fajita Seasoning:
- 1 tablespoon chili powder (I prefer ancho chili powder for a deeper, smokier flavor)
- 1 ½ teaspoons ground cumin
- 1 teaspoon smoked paprika (this is the secret to that authentic, campfire taste)
- 1 teaspoon garlic powder
- ½ teaspoon onion powder
- ½ teaspoon dried oregano (Mexican oregano if you have it)
- ½ teaspoon salt (plus more to taste)
- ¼ teaspoon black pepper
- Pinch of cayenne pepper (optional, for heat)
- For Serving:
- 8-10 small flour or corn tortillas, warmed
- Your favorite toppings: sour cream or Greek yogurt, guacamole or sliced avocado, fresh salsa or pico de gallo, shredded cheese, fresh cilantro, and a squeeze of lime juice.
Ingredient Tips: For the best texture, look for bell peppers that are firm and heavy for their size. I personally recommend using organic chicken from a trusted source, but any good-quality chicken will work. If you’re out of fresh limes, a splash of white vinegar in the seasoning can help brighten the flavors. For a dairy-free option, swap the sour cream with a plant-based version or just use extra guacamole.
Equipment Needed
The beauty of this recipe is that you don’t need much. Here’s what you’ll want to have on hand:
- Large Sheet Pan: A half-sheet pan (18×13 inches) is perfect. Make sure it has a rim to catch any juices. I’ve used cheap ones and expensive ones, and honestly, a good-quality, heavy-duty sheet pan distributes heat more evenly and prevents warping.
- Mixing Bowls: One large bowl for tossing the chicken and vegetables with the seasoning.
- Sharp Knife and Cutting Board: For slicing the chicken and vegetables. A good knife makes this prep work so much faster.
- Spatula or Tongs: For flipping the chicken and vegetables halfway through cooking.
- Small Bowl: For mixing the spice blend.
If you don’t have a large sheet pan, you can use two smaller ones, just make sure they aren’t overcrowded. A pizza pan or a large baking dish can work in a pinch, but the edges won’t get as crispy.
Preparation Method
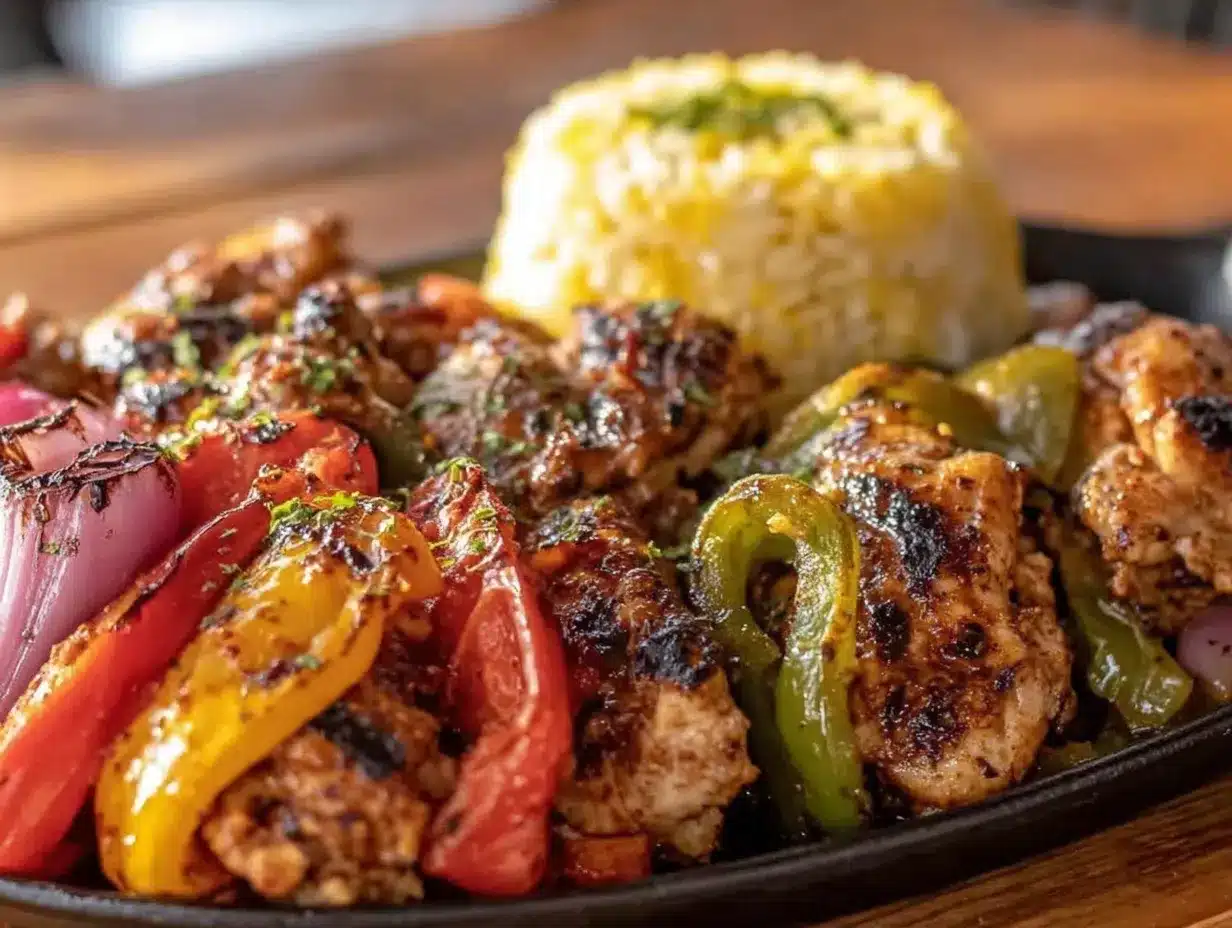
This is where the magic happens. Follow these steps, and you’ll have a perfect sheet pan dinner every time.
- Preheat and Prep: Preheat your oven to 400°F (200°C). This high heat is crucial for getting that beautiful char on the chicken and peppers. While the oven heats, line your sheet pan with parchment paper for easy cleanup—trust me on this one.
- Make the Seasoning: In a small bowl, combine the chili powder, cumin, smoked paprika, garlic powder, onion powder, oregano, salt, pepper, and cayenne if using. Give it a good stir. This is your flavor bomb.
- Prep the Chicken and Veggies: In a large bowl, add the sliced chicken, bell peppers, and red onion. Drizzle with the olive oil and sprinkle the seasoning mixture over the top. Using your hands (clean hands are the best tools!), toss everything together until every piece is evenly coated. Don’t be shy—really get in there.
- Spread on the Sheet Pan: Pour the seasoned chicken and vegetables onto your prepared sheet pan. Spread them out into a single, even layer. This is key. If the pieces are crowded, they will steam instead of roast, and you won’t get that lovely caramelization. If needed, use two pans.
- Roast: Place the sheet pan on the middle rack of your preheated oven. Roast for 15 minutes. After 15 minutes, remove the pan from the oven. Use your spatula or tongs to give everything a good stir, flipping the chicken pieces and moving the peppers around for even cooking.
- Finish Roasting: Return the pan to the oven and roast for another 10-15 minutes, or until the chicken is cooked through (internal temperature of 165°F / 74°C) and the vegetables are tender and have nice charred edges. The total time will be 25-30 minutes. You’ll know it’s done when the kitchen smells incredible and the edges of the peppers are starting to blacken in spots.
- Rest and Serve: Remove the pan from the oven and let it rest for 5 minutes. This allows the juices to redistribute in the chicken, keeping it moist. While it rests, warm your tortillas. You can do this by wrapping them in a damp paper towel and microwaving for 30 seconds, or by placing them directly on a gas burner for a few seconds per side.
- Assemble: Spoon the chicken and pepper mixture onto the warm tortillas. Top with your favorite fixings—a dollop of sour cream, a spoonful of guacamole, a sprinkle of cheese, and a generous squeeze of fresh lime juice. The lime juice is non-negotiable in my book; it wakes everything up.
Pro Tip: For extra-charred edges, you can turn on the broiler for the last 1-2 minutes of cooking. Keep a very close eye on it, as things can burn quickly under the broiler.
Cooking Tips & Techniques
Over the years, I’ve learned a few things the hard way so you don’t have to. Here are my best tips for sheet pan fajita success.
Don’t Overcrowd the Pan: This is the number one mistake people make. If the pan is too full, the chicken will steam and release its juices, making everything soggy. You want the pieces to have a little breathing room so the hot air can circulate and create that lovely brown crust. If you’re cooking for a crowd, use two sheet pans.
Slice Against the Grain: For the most tender chicken, slice the breasts or thighs against the grain before seasoning. This shortens the muscle fibers, making each bite more tender. I learned this after making a few batches of tough, stringy chicken. It makes a world of difference.
Get Your Oven Hot Enough: Don’t be tempted to lower the temperature. 400°F (200°C) is the sweet spot. It’s hot enough to caramelize the natural sugars in the peppers and onions without burning the spices. I once tried this at 350°F because I was in a rush, and the result was pale, sad fajitas. Never again.
Use a Meat Thermometer: This is the only foolproof way to know your chicken is perfectly cooked. Insert it into the thickest part of a strip. It’s ready at 165°F (74°C). Overcooked chicken is dry and sad, and a thermometer prevents that tragedy.
Variations & Adaptations
This recipe is endlessly adaptable. Here are a few of my favorite ways to change it up.
- Vegetarian Fajitas: Swap the chicken for 15 ounces of drained and rinsed black beans, extra-firm tofu (pressed and cubed), or a mix of portobello mushrooms and zucchini. Roast for the same amount of time, checking for tenderness.
- Spicy Fajitas: For those who like it hot, add a diced jalapeño or serrano pepper to the mix. You can also add an extra pinch of cayenne to the seasoning blend or drizzle the finished fajitas with your favorite hot sauce.
- Steak Fajitas: Substitute the chicken with 1 pound of flank steak or skirt steak. Slice it thinly against the grain and roast for the same amount of time. Keep an eye on it, as steak can cook a little faster than chicken.
- Low-Carb/Keto Fajitas: This is already a great low-carb meal! Simply serve the fajita filling over a bed of lettuce, cauliflower rice, or in large, crisp romaine lettuce leaves instead of tortillas.
- Extra Veggies: Feel free to add other vegetables like sliced zucchini, yellow squash, or even cherry tomatoes. Add them to the pan with the peppers and onions. Just remember that denser vegetables like carrots will need to be sliced thinner.
I once tried a variation with pineapple chunks added to the pan, and it was a game-changer. The sweetness of the roasted pineapple paired beautifully with the smoky, spicy chicken. It was a total accident, but a happy one.
Serving & Storage Suggestions
These fajitas are best served hot, straight from the oven. The contrast between the warm, tender filling and the cool, creamy toppings is what makes them so satisfying.
Serving: Set up a little “fajita bar” with all your toppings so everyone can build their own. I love serving these with a side of Mexican street corn salad or a simple pot of instant black bean soup for a full, cozy meal. A cold Mexican beer or a tart margarita is the perfect drink pairing.
Storage: Leftover fajita filling keeps beautifully. Store the chicken and vegetables in an airtight container in the refrigerator for up to 3-4 days. The flavors actually meld together and get even better overnight.
Reheating: The best way to reheat is in a hot skillet over medium-high heat for a few minutes, which will revive some of the char. You can also reheat on a sheet pan in a 350°F (180°C) oven for about 10 minutes. Avoid the microwave if you can, as it will make the peppers mushy. If you’re in a hurry, the microwave works, but the texture won’t be as good.
Freezing: You can freeze the cooked fajita filling for up to 3 months. Let it cool completely, then transfer it to a freezer-safe bag or container. To thaw, place it in the refrigerator overnight, then reheat as directed above.
Nutritional Information & Benefits
Here’s an estimated breakdown for a serving of the filling (about ⅙ of the recipe, without tortillas or toppings).
| Nutrient | Amount per Serving |
|---|---|
| Calories | ~280-320 |
| Total Fat | 12-15g |
| Saturated Fat | 2-3g |
| Cholesterol | 80-100mg |
| Sodium | 500-600mg |
| Total Carbohydrates | 12-15g |
| Dietary Fiber | 4-5g |
| Sugars | 6-8g |
| Protein | 30-35g |
This recipe is a fantastic source of lean protein, which is great for muscle repair and keeping you full. Bell peppers are packed with vitamin C—more than an orange, actually! The onions and garlic provide prebiotic fiber for gut health, and the healthy fats from the olive oil and avocado help your body absorb all those fat-soluble vitamins. This is a naturally gluten-free, low-carb meal that fits into many different dietary lifestyles. Just be mindful of your toppings if you have specific dietary needs.
Conclusion
So there you have it. These Cozy Sheet Pan Chicken Fajitas are more than just a quick dinner; they’re a solution for those nights when you need a little warmth and a lot of flavor without a lot of work. They’re forgiving, flexible, and honestly, they just make you feel good. I love this recipe because it reminds me that cooking doesn’t have to be complicated to be spectacular. It’s about working with what you have and trusting the process.
I encourage you to make this recipe your own. Use your favorite veggies, adjust the spice level, or try a new topping combo. Don’t be afraid to experiment! And when you do, I’d love to hear about it. Leave a comment below and tell me how your fajitas turned out, or share a photo with us on social media. Your kitchen adventures might just inspire someone else’s cozy night in.
Now go on, preheat that oven, and give yourself the gift of an easy, delicious dinner. You deserve it.
Frequently Asked Questions
Can I use frozen chicken for this recipe?
I wouldn’t recommend it for this specific method. Frozen chicken releases a lot of water as it thaws and cooks, which will steam the meat and vegetables instead of roasting them. For the best char and texture, always use fresh or fully thawed chicken.
My peppers are burning but the chicken isn’t done. What happened?
This usually happens if your oven runs hot or if the peppers are cut too thin. Next time, try slicing your peppers into slightly thicker strips (about ½-inch wide). You can also check your oven temperature with an oven thermometer to make sure it’s accurate.
Can I make this recipe ahead of time for meal prep?
Absolutely! You can prep the chicken and vegetables and store them in a zip-top bag with the seasoning and oil in the refrigerator for up to 24 hours. When you’re ready to cook, just spread them on the sheet pan and roast. You can also cook the entire dish and reheat it throughout the week.
What is the best way to warm tortillas?
My favorite method is right over a gas flame. Turn the burner to medium-low, place the tortilla directly on the grate, and let it heat for about 15-30 seconds per side. You’ll get lovely little char marks. For an electric stove, you can heat them in a dry skillet over medium heat for about 30 seconds per side. Wrapping them in a damp paper towel and microwaving for 20-30 seconds works great in a pinch.
Can I add cheese to the sheet pan while it roasts?
You can, but I’d recommend doing it only for the last 2-3 minutes of cooking. Sprinkle shredded Monterey Jack or cheddar over the top of the fajita filling and pop the pan back in the oven (or under the broiler) just until the cheese melts. If you add it too early, it can burn or become greasy.
Pin This Recipe!
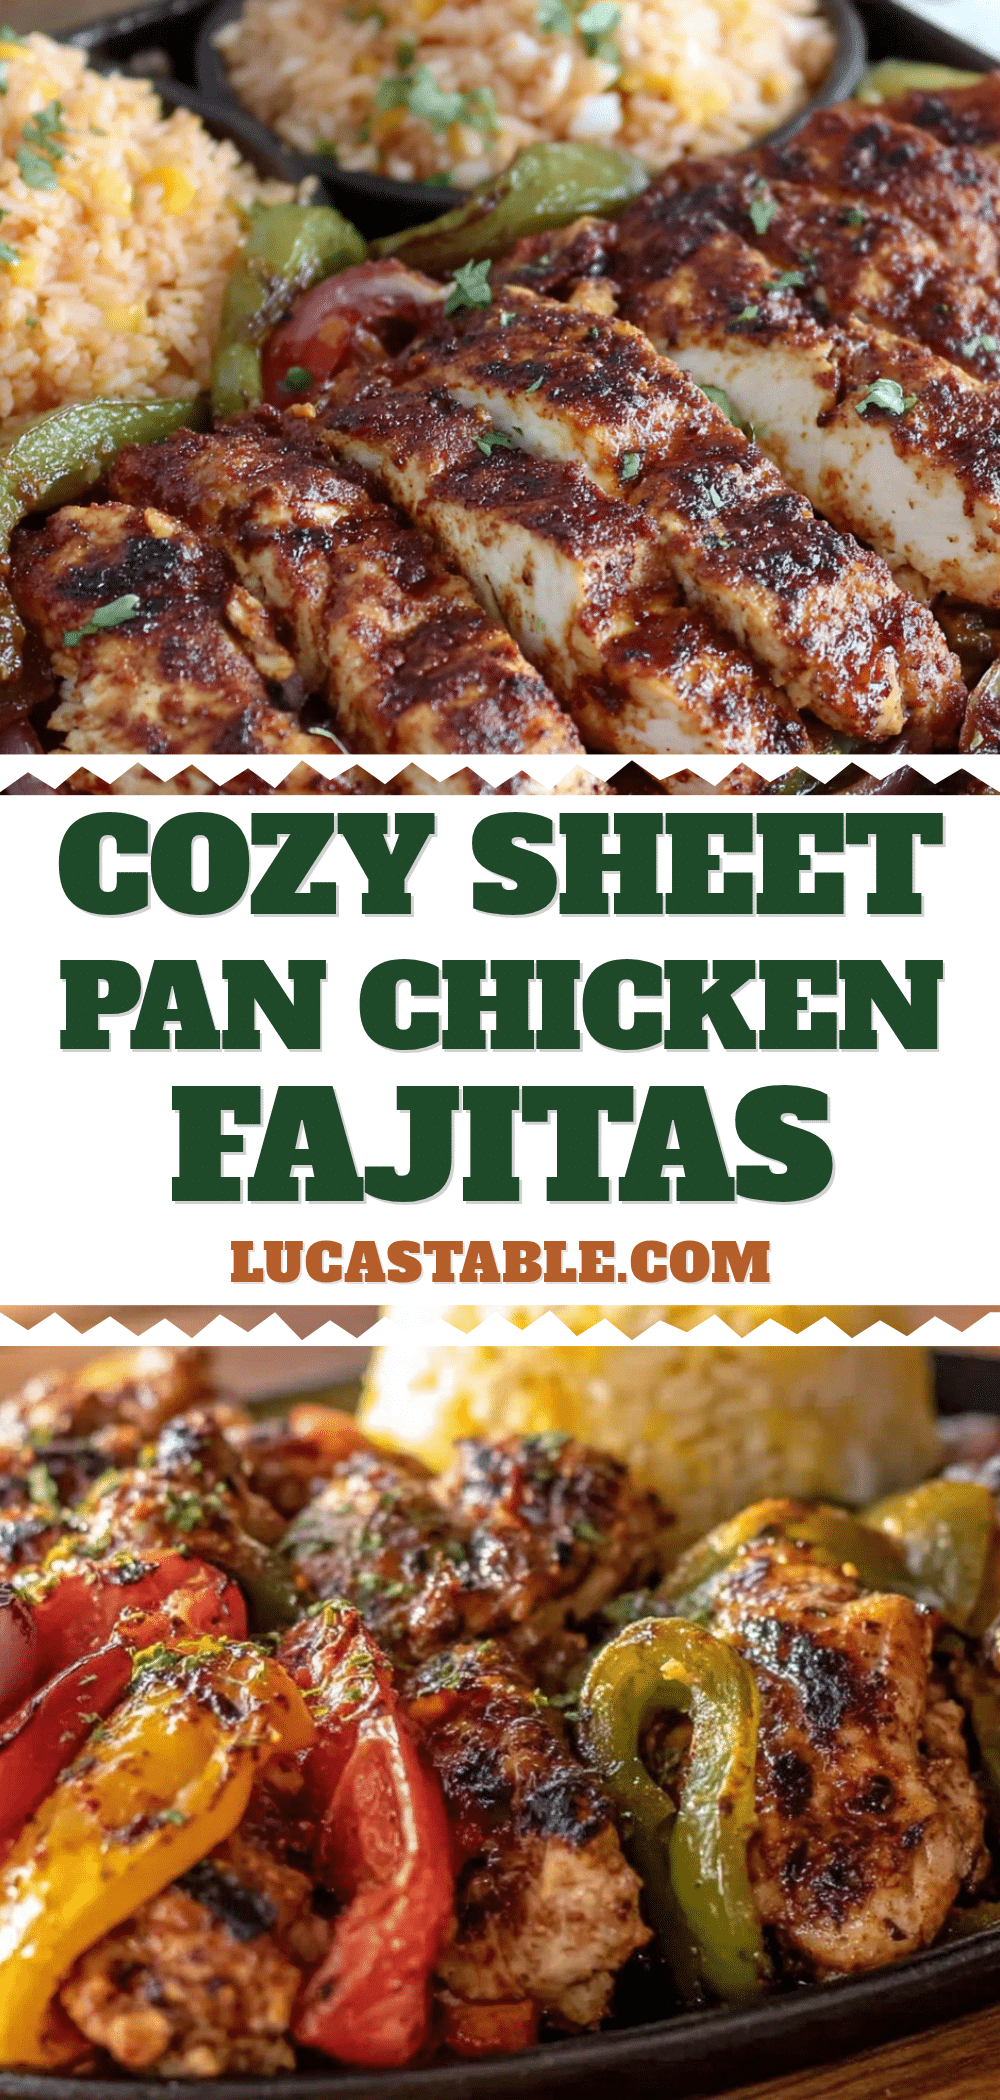
Cozy Sheet Pan Chicken Fajitas: Easy 30-Minute Dinner
Smoky, sizzling chicken fajitas made entirely on a sheet pan for an effortless, 30-minute weeknight dinner. Juicy chicken and caramelized peppers come together with a bold homemade spice blend for a meal that’s both cozy and crowd-pleasing.
- Prep Time: 10 minutes
- Cook Time: 25-30 minutes
- Total Time: 35-40 minutes
- Yield: 4-6 servings 1x
- Category: Main Course
- Cuisine: Mexican
Ingredients
- 1 ½ pounds boneless, skinless chicken breasts or thighs, sliced into ½-inch strips
- 3 large bell peppers (any color), sliced into ½-inch strips
- 1 large red onion, halved and sliced into ½-inch wedges
- 3 tablespoons olive oil or avocado oil
- 1 tablespoon chili powder (preferably ancho chili powder)
- 1 ½ teaspoons ground cumin
- 1 teaspoon smoked paprika
- 1 teaspoon garlic powder
- ½ teaspoon onion powder
- ½ teaspoon dried oregano (Mexican oregano preferred)
- ½ teaspoon salt (plus more to taste)
- ¼ teaspoon black pepper
- Pinch of cayenne pepper (optional, for heat)
- 8–10 small flour or corn tortillas, warmed
- For serving: sour cream or Greek yogurt, guacamole or sliced avocado, fresh salsa or pico de gallo, shredded cheese, fresh cilantro, lime wedges
Instructions
- Preheat your oven to 400°F (200°C). Line a large sheet pan with parchment paper for easy cleanup.
- In a small bowl, combine the chili powder, cumin, smoked paprika, garlic powder, onion powder, oregano, salt, pepper, and cayenne (if using). Stir to combine.
- In a large bowl, add the sliced chicken, bell peppers, and red onion. Drizzle with olive oil and sprinkle the seasoning mixture over the top. Use your hands to toss everything until evenly coated.
- Spread the seasoned chicken and vegetables onto the prepared sheet pan in a single, even layer. Avoid overcrowding; use two pans if necessary.
- Roast on the middle rack for 15 minutes. Remove the pan, stir the chicken and vegetables with a spatula or tongs, and return to the oven.
- Roast for another 10-15 minutes, until the chicken is cooked through (internal temperature of 165°F / 74°C) and the vegetables are tender with charred edges. Total roasting time: 25-30 minutes.
- Remove from the oven and let rest for 5 minutes. Meanwhile, warm the tortillas (wrap in a damp paper towel and microwave 30 seconds, or heat directly on a gas burner).
- Assemble the fajitas: spoon the chicken and pepper mixture onto warm tortillas. Top with desired toppings and a generous squeeze of fresh lime juice.
Notes
For extra-charred edges, turn on the broiler for the last 1-2 minutes of cooking, watching closely to prevent burning. Slice chicken against the grain for maximum tenderness. Do not overcrowd the pan to ensure proper caramelization. Leftover filling can be stored in an airtight container in the refrigerator for 3-4 days. Reheat in a hot skillet or oven for best texture.
Nutrition
- Serving Size: 1 serving (about 1/6
- Calories: 280320
- Sugar: 68
- Sodium: 500600
- Fat: 1215
- Saturated Fat: 23
- Carbohydrates: 1215
- Fiber: 45
- Protein: 3035
Keywords: sheet pan fajitas, chicken fajitas, easy dinner, 30-minute meal, weeknight dinner, Mexican, fajita recipe, sheet pan dinner


