The last piece of chicken was gone before I reached for a napkin. My husband looked up from his plate, fork still in hand, and just said, “Make this again tomorrow.” That never happens. We usually have leftovers, something to pack for lunch the next day. But this batch of crispy one-pan garlic butter chicken thighs? Completely wiped out. And honestly? I wasn’t even surprised.
I’d been chasing that perfect skin for weeks. You know the one—crackling, golden, almost shatteringly crisp, while the meat underneath stays so tender it practically falls apart. I tried different pans, different heat levels, different timing. I dried the skin obsessively, salted it hours ahead, even tried that baking powder trick everyone swears by. And then I stopped overthinking it. I went back to the basics: a hot pan, good butter, lots of garlic, and patience. The kind of patience that keeps you from fussing with the chicken while it sears.
The first time I nailed it, I actually laughed. It felt ridiculous—how simple the whole thing was. No marinating overnight, no complicated spice blends, no flipping the chicken every two minutes like a nervous wreck. Just let the pan do the work. And that garlic butter sauce? It’s the kind of thing you want to drink with a straw. I started spooning it over rice, then over vegetables, then just eating it straight from the pan when nobody was looking. This recipe stuck because it’s honest. It doesn’t pretend to be fancy. It just delivers exactly what it promises: crispy, juicy, garlicky chicken that makes everyone at the table slow down and actually enjoy dinner. Trust me on this one.
Why You’ll Love This Recipe
I’ve tested this recipe more times than I care to count, tweaking the heat, the butter amount, even the pan position in the oven. What I landed on is the version I’d serve to company without a second thought. It’s the kind of dish that looks impressive but asks very little of you.
- One Pan, Minimal Mess : Everything happens in a single skillet—searing, sauce-making, and finishing. Fewer dishes means more time actually enjoying your meal.
- Crispy Skin Every Time : No sogginess, no rubbery texture. Just shatteringly golden skin that crackles when you bite into it.
- Rich Garlic Butter Sauce : The sauce comes together in the same pan after the chicken rests, soaking up all those browned bits. It’s liquid gold, honestly.
- Under 40 Minutes : From fridge to table in about 35 minutes. Perfect for those evenings when you’re hungry and impatient.
- Simple Pantry Ingredients : Chicken, butter, garlic, salt, pepper. That’s it. No special grocery runs required.
- Naturally Gluten-Free & Low-Carb : Works beautifully for keto, paleo, or anyone watching their carbs without sacrificing flavor.
What makes this different from every other garlic butter chicken recipe out there? It’s the technique. Most recipes rush the searing step or crowd the pan, which steams the skin instead of crisping it. I learned that the hard way—ruined more than a few batches before figuring out that patience and proper pan temperature are non-negotiable. This version also uses a finishing method that keeps the skin crispy even after it’s been sauced. That’s the game-changer right there.
This is the kind of meal that makes you close your eyes after the first bite. It’s comfort food at its finest—simple, honest, and deeply satisfying. Perfect for a quiet weeknight dinner or for impressing guests without breaking a sweat.
What Ingredients You Will Need
This recipe relies on a handful of quality ingredients to deliver maximum flavor. Nothing fancy, just smart choices that make a difference. Here’s what you’ll need and why each one matters.
- Bone-in, skin-on chicken thighs (4-6 thighs, about 2 lbs / 900g) : This is non-negotiable for the crispiest skin. The bone keeps the meat juicy during cooking, and the skin renders beautifully when seared properly. Look for thighs that are roughly the same size for even cooking. I prefer organic or air-chilled chicken when I can find it—better texture, less water content.
- Unsalted butter (4 tablespoons / 56g) : Unsalted gives you control over the salt level. The butter does double duty here—it helps sear the chicken and forms the base of the sauce. Don’t substitute margarine or oil blends; real butter is key for flavor and browning.
- Garlic cloves (6-8 large cloves, thinly sliced) : Fresh garlic only. Pre-minced stuff from a jar will burn too quickly and taste bitter. Thin slices allow the garlic to caramelize gently in the butter without turning acrid. If you love garlic (like I do), go for the full 8 cloves.
- Kosher salt (1.5 teaspoons / 9g) : I use Diamond Crystal kosher salt. If you’re using table salt or a different brand, adjust accordingly—Morton’s is about twice as salty by volume. Season generously; chicken thighs can handle it.
- Freshly ground black pepper (1 teaspoon / 2g) : Pre-ground pepper won’t cut it here. Freshly cracked pepper adds a subtle heat and aromatic quality that complements the garlic butter beautifully.
- Fresh thyme sprigs (4-5 sprigs) : Optional but highly recommended. Thyme adds an earthy, slightly floral note that cuts through the richness of the butter. You can also use rosemary or sage in a pinch.
- Chicken broth or stock (1/4 cup / 60ml) : Used to deglaze the pan and loosen the browned bits for the sauce. Low-sodium is best so you can control the final salt level. If you don’t have broth, a splash of dry white wine works wonderfully too.
- Lemon juice (1 tablespoon / 15ml, from about half a lemon) : A squeeze of acidity at the end brightens the whole dish. It balances the richness of the butter and keeps the sauce from feeling heavy.
- Fresh parsley (2 tablespoons, chopped) : For garnish and a fresh finish. Flat-leaf parsley is ideal, but curly works fine too.
Ingredient Selection Tips: For the best results, choose chicken thighs that have the skin still attached and intact. Avoid thighs with torn or missing skin—you need that protective layer for proper crisping. If you’re using frozen chicken, thaw it completely in the refrigerator overnight and pat it extremely dry before cooking. Moisture is the enemy of crispy skin.
Substitution Guidance: Need a dairy-free option? Use ghee or a high-quality plant-based butter alternative. The flavor won’t be exactly the same, but the technique will still work. For a lower-fat version, you can use avocado oil for searing and reduce the butter to 2 tablespoons, but honestly, the skin won’t be quite as crispy or flavorful. If you can’t find fresh thyme, dried thyme works—just use about 1 teaspoon and add it to the butter while it melts.
Equipment Needed
You don’t need a fancy kitchen to nail this recipe. Here’s what you’ll actually use:
- 12-inch cast iron skillet or heavy-bottomed oven-safe pan : Cast iron is ideal because it holds heat evenly and gets screaming hot. A stainless steel skillet works too, but avoid non-stick—you won’t get the same browning or crispy skin. If you only have non-stick, you can still make this, but the skin won’t be as crackly.
- Tongs : Essential for flipping the chicken without piercing the skin. Piercing releases juices and ruins the crispiness. Spring-loaded tongs with silicone tips are my favorite—they grip well without scratching the pan.
- Paper towels : For drying the chicken skin thoroughly. This step is more important than you think. Use multiple layers and really press into the skin.
- Instant-read thermometer : Not strictly necessary, but it takes the guesswork out of doneness. Chicken thighs are done at 175-185°F (80-85°C). I use a Thermapen, but any reliable digital thermometer works.
- Sharp chef’s knife : For slicing garlic and chopping parsley. A dull knife will crush the garlic instead of slicing it cleanly, which affects how it cooks.
- Cutting board : Preferably wood or plastic. Have one dedicated for raw chicken and wash it thoroughly after use.
If you don’t have a cast iron skillet, don’t run out and buy one just for this. An oven-safe stainless steel pan works almost as well. Just make sure it’s heavy-bottomed so the heat distributes evenly. I’ve also made this in a carbon steel pan with excellent results—it’s lighter than cast iron but behaves similarly. Budget-wise, a Lodge cast iron skillet costs around $20-30 and will last forever. Worth every penny.
One tip: if your pan has any rough spots or rust, give it a good scrub with coarse salt and a potato half before seasoning. That sounds old-school, but it works like a charm.
Preparation Method
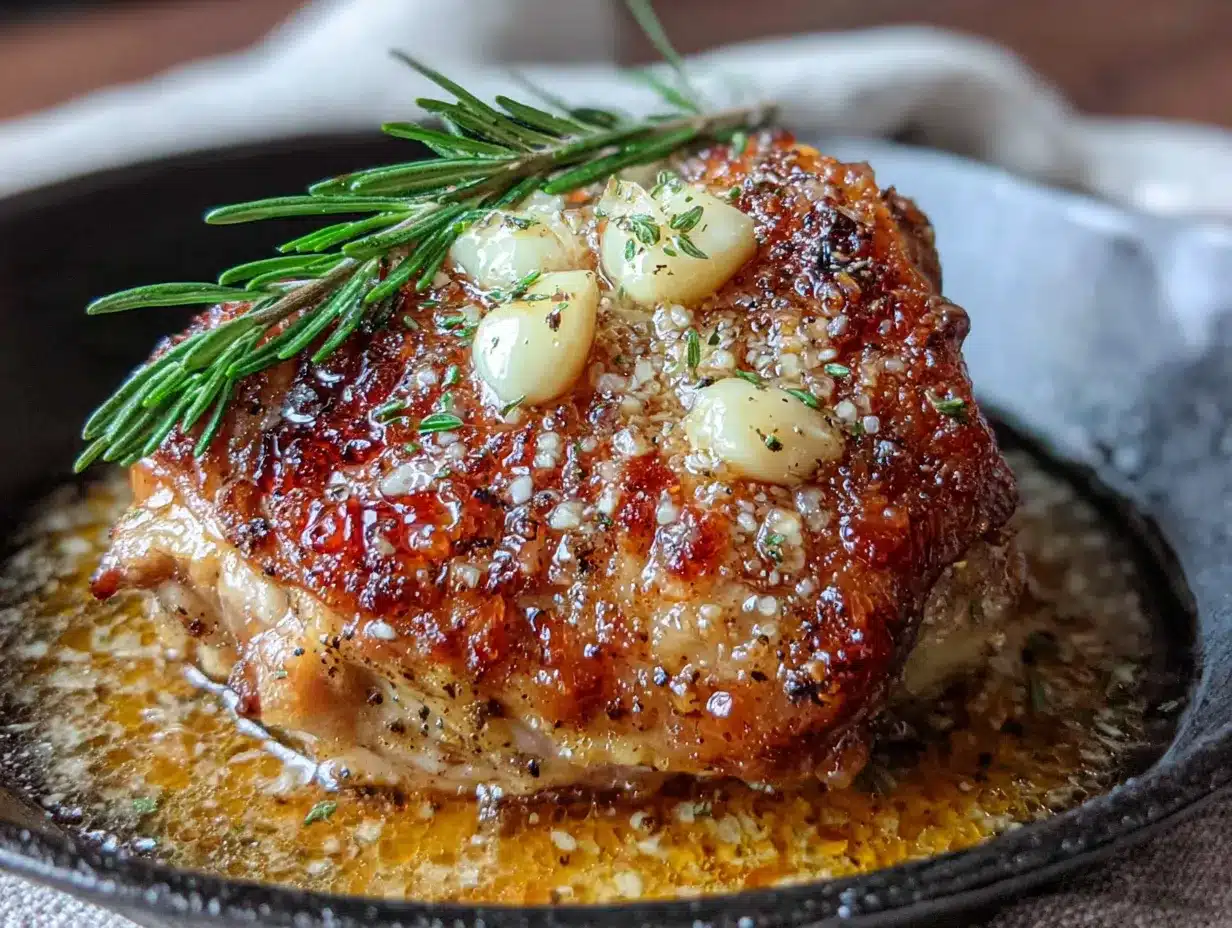
Let’s get cooking. This method is straightforward, but each step matters. Follow along and you’ll have restaurant-quality chicken at home.
- Prep the chicken (5 minutes) : Remove the chicken thighs from the refrigerator about 20 minutes before cooking to take the chill off. Pat them extremely dry with paper towels—really press into the skin to absorb any moisture. Season generously on both sides with kosher salt and freshly ground black pepper. Don’t be shy with the salt; chicken thighs can handle it. Let the seasoned chicken sit at room temperature while you prepare the other ingredients.
- Preheat the pan (3 minutes) : Place your cast iron skillet over medium-high heat and let it get hot. You want it screaming hot before adding any fat. To test, flick a drop of water onto the pan—if it sizzles and evaporates immediately, you’re ready. If it just sits there and bubbles, wait longer. This step is crucial for crispy skin.
- Start the sear (8-10 minutes) : Add 2 tablespoons of the butter to the hot pan. It should melt and sizzle immediately. Swirl the pan to coat the bottom. Carefully place the chicken thighs skin-side down in the pan, making sure not to overcrowd. If your pan is too small, cook in batches. Listen for that satisfying sizzle—if it’s quiet, the pan isn’t hot enough. Let the chicken cook undisturbed for 6-7 minutes. Resist the urge to peek or move them. You want the skin to develop a deep golden-brown crust.
- Flip and add aromatics (5-6 minutes) : Using tongs, flip the chicken thighs. The skin should be beautifully browned and crispy. Add the sliced garlic and thyme sprigs to the pan around the chicken. Add the remaining 2 tablespoons of butter. Let the butter melt and baste the chicken by tilting the pan and spooning the melted butter over the thighs. Cook for another 4-5 minutes, until the other side is also browned.
- Finish in the oven (10-12 minutes) : Preheat your oven to 400°F (200°C) if you haven’t already. Transfer the entire skillet to the oven. Roast the chicken for 10-12 minutes, or until the internal temperature reaches 175-185°F (80-85°C) when measured at the thickest part of the thigh. The skin will crisp up further in the oven’s dry heat. If you don’t have an oven-safe pan, transfer the chicken to a baking sheet lined with foil and roast that way.
- Make the pan sauce (3 minutes) : Carefully remove the skillet from the oven (use oven mitts—the handle is blazing hot). Transfer the chicken to a plate and tent loosely with foil to rest. Place the skillet back on the stovetop over medium heat. Add the chicken broth and scrape up any browned bits from the bottom with a wooden spoon. Let it simmer for 1-2 minutes until slightly reduced. Stir in the lemon juice and any accumulated juices from the resting chicken. Taste and adjust seasoning with salt and pepper.
- Serve immediately : Return the chicken to the pan or arrange on a serving platter. Spoon the garlic butter sauce over the top. Garnish with fresh parsley. Serve hot, with extra sauce on the side for drizzling.
Sensory cues to watch for: When you flip the chicken, the skin should release easily from the pan. If it sticks, it’s not ready—give it another minute. The garlic should be fragrant and just starting to turn golden, not brown or burnt. The sauce should bubble gently when you add the broth, and the browned bits should dissolve quickly. You’ll smell the lemon brightening everything up right before serving.
Troubleshooting tip: If your skin isn’t crispy after roasting, your pan wasn’t hot enough during searing, or you moved the chicken too early. Next time, let it sear longer without touching it. Also, make sure the chicken is bone-dry before it hits the pan—moisture is the enemy of crispiness.
Cooking Tips & Techniques
I’ve made this recipe more times than I can count, and I’ve learned a few things the hard way. Here’s what I wish someone had told me from the start.
Patience is everything. The biggest mistake people make is moving the chicken too soon. When you first place the chicken skin-side down, it will stick to the pan. That’s normal. As the skin renders and crisps, it will naturally release. If you try to flip it too early, you’ll tear the skin and lose all that beautiful crispiness. Trust the process. Set a timer for 6 minutes and don’t touch it.
Don’t crowd the pan. If your skillet is too small, cook the chicken in batches. Overcrowding lowers the pan temperature and causes the chicken to steam instead of sear. Steam equals soggy skin. Use a 12-inch skillet for 4-6 thighs, or cook in two batches if you’re doubling the recipe.
Dry the chicken like you mean it. I cannot overstate this. Pat the skin dry with paper towels, then let it air-dry for a few minutes while the pan heats. Some chefs even refrigerate the chicken uncovered overnight to dry out the skin. That’s overkill for a weeknight dinner, but the principle is sound: drier skin = crispier results.
Use the oven to your advantage. Finishing the chicken in the oven does two things: it ensures the meat cooks through without burning the skin, and it allows the skin to crisp up even more in the dry heat. If you try to cook the chicken entirely on the stovetop, you’ll likely burn the butter or undercook the meat. The oven is your safety net.
Let the chicken rest. I know it’s tempting to dig in immediately, but letting the chicken rest for 5 minutes under foil allows the juices to redistribute. Cut into it too soon, and all those flavorful juices will run out onto the plate instead of staying in the meat. Trust me on this—I’ve made that mistake more than once.
One failure I’ll never forget: I once tried to rush this recipe by using a non-stick pan and cranking the heat to high. The butter burned, the garlic turned bitter, and the chicken skin was pale and rubbery. I ended up ordering pizza. That night taught me that shortcuts don’t work with this dish. Respect the process, and it will reward you.
Variations & Adaptations
This recipe is incredibly versatile. Here are a few ways to switch it up depending on your mood, dietary needs, or what’s in your fridge.
Spicy Garlic Butter Chicken : Add 1-2 teaspoons of red pepper flakes along with the garlic. The heat cuts through the richness of the butter beautifully. I love this version with a side of cooling cucumber salad or creamy coleslaw. If you’re a fan of heat, you might also enjoy our spicy Thai basil chicken for another quick weeknight option.
Lemon Herb Variation : Replace the thyme with fresh rosemary and add the zest of one lemon along with the juice. The extra citrus brightness makes this version perfect for spring or summer. Serve with roasted asparagus or a simple green salad.
Creamy Garlic Butter Chicken : After making the pan sauce, stir in 1/4 cup (60ml) of heavy cream and let it simmer for 2 minutes until thickened. This creates a luscious, velvety sauce that’s incredible over mashed potatoes or pasta. It’s indulgent, but sometimes you need that.
Dairy-Free Adaptation : Use ghee or a high-quality plant-based butter for the searing step. The sauce can be made with olive oil and a splash of coconut cream for richness. The flavor profile changes slightly, but it’s still delicious. For a completely different but equally quick chicken dinner, try our zesty lemon chicken—it’s ready in 20 minutes.
Herb Crust Variation : Before searing, press a mixture of finely chopped fresh herbs (parsley, thyme, rosemary, sage) onto the skin side of the chicken. The herbs create a fragrant, crispy crust that’s absolutely gorgeous. This works especially well for dinner parties.
One I’ve tried and loved: I once added a tablespoon of Dijon mustard to the pan sauce right at the end. It added a subtle tanginess that balanced the butter perfectly. My husband declared it his new favorite version. Sometimes the best variations come from a moment of curiosity.
Serving & Storage Suggestions
Serving: Serve the chicken hot, straight from the pan. The skin is at its crispiest within the first 10 minutes after cooking. Arrange the thighs on a warm platter and spoon plenty of the garlic butter sauce over the top. Garnish with fresh parsley and a few extra thyme leaves if you have them. A final squeeze of lemon juice right before serving brightens everything up.
What goes with it: This chicken pairs beautifully with simple sides that let the sauce shine. Mashed potatoes are a classic choice—the creamy texture soaks up all that garlic butter goodness. Steamed rice, couscous, or crusty bread are also excellent for catching every drop of sauce. For vegetables, try roasted asparagus, sautéed green beans, or a simple arugula salad with lemon vinaigrette. If you’re in the mood for something different, our quick fried rice makes a fantastic side dish that comes together in 30 minutes.
Storage: Leftover chicken can be stored in an airtight container in the refrigerator for up to 4 days. Keep the sauce separate if possible, or store it with the chicken—just know the skin will soften over time. To reheat, place the chicken in a skillet over medium heat with a splash of broth or water. Cover and heat for 5-7 minutes until warmed through. For crispier skin, reheat in a 375°F (190°C) oven for 10 minutes, uncovered.
Freezing: This recipe freezes well, though the skin won’t be crispy after thawing. Place cooled chicken and sauce in a freezer-safe container and freeze for up to 3 months. Thaw overnight in the refrigerator and reheat as directed above. The meat stays juicy and flavorful even after freezing—perfect for meal prep.
How flavors develop: Honestly, this dish is best fresh from the pan. The skin loses its crackle after a few hours in the fridge. But the sauce? It gets even better overnight as the garlic and herb flavors meld together. If you have leftovers, I recommend shredding the chicken and using it in tacos, over rice bowls, or stirred into pasta the next day. The flavor is still incredible, even if the texture changes.
Nutritional Information & Benefits
Here’s an approximate nutritional breakdown for one serving (based on 4 servings, using bone-in skin-on chicken thighs with butter sauce):
| Nutrient | Amount per Serving |
|---|---|
| Calories | 420-480 |
| Protein | 32-38g |
| Fat | 32-36g |
| Saturated Fat | 14-16g |
| Carbohydrates | 2-4g |
| Fiber | 0g |
| Sugar | 0-1g |
| Sodium | 600-800mg |
Health Benefits: Chicken thighs are an excellent source of high-quality protein, which supports muscle repair and keeps you feeling full. They’re also rich in B vitamins, particularly B6 and B12, which are important for energy metabolism and brain function. The skin contains healthy fats that help your body absorb fat-soluble vitamins. Garlic is known for its anti-inflammatory and immune-supporting properties, thanks to compounds like allicin. Fresh thyme adds antioxidants and a boost of vitamin C.
Dietary Considerations: This recipe is naturally gluten-free, low-carb, and keto-friendly. It’s also suitable for paleo and whole30 diets if you use ghee instead of butter. For dairy-free, use avocado oil and skip the butter—the flavor changes but it’s still delicious. The recipe contains no nuts, eggs, or soy, making it safe for most common allergies. If you’re watching your sodium, use low-sodium broth and reduce the added salt to 1 teaspoon.
Personal note: I love that this recipe feels indulgent but is actually quite balanced. The protein keeps you satisfied, the fat provides sustained energy, and the garlic and herbs add nutritional benefits without any extra effort. It’s comfort food that doesn’t leave you feeling guilty.
Conclusion
This crispy one-pan garlic butter chicken thighs recipe is proof that you don’t need complicated techniques or fancy ingredients to create something truly memorable. It’s honest cooking at its best—simple, forgiving, and deeply satisfying. The kind of meal that makes you slow down, take a breath, and actually taste what you’re eating.
I hope you give this recipe a try and make it your own. Maybe you’ll add extra garlic like I do, or throw in some red pepper flakes for heat, or serve it with your favorite roasted vegetables. That’s the beauty of a recipe like this—it’s a starting point, not a rulebook. Cooking should feel like play, not homework.
If you make this, I’d love to hear how it turned out. Drop a comment below and let me know if your family wiped the pan clean like mine did. Did you try a variation? Discover a new side dish pairing? Share your wins—I read every single comment and I love hearing about your kitchen victories.
Until next time, keep your pans hot and your butter unsalted. Happy cooking!
Frequently Asked Questions
Can I use boneless, skinless chicken thighs instead?
You can, but you won’t get the same crispy skin or juicy texture. Boneless thighs cook much faster and can dry out easily. If you’re in a pinch, reduce the cooking time by about 5-7 minutes and check for doneness at 165°F (74°C). The sauce will still be delicious, but the texture won’t be the same.
Why is my chicken skin not getting crispy?
Most likely, the skin wasn’t dry enough before cooking, or the pan wasn’t hot enough. Pat the chicken extremely dry with paper towels and let it sit uncovered for 10 minutes before cooking. Make sure your pan is screaming hot before adding the butter and chicken. Also, don’t move the chicken while it sears—let it develop that golden crust undisturbed.
Can I make this recipe ahead of time?
This dish is best enjoyed fresh, but you can prep ahead. Season the chicken and keep it uncovered in the refrigerator for up to 24 hours—this actually helps dry out the skin for better crisping. You can also slice the garlic and chop the parsley in advance. The actual cooking should be done just before serving for the best texture.
What’s the best pan to use if I don’t have cast iron?
A heavy-bottomed stainless steel skillet is your next best option. Look for one that’s oven-safe up to 400°F (200°C). Avoid non-stick pans—they don’t get hot enough for proper browning, and the high heat can damage the coating. If you only have non-stick, you can still make this, but the skin won’t be as crispy.
How do I prevent the garlic from burning?
Add the garlic after you flip the chicken, not before. The garlic only needs a few minutes in the hot pan to become fragrant and golden. If you add it too early, it will burn and turn bitter. Also, keep the heat at medium after you flip—high heat will scorch the garlic before the chicken is done.
Pin This Recipe!
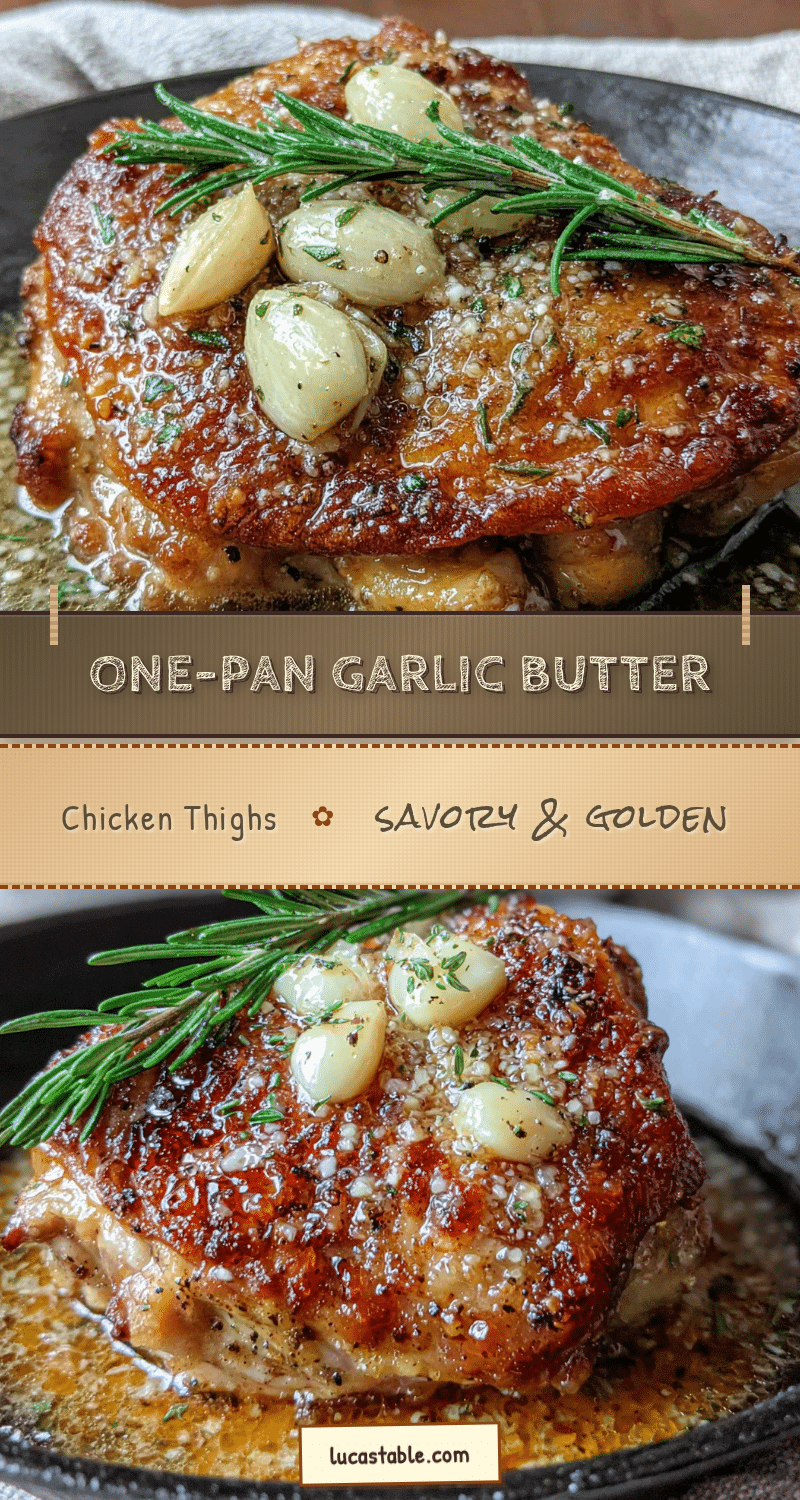
Crispy One-Pan Garlic Butter Chicken Thighs

Crispy, juicy, garlicky chicken thighs cooked in one pan with a rich garlic butter sauce. Ready in under 40 minutes with simple pantry ingredients.
- Prep Time: 10 minutes
- Cook Time: 25 minutes
- Total Time: 35 minutes
- Yield: 4 servings 1x
- Category: Main Course
- Cuisine: American
Ingredients
- 4–6 bone-in, skin-on chicken thighs (about 2 lbs / 900g)
- 4 tablespoons unsalted butter (56g), divided
- 6–8 large garlic cloves, thinly sliced
- 1.5 teaspoons kosher salt (9g)
- 1 teaspoon freshly ground black pepper (2g)
- 4–5 fresh thyme sprigs
- 1/4 cup chicken broth or stock (60ml)
- 1 tablespoon lemon juice (15ml)
- 2 tablespoons fresh parsley, chopped
Instructions
- Remove chicken from refrigerator 20 minutes before cooking. Pat extremely dry with paper towels. Season generously on both sides with kosher salt and black pepper. Let sit at room temperature.
- Place a 12-inch cast iron skillet over medium-high heat and let it get screaming hot. Test by flicking a drop of water onto the pan—it should sizzle and evaporate immediately.
- Add 2 tablespoons butter to the hot pan. Swirl to coat. Place chicken skin-side down in the pan, not overcrowding. Cook undisturbed for 6-7 minutes until deep golden-brown.
- Flip chicken using tongs. Add sliced garlic, thyme sprigs, and remaining 2 tablespoons butter to the pan. Baste chicken by spooning melted butter over thighs. Cook 4-5 minutes until other side is browned.
- Preheat oven to 400°F (200°C). Transfer skillet to oven and roast 10-12 minutes until internal temperature reaches 175-185°F (80-85°C).
- Remove skillet from oven. Transfer chicken to a plate and tent with foil. Place skillet over medium heat, add chicken broth, and scrape up browned bits. Simmer 1-2 minutes until slightly reduced. Stir in lemon juice and accumulated chicken juices. Season to taste.
- Return chicken to pan or arrange on platter. Spoon sauce over top. Garnish with fresh parsley. Serve hot.
Notes
Pat chicken extremely dry for crispiest skin. Don’t crowd the pan. Let chicken rest 5 minutes before serving. For dairy-free, use ghee or avocado oil. Sauce can be made creamy by adding 1/4 cup heavy cream.
Nutrition
- Serving Size: 1 chicken thigh with
- Calories: 450
- Sodium: 700
- Fat: 34
- Saturated Fat: 15
- Carbohydrates: 3
- Protein: 35
Keywords: crispy chicken thighs, garlic butter chicken, one-pan chicken, easy chicken dinner, keto chicken, gluten-free chicken


