“You sure that pan’s hot enough?” my friend joked as I nervously slid the pork chop onto the skillet. Honestly, I wasn’t sure either. I’d read a dozen times that getting that perfect crispy crust without drying out the meat was some kind of culinary magic trick. But that evening, armed with just a cast iron skillet and a bit of patience, I gave it a shot. The first sizzle was promising, filling the kitchen with that mouthwatering aroma of searing meat and browned butter. I flipped it once, resisting the urge to poke or prod, waiting for that golden crust to form. When I finally cut into it, the chop was juicy and tender inside with a crackling crust that made the whole effort worth it. Not to brag, but since then, this crispy pan-seared pork chop recipe has become my secret weapon for quick dinners that feel a little fancy but are totally doable on a weeknight.
What’s funny is that this recipe wasn’t planned—it was almost an accident. I was low on time and ingredients, but craving something satisfying. The pork chop’s perfect texture and flavor surprised me so much that it quickly became a staple. It’s the kind of dish that proves you don’t need complicated steps or obscure ingredients to impress yourself (and your dinner guests). Plus, it pairs beautifully with so many sides, from simple roasted veggies to creamy mashed potatoes. If you’re tired of dry pork chops or intimidating techniques, this one’s for you. The balance of crispy exterior and juicy interior is honestly life-changing, and I’m confident it’ll stick with you, too.
Why You’ll Love This Recipe
When I first nailed this crispy pan-seared pork chop recipe, I couldn’t stop making it all week. It’s just that good. Here’s why this recipe stands out and why you’ll want to keep it in your regular rotation:
- Quick & Easy: Comes together in about 20 minutes, making it perfect for busy weeknights when you don’t want to fuss but still crave a satisfying meal.
- Simple Ingredients: No hunting for specialty products here—you likely have everything in your pantry or fridge already.
- Perfect for Casual Dinners or Date Nights: Whether it’s a laid-back meal or you want to impress without stress, this recipe delivers.
- Crowd-Pleaser: My family, friends, even picky eaters always ask for seconds. The crispy crust combined with the tender meat wins every time.
- Unbelievably Delicious: The contrast of textures—the crunch of the seared outside and the juicy inside—is just next-level comfort food.
What sets this version apart is the simple but crucial step of seasoning and resting the pork chop before searing, which lets the meat relax and absorb flavors. Plus, finishing it with a pat of butter and a quick baste creates that rich, golden crust with a hint of garlic and thyme. It’s a humble trick I picked up after a few trial runs, and trust me, it changes everything. This isn’t just any pork chop recipe—it’s the one you’ll find yourself making again when you want a meal that feels both easy and special.
What Ingredients You Will Need
This recipe uses straightforward, wholesome ingredients that come together to create bold flavors and a satisfying texture without fuss. Most are pantry staples, so no surprise trips to the store required.
- Pork Chops – Bone-in, about 1-inch thick, ideally center-cut for even cooking and best texture. I prefer pork chops from trusted local butchers or brands like Smithfield for consistent quality.
- Salt and Freshly Ground Black Pepper – The backbone of flavor. Season generously for that perfect crust.
- Olive Oil – Use a neutral or light olive oil with a high smoke point, like California Olive Ranch. It helps achieve a nice sear without burning.
- Unsalted Butter – Adds richness to the pan and enhances browning during basting.
- Fresh Garlic Cloves – Crushed or lightly smashed to infuse the butter with flavor.
- Fresh Thyme or Rosemary Sprigs – Optional but highly recommended for aromatic depth.
- Lemon – A squeeze of fresh lemon juice at the end brightens the dish and cuts through the richness.
If you want a gluten-free option, this recipe naturally fits since it uses no flour or breading. For a dairy-free version, swap the butter with a plant-based alternative or extra olive oil. In case fresh herbs aren’t on hand, dried herbs can work, but fresh really makes the difference in flavor.
Equipment Needed
- Cast Iron Skillet or Heavy-Bottomed Pan: This is key for even heat and that coveted crust. I’ve tried nonstick pans, but nothing compares to cast iron’s heat retention and sear quality.
- Tongs: For easy flipping and basting without piercing the meat (which would let juices escape).
- Instant-Read Meat Thermometer: Optional but highly useful to check doneness without cutting into the pork.
- Small Spoon: For basting butter and pan juices over the chops.
If you don’t have cast iron, a stainless steel skillet works but be prepared for slightly less even heat. Keep your pan well-seasoned and clean it gently to keep it performing its best—this little upkeep makes a big difference in searing success.
Preparation Method
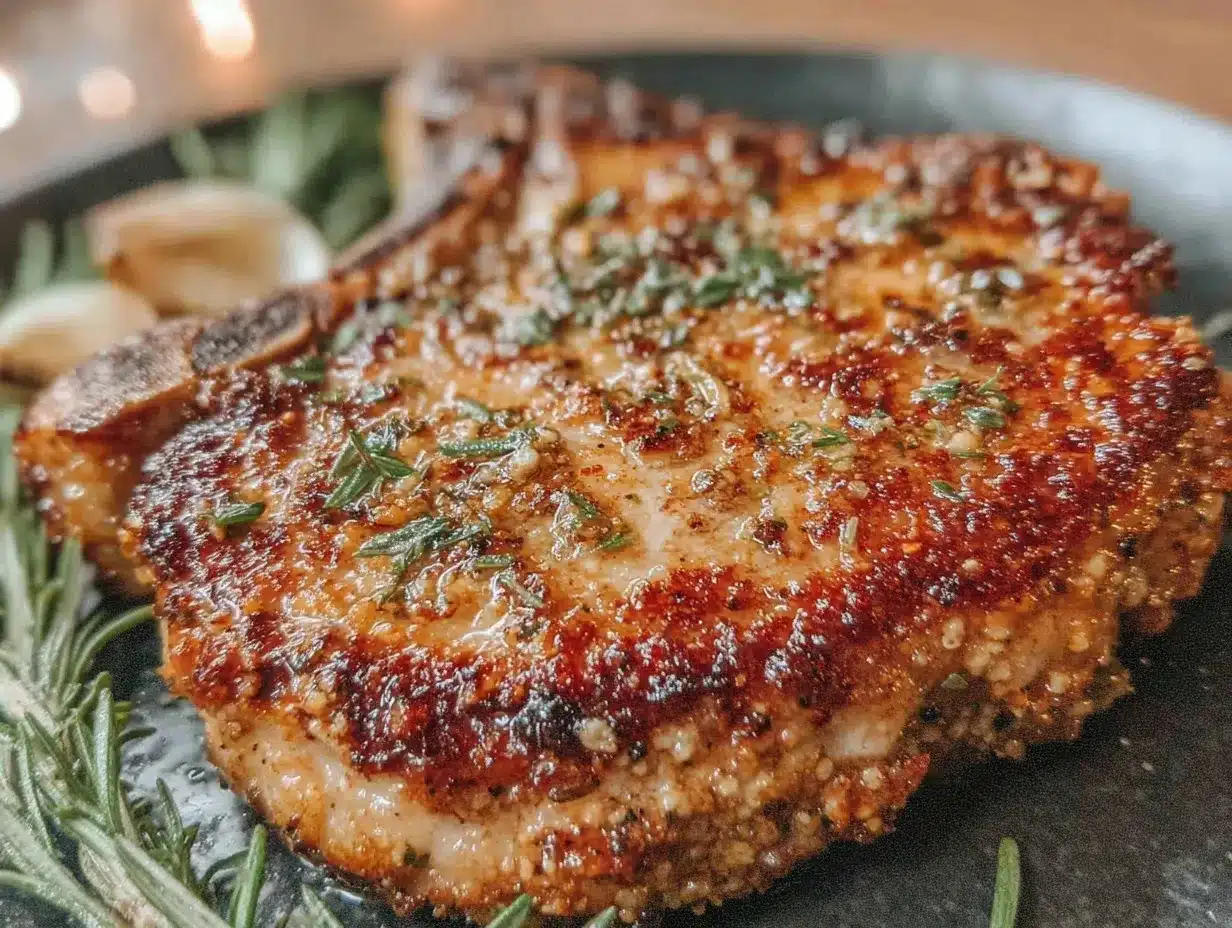
- Pat the pork chops dry with paper towels. This step is crucial for a crispy crust—moisture is the enemy of searing. Let them sit at room temperature for about 15 minutes before cooking.
- Season generously on both sides with salt and freshly ground black pepper. Don’t be shy; the seasoning forms the flavorful crust.
- Heat your cast iron skillet over medium-high heat until hot but not smoking, about 3-5 minutes. You want the pan hot enough that a drop of water sizzles and evaporates immediately.
- Add olive oil to the pan, swirling to coat the surface evenly.
- Place the chops carefully in the pan—lay them away from you to avoid splatters. Let them cook undisturbed for about 4-5 minutes. You’re aiming for a deep golden-brown crust.
- Flip the chops and immediately add butter, garlic, and thyme (or rosemary) to the pan.
- Baste the pork chops by tilting the pan slightly and spooning the melted butter and aromatics over the top repeatedly. Cook for another 3-5 minutes, depending on thickness and your preferred doneness.
- Check doneness with an instant-read thermometer—145°F (63°C) is the USDA recommended safe temperature for pork. If you don’t have a thermometer, the chops should feel firm but still give slightly when pressed with your finger.
- Remove the chops and let them rest on a plate for 5 minutes. Resting allows juices to redistribute, keeping the meat juicy and tender.
- Squeeze fresh lemon juice over the chops just before serving for a bright finish.
Pro tip: Resist the urge to move the chops around while searing. Let that crust develop naturally. Also, basting with butter and herbs creates a flavor boost and helps finish the crust beautifully.
Cooking Tips & Techniques
Getting that crispy, golden crust while keeping the pork chop juicy inside feels tricky, but a few tricks make it reliable. First, dry meat is key. You can’t shortcut that step if you want crunch.
Another lesson learned the hard way: don’t overcrowd the pan. Give each chop enough space so they sear instead of steam. If your skillet is small, cook in batches.
Timing matters. Pork chops can get tough if overcooked, so keep an eye on your thermometer or use the finger test (press the thickest part; it should be firm but springy). Resting is a must—cutting in too soon will spill all that juicy goodness onto your plate.
One thing I often do is prep a simple side while the chops rest—maybe a quick pan sauce or steamed greens. It makes multitasking manageable and the whole dinner come together smoothly.
Variations & Adaptations
- Herb Variations: Try swapping thyme for sage or rosemary for a different aromatic profile. Fresh herbs really shine in this recipe.
- Spice it Up: Add smoked paprika, cayenne, or a pinch of cumin to the seasoning mix if you like a bit of heat and smokiness.
- Gluten-Free Twist: This recipe is naturally gluten-free, but you can add a gluten-free breadcrumb crust by dredging chops in beaten egg and gluten-free panko before searing for extra crunch.
- Dairy-Free Alternative: Use olive oil or coconut oil for basting instead of butter, and skip the lemon if you want a creamier finish with a dairy substitute sauce.
- Cooking Method Swap: If you prefer oven finishing, sear the chops on stovetop for 3 minutes per side, then transfer to a 400°F (200°C) oven for 5-7 minutes.
I once tried adding a spoonful of Dijon mustard to the butter during basting for a tangy twist—surprisingly delicious and worth experimenting if you want a little zing.
Serving & Storage Suggestions
This pork chop shines best served hot, straight from the pan, with that crispy crust still intact. I love pairing it with easy sides like garlic mashed potatoes or a crisp green salad—something light to balance the richness. It also goes beautifully with quick, zesty lemon chicken for a mixed protein feast or alongside crispy chicken fried rice if you want a fusion-style meal.
For storage, keep leftover chops in an airtight container in the refrigerator for up to 3 days. When reheating, do it gently in a skillet over medium-low heat to preserve moisture and crispness. Avoid microwaving if you want to keep that crust intact—microwaves tend to make it soggy.
Flavors actually deepen after a day in the fridge, so leftovers can be even tastier—perfect for quick lunches or reheated dinners.
Nutritional Information & Benefits
This crispy pan-seared pork chop recipe offers a hearty source of protein, essential for muscle repair and energy. Pork chops also provide important vitamins like B6 and B12, along with minerals such as zinc and selenium, which support immune health.
Using lean cuts helps keep fat content moderate, and cooking with olive oil and fresh herbs adds heart-healthy fats and antioxidants. The recipe is naturally gluten-free, making it suitable for those avoiding gluten. Keep in mind the butter adds richness, so for a lighter version, reduce or substitute with olive oil.
From a wellness perspective, it’s a balanced comfort meal that delivers satisfaction without empty calories, especially when paired with nutrient-packed sides.
Conclusion
This crispy pan-seared pork chop recipe has earned a permanent spot in my kitchen because it’s simple, quick, and reliably delicious. The contrast between the crunchy crust and juicy interior is what keeps me coming back, especially on hectic nights when I want something that feels special but won’t keep me in the kitchen forever.
Feel free to tweak the herbs and seasoning to match your taste or dietary needs—this recipe is flexible and forgiving. I hope you find the same quiet joy I did when slicing into that perfect chop after a long day. If you try it, share your thoughts and any creative spins you put on it—I love hearing how recipes evolve in your kitchen.
Frequently Asked Questions
How do I prevent pork chops from drying out?
Pat your chops dry before seasoning and don’t overcook them. Using a meat thermometer to reach an internal temperature of 145°F (63°C) helps keep them juicy. Rest the chops after cooking to let juices redistribute.
Can I use boneless pork chops for this recipe?
Yes, but boneless chops tend to cook faster and can dry out more easily. Adjust cooking time accordingly and watch closely to avoid overcooking.
What if I don’t have fresh herbs?
Dried herbs can work in a pinch—use about one-third the amount of fresh. Adding them during basting still brings flavor, but fresh herbs provide the best aroma and taste.
Is it necessary to baste with butter and herbs?
While not strictly required, basting adds richness and flavor to the crust. If you want a lighter version, you can skip it, but the butter basting really makes the difference.
Can I make this recipe dairy-free?
Absolutely! Substitute butter with extra olive oil or a plant-based option for basting. The crispy sear will still be fantastic.
Pin This Recipe!
Crispy Pan-Seared Pork Chop
A quick and easy recipe for juicy, tender pork chops with a crispy golden crust, perfect for weeknight dinners or special occasions.
- Prep Time: 15 minutes
- Cook Time: 10 minutes
- Total Time: 25 minutes
- Yield: 2 servings 1x
- Category: Main Course
- Cuisine: American
Ingredients
- 2 bone-in pork chops, about 1 inch thick, center-cut
- Salt, to taste
- Freshly ground black pepper, to taste
- 2 tablespoons olive oil (neutral or light, high smoke point)
- 2 tablespoons unsalted butter
- 2 fresh garlic cloves, crushed or lightly smashed
- 2 sprigs fresh thyme or rosemary (optional)
- 1 teaspoon fresh lemon juice
Instructions
- Pat the pork chops dry with paper towels and let them sit at room temperature for about 15 minutes.
- Season both sides generously with salt and freshly ground black pepper.
- Heat a cast iron skillet over medium-high heat until hot but not smoking, about 3-5 minutes.
- Add olive oil to the pan and swirl to coat evenly.
- Place the pork chops carefully in the pan and cook undisturbed for 4-5 minutes until a deep golden-brown crust forms.
- Flip the chops and immediately add butter, garlic, and thyme or rosemary to the pan.
- Baste the pork chops by tilting the pan and spooning melted butter and aromatics over the top repeatedly. Cook for another 3-5 minutes depending on thickness and desired doneness.
- Check doneness with an instant-read thermometer; the internal temperature should reach 145°F (63°C).
- Remove the chops and let them rest on a plate for 5 minutes to redistribute juices.
- Squeeze fresh lemon juice over the chops just before serving.
Notes
Patting the pork chops dry before cooking is crucial for a crispy crust. Avoid overcrowding the pan to prevent steaming. Rest the chops after cooking to keep them juicy. For dairy-free, substitute butter with olive oil or plant-based alternatives. Fresh herbs are preferred but dried can be used in smaller amounts.
Nutrition
- Serving Size: 1 pork chop
- Calories: 350
- Sodium: 600
- Fat: 24
- Saturated Fat: 8
- Carbohydrates: 1
- Protein: 32
Keywords: pork chops, pan-seared pork chop, crispy pork chop, easy pork recipe, juicy pork chop, weeknight dinner, cast iron skillet


