My brother-in-law Mark had refused to participate in Christmas dessert for seven years. Seven years of watching him wave off pie, cake, cookies—anything sweet—with that same polite smile. “Not a dessert guy,” he’d say, and we’d all shrug and move on. Then last December, I caught him standing alone in my kitchen at 11 p.m., spoon deep in a bowl of something brown and melty, eyes half-closed like he’d just discovered a secret. The bowl was my experimental brownie dip. The spoon was my good serving spoon. And Mark? He was caught, red-handed and chocolate-mouthed, in the middle of proving himself wrong.
Honestly, I wasn’t even trying to convert him. I’d thrown this Christmas Tree Brownie Dip together for a casual family movie night—the kind where you’re in pajamas by 6 p.m. and nobody’s judging your third helping. I wanted something that felt festive without the fuss of rolling out dough or frosting a layer cake. Something warm, shareable, and just a little bit ridiculous in the best way. The tree shape was an afterthought, honestly—a happy accident of spreading warm brownie batter into a triangle on a platter and realizing, hey, that actually looks like something.
The thing is, I keep making it now. Not just for Mark (though he’s requested it for three separate gatherings since). I make it for the slow nights, the ones where you need a little extra sparkle. For the snow days when the kids are bouncing off walls and you just want to sit them down with something fun. For the holiday parties where you want to impress without stress. It’s the kind of recipe that makes you feel like you’ve done something special without actually working that hard—and maybe you’ve been there, standing in your kitchen at the last minute, wondering what on earth to bring. This is your answer.
Why You’ll Love This Recipe
Let me tell you why this Easy Christmas Tree Brownie Dip has become my secret weapon for the holiday season. I’ve tested it four times now—yes, four—to get the texture exactly right. Not too thick, not too runny, just that perfect fudgy consistency that clings to a strawberry like it was meant to be there.
- Quick & Easy: From start to table in under 30 minutes. Seriously. You can make this while the kids are opening one present.
- Simple Ingredients: You probably have everything in your pantry right now. No weird extracts, no specialty chocolate—just real, honest baking staples.
- Perfect for Holiday Gatherings: It’s a showstopper on any dessert table, but it’s also casual enough for a cozy night in with hot cocoa.
- Crowd-Pleaser: I’ve served this to toddlers, teenagers, and grandparents. The bowl comes back empty every single time. Even my non-dessert-guy brother-in-law can’t resist.
- Unbelievably Delicious: The contrast between warm, fudgy brownie dip and cold, fresh fruit is honestly next-level. It’s comfort food that feels a little fancy.
What makes this recipe different from every other brownie dip out there? It’s the texture, honestly. I spent a lot of time figuring out the perfect ratio of cocoa to butter to sugar so the dip stays soft and scoopable even after it cools slightly. No stiff, cakey mess here. It stays luscious and silky, the kind of dip that makes you close your eyes after the first bite. Plus, shaping it into a Christmas tree isn’t just cute—it actually makes serving easier. The triangle shape means more surface area for fruit to nestle against, so every scoop gets a perfect balance of dip and fruit.
This recipe isn’t just good—it’s the kind that makes people ask for the recipe before they’ve even finished eating. It’s comfort food reimagined for the holidays: warm, chocolatey, and decorated like a little edible Christmas tree. Perfect for impressing guests without stress, or turning a simple evening into something memorable.
What Ingredients You Will Need
This recipe uses simple, wholesome ingredients to deliver that rich, fudgy brownie flavor without any fuss. Most of these are pantry staples, which means you can whip this up even when the stores are closed and you’re snowed in.
For the Brownie Dip
- Unsalted butter, ½ cup (1 stick) – softened to room temperature (I prefer Kerrygold for the richness)
- Granulated sugar, 1 cup – adds sweetness and helps create that crackly top
- Large eggs, 2 – room temperature for better incorporation
- Vanilla extract, 1 teaspoon – pure, not imitation, for the best flavor
- All-purpose flour, ½ cup – spoon and level for accuracy
- Unsweetened cocoa powder, ⅓ cup – I use Ghirardelli for deep, rich chocolate flavor
- Salt, ¼ teaspoon – enhances the chocolate, don’t skip it
- Baking powder, ¼ teaspoon – just enough to give it a tiny lift
For the Christmas Tree Decoration
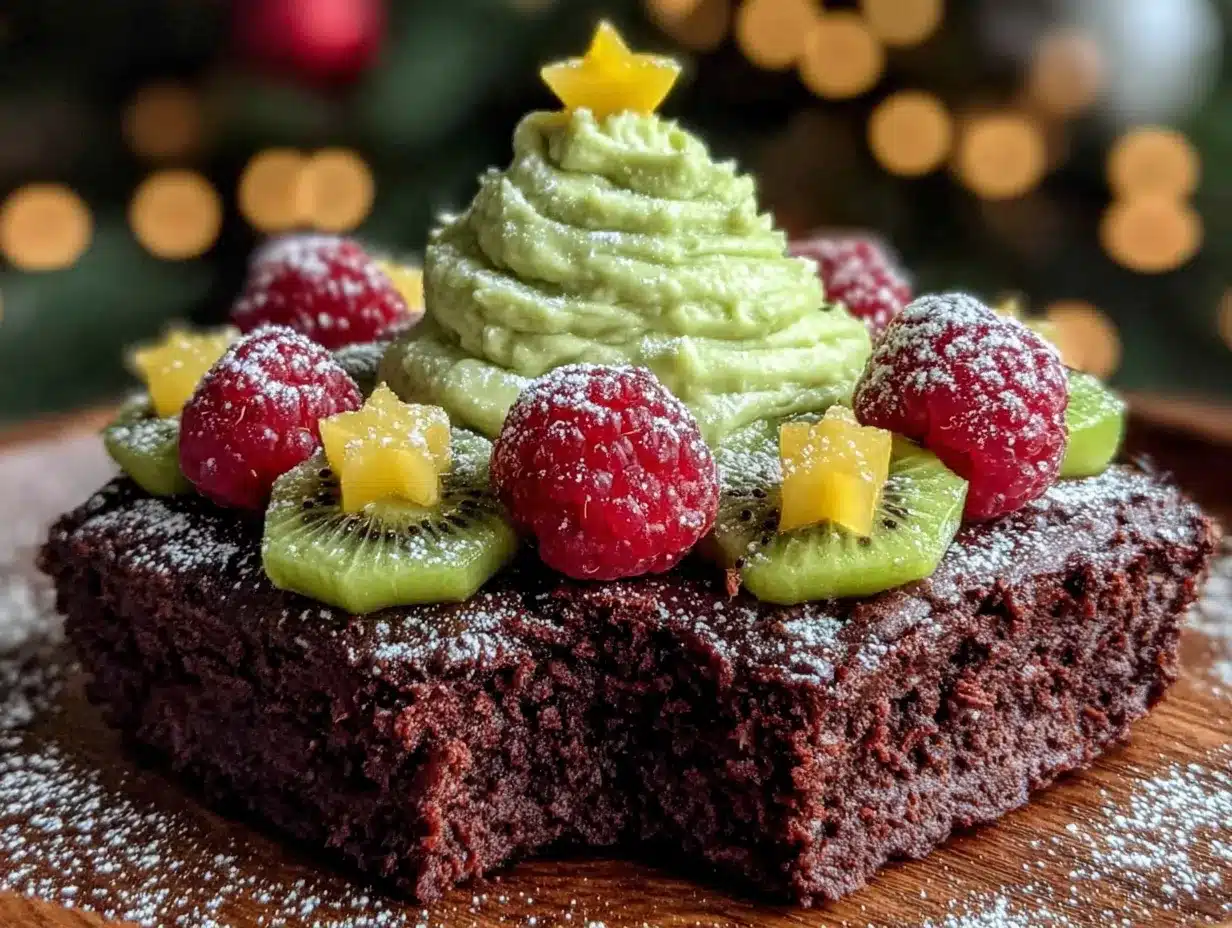
- Powdered sugar, for dusting – like snow on the tree
- Fresh strawberries, 1 pint, hulled and halved – they look like little ornaments
- Fresh blueberries, 1 cup – for that blue ornament effect
- Green grapes, 1 cup, halved – adds more green tree color
- Pomegranate seeds, ½ cup – like tiny, jewel-toned decorations
- Mint leaves, a few sprigs – for the tree topper effect (optional, but cute)
- Pretzel sticks, 3-4 – for the tree trunk
Ingredient Selection Tips: For the best texture, make sure your butter and eggs are truly at room temperature. Cold ingredients won’t emulsify properly, and you’ll end up with a greasy dip instead of a silky one. I learned this the hard way during my second test batch—it was a sad, separated mess. For the cocoa powder, Dutch-process will give you a darker, more intense color, but natural unsweetened works beautifully too. If you’re using natural cocoa, don’t swap the baking powder for baking soda—the acid balance is different.
Substitution Guidance: Need a dairy-free version? Use vegan butter sticks (not margarine) and it works perfectly. For a gluten-free option, swap the all-purpose flour with a 1:1 gluten-free baking blend—I’ve tested it with Bob’s Red Mill and it’s almost indistinguishable. If strawberries aren’t in season, use sliced apples or pears instead. The dip is forgiving, so feel free to get creative with your fruit choices based on what looks good at the store.
Equipment Needed
- Medium mixing bowl – any medium bowl will do; I use my grandmother’s old ceramic one
- Electric hand mixer or stand mixer – you can whisk by hand, but your arm will thank you for the mixer
- 8×8-inch baking pan – for baking the dip; a 9-inch round cake pan works too
- Rubber spatula – for scraping every last bit of batter
- Large serving platter or wooden board – at least 12 inches wide for the tree shape
- Piping bag or zip-top bag – for shaping the dip into a tree (optional but helpful)
- Small offset spatula – for smoothing the dip into a tree shape
- Fine-mesh sieve – for dusting powdered sugar evenly
Budget-Friendly Options: Don’t have a piping bag? No problem. A zip-top bag with the corner snipped off works exactly the same way. No offset spatula? A butter knife does the job—just go slow. I’ve made this with a whisk and a lot of elbow grease when my mixer was on the fritz, and it still turned out delicious. The equipment doesn’t have to be fancy; the technique matters more.
Preparation Method
- Preheat your oven to 350°F (175°C). Grease your 8×8-inch baking pan with butter or non-stick spray. I like to line mine with parchment paper too—makes cleanup a breeze.
- Melt the butter in a medium saucepan over low heat, or in a microwave-safe bowl in 30-second bursts. Let it cool slightly—you don’t want it hot enough to cook the eggs when you add them. It should be warm but not steaming.
- In your mixing bowl, combine the melted butter and sugar. Beat with your electric mixer on medium speed for about 2 minutes until it looks light and fluffy. This is where the magic starts—the sugar dissolving into the butter creates that fudgy texture.
- Add the eggs one at a time, beating well after each addition. Scrape down the sides of the bowl with your spatula. Add the vanilla extract and beat for another 30 seconds. The mixture should look thick and glossy, almost like caramel.
- In a separate small bowl, whisk together the flour, cocoa powder, salt, and baking powder. This ensures everything is evenly distributed—nobody wants a pocket of baking powder in their dip.
- Gradually add the dry ingredients to the wet mixture, mixing on low speed until just combined. Do not overmix! Stop as soon as you don’t see any more flour streaks. Overmixing will make the dip tough instead of tender.
- Pour the batter into your prepared pan and spread it evenly. Bake for 18-22 minutes. The edges should look set and slightly cracked, but the center should still be soft and jiggly. A toothpick inserted in the center should come out with moist crumbs, not wet batter. This is crucial—overbaking will give you a cakey dip instead of a fudgy one.
- Let the brownie dip cool in the pan for 10 minutes. It will continue to set as it cools. Don’t skip this step—it needs to be firm enough to shape.
- To shape the Christmas tree: Scoop the warm brownie dip onto your serving platter. Use your offset spatula (or a butter knife) to shape it into a triangle—wide at the bottom, tapering to a point at the top. Don’t stress about perfection; rustic trees are charming. If the dip is too sticky, lightly wet your spatula with water.
- Create the tree trunk: Arrange 3-4 pretzel sticks at the bottom center of the triangle, extending downward like a trunk.
- Dust generously with powdered sugar using your fine-mesh sieve. Hold the sieve high above the platter for an even, snowy coating.
- Decorate with fruit: Arrange your strawberries, blueberries, green grapes, and pomegranate seeds in rows or scattered patterns across the “tree.” Think of it like decorating a real Christmas tree—distribute the colors evenly. Place a small cluster of mint leaves at the very top as a tree topper.
- Serve immediately with extra fruit on the side for dipping. The dip is best warm, but it’s still delicious at room temperature.
Cooking Tips & Techniques
I’ve made this Christmas Tree Brownie Dip enough times to know where things can go wrong. Let me save you the trouble.
The biggest mistake? Overbaking. I did it on my first try—left it in the oven an extra 3 minutes while I answered a text, and the dip came out more like a brownie bar. Still tasty, but not scoopable. The center should still look slightly underdone when you pull it out. It finishes cooking from the residual heat as it cools. Trust the jiggle.
Another common issue: cold ingredients. I once used cold eggs straight from the fridge, and the batter seized up into little butter clumps. Room temperature really matters here. If you forget to take your eggs out ahead of time, place them in a bowl of warm water for 5 minutes. Same for the butter—microwave it in 5-second bursts until it’s softened but not melted.
For shaping the tree, here’s a trick I figured out after my third batch: if the dip is too sticky to shape, pop the platter in the fridge for 10 minutes. The dip firms up just enough to hold its shape, and you can smooth it into a perfect triangle. Then let it come back to room temperature before serving.
Timing strategy: I like to bake the dip while I’m washing and prepping the fruit. That way, everything is ready to assemble at the same time. Multitasking in the kitchen is all about overlapping steps—bake time is prep time for the next step.
For consistent results, use a kitchen scale. I know, I know—we’re not all bakers who weigh everything. But cocoa powder and flour can vary wildly by how you scoop them. ½ cup of flour can be anywhere from 55 to 70 grams depending on how packed it is. Weighing ensures the same perfect texture every time.
Variations & Adaptations
One of the things I love about this recipe is how adaptable it is. Here are some variations I’ve tried and loved:
Vegan Version: Use flax eggs (2 tablespoons ground flaxseed mixed with 6 tablespoons water, let sit for 5 minutes) and vegan butter. I tested this for a friend with dairy allergies, and honestly? It was almost indistinguishable from the original. The flax adds a nice nuttiness that complements the chocolate.
Peppermint Twist: Add ½ teaspoon peppermint extract along with the vanilla, and crush some candy canes to sprinkle on top after the powdered sugar. The minty freshness with the warm chocolate is absolutely dreamy. I made this for a cookie exchange and it disappeared first.
Spiced Holiday Version: Add 1 teaspoon cinnamon, ½ teaspoon nutmeg, and a pinch of cayenne to the dry ingredients. It gives the brownie dip a subtle warmth that pairs beautifully with the cold fruit. My mom, who’s not usually a chocolate person, asked for seconds of this version.
Nutella Swirl: After spreading the batter in the pan, drop spoonfuls of Nutella on top and swirl it in with a knife before baking. It adds a hazelnut richness that takes the dip to another level. Fair warning: this version is dangerously addictive.
Low-Sugar Option: Swap the granulated sugar with coconut sugar or a monk fruit blend. The texture will be slightly different—coconut sugar makes it a bit more grainy—but the flavor is still fantastic. I’ve made this for friends watching their sugar intake, and they were thrilled.
Grill Method: You can actually make this on a grill! Use a cast-iron skillet, cover the grill, and bake at 350°F for about 20 minutes. The slight smokiness from the grill adds an unexpected depth. Perfect for summer holiday parties or camping trips.
Serving & Storage Suggestions
This dip is best served warm, straight from the oven to the platter. The contrast between the warm, fudgy brownie and the cold, crisp fruit is what makes it magical. I like to set it out about 10 minutes after it comes out of the oven—warm enough to be scoopable, but not so hot that it burns anyone’s mouth.
What to serve with it: Beyond the fruit decorations, I love setting out extra dippers. Graham crackers, shortbread cookies, pretzel chips, and marshmallows are all fantastic. For a healthier option, apple slices and pear wedges work beautifully. If you’re feeling indulgent, drizzle some warm caramel sauce over the top right before serving.
Storage instructions: If you have leftovers (which, let’s be honest, is rare), cover the platter tightly with plastic wrap and refrigerate for up to 3 days. The dip firms up in the fridge, but it softens again at room temperature. To reheat, microwave individual portions for 15-20 seconds, or warm the whole platter in a 300°F oven for 5-7 minutes.
Freezer option: You can freeze the baked brownie dip (without decorations) for up to 2 months. Wrap it tightly in plastic wrap and then foil. Thaw overnight in the fridge, then reheat and decorate before serving. I’ve done this for surprise guests—just thaw, warm, and decorate, and they think you spent hours on it.
Flavor development: Interestingly, the dip tastes even better the next day. The flavors meld together, and the chocolate becomes deeper and more complex. If you can resist eating it all in one sitting, refrigerate it overnight, reheat gently, and enjoy an even richer experience.
Nutritional Information & Benefits
Let’s be real—this is a treat, not a health food. But that doesn’t mean it’s without its merits. Here’s a rough estimate per serving (based on 8 servings, dip only, without fruit):
| Nutrient | Amount per Serving |
|---|---|
| Calories | 285 |
| Total Fat | 14g |
| Saturated Fat | 8g |
| Carbohydrates | 38g |
| Sugar | 28g |
| Protein | 4g |
| Fiber | 2g |
Health highlights: The cocoa powder is actually packed with antioxidants called flavonoids, which can help reduce inflammation and improve heart health. Dark chocolate in general has some solid health credentials—just in moderation. The fresh fruit adds vitamins, fiber, and natural sweetness, so you’re getting some nutrients with your indulgence.
Dietary considerations: This recipe contains gluten, dairy, and eggs. For gluten-free, use a 1:1 baking blend. For dairy-free, use vegan butter. For egg-free, use flax eggs as mentioned above. It’s not suitable for low-carb or keto diets as written, but you could experiment with almond flour and a sugar substitute.
My personal perspective: I believe in balance. This dip is a celebration—it’s for holidays, special occasions, and cozy nights when you need a little joy. I don’t stress about the sugar content on those days. I focus on the laughter around the table, the happy faces, and the shared experience. Food is about connection, and this recipe delivers that in spades.
Conclusion
This Easy Christmas Tree Brownie Dip with Fresh Fruit has become more than just a recipe in my kitchen—it’s a tradition now. It’s the thing I make when I want to bring people together, when I want to create a moment that feels special without spending hours in the kitchen. It’s the dessert that converted my dessert-skeptic brother-in-law, that made my niece squeal with delight, that turned a regular Tuesday into a mini celebration.
I love that this recipe invites creativity. You can make it your own—swap the fruits, add different toppings, experiment with flavors. The base is forgiving, and the possibilities are endless. That’s the beauty of a good recipe: it gives you a foundation, and then you make it yours.
So go ahead—grab your ingredients, preheat your oven, and make yourself a little Christmas tree of chocolatey goodness. Invite someone to share it with you. Watch their face light up when they take that first bite. And if you happen to catch someone standing in your kitchen at 11 p.m. with a spoon in the bowl? Just smile and pretend you didn’t see a thing.
I’d love to hear how yours turns out! Drop a comment below with your favorite fruit combinations or any creative twists you tried. Share this recipe with a friend who needs a little holiday cheer. And most of all, enjoy every warm, chocolatey, fruit-filled bite. You deserve it.
Frequently Asked Questions
Can I make this Christmas Tree Brownie Dip ahead of time?
Absolutely! You can bake the brownie dip up to 2 days ahead and store it covered in the refrigerator. When you’re ready to serve, reheat it in a 300°F oven for 5-7 minutes, then shape and decorate with fruit and powdered sugar. The fruit should always be added fresh for the best texture and appearance.
What if I don’t have an 8×8 pan? Can I use a different size?
Yes, you can use a 9-inch round cake pan or even a cast-iron skillet. Just keep an eye on the baking time—a wider, shallower pan will bake faster (check at 15 minutes), while a smaller, deeper pan will need a few extra minutes. The key is the jiggly center test, not the clock.
How do I prevent the dip from becoming too cakey?
The secret is not overbaking and not overmixing. Pull the dip out when the center still looks slightly underdone—it should jiggle when you shake the pan. Also, mix the batter only until the flour disappears. Overmixing develops gluten, which makes the dip tough and cakey instead of soft and fudgy.
Can I use frozen fruit for the decoration?
I don’t recommend it. Frozen fruit releases water as it thaws, which will make the powdered sugar dissolve and create a soggy mess on your beautiful tree. Stick with fresh fruit for the best visual effect and texture. If fresh fruit isn’t available, try dried fruit like cranberries or apricots for a different but still festive look.
Is this recipe kid-friendly for making together?
Absolutely! This is one of my favorite recipes to make with kids. They can help measure ingredients, mix the batter (with supervision), and—best of all—decorate the tree with fruit. It’s like an edible craft project. Just handle the hot pan and oven steps yourself, and let them go wild with the decorating. My niece made a “rainbow tree” with every fruit color she could find, and it was beautiful in its own chaotic way.
Pin This Recipe!
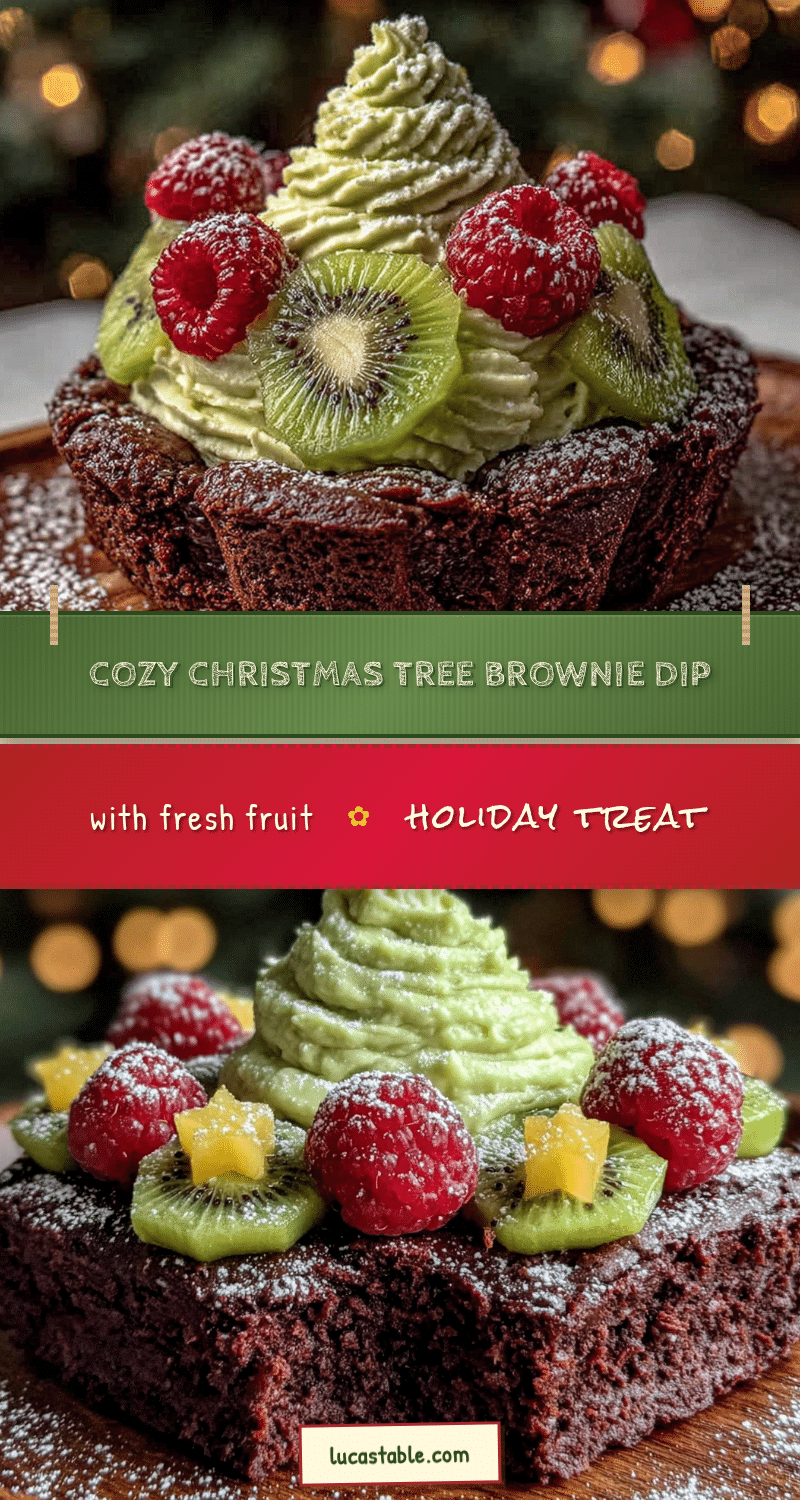
Easy Christmas Tree Brownie Dip with Fresh Fruit
A warm, fudgy brownie dip shaped like a Christmas tree and decorated with fresh fruit. Perfect for holiday gatherings, this quick and easy dessert is a crowd-pleaser that comes together in under 30 minutes.
- Prep Time: 10 minutes
- Cook Time: 20 minutes
- Total Time: 30 minutes
- Yield: 8 servings 1x
- Category: Dessert
- Cuisine: American
Ingredients
- ½ cup (1 stick) unsalted butter, softened to room temperature
- 1 cup granulated sugar
- 2 large eggs, room temperature
- 1 teaspoon pure vanilla extract
- ½ cup all-purpose flour, spooned and leveled
- ⅓ cup unsweetened cocoa powder
- ¼ teaspoon salt
- ¼ teaspoon baking powder
- Powdered sugar, for dusting
- 1 pint fresh strawberries, hulled and halved
- 1 cup fresh blueberries
- 1 cup green grapes, halved
- ½ cup pomegranate seeds
- A few sprigs mint leaves (optional, for tree topper)
- 3–4 pretzel sticks (for tree trunk)
Instructions
- Preheat your oven to 350°F (175°C). Grease an 8×8-inch baking pan with butter or non-stick spray; line with parchment paper if desired.
- Melt the butter in a medium saucepan over low heat or in a microwave-safe bowl in 30-second bursts. Let cool slightly until warm but not steaming.
- In a mixing bowl, combine the melted butter and sugar. Beat with an electric mixer on medium speed for about 2 minutes until light and fluffy.
- Add the eggs one at a time, beating well after each addition. Scrape down the sides of the bowl. Add the vanilla extract and beat for another 30 seconds until thick and glossy.
- In a separate small bowl, whisk together the flour, cocoa powder, salt, and baking powder.
- Gradually add the dry ingredients to the wet mixture, mixing on low speed until just combined. Do not overmix.
- Pour the batter into the prepared pan and spread evenly. Bake for 18-22 minutes. The edges should look set and slightly cracked, but the center should still be soft and jiggly. A toothpick inserted in the center should come out with moist crumbs, not wet batter.
- Let the brownie dip cool in the pan for 10 minutes. It will continue to set as it cools.
- To shape the Christmas tree: Scoop the warm brownie dip onto a serving platter. Use an offset spatula or butter knife to shape it into a triangle—wide at the bottom, tapering to a point at the top. If too sticky, lightly wet the spatula with water.
- Create the tree trunk: Arrange 3-4 pretzel sticks at the bottom center of the triangle, extending downward.
- Dust generously with powdered sugar using a fine-mesh sieve.
- Decorate with fruit: Arrange strawberries, blueberries, green grapes, and pomegranate seeds in rows or scattered patterns across the tree. Place a small cluster of mint leaves at the very top as a tree topper.
- Serve immediately with extra fruit on the side for dipping.
Notes
Do not overbake; the center should still look slightly underdone when removed from the oven. Room temperature ingredients are crucial for proper emulsification. For easier shaping, refrigerate the dip for 10 minutes if too sticky. The dip tastes even better the next day.
Nutrition
- Serving Size: 1 serving (dip only,
- Calories: 285
- Sugar: 28
- Fat: 14
- Saturated Fat: 8
- Carbohydrates: 38
- Fiber: 2
- Protein: 4
Keywords: Christmas tree brownie dip, easy brownie dip, holiday dessert, chocolate dip, fruit dip, Christmas dessert, brownie dip recipe


