The way the green marshmallow treats hold their shape when you press them down—firm but with just a little spring-back when you poke them—that’s the whole reason I make these every October. Everything else is just decoration. I mean, the chocolate chip eyes and the little pretzel-stick scars are fun, but that initial, slightly squishy resistance when you cut into the block? That’s what tells you you’ve nailed it. I remember the first time I made these with my niece, and she kept poking the pan, just to feel it. I couldn’t blame her.
It started a few Halloweens ago when I realized I needed something for her class party that wasn’t just another bag of candy. Something that looked like it took effort (it didn’t) and that she could actually help make without a flour explosion covering my entire kitchen. We’d already made a batch of regular rice krispie treats, and she looked at me with those big eyes and said, “Can we make them spooky?” So we did. We dyed the marshmallow mixture green, and she stuck on the faces. It was messy, sticky, and honestly, a little lopsided. But the kids at school lost their minds over them.
That’s the thing about these Easy Frankenstein Rice Krispie Treats. They’re not about being perfect. They’re about the sticky fingers and the laughter and the fact that you can make a Halloween dessert that feels special without turning on your oven. It’s a no-bake win, and honestly, after a long day of carving pumpkins or running around looking for costumes, that’s exactly the kind of recipe you need in your back pocket. You can trust this one—I’ve made it every year since, and it never fails to get a grin.
Why You’ll Love This Recipe
Let’s be real—Halloween can be a lot. Between the costume drama and the sugar rushes, the last thing you need is a complicated baking project. These Frankenstein Rice Krispie Treats are the opposite of complicated. They’re the kind of recipe that makes you look like a Halloween hero without breaking a sweat.
- No-Bake & Quick: You don’t even need to turn on the oven. From start to finish, you’re looking at about 20 minutes of active work. The hardest part is waiting for them to set.
- Simple Ingredients: Marshmallows, butter, rice cereal, green food coloring, and a few candies for the face. You probably have most of this in your pantry right now.
- Perfect for Halloween Parties: These little guys are the star of any school party, office potluck, or neighborhood gathering. They’re portable, kid-friendly, and instantly recognizable.
- Crowd-Pleaser: Kids love them, adults secretly love them, and everyone loves the fun factor. I’ve seen grown-ups argue over the last Frankenstein head.
- Unbelievably Fun: The texture is that classic chewy, gooey rice krispie goodness, but the green color and silly faces make it feel like a whole new treat. It’s comfort food with a costume on.
What makes this version different from the hundred other Halloween treats out there? It’s the balance. The marshmallow-to-cereal ratio is just right—not too hard, not too sticky. And the decorating is forgiving. You don’t need piping bags or steady hands. Just some candy eyes and a little imagination. This isn’t just another recipe; it’s the one that makes you close your eyes after the first bite because it tastes exactly like childhood, only spookier.
What Ingredients You Will Need
This recipe keeps things simple. You’re using pantry staples to create something that looks like it came from a fancy bakery. The key is in the quality of your marshmallows and the color. Here’s what you’ll need:
- 3 tablespoons unsalted butter (plus a little extra for greasing the pan). I use salted butter in a pinch, but unsalted lets you control the flavor better. It adds richness to the marshmallow mixture.
- 1 package (10 ounces) regular marshmallows or 4 cups mini marshmallows. The mini ones melt faster, but regular ones work just fine. Don’t use the flavored or fruity ones—stick with plain vanilla for the best color.
- 6 cups crispy rice cereal. The classic brand works best for that signature texture, but any store-brand crispy rice cereal will do.
- Green gel food coloring. This is important. Liquid food coloring will make your mixture too wet and can mess with the texture. Gel gives you that vibrant Frankenstein green without thinning out the marshmallow. I recommend the Wilton brand for the most consistent color.
- Candy eyes (about 24). You can find these at any craft store or grocery store in the baking aisle. They’re inexpensive and make the treats look instantly alive.
- Black licorice string or black frosting for the mouth and scars. I prefer black frosting in a tube because it’s less sticky to work with, but licorice strings give a nice chewy texture.
- Pretzel sticks for the bolts on the side of the head. Just snap them in half and poke them in. It’s the quintessential Frankenstein detail.
- Optional: white chocolate chips to melt and use as “glue” for the eyes if they aren’t sticking well. Sometimes the marshmallow isn’t tacky enough.
For the green color, be patient. Add the gel a drop at a time and stir well. You want a deep, swampy green, not a pastel. If you’re making these with kids, let them help with the stirring—just watch out for the hot marshmallow mixture. I’ve had a few close calls myself.
Equipment Needed
You don’t need any fancy gear for this. Here’s what you’ll need:
- Large saucepan (at least 4-quart capacity). You need room to stir the marshmallows and the cereal without making a mess.
- 9×13-inch baking pan. This gives you the perfect thickness for cutting into rectangles. You can also use an 8×8 pan for thicker treats, but you’ll need to adjust the cutting.
- Parchment paper. This is a lifesaver. Line your pan with parchment paper, leaving some overhang on the sides. It makes lifting the whole block out so much easier.
- Rubber spatula or wooden spoon. A silicone spatula is great because it doesn’t scratch your pan and it handles the sticky mixture well.
- Sharp knife for cutting. A chef’s knife works, but a long serrated knife gives you cleaner edges.
- Small bowls for organizing your candy decorations. It keeps things tidy and makes assembly faster.
If you don’t have a 9×13 pan, you can use a rimmed baking sheet. Just press the mixture into a rectangle shape. The treats will be a little thinner, but they’ll still taste great. A tip from experience: spray your spatula with a little non-stick cooking spray before pressing the mixture into the pan. It keeps everything from sticking and saves you a lot of frustration.
Preparation Method
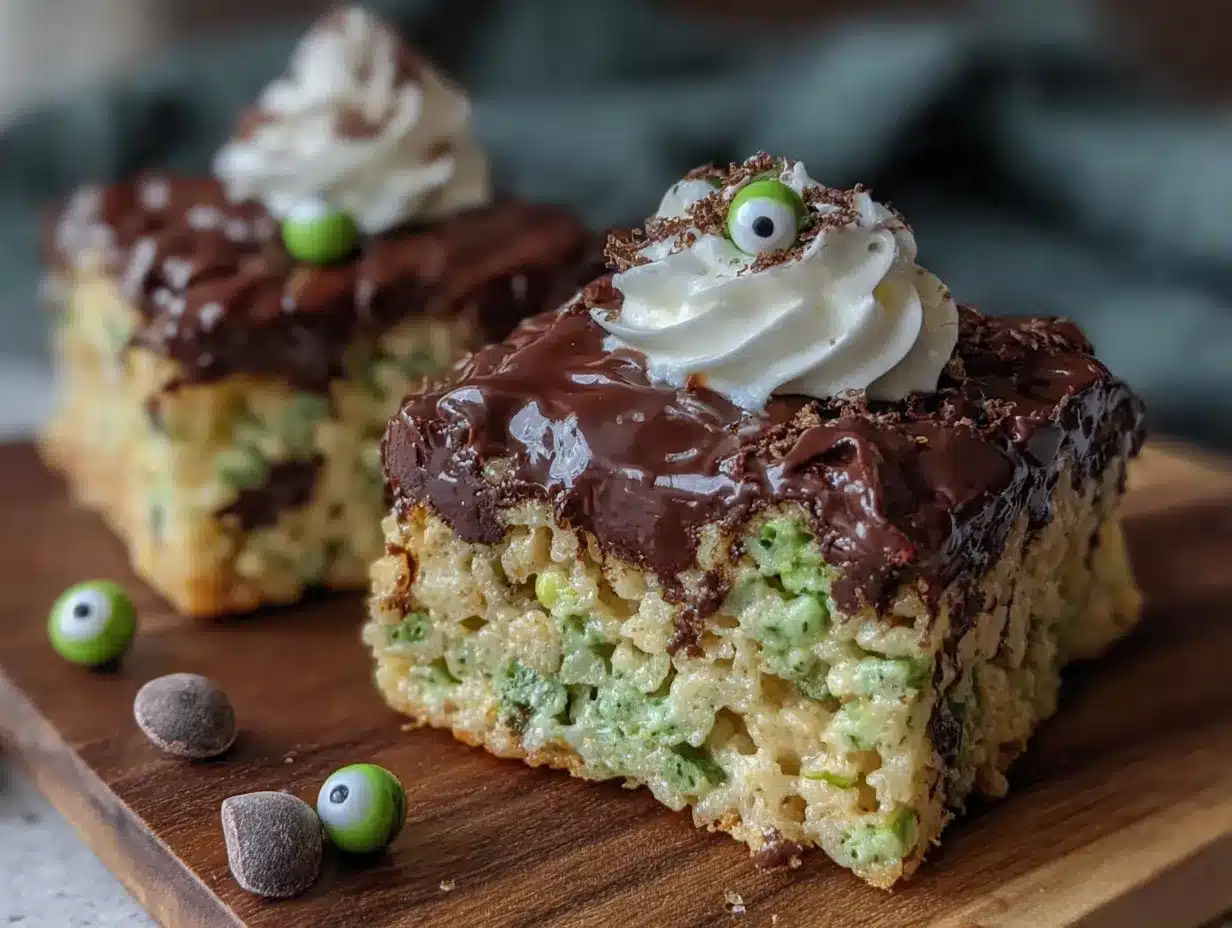
Let’s get to the fun part. Follow these steps, and you’ll have a pan of adorable Frankenstein treats in no time.
- Prep your pan. Line your 9×13-inch baking pan with parchment paper, leaving a couple inches of overhang on two opposite sides. Lightly grease the parchment paper with a little butter or non-stick spray. This ensures nothing sticks.
- Melt the butter. In your large saucepan, melt the 3 tablespoons of butter over low heat. Don’t rush this—medium heat can burn the butter. Stir it gently until it’s fully melted and just starting to bubble.
- Add the marshmallows. Pour in the entire bag of marshmallows. Stir constantly with your rubber spatula or wooden spoon until the marshmallows are completely melted and smooth. This usually takes about 5-7 minutes. Don’t walk away—marshmallows can scorch quickly.
- Color it green. Remove the pan from the heat. Add your green gel food coloring, one drop at a time. Stir thoroughly after each drop. You’re aiming for a deep, vibrant green. I usually use about 8-10 drops for a good Frankenstein shade. It should look almost neon.
- Add the cereal. Pour in the 6 cups of crispy rice cereal. Fold it into the marshmallow mixture gently but firmly. You want every piece of cereal coated. Don’t overmix, or the treats can get tough. Just fold until you don’t see any white marshmallow streaks.
- Press into the pan. Transfer the mixture to your prepared pan. Using your greased spatula or a piece of wax paper, press the mixture evenly into the pan. Be firm but gentle—you want them to hold together without being compressed into hard bricks.
- Let them set. Allow the treats to cool completely at room temperature. This takes about 30-45 minutes. Don’t rush them into the fridge, or they can get a little too firm and lose their chewy texture.
- Cut into rectangles. Once cooled, use the parchment paper to lift the whole block out of the pan. Use a sharp knife to cut the block into 12 rectangles. Each rectangle will be one Frankenstein head.
- Decorate the faces. This is where the personality comes in. Press two candy eyes onto each rectangle. Use a dab of melted white chocolate or a little bit of marshmallow from the pan to help them stick if needed. Add a mouth using black frosting or a piece of licorice string. For the bolts, snap a pretzel stick in half and press one piece into each side of the head.
- Let the decorations set. If you used frosting or melted chocolate, let the treats sit for another 10 minutes so everything firms up. Then they’re ready to serve.
A quick note: if you’re making these ahead of time, wait to decorate until just before serving. The candy eyes can get a little soft if they sit on the treats overnight. The faces stay much cuter if you add them fresh.
Cooking Tips & Techniques
I’ve made these treats more times than I can count, and I’ve learned a few things the hard way. Here’s what I wish I knew from the start.
The marshmallow-to-butter ratio is everything. Too much butter, and your treats will be greasy and fall apart. Too little, and they’ll be rock hard. Stick with the 3 tablespoons. It’s the sweet spot for chewy, not hard, treats.
Don’t skimp on the stirring. When you’re melting the marshmallows, stir constantly. I know it’s tempting to walk away for a second, but that’s when they burn. Burnt marshmallow has a bitter, smoky taste that ruins the whole batch. Low and slow is the way to go.
Color first, then cereal. Always add your food coloring to the melted marshmallow before you add the cereal. If you add it after, you’ll end up with white patches that won’t blend in. Trust me, I’ve made that mistake, and you end up with a sad, spotty Frankenstein.
Keep your hands greased. If you’re pressing the mixture into the pan with your hands (which is totally fine), grease them lightly with butter or non-stick spray. The marshmallow mixture is sticky, and trying to press it down with bare hands is a sticky nightmare.
Cut with confidence. When you’re cutting the block, use a sharp knife and cut in one smooth motion. Don’t saw back and forth, or you’ll crumble the edges. If the knife gets sticky, wipe it clean between cuts.
Make extra faces. Some of the treats might break when you cut them, or you might mess up a face. Having a few extra candy eyes and pretzel sticks on hand gives you room to experiment. Plus, the broken ones are perfect for snacking while you work.
Variations & Adaptations
One of the best things about this recipe is how easy it is to change it up. Here are a few ways to make these treats your own.
- Gluten-Free Version: Most crispy rice cereals are naturally gluten-free, but check the label to be sure. The rest of the ingredients are already gluten-free, so this is an easy swap.
- Vegan Option: Use vegan marshmallows and vegan butter. The texture will be a little different—vegan marshmallows can be a bit gummier—but the taste is still great. Just follow the same steps.
- Different Colors & Themes: Don’t limit yourself to Frankenstein. Use orange food coloring and make pumpkin faces. Use purple and make monster treats. The decorating possibilities are endless. I once made a batch of “alien” treats using green and purple swirls, and they were a huge hit.
- Add Mix-Ins: Before you press the mixture into the pan, fold in some mini chocolate chips, sprinkles, or crushed Oreos. It adds texture and flavor. Just don’t overload it, or the treats won’t hold together.
- Spooky Spider Version: Instead of Frankenstein faces, press the mixture into round shapes and use pretzel sticks for spider legs. Add candy eyes and a small chocolate candy for the body. It’s a fun twist.
I once tried a variation where I added a layer of melted white chocolate on top before decorating. It made the treats look even more polished, and the white chocolate added a nice sweetness. Just let the white chocolate set completely before cutting.
Serving & Storage Suggestions
These treats are best served at room temperature. The marshmallow is soft and chewy, and the candy eyes aren’t too hard. If you’re serving them at a party, arrange them on a platter with some Halloween-themed napkins. They’re a conversation starter, so be ready for compliments.
Storage: Store the treats in an airtight container at room temperature. They’ll stay fresh for up to 3 days. Don’t refrigerate them—the fridge makes them hard and dry. If you need to store them longer, you can freeze them for up to a month. Just wrap each treat individually in plastic wrap, then place them in a freezer bag. Thaw at room temperature before serving.
Reheating: If your treats have gotten a little stale, pop one in the microwave for 5-10 seconds. It softens them right up. Just don’t overdo it, or the candy eyes might melt.
Flavor Development: Honestly, these taste best the day you make them. The marshmallow is at its peak softness, and the cereal is still perfectly crisp. By day two, they’re a little chewier, but still delicious. I’ve never had leftovers last longer than that.
These treats pair wonderfully with a warm drink. If you’re looking for a full Halloween dinner idea, try them alongside a bowl of quick chicken lo mein for a fun, savory-sweet combo. Or, if you’re keeping things simple, they’re perfect after a plate of flavorful fried rice.
Nutritional Information & Benefits
Let’s be honest—these are a treat, not a health food. But here’s the breakdown for one Frankenstein treat (based on 12 servings):
- Calories: Approximately 180-200
- Fat: 4g
- Carbohydrates: 38g
- Sugar: 20g
- Protein: 1g
The main ingredients are marshmallows and cereal, so they’re high in sugar and low in protein. But the butter adds a small amount of fat, which helps with satiety. The rice cereal is fortified with some iron and B vitamins, so you’re getting a tiny nutritional boost. The candy decorations add minimal calories.
Dietary Considerations: This recipe is naturally nut-free (check your cereal and candy labels), but it does contain dairy from the butter. For a dairy-free version, use vegan butter. It’s also vegetarian-friendly. If you have celiac disease, double-check that your cereal is certified gluten-free.
From a wellness perspective, I think these treats are about joy. They’re a special-occasion food, and that’s okay. Life needs a little whimsy now and then. Enjoy them, share them, and don’t stress about the numbers.
Conclusion
These Easy Frankenstein Rice Krispie Treats are proof that Halloween doesn’t have to be complicated to be memorable. They’re quick, they’re fun, and they taste exactly like the childhood classic you love—just with a spooky makeover. The green color, the silly faces, and that perfect chewy texture make them a hit with kids and adults alike.
I hope you’ll give them a try. Customize the faces to make each one unique. Let the kids take over the decorating. Don’t worry if the eyes are crooked or the mouths are lopsided—that’s what gives them character. And if you come up with a fun variation, I’d love to hear about it. Drop a comment below and share your creation. Tag me in your photos, too. Nothing makes my day like seeing a pan of green monster heads on your table.
So go ahead. Make a batch. Laugh a little. And have a very happy Halloween.
Frequently Asked Questions
Can I use liquid food coloring instead of gel?
You can, but I don’t recommend it. Liquid food coloring adds extra moisture to the marshmallow mixture, which can make the treats too sticky and affect the texture. Gel coloring gives you a vibrant color without changing the consistency. It’s worth the extra step to find it.
How do I keep the candy eyes from falling off?
The easiest way is to press them into the marshmallow while it’s still slightly warm and tacky. If the treats have already cooled, you can use a tiny dab of melted white chocolate or a little bit of frosting as “glue.” It holds them in place perfectly.
Can I make these treats ahead of time?
Yes, but wait to decorate them until just before serving. The treats themselves can be made a day in advance and stored in an airtight container at room temperature. Add the candy eyes and frosting faces right before you serve them so they look their best.
My treats turned out too hard. What did I do wrong?
You probably pressed the mixture into the pan too firmly. The marshmallow mixture should be pressed down evenly, but not compacted. Pressing too hard squeezes out the air and makes the treats dense and hard. Next time, use a light hand.
Can I use a different cereal?
Absolutely. You can use any crispy rice cereal, including store brands. The texture might vary slightly, but the taste will be similar. For a different flavor, you can try using cocoa rice cereal or fruity cereal, but the color will change, so adjust your food coloring accordingly.
Pin This Recipe!
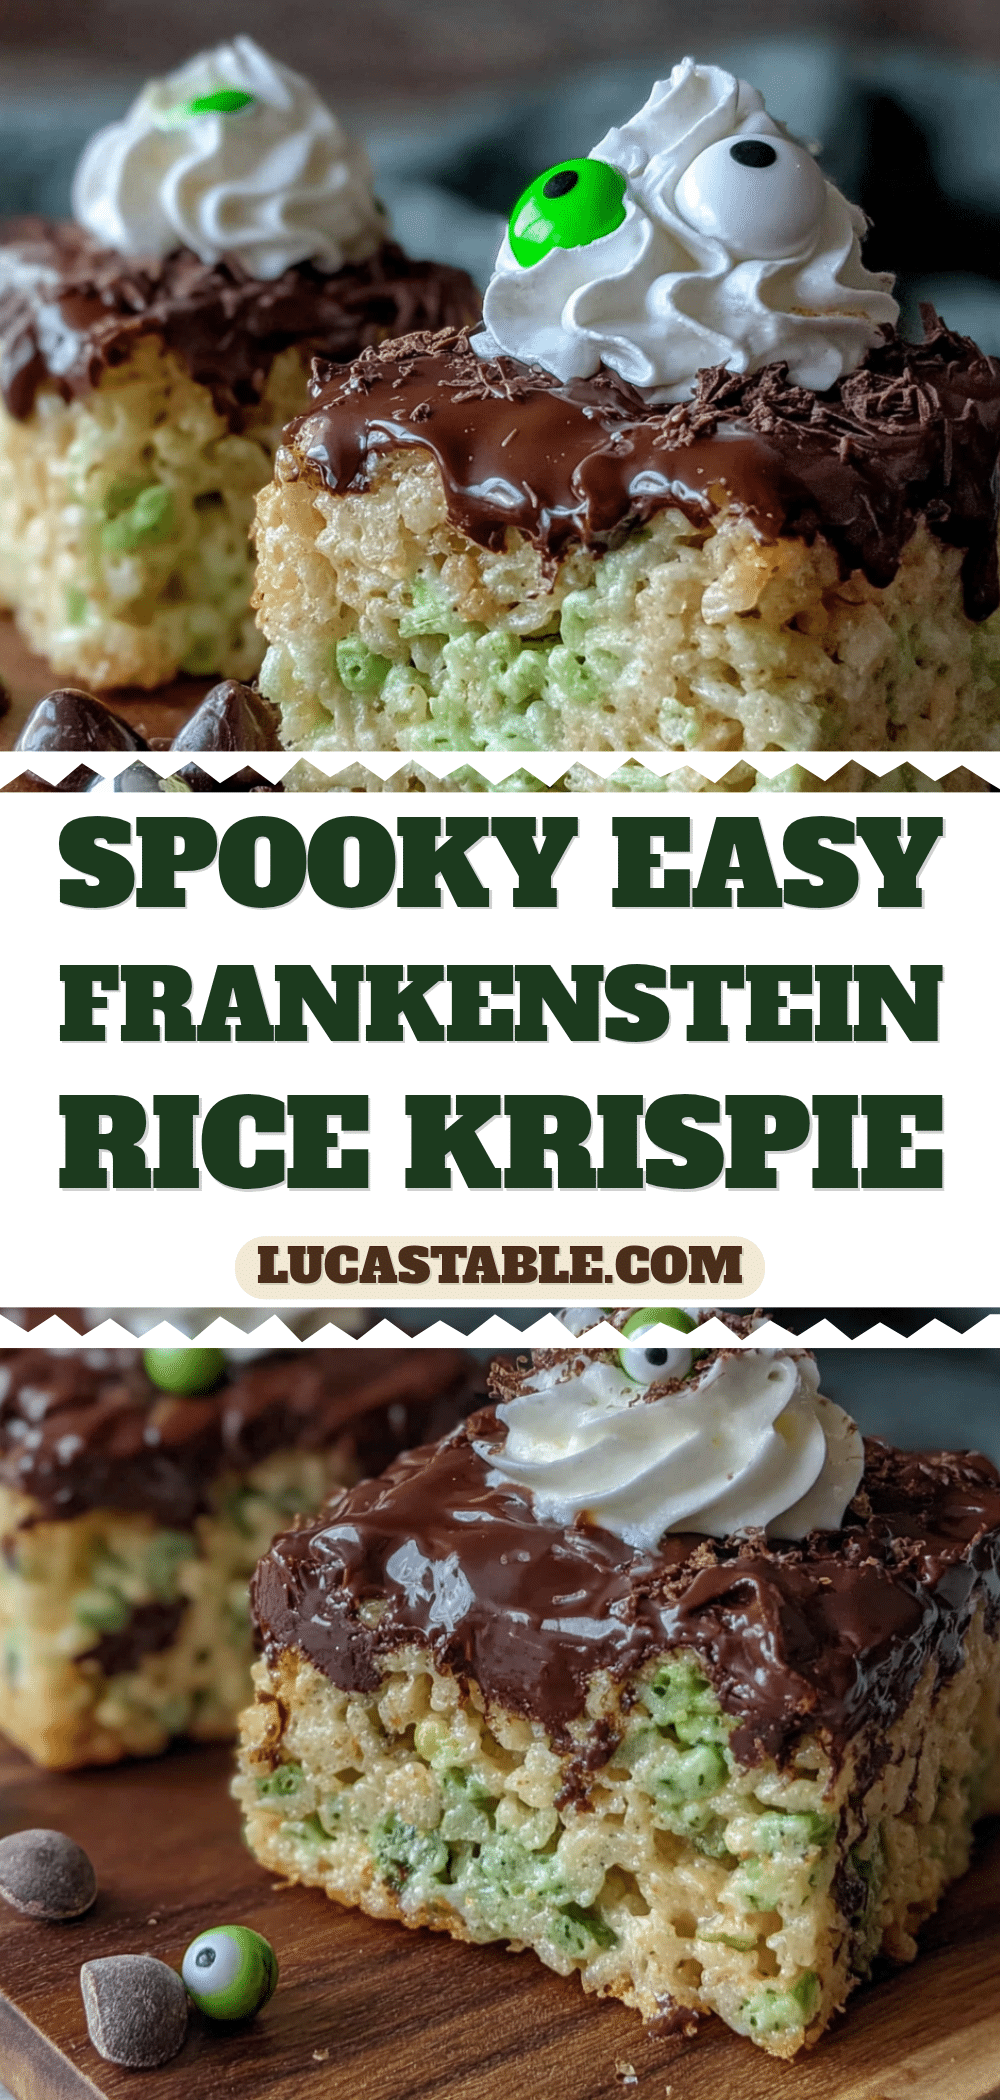
Easy Frankenstein Rice Krispie Treats: Best No-Bake Halloween Dessert
These no-bake Frankenstein Rice Krispie Treats are a fun and easy Halloween dessert that kids and adults love. With a vibrant green marshmallow base and silly candy faces, they’re perfect for parties and require only 20 minutes of active work.
- Prep Time: 20 minutes
- Cook Time: 10 minutes
- Total Time: 1 hour 15 minutes (including cooling and setting)
- Yield: 12 servings 1x
- Category: Dessert
- Cuisine: American
Ingredients
- 3 tablespoons unsalted butter (plus extra for greasing)
- 1 package (10 ounces) regular marshmallows or 4 cups mini marshmallows
- 6 cups crispy rice cereal
- Green gel food coloring
- Candy eyes (about 24)
- Black licorice string or black frosting for mouth and scars
- Pretzel sticks for bolts
- Optional: white chocolate chips for glue
Instructions
- Line a 9×13-inch baking pan with parchment paper, leaving overhang on two sides. Lightly grease the parchment with butter or non-stick spray.
- In a large saucepan, melt 3 tablespoons of butter over low heat until fully melted and just starting to bubble.
- Add the marshmallows and stir constantly until completely melted and smooth, about 5-7 minutes.
- Remove from heat. Add green gel food coloring one drop at a time, stirring thoroughly after each drop, until you achieve a deep, vibrant green (about 8-10 drops).
- Pour in the crispy rice cereal and fold gently until every piece is coated and no white streaks remain.
- Transfer the mixture to the prepared pan. Using a greased spatula or wax paper, press evenly into the pan. Be firm but gentle.
- Let the treats cool completely at room temperature, about 30-45 minutes.
- Once cooled, lift the block out using the parchment paper. Cut into 12 rectangles using a sharp knife.
- Decorate each rectangle: press two candy eyes onto each, add a mouth using black frosting or licorice string, and snap a pretzel stick in half to press into each side for bolts.
- If using frosting or melted chocolate as glue, let the decorations set for 10 minutes before serving.
Notes
For best results, use gel food coloring instead of liquid to avoid excess moisture. Decorate just before serving to keep candy eyes from softening. If the mixture is too sticky to press, lightly grease your hands or spatula with non-stick spray. Store in an airtight container at room temperature for up to 3 days; freeze for up to a month.
Nutrition
- Serving Size: 1 treat
- Calories: 190
- Sugar: 20
- Sodium: 150
- Fat: 4
- Saturated Fat: 2
- Carbohydrates: 38
- Protein: 1
Keywords: Frankenstein Rice Krispie Treats, Halloween dessert, no-bake, easy, kid-friendly, spooky treats


