My neighbor, a retired baker named Mrs. Kowalski, watched me trying to pipe frosting onto a batch of sad-looking sugar cookies last October. I was using a zip-top bag with the corner snipped off, and frankly, it was a mess. She didn’t say anything at first. Then she just shook her head, went inside her house, and came back with a small, worn recipe card. “Forget the cookies,” she said, handing it over. “Make these with the kids instead. They’re easier and they disappear faster.”
The card was for meringue cookies, and the note at the top just said “Ghosts.” I’ll be honest, I was a little intimidated. Meringue always seemed like something fancy pastry chefs made. But Mrs. Kowalski is a no-nonsense woman, and she insisted it was the simplest thing in the world. She was right. That first batch, I had my three-year-old helping me pour in the sugar, and we didn’t even have a stand mixer—just a hand mixer that sounded like it was on its last legs. The ghosts came out a little lopsided, and some of them had tiny cracks, but my kids thought they were the most magical thing they’d ever seen. Maybe you’ve been there, trying to find a Halloween treat that’s actually fun to make, not just stressful.
The best part? These ghost meringue cookies are budget-friendly. No expensive candy melts, no fancy cookie cutters. Just egg whites, sugar, and a little vanilla. That’s it. I’ve made them every Halloween since, and they’ve become our go-to for classroom parties, playdates, and just a quiet night at home. They’re the kind of recipe that feels special without any of the fuss. Honestly, if a recipe can survive a toddler “helping” and still turn out this good, it’s a keeper.
Why You’ll Love This Recipe
Let’s face it, Halloween can get expensive. Between costumes and candy, the treats can break the bank. These ghost meringue cookies are the answer to that problem. They use only three main ingredients, most of which you probably already have in your pantry. No need to hunt down specialty items.
- Budget-Friendly: Eggs and sugar are about as cheap as it gets. This recipe makes a big batch for just a few dollars.
- Kid-Approved & Fun: The process is like a little science experiment. Watching the meringue turn into stiff, glossy peaks is magic for kids. Piping the ghosts is easy enough for little hands with a little guidance.
- Perfect for Halloween: These are light, airy, and not overly sweet. They’re a great alternative to heavy chocolate candies. They look adorable on a Halloween dessert table.
- Surprisingly Simple: I know meringue sounds fancy, but this recipe is foolproof. I’ve tested it with a hand mixer and a stand mixer, and it works perfectly every time. No special skills required.
- Crowd-Pleaser: Kids love the ghost shape, and adults love that they’re not loaded with fat. They literally melt in your mouth. I’ve seen a plate of these disappear in minutes at a school party.
What makes this recipe different? It’s not just another sugar cookie. The texture is unique—crispy on the outside and marshmallowy on the inside. And the flavor is pure, simple vanilla. It’s a blank canvas that you can dress up with food coloring or chocolate chips if you want, but it’s perfect just as it is. This is the recipe that makes you forget about the store-bought stuff. It’s the kind of treat that makes you close your eyes after the first bite, just for a second.
What Ingredients You Will Need
This recipe uses the most basic ingredients to create something truly special. You don’t need a long list of exotic items. Here is everything you need to make these adorable ghost cookies.
- 3 large egg whites, at room temperature (this is key for maximum volume; separate your eggs when they are cold, then let the whites sit out for 30 minutes)
- 3/4 cup (150g) granulated sugar (not powdered sugar; the fine crystals dissolve best)
- 1/2 teaspoon vanilla extract (pure vanilla gives the best flavor, but imitation works fine too)
- 1/4 teaspoon cream of tartar (this stabilizes the meringue and helps it hold its shape; you can substitute with 1/2 teaspoon of lemon juice or white vinegar)
- A pinch of salt (just a tiny pinch to balance the sweetness)
- Mini chocolate chips or black gel food coloring, for the ghost faces (optional, but they make the ghosts come to life)
That’s it. Seriously. You probably have most of these things in your kitchen right now. I always use large eggs because they are the standard for most baking recipes. If you use extra-large eggs, the meringue might be a little looser, but it will still work. I recommend using a brand of sugar like Domino or C&H for consistent results. For the vanilla, I’m partial to Nielsen-Massey, but any pure vanilla extract will do the trick.
One important note: make sure your mixing bowl and whisk attachment are completely clean and free of any grease. Even a tiny bit of oil or yolk can prevent your egg whites from whipping up properly. I like to wipe my bowl down with a little lemon juice or white vinegar on a paper towel before I start, just to be safe. It’s a small step that makes a big difference.
Equipment Needed
You don’t need a professional pastry kitchen to make these. Here is the basic equipment you’ll need.
- Electric mixer (a stand mixer is ideal, but a hand mixer works perfectly well; you’ll just need to hold it for a bit longer)
- Large, clean mixing bowl (glass or metal is best; plastic can sometimes hold onto grease)
- Rubber spatula
- Baking sheet
- Parchment paper or a silicone baking mat (parchment is cheap and works great)
- Piping bag or a large zip-top bag (a zip-top bag is a great budget-friendly option; just snip off a corner)
- Round piping tip (optional, but a Wilton 1A or 2A tip gives a nice, clean ghost shape; you can also just snip the bag)
If you don’t have a piping bag, don’t worry. I’ve made these many times with just a sturdy zip-top bag. Just make sure to not snip too big of a hole. Start small and test it out. You can always make the hole bigger. For a hand mixer, just be patient. It will take about 8-10 minutes to get stiff peaks, but it’s a good arm workout! I actually prefer my hand mixer for small batches because I feel like I have more control.
Preparation Method
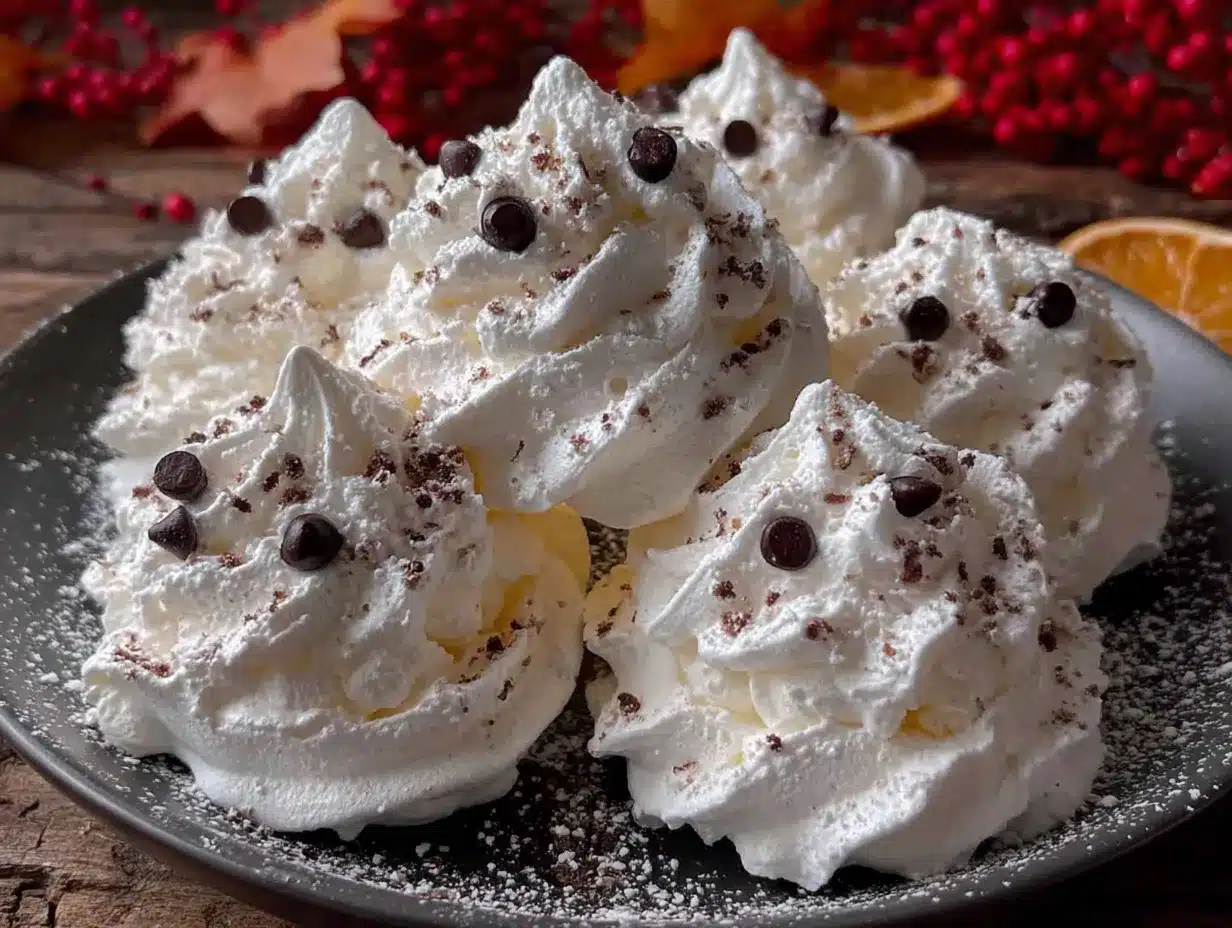
Ready to make some ghosts? Follow these steps, and you’ll have a spooky, delicious treat in no time. Preheat your oven to 200°F (95°C). This is a very low temperature—we are drying the meringues, not baking them.
- Prepare your baking sheet. Line a large baking sheet with parchment paper or a silicone mat. Set it aside.
- Start the meringue. In your perfectly clean, large mixing bowl, combine the room-temperature egg whites, cream of tartar, and the pinch of salt. Beat on medium speed until the mixture becomes frothy and bubbly, about 1 minute. It should look like a light foam.
- Add the sugar slowly. With the mixer running on medium-low speed, start adding the granulated sugar, one tablespoon at a time. This is important—don’t just dump it all in at once. Adding it slowly helps it dissolve properly. Take your time; this step should take about 2-3 minutes.
- Whip to stiff peaks. Once all the sugar is in, increase the speed to medium-high. Beat until the meringue is thick, glossy, and holds stiff peaks. This means when you lift the beater, the meringue stands up straight without flopping over. It should feel smooth, not gritty, when you rub a little bit between your fingers. This will take about 5-7 minutes with a stand mixer, or 8-10 minutes with a hand mixer. It’s ready when it looks like a fluffy, shiny cloud.
- Add vanilla. Pour in the vanilla extract and beat for another 30 seconds, just until it’s combined. Don’t overmix at this point.
- Transfer to a piping bag. Scoop the meringue into your piping bag fitted with a round tip (or into a zip-top bag with a corner snipped off). If you’re using a zip-top bag, be careful not to squeeze the meringue out while you’re filling it.
- Pipe the ghosts. Hold the bag straight up and down, about 1/2 inch above the baking sheet. Squeeze out a small, round base. Then, without releasing pressure, slowly lift the bag straight up to create a tall, teardrop shape. Stop squeezing and pull the bag away quickly. You should have a little ghost shape! Don’t worry if they aren’t perfect. I promise, lopsided ghosts are the cutest ones.
- Add faces (optional). If you are using mini chocolate chips, gently press two into each ghost for eyes and one for a mouth. If using black gel food coloring, wait until the meringues are piped and then use a toothpick to draw on the faces. I find the chocolate chips easier for little helpers.
- Bake low and slow. Place the baking sheet in the preheated oven. Bake for 60 minutes. Do not open the oven door! After 60 minutes, turn the oven off but leave the meringues inside for another 30-60 minutes to dry out completely. They are done when they are firm and easily peel off the parchment paper.
- Cool completely. Let them cool completely on the baking sheet before you try to move them. They are very fragile when warm.
One time, I forgot to add the cream of tartar. The meringue still whipped up, but it was a little less stable and the ghosts spread out a bit more. They were still delicious, just a little wider than I wanted. So don’t skip the cream of tartar if you can help it!
Cooking Tips & Techniques
I’ve made my share of meringue mistakes so you don’t have to. Here are the things I’ve learned the hard way.
The biggest mistake is not getting your bowl clean. I wiped my bowl with a paper towel once that had a little bit of dish soap residue on it. The egg whites never got stiff. They just stayed a sad, runny puddle. Now, I always wipe my bowl and whisk with a little lemon juice or white vinegar. It’s a game-changer.
Another common issue is under-whipping. You really need those stiff peaks. If you stop too early, the meringue will be too soft to pipe, and the ghosts will spread into puddles. The test is the “rub test.” Take a tiny bit of meringue between your thumb and forefinger and rub it together. If it feels smooth, the sugar has dissolved. If it feels gritty, keep beating.
Don’t open the oven door while they are baking! The sudden change in temperature can cause the meringues to crack or collapse. I know it’s tempting to peek, but resist. The low heat is what dries them out. If you open the door, you let in cool air and moisture.
Humidity is the enemy of meringue. Try to make these on a dry day. If it’s raining or very humid outside, the meringue can absorb moisture from the air and become sticky. If you can’t wait, just know they might not be as crisp. You can try baking them a little longer to help dry them out.
For consistent shapes, practice your piping. Hold the bag straight up and squeeze from the top. Use your other hand to guide the tip if you need to. The more you do it, the better you’ll get. And remember, imperfect ghosts are charming!
Variations & Adaptations
Once you’ve mastered the basic ghost, the possibilities are endless. Here are some fun ways to change it up.
- Halloween Colors: Divide the meringue into two or three bowls and add a drop of gel food coloring to each. You can make green monsters, orange pumpkins, or purple witches. Just fold the color in gently with a spatula until it’s swirled through. Don’t overmix or you’ll deflate the meringue.
- Chocolate Dipped Ghosts: Once the meringues are completely cool, melt some dark or white chocolate chips. Dip the bottom of each ghost into the chocolate and let it set on a piece of parchment paper. This adds a nice, rich flavor and a fun crunch. It also makes them look a little more dressed up for a party.
- Peppermint or Almond Flavor: Swap the vanilla extract for 1/4 teaspoon of peppermint extract or 1/2 teaspoon of almond extract. Peppermint ghosts are great for a winter-themed party, and almond gives a lovely, nutty flavor. Just be careful with peppermint—a little goes a long way.
- Gluten-Free & Dairy-Free: These cookies are naturally gluten-free and dairy-free! Just make sure your vanilla extract is gluten-free (most are). They are a perfect treat for kids with dietary restrictions.
- Spider Webs: Pipe small rounds of meringue for spider bodies, then use a toothpick to drag a little bit of chocolate syrup through the meringue to create a web pattern before baking. It’s a fun twist on the ghost shape.
I once tried making a batch with brown sugar instead of white. The flavor was interesting—a little caramel-like—but the color was more tan than white, so they didn’t look as much like ghosts. They tasted good, but the look was off. So stick with white sugar for the classic ghost look.
Serving & Storage Suggestions
These ghost meringue cookies are best served at room temperature. They are light, airy, and literally melt in your mouth. They are perfect for a Halloween party, a school bake sale, or a fun afternoon snack.
How to serve them: Pile them on a festive platter or arrange them in a clear glass jar. They look adorable peeking out of a treat bag tied with a ribbon. You can also stick them into a bowl of vanilla ice cream for a spooky sundae. They are great on their own or as a decoration on top of a Halloween cake.
Storage: This is the most important part. Meringues are very sensitive to moisture. Store them in an airtight container at room temperature. Do not put them in the refrigerator—the humidity will make them sticky and soft. They will stay crisp for up to 2 weeks if stored properly. I like to add a food-safe silica gel packet to the container to help absorb any extra moisture.
Can you freeze them? Yes! Meringues freeze beautifully. Place them in a single layer in a freezer-safe container, with parchment paper between the layers. They will keep for up to 3 months. To thaw, just let them sit at room temperature for about 15 minutes. They will be just as crisp as the day you made them.
One thing I’ve noticed is that the flavor actually gets a little better after a day or two. The vanilla seems to mellow and deepen. So don’t be afraid to make them a day or two before your party. They are a great make-ahead treat.
Nutritional Information & Benefits
While these are a treat, they are a lighter option compared to many Halloween candies. Here is the estimated nutritional information for one ghost meringue cookie (based on a batch of 24).
| Nutrient | Amount |
|---|---|
| Calories | ~25 |
| Fat | 0g |
| Saturated Fat | 0g |
| Cholesterol | 0mg |
| Sodium | ~10mg |
| Carbohydrates | ~6g |
| Sugar | ~6g |
| Protein | ~0.5g |
Health Benefits: The main ingredient is egg whites, which are a great source of high-quality protein and contain no fat or cholesterol. They are also a good source of riboflavin and selenium. Of course, this is still a sugary treat, but it’s a fat-free one. For a Halloween treat, that’s a win in my book.
Dietary Considerations: These cookies are naturally gluten-free, dairy-free, and nut-free, making them a safe option for many kids with food allergies. Just be sure to check your vanilla extract if you have a gluten sensitivity. They are also low in calories per cookie, which makes them a nice option for portion control. You can eat a few without feeling overly guilty.
Honestly, I feel better giving these to my kids than a bag of candy. They are made with real ingredients, and I know exactly what’s in them. Plus, the process of making them together is a fun memory in itself.
Conclusion
These Kid-Approved Halloween Ghost Meringue Cookies are more than just a treat. They are a fun activity, a budget-friendly alternative to store-bought candy, and a way to create a little Halloween magic without a lot of stress. They are proof that the best things in life are often the simplest.
I hope you give them a try. Don’t worry if your ghosts look a little different from the ones in the photos. That’s part of the charm. Each one will have its own little personality. Let the kids get involved in piping and decorating. The mess is part of the fun, I promise.
Have you made these? I would love to hear how they turned out. Leave a comment below and tell me about your ghost stories. Did you add any fun variations? Did your kids love them? Share a photo on social media and tag me—I can’t wait to see your spooky creations. Happy Halloween, and happy baking!
Frequently Asked Questions
Why did my meringue not get stiff?
This is almost always due to a trace amount of fat or grease in your bowl or on your whisk. Egg whites are very sensitive. Make sure your bowl and utensils are perfectly clean. Also, make sure no yolk got into the whites. Even a tiny speck can ruin the batch. If your bowl was clean and your whites were pure, you might not have beaten them long enough. Keep going until they are glossy and hold a stiff peak.
Can I use liquid egg whites from a carton?
Yes, you can, but they are harder to whip to stiff peaks. Carton egg whites are often pasteurized at a higher temperature, which can affect their ability to foam. If you use them, make sure they are at room temperature and add an extra 1/4 teaspoon of cream of tartar to help stabilize them. They might take a little longer to whip, but it is possible.
Why are my ghost meringues cracking?
Small cracks are normal and actually give the ghosts a “spooky” look, so don’t worry too much. Large cracks usually happen because the oven temperature is too high or the meringues were baked too quickly. Make sure your oven is at the correct low temperature (200°F/95°C). Also, don’t open the oven door while they are baking. The sudden rush of cool air can cause them to crack.
How do I know when the meringues are done?
They are done when they are firm to the touch and easily peel off the parchment paper. They should not be sticky. The inside should be dry and crisp all the way through. If you are unsure, you can turn the oven off and let them sit in the closed oven for an extra hour to continue drying. They are very forgiving as long as the heat is low.
Can I make these on a rainy day?
It’s not ideal. Meringue is very sensitive to humidity. The sugar can absorb moisture from the air, making the meringue sticky and preventing it from getting crisp. If you absolutely have to make them on a humid day, try baking them for an extra 15-20 minutes and then let them dry in the turned-off oven for a full hour. Store them in an airtight container as soon as they are cool.
Pin This Recipe!
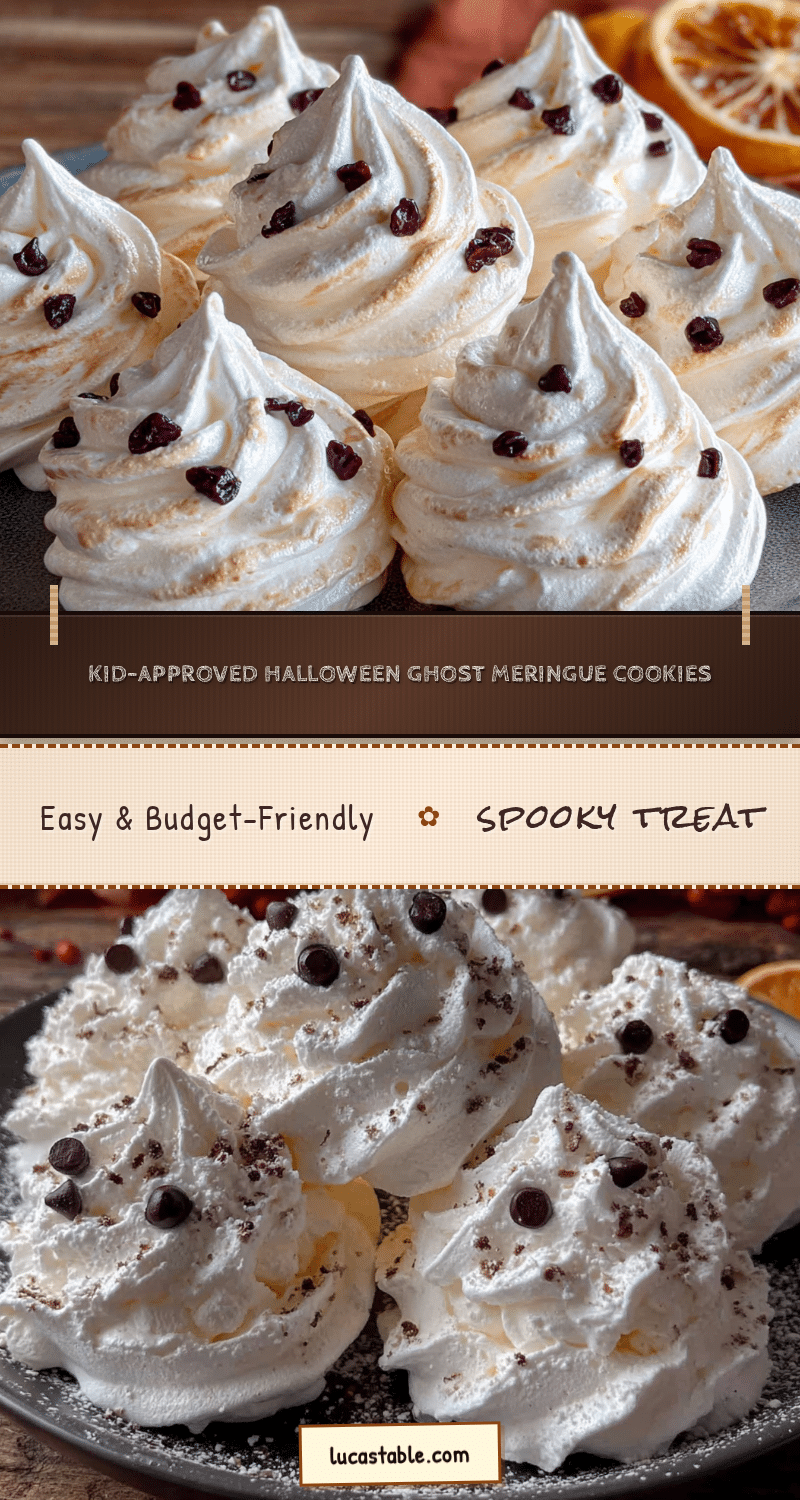
Easy Ghost Meringue Cookies: Best Kid-Approved Halloween Treat
These light and airy ghost meringue cookies are a budget-friendly, kid-approved Halloween treat. Made with just a few simple ingredients, they’re fun to make and even more fun to eat.
- Prep Time: 15 minutes
- Cook Time: 60 minutes
- Total Time: 2 hours 15 minutes
- Yield: 24 servings 1x
- Category: Dessert
- Cuisine: American
Ingredients
- 3 large egg whites, at room temperature
- 3/4 cup (150g) granulated sugar
- 1/2 teaspoon vanilla extract
- 1/4 teaspoon cream of tartar
- A pinch of salt
- Mini chocolate chips or black gel food coloring, for the ghost faces (optional)
Instructions
- Preheat your oven to 200°F (95°C). Line a large baking sheet with parchment paper or a silicone mat.
- In a perfectly clean, large mixing bowl, combine the room-temperature egg whites, cream of tartar, and the pinch of salt. Beat on medium speed until the mixture becomes frothy and bubbly, about 1 minute.
- With the mixer running on medium-low speed, add the granulated sugar, one tablespoon at a time, taking about 2-3 minutes.
- Once all the sugar is in, increase the speed to medium-high. Beat until the meringue is thick, glossy, and holds stiff peaks, about 5-7 minutes with a stand mixer or 8-10 minutes with a hand mixer.
- Pour in the vanilla extract and beat for another 30 seconds, just until combined.
- Scoop the meringue into a piping bag fitted with a round tip (or into a zip-top bag with a corner snipped off).
- Hold the bag straight up and down, about 1/2 inch above the baking sheet. Squeeze out a small, round base, then slowly lift the bag straight up to create a tall, teardrop shape. Stop squeezing and pull the bag away quickly.
- If using mini chocolate chips, gently press two into each ghost for eyes and one for a mouth. If using black gel food coloring, wait until the meringues are piped and then use a toothpick to draw on the faces.
- Place the baking sheet in the preheated oven. Bake for 60 minutes. Do not open the oven door. After 60 minutes, turn the oven off but leave the meringues inside for another 30-60 minutes to dry out completely.
- Let them cool completely on the baking sheet before moving them.
Notes
Make sure your mixing bowl and whisk attachment are completely clean and free of any grease. Even a tiny bit of oil or yolk can prevent your egg whites from whipping up properly. Wipe your bowl down with a little lemon juice or white vinegar on a paper towel before you start. Do not open the oven door while the meringues are baking. The sudden change in temperature can cause them to crack or collapse. Try to make these on a dry day, as humidity is the enemy of meringue. Store in an airtight container at room temperature for up to 2 weeks. They can also be frozen for up to 3 months.
Nutrition
- Serving Size: 1 ghost meringue coo
- Calories: 25
- Sugar: 6
- Sodium: 10
- Carbohydrates: 6
- Protein: 0.5
Keywords: ghost meringue cookies, Halloween cookies, meringue cookies, kid-friendly Halloween treats, easy Halloween dessert, gluten-free Halloween cookies, dairy-free Halloween treats


