October had settled in, and the kitchen window was fogged up from the steam of a pot of tea I didn’t even remember making. The rain was doing that thing where it taps against the glass in a rhythm that feels almost intentional, and I was staring into the pantry like it might offer up some kind of autumnal revelation. I had a carton of egg whites left over from a batch of carbonara I’d made the night before, and a half-empty bag of chocolate chips. It wasn’t a plan, exactly. It was more like a quiet challenge. Could I make something that felt like a celebration, but also like a secret? Something that looked like it took hours, but really just needed a little patience and a steady hand?
That’s how these ghost meringue cookies came to be. They’re not complicated. They don’t require any special equipment or a pastry degree. But there is something about them, you know? Something about the way the meringue bakes up crisp and airy, with just a hint of chew in the middle, and then you press those tiny chocolate chip eyes into the soft surface before they set. It feels like you’re bringing them to life. Honestly, I stood there for a full minute after I finished the first batch, just looking at them. They’re cute, but not in a forced, over-the-top way. They’re simple. And that’s exactly what I needed that rainy evening—a small, quiet thing that felt like a tiny victory.
These ghost meringue cookies have become my go-to for Halloween parties, for school bake sales, or even just for a Tuesday when I want to surprise my kids. They are impossibly light, naturally gluten-free, and they disappear faster than you’d think possible. If you have never made meringue from scratch, let me tell you—it is one of those kitchen skills that feels almost magical. You take something as simple as egg whites and sugar, and with a little whisking, you get this glossy, cloud-like batter that bakes into something completely different. And when you add those little chocolate eyes? Well, it is hard not to smile. So let me show you how to make these adorable little ghosts, and maybe you’ll find yourself looking at your pantry a little differently, too.
Why You’ll Love This Recipe
I have tested this recipe at least half a dozen times to get the texture just right. The first batch I made was too flat. The second batch had tiny cracks all over. The third batch? Perfect. Here is why I think this version works so well, and why I keep coming back to it year after year.
- Quick & Easy: The active prep time is only about 15 minutes. The oven does most of the work, and you just need to be patient while they bake low and slow.
- Simple Ingredients: You probably already have everything you need. Egg whites, sugar, cream of tartar, vanilla, and chocolate chips. No fancy grocery trips required.
- Perfect for Halloween: These are the star of any spooky spread. Kids love them, adults love them, and they look incredibly impressive with minimal effort.
- Crowd-Pleaser: They are naturally gluten-free and low in fat, so they work for almost any dietary restriction. Plus, who can resist a cookie that looks like a tiny ghost?
- Unbelievably Delicious: The texture is what gets me every time. The outside is crisp and delicate, and the inside is soft and marshmallow-like. It is pure comfort in a bite-sized package.
What makes these different from other meringue recipes? It’s the technique. I use a slightly lower oven temperature and a longer baking time to ensure the ghosts stay pearly white and don’t brown. I also add a tiny bit of cornstarch to the sugar mixture, which helps stabilize the meringue and gives it that perfect, pillowy interior. This isn’t just another cookie recipe. It’s the one I’ve perfected over years of trial and error, and I am so excited to share it with you.
There is something about biting into one of these that just feels right. It’s not just the sweetness. It’s the lightness. It’s the way the chocolate chips add a little pop of richness. It is comfort food reimagined—lighter, faster, and with the same soul-soothing satisfaction. Perfect for impressing guests without stress, or turning a simple evening into something memorable.
What Ingredients You Will Need
This recipe uses simple, everyday ingredients to create something that feels a little bit magical. You don’t need anything exotic or hard to find. Just a few pantry staples and a little bit of patience.
- Egg whites: 3 large egg whites, at room temperature. Room temperature egg whites whip up much better than cold ones. I usually separate my eggs about 30 minutes before I start. (For best volume, use fresh eggs.)
- Granulated sugar: ¾ cup (150 grams). Use fine granulated sugar. It dissolves more easily into the egg whites. I do not recommend using powdered sugar here, as it can make the meringue too dense.
- Cream of tartar: ¼ teaspoon. This stabilizes the egg whites and helps them hold their shape. If you don’t have cream of tartar, you can substitute with ½ teaspoon of lemon juice or white vinegar.
- Cornstarch: 1 teaspoon. This is my secret ingredient. It helps absorb excess moisture and gives the meringue a soft, marshmallow-like center.
- Vanilla extract: 1 teaspoon. Use pure vanilla extract for the best flavor. It adds warmth and depth to the otherwise simple sweetness.
- Mini chocolate chips: ¼ cup (45 grams). These are for the eyes. I prefer mini chips because they look more proportional on the small ghosts. (For a spookier look, you can use black gel food coloring to pipe tiny mouths, but I find the chocolate chips are cuter.)
- Salt: A tiny pinch. Just a pinch helps balance the sweetness and enhances the vanilla flavor.
Ingredient Selection Tips: I recommend using organic cane sugar if you can find it. It has a slightly finer texture and dissolves more easily. For the egg whites, fresh eggs from a local farm make a noticeable difference in volume and stability. But honestly, store-bought eggs work perfectly fine. Just make sure they are at room temperature.
Substitution Guidance: If you are vegan, you can try using aquafaba (the liquid from a can of chickpeas) instead of egg whites. Use 3 tablespoons of aquafaba per egg white. The texture will be slightly different, but it works surprisingly well. For a dairy-free option, use dairy-free chocolate chips. There are plenty of great options available now.
Equipment Needed
You do not need a lot of fancy equipment to make these ghost meringue cookies. But a few key tools will make the process much smoother and more enjoyable.
- Electric mixer: A stand mixer with a whisk attachment is ideal, but a hand-held electric mixer works just as well. You could whisk by hand, but your arm will get very tired. Trust me on this one.
- Large mixing bowl: Make sure it is completely clean and dry. Any trace of grease can prevent the egg whites from whipping up properly. I usually wipe my bowl with a little lemon juice and a paper towel before I start.
- Piping bag: A large piping bag fitted with a round tip (I use a ½-inch tip). If you don’t have a piping bag, you can use a sturdy zip-top bag with the corner snipped off. It won’t be as precise, but it will work.
- Baking sheets: Two large baking sheets lined with parchment paper. Do not use wax paper or foil. The parchment paper prevents sticking and makes cleanup a breeze.
- Rubber spatula: For folding in the cornstarch and vanilla, and for transferring the meringue to the piping bag.
- Small offset spatula: Optional, but helpful for smoothing the meringue if you are piping freeform ghosts.
Personal Experience: I have made these with both a cheap hand mixer and a high-end stand mixer. Honestly, the results were almost identical. The key is not the mixer itself, but making sure your bowl is completely clean and your egg whites are at room temperature. I have also used a glass bowl and a metal bowl, and both worked fine. So don’t stress about having the perfect equipment. Just use what you have.
Budget-Friendly Options: If you don’t have a piping bag, you can simply drop spoonfuls of meringue onto the baking sheet and shape them into ghost-like blobs with the back of the spoon. They won’t be as uniform, but they will still taste amazing. And honestly, imperfect ghosts have their own charm.
Preparation Method
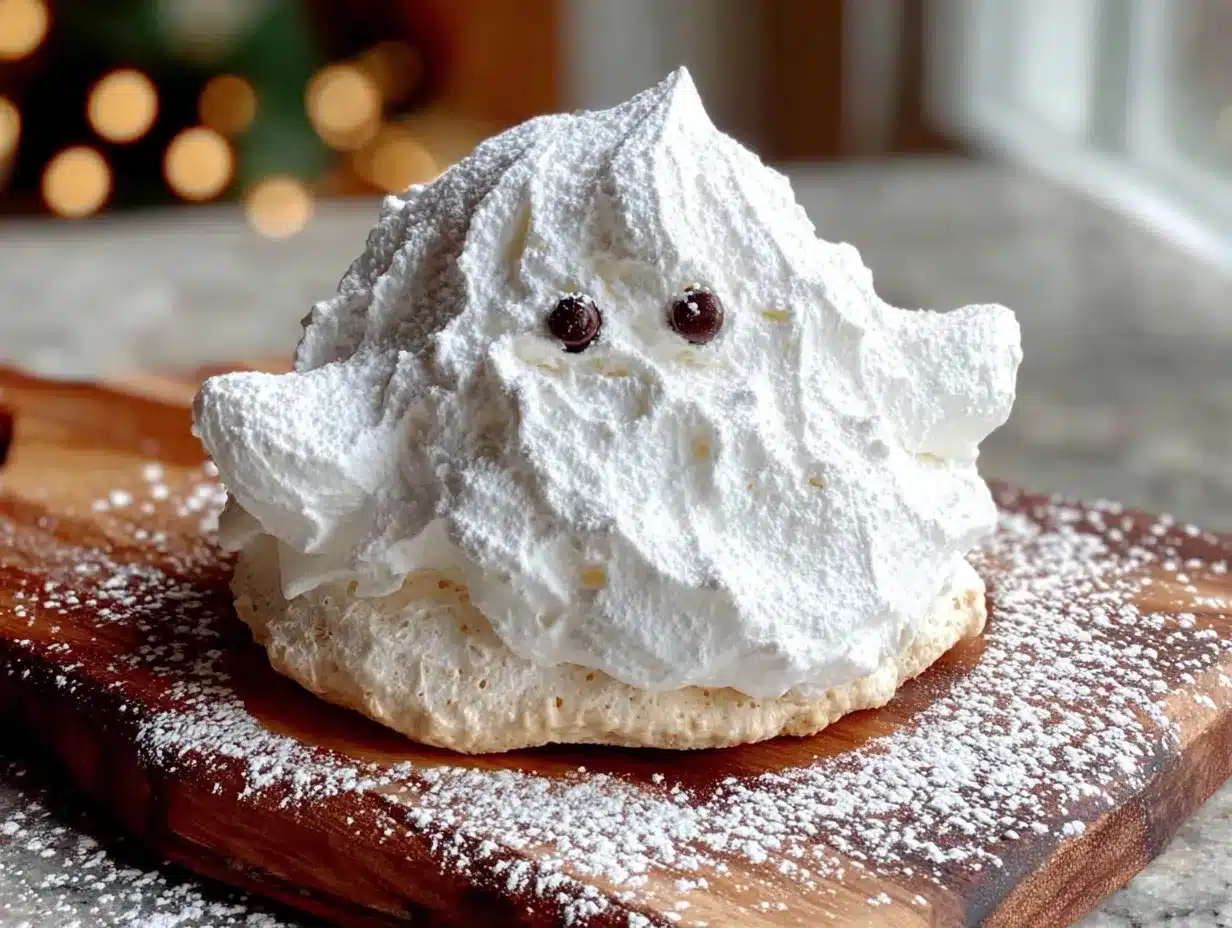
Let me walk you through this step by step. I promise it is easier than it looks. Just take your time, and don’t rush the whipping process.
- Preheat your oven to 200°F (93°C). Yes, that is very low. We are going to bake these ghosts low and slow so they dry out without browning. Line two large baking sheets with parchment paper and set them aside.
- Prepare your egg whites. Separate your eggs while they are cold, then let the whites come to room temperature. This takes about 30 minutes. (Cold egg whites don’t whip as well, and they can deflate more easily.)
- Combine the sugar and cornstarch. In a small bowl, whisk together the ¾ cup of granulated sugar and the 1 teaspoon of cornstarch. This helps the cornstarch distribute evenly into the meringue later.
- Start whipping the egg whites. Place the room temperature egg whites in your clean, dry mixing bowl. Add the ¼ teaspoon of cream of tartar and the tiny pinch of salt. Begin whipping on medium speed. After about 30 seconds, the mixture will become frothy and start to look like foam.
- Gradually add the sugar. Increase the mixer speed to medium-high. Start adding the sugar-cornstarch mixture one tablespoon at a time, waiting about 15 seconds between each addition. This slow incorporation is crucial. If you dump all the sugar in at once, the meringue can deflate and become grainy.
- Whip to stiff peaks. Continue whipping on high speed for about 5 to 7 minutes. You are looking for stiff, glossy peaks. This means when you lift the whisk attachment, the meringue stands up straight and holds its shape without drooping. The mixture should also feel smooth between your fingers, not grainy. If it feels gritty, keep whipping for another minute or two.
- Add the vanilla. Once you have stiff peaks, add the 1 teaspoon of vanilla extract. Whip on low speed for just a few seconds to incorporate it. Do not overmix at this stage, or you risk deflating the meringue.
- Prepare your piping bag. Fit your piping bag with a round tip. If you are using a zip-top bag, snip about ½ inch off one corner. Use a rubber spatula to gently transfer the meringue into the bag. Do not overfill it—about halfway is perfect.
- Pipe the ghosts. Hold the piping bag straight up and down, about ½ inch above the parchment paper. Pipe a small mound of meringue, about 1½ inches wide. As you finish piping, lift the bag straight up to create a little peak on top. This peak will soften slightly during baking, which is exactly what we want. Leave about 1 inch of space between each ghost.
- Add the chocolate chip eyes. This is the fun part. While the meringue is still wet and sticky, gently press two mini chocolate chips into each ghost to form eyes. Press them in just enough so they stay put, but not so deep that they sink into the meringue. (If you want, you can also add a tiny third chip for a nose, or use black gel food coloring to pipe a mouth. I prefer just the eyes for a classic, friendly ghost look.)
- Bake the ghosts. Place the baking sheets in the preheated oven. Bake for 60 to 75 minutes. The ghosts are done when they are firm to the touch and easily peel off the parchment paper. They should be dry on the outside but still slightly soft in the center. (If you live in a humid climate, you may need to bake them for closer to 90 minutes.)
- Cool completely. Turn off the oven and leave the ghosts inside with the door slightly ajar for another 30 minutes. This helps them dry out completely and prevents them from cracking. After 30 minutes, transfer them to a wire rack to cool completely.
Troubleshooting Tip: If your meringue is weeping (little beads of moisture forming on the surface), it means either the sugar wasn’t fully dissolved, or the oven temperature was too high. Next time, make sure you whip the meringue until it feels completely smooth between your fingers, and double-check your oven temperature with an oven thermometer.
Cooking Tips & Techniques
I have made these ghost meringue cookies more times than I can count, and I have learned a few things along the way. Here are my best tips to help you nail them on your first try.
Room temperature is non-negotiable. I know it is tempting to use cold egg whites straight from the fridge, but don’t do it. Cold egg whites don’t whip as high, and they are more likely to deflate. Leave them on the counter for at least 30 minutes. If you are in a hurry, you can place the bowl of egg whites in a bowl of warm water for about 10 minutes, stirring occasionally.
Don’t overmix the vanilla. Once you add the vanilla, just fold it in gently with a spatula or whip on the lowest speed for a few seconds. Overmixing at this stage can deflate all that beautiful volume you just created.
Use an oven thermometer. Ovens are notoriously inaccurate, especially at low temperatures. An oven thermometer costs about $10 and will save you from a batch of browned, cracked ghosts. You want the oven to stay at a steady 200°F (93°C).
Bake on a dry day. Meringue is very sensitive to humidity. If you live in a humid climate, or if it is raining outside, your meringue may take longer to bake and may not get as crisp. You can compensate by baking them for an extra 15 to 20 minutes. (I once tried to make these on a humid summer afternoon, and they never fully dried out. It was a sad day.)
Let them cool in the oven. This is probably the most important tip. After the baking time is up, turn off the oven and leave the ghosts inside with the door slightly ajar for at least 30 minutes. This gradual cooling prevents sudden temperature changes that can cause cracking. It also helps them dry out completely.
Multitasking strategy: While the meringue is baking, you can clean up your kitchen, prepare the chocolate chips, or even start working on another recipe. I often make a batch of these while I am also making a quick dinner, like this easy honey garlic chicken. The low oven temperature means you can pop them in and forget about them for an hour.
Variations & Adaptations
One of the best things about this recipe is how easy it is to adapt. Here are some of my favorite variations.
- Pumpkin Spice Ghosts: Add ½ teaspoon of pumpkin pie spice and ¼ teaspoon of cinnamon to the sugar-cornstarch mixture. This gives the ghosts a warm, autumnal flavor that is perfect for Halloween parties.
- Chocolate Ghosts: Sift 1 tablespoon of unsweetened cocoa powder into the sugar-cornstarch mixture. The ghosts will be a pale brown color, but they will have a subtle chocolate flavor that pairs beautifully with the vanilla.
- Peppermint Ghosts: Replace the vanilla extract with ½ teaspoon of peppermint extract. Crush a few candy canes and sprinkle the crumbs over the ghosts before baking. This is a fun twist for a Christmas-themed party.
- Vegan Ghosts: Use 9 tablespoons of aquafaba (the liquid from a can of chickpeas) instead of the egg whites. Whip the aquafaba with the cream of tartar until frothy, then gradually add the sugar. The texture will be a bit softer, but they will still be delicious. Use dairy-free chocolate chips.
- Colorful Ghosts: Add a few drops of gel food coloring to the meringue after you have stiff peaks. Fold it in gently with a spatula. You can make orange ghosts for Halloween, pink ghosts for Valentine’s Day, or green ghosts for a fun St. Patrick’s Day treat.
Personal Variation: My favorite variation is the Pumpkin Spice Ghosts. I sprinkle a little extra cinnamon on top before baking, and they fill the kitchen with the most amazing aroma. I usually make a double batch around Halloween and keep them in an airtight container for a week. They never last that long, though.
Serving & Storage Suggestions
These ghost meringue cookies are best served at room temperature. They are light, airy, and practically melt in your mouth. I love serving them alongside a cup of hot cocoa or a warm mug of spiced apple cider. They also make a fantastic addition to any Halloween dessert platter, alongside brownies or cookies.
Presentation Tip: Arrange the ghosts on a platter lined with black or orange tissue paper. You can also dust them with a little powdered sugar to look like snow or spiderwebs. For a fun party idea, attach them to lollipop sticks and use them as cake toppers or cupcake decorations.
Complementary Dishes: These ghosts pair beautifully with a rich, chocolatey dessert like a crispy chicken parmesan for a fun dinner party. Or, serve them after a light meal like shrimp scampi for a sweet, airy finish.
Storage Instructions: Store the baked ghosts in an airtight container at room temperature for up to 7 days. Do not refrigerate them. The refrigerator is too humid and will make them soft and sticky. If you live in a humid climate, you can store them with a silica gel packet to help absorb excess moisture.
Freezing Instructions: You can freeze the baked ghosts for up to 2 months. Place them in a single layer in a freezer-safe container, with parchment paper between each layer. To thaw, let them sit at room temperature for about 30 minutes. Do not microwave them. The texture will become rubbery.
Reheating Tips: These are best enjoyed at room temperature. If they have softened, you can crisp them up by placing them on a baking sheet in a 200°F (93°C) oven for about 10 minutes. Let them cool completely before serving.
Flavor Development: Interestingly, the flavor of these ghosts actually improves after a day or two. The vanilla and sugar meld together, and the texture becomes even more delicate. So don’t be afraid to make them a day ahead of time.
Nutritional Information & Benefits
These ghost meringue cookies are surprisingly light and low in calories compared to traditional cookies. Here is the estimated nutritional breakdown per cookie (based on 24 cookies).
- Calories: 35
- Fat: 0.5g
- Saturated Fat: 0.3g
- Carbohydrates: 7g
- Sugar: 6g
- Protein: 1g
- Sodium: 10mg
Health Benefits: Egg whites are a great source of lean protein and contain no fat or cholesterol. They are also rich in riboflavin and selenium. This recipe is naturally gluten-free, making it a safe option for anyone with celiac disease or gluten sensitivity. It is also low in fat and relatively low in calories, so you can enjoy a few without guilt.
Dietary Considerations: As written, this recipe is gluten-free, low-fat, and vegetarian. For a vegan version, use aquafaba and dairy-free chocolate chips. For a sugar-free version, you can try using a granulated monk fruit sweetener, but the texture may be slightly different.
Potential Allergens: This recipe contains eggs and dairy (from the chocolate chips). If you have a dairy allergy, use dairy-free chocolate chips. If you have an egg allergy, use the aquafaba substitution.
Personal Wellness Perspective: I love that these cookies allow me to indulge in something sweet without feeling weighed down. They are the perfect treat for when I want a little something after dinner, but I don’t want to overdo it. They are also a great option for kids’ parties, because they are fun to eat but not loaded with sugar and fat.
Conclusion
These ghost meringue cookies are more than just a Halloween treat. They are a reminder that simple ingredients, a little patience, and a touch of creativity can create something truly special. They are light, airy, and just sweet enough, with those adorable chocolate chip eyes that make everyone smile. Whether you are making them for a spooky party, a school bake sale, or just because you have leftover egg whites, I promise they will be a hit.
I love this recipe because it is forgiving. It doesn’t require perfect piping skills or expensive equipment. It just requires a little bit of time and a willingness to try. And honestly, even the imperfect ghosts are delicious. So go ahead and customize them. Add food coloring. Change the extract. Make them your own. That is the beauty of cooking.
I would love to hear how yours turn out. Did you add a mouth? Did you make them pumpkin spice? Did your kids help press in the chocolate chips? Drop a comment below and let me know. And if you share them on social media, tag me so I can see your beautiful creations. Happy baking, and happy Halloween!
Frequently Asked Questions
Can I make these ghost meringue cookies ahead of time?
Yes, absolutely. These cookies store beautifully for up to 7 days in an airtight container at room temperature. In fact, the flavor and texture often improve after a day. You can also freeze them for up to 2 months.
Why did my meringue turn brown?
Your oven temperature was likely too high. Meringue needs to bake low and slow to stay white. Use an oven thermometer to make sure your oven is at a steady 200°F (93°C). Also, avoid opening the oven door during baking, as the sudden temperature change can cause browning.
Can I use liquid egg whites from a carton?
I do not recommend it. Liquid egg whites from a carton are pasteurized and often contain stabilizers that prevent them from whipping up properly. Fresh egg whites will give you much better volume and a more stable meringue.
How do I know when the meringue is fully baked?
The ghosts are done when they are firm to the touch and easily peel off the parchment paper. They should be dry on the outside but still slightly soft in the center. If they are still sticky, bake them for another 10 to 15 minutes.
Can I use a different type of chocolate chip?
Absolutely. Mini chocolate chips are my favorite because they look proportional, but you can use regular chocolate chips, dark chocolate chips, or even white chocolate chips. For a spookier look, you can use black gel food coloring to pipe the eyes instead.
Pin This Recipe!
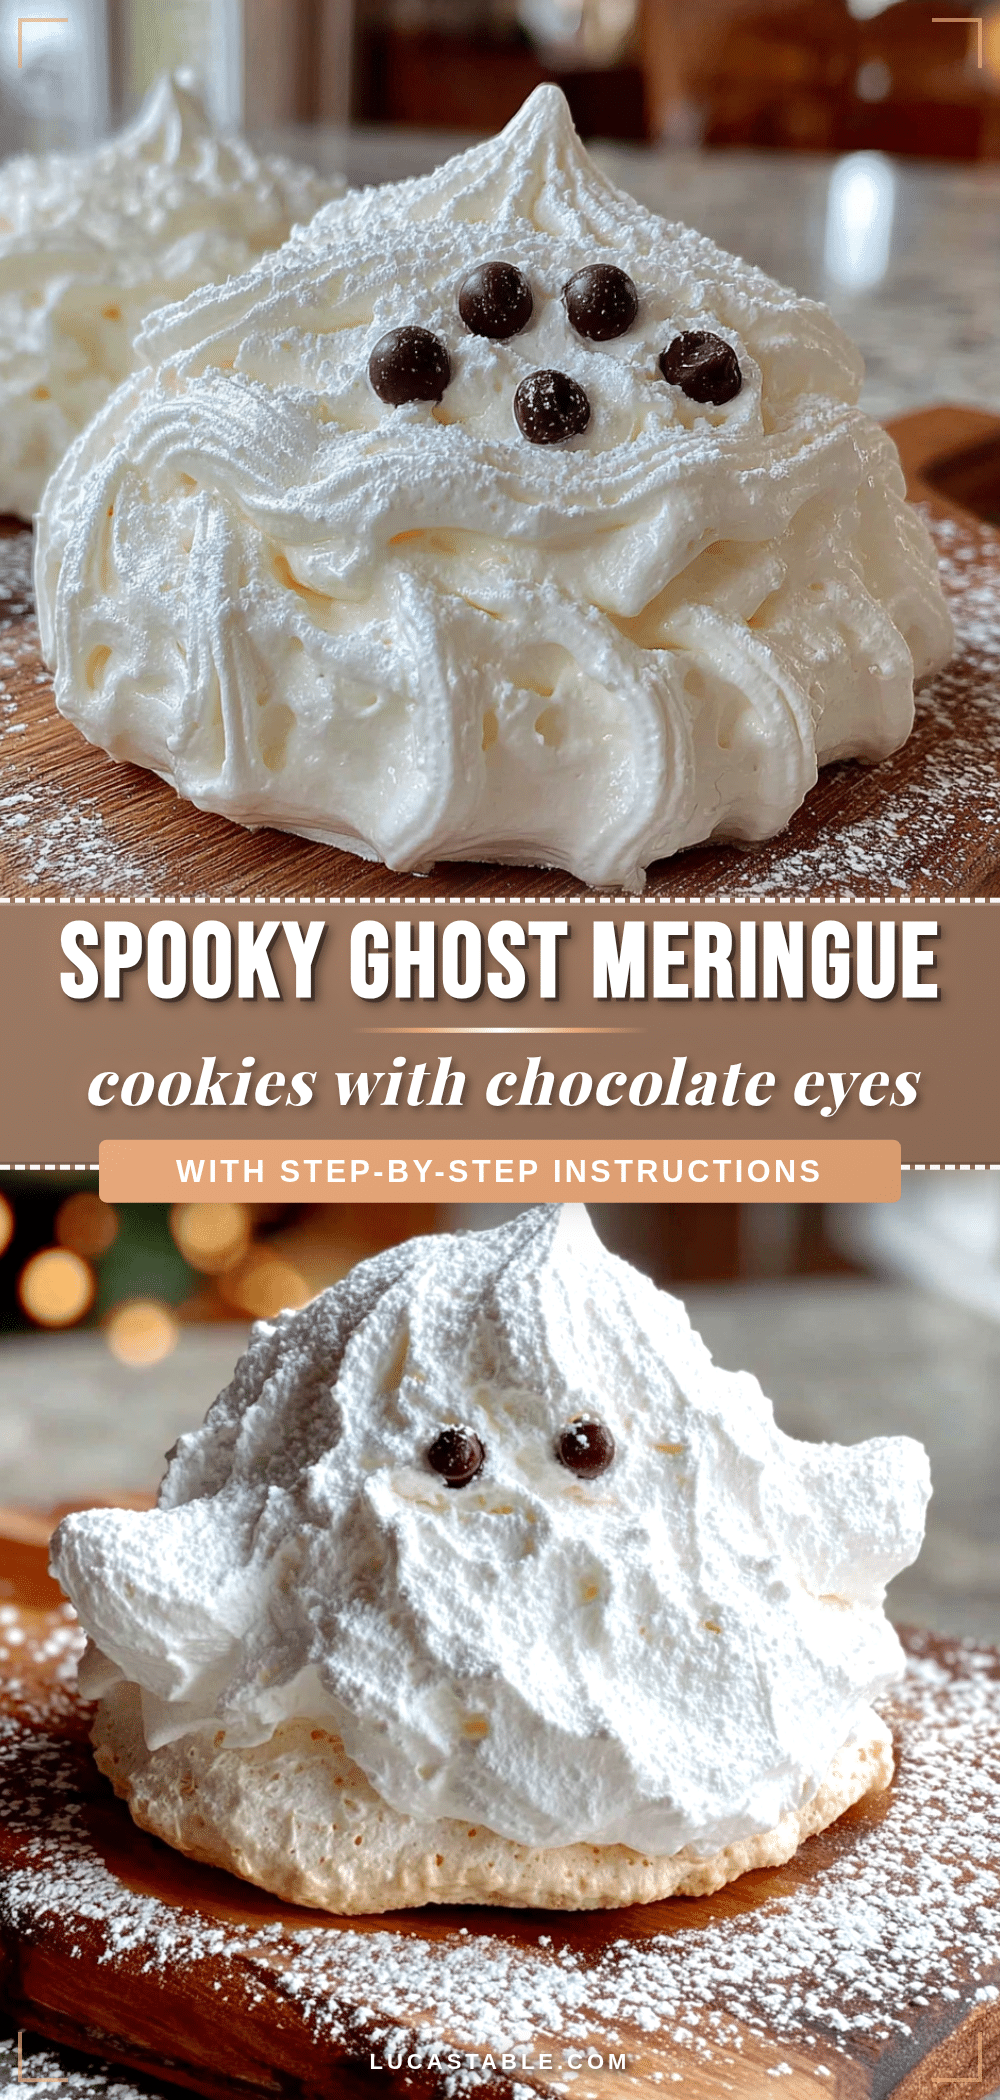
Easy Ghost Meringue Cookies with Chocolate Chip Eyes
These ghost meringue cookies are light, airy, and naturally gluten-free, with adorable chocolate chip eyes that make them perfect for Halloween parties or a fun treat any time.
- Prep Time: 15 minutes
- Cook Time: 60-75 minutes
- Total Time: 1 hour 45 minutes to 2 hours
- Yield: 24 cookies 1x
- Category: Dessert
- Cuisine: American
Ingredients
- 3 large egg whites, at room temperature
- 3/4 cup (150 grams) granulated sugar
- 1/4 teaspoon cream of tartar
- 1 teaspoon cornstarch
- 1 teaspoon vanilla extract
- 1/4 cup (45 grams) mini chocolate chips
- A tiny pinch of salt
Instructions
- Preheat your oven to 200°F (93°C). Line two large baking sheets with parchment paper.
- Separate your eggs while they are cold, then let the whites come to room temperature (about 30 minutes).
- In a small bowl, whisk together the sugar and cornstarch.
- Place the room temperature egg whites in a clean, dry mixing bowl. Add the cream of tartar and salt. Begin whipping on medium speed until frothy (about 30 seconds).
- Increase mixer speed to medium-high. Gradually add the sugar-cornstarch mixture one tablespoon at a time, waiting about 15 seconds between each addition.
- Continue whipping on high speed for 5 to 7 minutes until stiff, glossy peaks form. The mixture should feel smooth between your fingers, not grainy.
- Add the vanilla extract and whip on low speed for a few seconds to incorporate. Do not overmix.
- Fit a piping bag with a round tip (or snip 1/2 inch off the corner of a zip-top bag). Gently transfer the meringue into the bag.
- Pipe small mounds of meringue (about 1.5 inches wide) onto the prepared baking sheets, lifting the bag straight up to create a peak on top. Leave about 1 inch of space between each ghost.
- While the meringue is still wet, gently press two mini chocolate chips into each ghost to form eyes.
- Bake for 60 to 75 minutes, until the ghosts are firm to the touch and easily peel off the parchment paper.
- Turn off the oven and leave the ghosts inside with the door slightly ajar for 30 minutes to cool and dry completely. Then transfer to a wire rack to cool completely.
Notes
Room temperature egg whites are essential for proper volume. Use an oven thermometer to ensure a steady 200°F (93°C). Bake on a dry day if possible, as humidity can affect the meringue. Let the ghosts cool in the oven to prevent cracking.
Nutrition
- Serving Size: 1 cookie
- Calories: 35
- Sugar: 6
- Sodium: 10
- Fat: 0.5
- Saturated Fat: 0.3
- Carbohydrates: 7
- Protein: 1
Keywords: ghost meringue cookies, Halloween cookies, meringue cookies, gluten-free cookies, easy Halloween treat


