My nephew had refused to have anything to do with Halloween baking for years. He’s eight, and in his world, cupcakes were fine—but ghosts? That was “for little kids.” I’d see him roll his eyes every time I pulled out the piping bag. Then, last October, I was testing this ghost vanilla cupcake recipe just for myself. I was up to my elbows in buttercream, and I didn’t even hear him come into the kitchen. I turned around, and there he was, licking a ghost-shaped swirl off his finger. He didn’t say a word. He just grabbed a piping bag and started making his own little ghost army. I mean, honestly, that’s the moment I knew this recipe was something special.
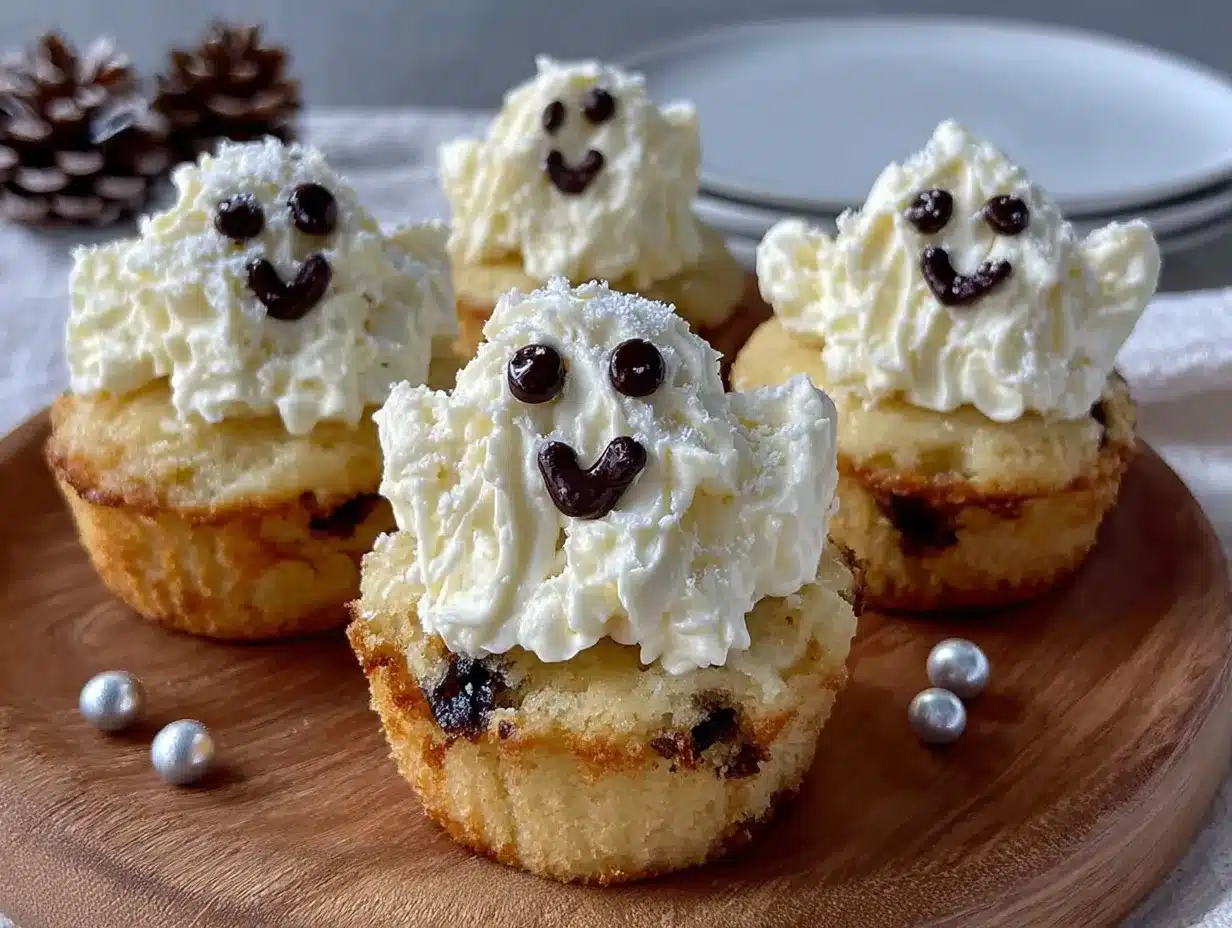
These aren’t just any Halloween cupcakes. They are soft, fluffy vanilla clouds topped with a simple buttercream that you can shape into adorable, wobbly ghosts in about two seconds flat. The best part? The kids do all the decorating. Maybe you’ve been there—trying to get little hands to help with a complicated cookie cutter or a fussy fondant shape. This is the opposite of that. You just pipe a blob, add two chocolate chip eyes, and suddenly you have a whole haunted house of friends. The recipe itself is a classic vanilla base, which is the perfect blank canvas for this kind of fun. It’s the kind of baking that makes you feel like you’re actually playing, not just cooking.
Why You’ll Love This Recipe
I’ve tested this recipe about seven times now. I wanted a cupcake that was sturdy enough to hold a big dollop of frosting but light enough that you don’t feel like you’re eating a brick. After a few trial runs—some were too dense, a couple were too crumbly—I landed on this version. It’s a keeper. Here is why these ghost vanilla cupcakes stand out from the crowd:
- Incredibly Easy for Little Hands: The decorating is a no-fail activity. If you can make a dollop of whipped cream, you can make a ghost. No fancy piping tips required.
- Simple Pantry Ingredients: You probably have everything you already need in your kitchen right now. Butter, sugar, flour, eggs, vanilla. No weird extracts or specialty flours.
- Perfect for Halloween Parties: Whether it’s a classroom treat, a family gathering, or a spooky movie night, these cupcakes fit right in. They are cute enough for a party but simple enough for a Tuesday.
- Crowd-Pleaser Guaranteed: Honestly, I have never seen a kid turn one down. The vanilla flavor is pure comfort, and the ghost faces make everyone smile.
- Unbelievably Delicious: The texture is what gets me. The crumb is tender, almost like a pound cake, and the frosting is just sweet enough without being sticky. It’s next-level comfort food.
What makes this recipe different from the rest is the balance. I use a little sour cream in the batter to keep the cupcakes moist for days (yes, days), and a splash of milk to make the batter pour easily. The frosting is a simple American buttercream, but the trick is to beat it long enough to get it super light and fluffy. That fluffiness is what makes the ghosts look so soft and cute. This isn’t just another vanilla cupcake—it’s your new go-to Halloween treat.
What Ingredients You Will Need
This recipe uses simple, wholesome ingredients to deliver bold vanilla flavor and a soft, tender crumb. Most of these are pantry staples, so you probably won’t need a special trip to the store. Here is everything you need to make these ghost vanilla cupcakes:
For the Cupcakes
- 1 ½ cups (190g) all-purpose flour – I use Gold Medal for consistent results. Spoon and level it for best texture.
- 1 ½ teaspoons baking powder – Make sure it’s fresh. This gives the cupcakes their lift.
- ¼ teaspoon salt – Balances the sweetness and enhances the vanilla flavor.
- ½ cup (113g) unsalted butter, softened – Let it sit out for about 30 minutes. Cold butter won’t cream properly.
- 1 cup (200g) granulated sugar – Regular white sugar works perfectly.
- 2 large eggs, room temperature – If you forget, place them in a bowl of warm water for 5 minutes.
- 2 teaspoons pure vanilla extract – I prefer Nielsen-Massey for a rich, authentic flavor. Avoid imitation vanilla here.
- ½ cup (120ml) whole milk, room temperature – Whole milk makes the crumb richer, but 2% works too.
- ¼ cup (60g) sour cream, room temperature – This is my secret ingredient. It makes the cupcakes incredibly moist.
For the Ghost Buttercream
- 1 cup (226g) unsalted butter, softened – Use a good quality butter like Land O’Lakes for the best taste.
- 3 ½ cups (420g) powdered sugar, sifted – Sifting prevents lumps. If you skip this, you might get bumpy ghosts.
- 2 teaspoons pure vanilla extract – Keeps the frosting white and creamy.
- 2-3 tablespoons heavy cream or whole milk – For thinning the frosting. Start with 2, add more if needed.
- Pinch of salt – Cuts the sweetness.
- Mini chocolate chips – For the ghost eyes. Use about 2-3 per ghost.
Ingredient Selection Tip: For the best texture, make sure your butter and eggs are truly at room temperature. If they are too cold, the batter will curdle. Don’t panic if it looks a little lumpy—it will come together once you add the flour.
Substitution Guidance: If you need a dairy-free option, you can swap the butter for a high-quality vegan butter (like Earth Balance) and use oat milk instead of whole milk. The sour cream can be replaced with full-fat coconut yogurt. The texture will be slightly different, but still delicious.
Equipment Needed
You don’t need a professional bakery setup for these ghost vanilla cupcakes. Here is what you will need:
- Muffin tin (12-cup) – A standard metal tin works best. Darker tins can brown the bottoms faster.
- Paper cupcake liners – I like white liners for a clean ghost backdrop. Halloween-themed ones are fun too.
- Large mixing bowls (2) – One for dry ingredients, one for wet.
- Electric hand mixer or stand mixer – A hand mixer is totally fine. I actually prefer it for small batches because it’s easier to scrape the bowl.
- Rubber spatula – For folding and scraping every last bit of batter.
- Cooling rack – Letting the cupcakes cool completely is non-negotiable. If they are warm, the frosting will melt into a puddle.
- Piping bag (or zip-top bag) – I use a disposable piping bag with the tip snipped off to about ½ inch. A zip-top bag with a corner cut off works just as well.
- Small cookie scoop (optional) – For evenly portioning the batter. It’s a game-changer for consistent sizes.
Budget-Friendly Tip: If you don’t own a piping bag, don’t buy one. Just use a sturdy zip-top bag. I’ve done it a hundred times when I’ve run out of bags mid-batch. It works like a charm.
Preparation Method
Making these ghost vanilla cupcakes is straightforward, but there are a few moments where paying attention makes a big difference. Let’s break it down step by step.
- Preheat and Prep: Preheat your oven to 350°F (175°C). Line your muffin tin with paper liners. This is a good time to let your butter and eggs sit out if you forgot earlier. Honestly, I’ve started baking with cold butter and just microwaved it in 5-second bursts. It’s not ideal, but it works in a pinch.
- Mix Dry Ingredients: In a medium bowl, whisk together the flour, baking powder, and salt. Set this aside. Whisking aerates the flour and ensures the baking powder is evenly distributed. You don’t want a pocket of baking powder in one cupcake—it will taste metallic.
- Cream Butter and Sugar: In a large bowl, beat the softened butter and granulated sugar together on medium speed for about 3-4 minutes. You are looking for a pale, fluffy mixture. It should look like light sand. This step is crucial. If you don’t cream it long enough, your cupcakes will be dense. I’ve made that mistake—they were edible but heavy.
- Add Eggs and Vanilla: Add the eggs one at a time, beating well after each addition. Scrape down the sides of the bowl with your spatula. Then add the vanilla extract and beat for another 30 seconds. The mixture might look a little curdled at this point if your eggs were cold. Don’t worry, the flour will fix it.
- Combine Wet and Dry: With the mixer on low speed, add about one-third of the dry ingredients. Mix until just combined. Then add half of the milk and the sour cream. Mix again. Repeat with another third of the dry, then the remaining milk, and finally the last of the dry. Stop mixing as soon as the flour disappears. Over-mixing develops gluten and makes tough cupcakes.
- Fill the Liners: Use your cookie scoop or a spoon to fill each liner about two-thirds full. I usually use about 3 tablespoons of batter per cupcake. This gives you a nice dome without overflowing. If you fill them too high, the ghost will look weird on top.
- Bake: Bake for 18-20 minutes, or until a toothpick inserted into the center comes out clean or with a few moist crumbs. The tops should be lightly golden. Let them cool in the pan for 5 minutes, then transfer to a cooling rack to cool completely. This is the hardest part—waiting. The kitchen will smell amazing.
- Make the Buttercream: While the cupcakes cool, make the frosting. Beat the softened butter on medium speed for 2 minutes until it’s smooth and creamy. Gradually add the sifted powdered sugar, one cup at a time, beating on low speed. Add the vanilla and a pinch of salt. Then add the heavy cream, one tablespoon at a time, until you reach a spreadable consistency. Beat on medium-high for 3-4 minutes. It should be light, fluffy, and very white.
- Pipe the Ghosts: Transfer the buttercream to your piping bag. Hold the bag straight up over a cooled cupcake. Squeeze a generous dollop in the center, letting it spread into a round blob. Then, as you pull the bag up, release pressure slowly to create a little peak. That peak is the ghost’s head. Don’t worry if it looks messy—ghosts are supposed to be wobbly. Immediately press two mini chocolate chips into the front for eyes. I like to place them slightly close together for a cuter, more surprised expression.
- Chill and Serve: Place the decorated cupcakes in the fridge for about 15 minutes to set the frosting. This makes them easier to transport. Serve them at room temperature for the best flavor and texture.
Personal Tip: If you want a ghost that looks like it’s floating, pipe the frosting slightly off-center. It gives the ghost a little personality, like it’s drifting across the cupcake.
Cooking Tips & Techniques
I’ve learned a few things the hard way while perfecting these ghost vanilla cupcakes. Here are my best tips to save you from my mistakes:
- Don’t Overfill the Pans: I once filled the liners almost to the top because I wanted “big” cupcakes. They overflowed and looked like mutant mushrooms. Stick to two-thirds full. It’s a perfect size for little hands.
- The Toothpick Test Lies: Sometimes a toothpick comes out clean, but the cupcake is still underbaked in the center. Give the top a gentle press. If it springs back, it’s done. If your finger leaves a dent, give it another 2 minutes.
- Room Temperature is Real: I know it’s annoying, but cold ingredients really do affect the texture. If you are short on time, cut your butter into small cubes and let it sit for 15 minutes. For eggs, place them in a bowl of warm water for 5 minutes. It makes a difference.
- Ghost Eye Placement: Press the chocolate chips in at an angle, not straight down. It gives the ghost a slightly goofy, friendly expression. If you press them straight in, it looks like the ghost is staring at you. Which is also fun, but maybe not for a kid-friendly treat.
- Multitasking Strategy: While the cupcakes are baking, clean up your mixing bowls and set up your piping station. That way, when the cupcakes are cool, you can decorate immediately. I like to have the chocolate chips ready in a small bowl so I can grab them quickly.
Variations & Adaptations
One of the best things about this recipe is how easy it is to change up. Here are a few ways to make these ghost vanilla cupcakes your own:
- Chocolate Ghosts: Swap out ¼ cup of the flour for ¼ cup of unsweetened cocoa powder. You get a chocolate base with a white ghost on top. It looks like a little ghost sitting on a dirt pile. My kids thought this was hilarious.
- Pumpkin Spice Ghosts: Add 1 teaspoon of pumpkin pie spice to the dry ingredients. It gives the cupcakes a warm, fall flavor that pairs beautifully with the vanilla frosting. This is great for a Halloween-Thanksgiving crossover party.
- Vegan Version: Use a flax egg (1 tablespoon flaxseed meal + 3 tablespoons water) for each egg, and swap the butter and milk for vegan alternatives. The texture is a bit more dense, but the flavor is still spot on. I tested this for a friend with dairy allergies, and we both loved the result.
- Gluten-Free Option: Use a 1:1 gluten-free baking flour blend. I like Bob’s Red Mill. The cupcakes might be slightly more delicate, so handle them gently when decorating.
- Different Ghost Faces: Instead of chocolate chips for eyes, use mini M&Ms or candy eyes. You can also use a tiny bit of black frosting to pipe a little “o” mouth. My nephew made one with a surprised “O” mouth and called it the “scream ghost.”
Serving & Storage Suggestions
These ghost vanilla cupcakes are best served at room temperature. The buttercream is soft and creamy, and the cupcake is tender. Here is how to handle them:
- Serving Temperature: Take them out of the fridge about 20 minutes before serving. Cold cupcakes can taste a bit dense, and the buttercream gets hard. Letting them sit takes the chill off.
- Presentation Idea: Arrange them on a black or orange platter. You can add a few fake spider webs or plastic spiders around the edges for a spooky effect. I once served them on a cutting board with a few candy corn scattered around—it looked adorable.
- Storage: Store leftover cupcakes in an airtight container in the refrigerator for up to 4 days. The cupcakes actually get more moist on day two, which is a happy accident.
- Freezing: You can freeze the undecorated cupcakes for up to 3 months. Wrap them tightly in plastic wrap and then foil. When you are ready to serve, thaw them at room temperature, then make the frosting and decorate. This is a great time-saver for busy Halloween weeks.
- Reheating: If you want a warm cupcake, microwave it for about 10 seconds. Be careful—the chocolate chips might get hot. I usually just eat them cold from the fridge. They are still delicious.
Nutritional Information & Benefits
Let’s be real—these are a treat, not a health food. But here is the breakdown for one ghost vanilla cupcake (based on 12 servings):
| Nutrient | Amount per Cupcake |
|---|---|
| Calories | ~380 |
| Total Fat | 22g |
| Saturated Fat | 14g |
| Carbohydrates | 45g |
| Sugar | 35g |
| Protein | 3g |
Health Benefits: The butter and eggs provide a small amount of vitamin A and protein. Vanilla extract has been linked to antioxidant properties, though the amount here is minimal. Honestly, the biggest benefit is the joy factor. Baking with kids builds confidence and creates memories. That counts for something.
Dietary Considerations: This recipe contains dairy, eggs, and gluten. For allergy-friendly options, check the variations section above. If you are watching sugar intake, you can reduce the sugar in the cupcake batter to ¾ cup without ruining the texture, but the frosting needs the full amount for structure.
Conclusion
These ghost vanilla cupcakes are everything I want in a Halloween recipe. They are fun, simple, and forgiving. The kids can do almost all of the decorating themselves, which means you get to sit back and watch them create. My nephew is already asking if we can make them again for his birthday. I think that says it all.
I encourage you to make these your own. Add a little green food coloring to the frosting for a zombie ghost. Use candy corn for a hat. Let the kids go wild. The base recipe is solid, so you can experiment without worry. When you make them, I would love to hear how they turned out. Drop a comment below and tell me about your ghost faces. Did you make them silly? Spooky? All of the above? Happy Halloween baking, and remember—the mess is part of the fun!
Frequently Asked Questions
Can I use a boxed cake mix for the base?
Yes, absolutely. If you are short on time, a white or vanilla boxed cake mix works perfectly. Just make the buttercream from scratch to keep that homemade taste. The ghost decoration is the star anyway.
Why did my buttercream turn out too runny?
This usually happens if your butter was too soft or you added too much cream. Pop the bowl in the fridge for 10 minutes, then beat it again. It should firm up. If it is still runny, add a little more sifted powdered sugar.
How far in advance can I make these cupcakes?
You can bake the cupcakes up to two days ahead and store them in an airtight container at room temperature. Decorate them the day you plan to serve them for the freshest look. The frosting can also be made a day ahead and kept in the fridge—just let it soften and re-whip it before using.
Can I use a different frosting flavor?
Sure. A cream cheese frosting would be delicious, though it is a little softer and harder to shape into ghosts. You could also add a drop of peppermint extract for a minty ghost. Just keep the frosting thick enough to hold its shape.
My ghost faces look lumpy and weird. What did I do wrong?
Nothing! Lumpy and weird is the ghost aesthetic. Seriously, the charm of these cupcakes is that each ghost is unique. If you want a smoother ghost, beat your buttercream for an extra minute to get it really fluffy. But honestly, the lumpy ones are my favorite.
Pin This Recipe!
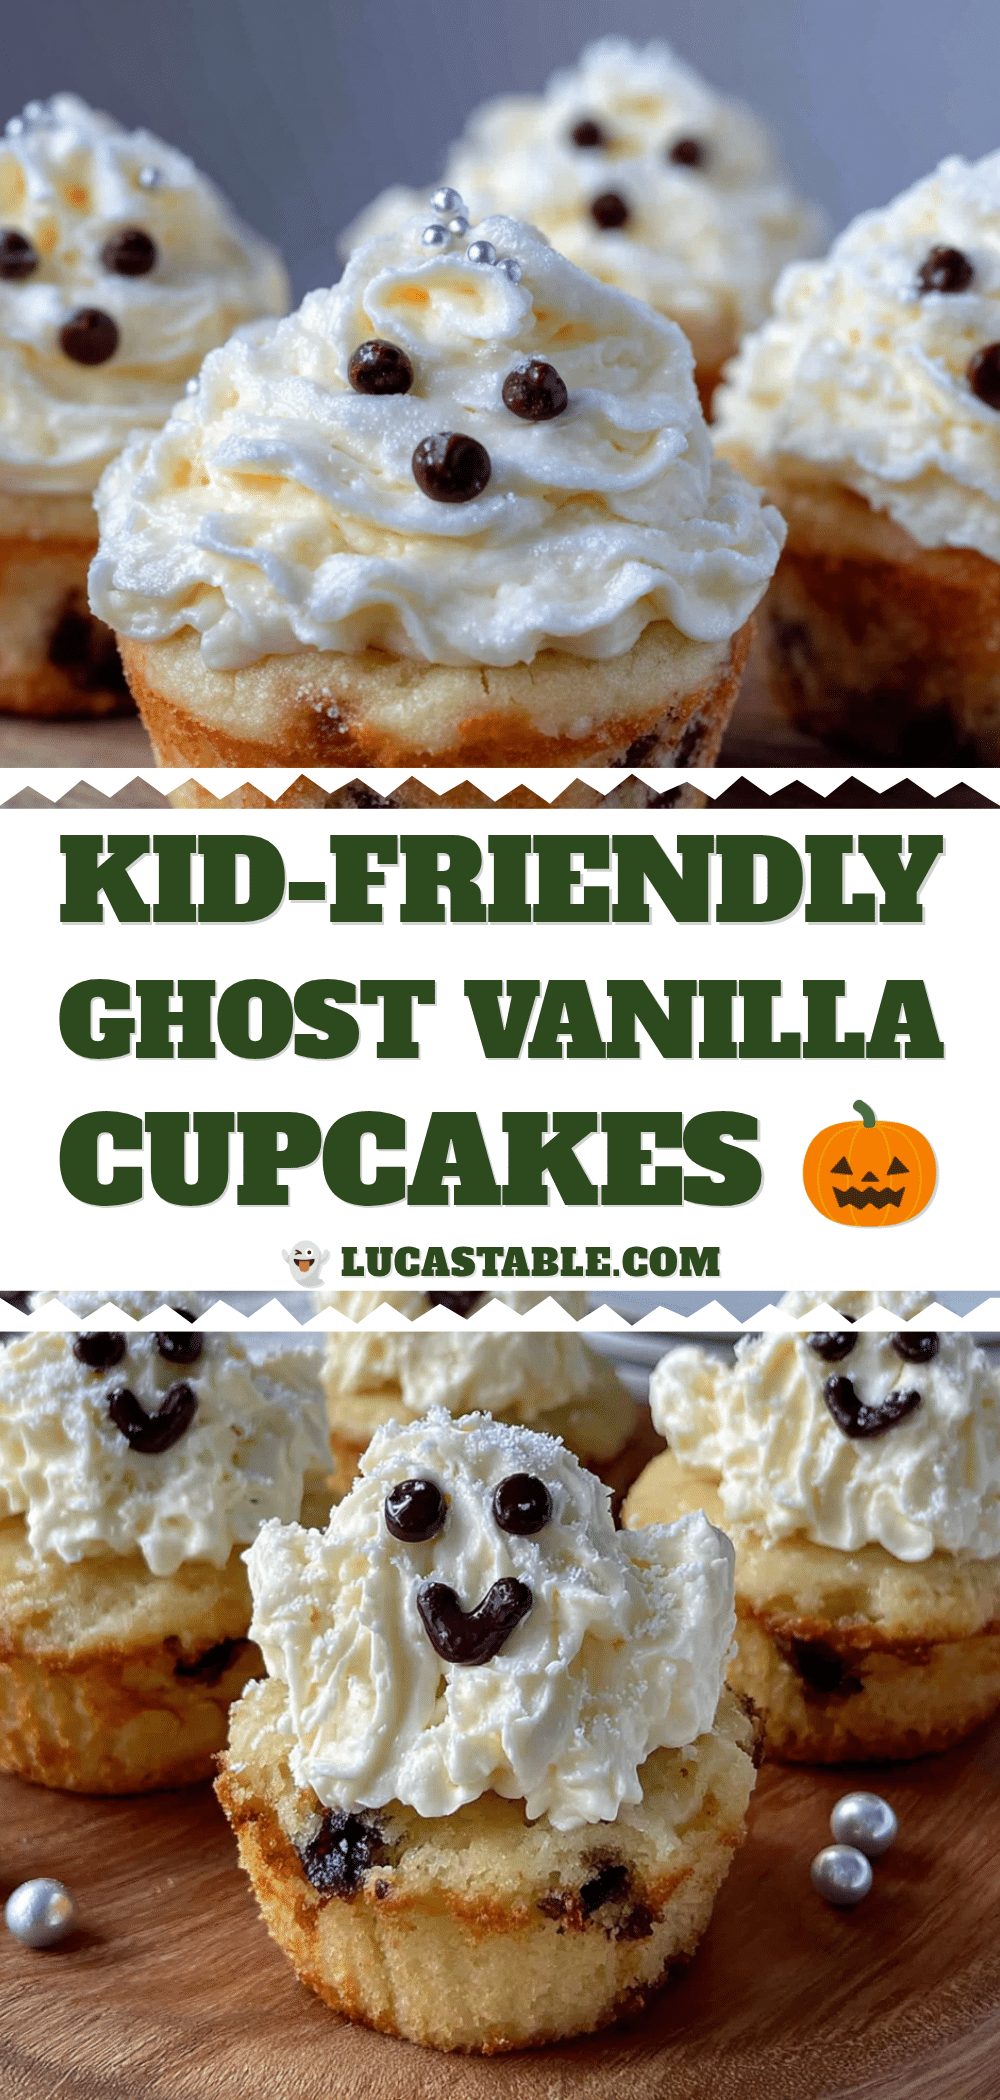
Easy Ghost Vanilla Cupcakes: Best Kid-Friendly Halloween Treat
Soft, fluffy vanilla cupcakes topped with a simple buttercream that you can shape into adorable, wobbly ghosts in about two seconds flat. The kids do all the decorating, making it a perfect Halloween activity.
- Prep Time: 20 minutes
- Cook Time: 20 minutes
- Total Time: 40 minutes
- Yield: 12 cupcakes 1x
- Category: Dessert
- Cuisine: American
Ingredients
- 1 ½ cups (190g) all-purpose flour
- 1 ½ teaspoons baking powder
- ¼ teaspoon salt
- ½ cup (113g) unsalted butter, softened
- 1 cup (200g) granulated sugar
- 2 large eggs, room temperature
- 2 teaspoons pure vanilla extract
- ½ cup (120ml) whole milk, room temperature
- ¼ cup (60g) sour cream, room temperature
- 1 cup (226g) unsalted butter, softened (for frosting)
- 3 ½ cups (420g) powdered sugar, sifted
- 2 teaspoons pure vanilla extract (for frosting)
- 2–3 tablespoons heavy cream or whole milk
- Pinch of salt
- Mini chocolate chips (for ghost eyes)
Instructions
- Preheat oven to 350°F (175°C). Line a 12-cup muffin tin with paper liners.
- In a medium bowl, whisk together flour, baking powder, and salt. Set aside.
- In a large bowl, beat softened butter and granulated sugar on medium speed for 3-4 minutes until pale and fluffy.
- Add eggs one at a time, beating well after each addition. Add vanilla extract and beat for 30 seconds.
- With mixer on low, add one-third of dry ingredients, mixing until just combined. Add half of milk and sour cream, mix. Repeat with another third of dry, remaining milk, then last of dry. Mix until just combined; do not overmix.
- Fill each liner about two-thirds full (about 3 tablespoons batter per cupcake).
- Bake for 18-20 minutes, until a toothpick inserted in center comes out clean or with a few moist crumbs. Cool in pan 5 minutes, then transfer to a wire rack to cool completely.
- For buttercream: Beat softened butter on medium speed for 2 minutes until smooth. Gradually add sifted powdered sugar, one cup at a time, beating on low. Add vanilla and salt. Add heavy cream one tablespoon at a time until spreadable. Beat on medium-high for 3-4 minutes until light and fluffy.
- Transfer buttercream to a piping bag with tip snipped to ½ inch. Pipe a generous dollop in center of each cooled cupcake, pulling up to create a peak. Immediately press two mini chocolate chips into front for eyes.
- Refrigerate decorated cupcakes for 15 minutes to set frosting. Serve at room temperature.
Notes
For best texture, ensure butter and eggs are at room temperature. If cold, cut butter into small cubes and let sit 15 minutes; place eggs in warm water for 5 minutes. Don’t overfill liners—two-thirds full is perfect. For ghost eyes, press chocolate chips at an angle for a cuter expression. Cupcakes can be baked up to 2 days ahead; decorate day of serving. Undecorated cupcakes can be frozen up to 3 months.
Nutrition
- Serving Size: 1 cupcake
- Calories: 380
- Sugar: 35
- Sodium: 150
- Fat: 22
- Saturated Fat: 14
- Carbohydrates: 45
- Protein: 3
Keywords: Halloween cupcakes, ghost cupcakes, vanilla cupcakes, kid-friendly Halloween treat, easy Halloween dessert


