I figured ghost-shaped meringue cookies were going to be fussy. You know the type—the kind of baking project that requires a pastry degree, a steady hand you don’t have, and about three hours of patience you definitely don’t possess after a long week. It took about ten minutes of watching these little guys puff up in the oven for that assumption to fall apart completely.
Honestly, I stumbled into this recipe by accident. I was testing out a batch of basic meringues for a friend’s Halloween party, and I had this nagging feeling they needed to be something more than just plain white blobs. So I grabbed a piping bag—the cheap disposable kind, let’s be real—and squeezed out a few wobbly little shapes. The first one looked more like a sad cloud than a ghost. The second one had a lopsided head. But the third one? It looked like Casper’s long-lost cousin, and I laughed out loud in my empty kitchen.
These easy Halloween ghost meringue cookies are the kind of recipe that makes you feel like a kitchen wizard without any of the actual wizardry. They’re light, they’re crunchy, they melt in your mouth like a sweet little whisper, and they only need four ingredients you probably already have. No food coloring, no complicated piping techniques, no stress. Just a fun, slightly spooky treat that comes together faster than you’d think.
There’s something deeply satisfying about watching a simple mixture of egg whites and sugar transform into something this ethereal. It feels a little bit like magic—the good kind, not the kind that leaves you scrubbing burnt sugar off your stovetop. These ghosts aren’t perfect, and that’s exactly why I love them.
Why You’ll Love This Recipe
Let me tell you why these ghost meringue cookies have become my go-to Halloween treat. First off, they are ridiculously easy. I’m talking four ingredients, a mixer, and about twenty minutes of hands-on time. If you can separate an egg and turn on a stand mixer, you can make these. No baking experience required.
- Quick & Easy: From start to finish, these come together in under an hour (including baking time). Perfect for last-minute Halloween plans or a fun afternoon project with the kids.
- Simple Ingredients: You likely have everything in your kitchen right now. Egg whites, sugar, cream of tartar, and vanilla extract. That’s it. No weird specialty items or trips to three different stores.
- Perfect for Halloween Parties: These little ghosts are the star of any dessert table. They’re cute enough for kids and elegant enough for adults. Plus, they’re naturally gluten-free, so everyone can enjoy them.
- Crowd-Pleaser: I’ve brought these to potlucks, school events, and family gatherings. They disappear fast. People love the novelty, and they always ask for the recipe.
- Unbelievably Delicious: The texture is what gets you. Crispy on the outside, airy and light on the inside, with a sweet vanilla flavor that melts on your tongue. It’s like eating a sweet little cloud.
What makes this recipe different from all the other meringue recipes out there? It’s the technique. I’ve tested this method a dozen times to get it just right—the perfect oven temperature, the right amount of cream of tartar for stability, and a piping trick that makes shaping the ghosts almost foolproof. This isn’t just another version of a meringue cookie. It’s the version that actually works, every single time.
And honestly? There’s something about making these that just feels good. It’s a simple, quiet kind of baking that doesn’t demand perfection. Each ghost comes out a little different—some chubby, some tall, some with slightly crooked smiles—and that’s what makes them charming. It’s comfort food reimagined for the spooky season, with the same soul-soothing satisfaction as a cozy afternoon in the kitchen.
What Ingredients You Will Need
This recipe uses simple, wholesome ingredients to deliver that signature light-as-air texture and sweet vanilla flavor. You probably have most of these in your pantry already, which makes these ghost meringue cookies perfect for spontaneous baking sessions.
- 4 large egg whites, at room temperature (this is important—cold eggs won’t whip up as well. Let them sit out for about 30 minutes before you start.)
- 1 cup (200g) granulated white sugar (not powdered sugar—granulated dissolves better into the egg whites for that stable, glossy meringue)
- 1/4 teaspoon cream of tartar (this stabilizes the egg whites and helps them hold their shape. You can substitute with 1/2 teaspoon lemon juice or white vinegar in a pinch.)
- 1 teaspoon pure vanilla extract (I prefer Nielsen-Massey for its rich flavor, but any good quality vanilla works. Avoid imitation vanilla—it can affect the texture.)
For the ghost faces (optional but highly recommended):
- Mini chocolate chips or black decorating gel for the eyes and mouth. I’ve used both, and honestly, the mini chocolate chips are easier to press on before baking. The decorating gel works great if you want to draw faces after they’re done, but it can smudge a bit.
Ingredient selection tips: Look for eggs that are fresh but not too fresh—eggs that are about a week old actually whip up better than farm-fresh ones. The slight aging helps the egg whites break down more easily. And please, please use room temperature egg whites. I know it’s tempting to rush, but cold egg whites are stubborn and won’t reach that stiff peak stage as easily.
Substitution guidance: If you’re avoiding sugar, you can try using superfine sugar or even a sugar substitute like Swerve, but I’ll be honest—the texture won’t be quite the same. For a dairy-free option, these are already dairy-free. For a vegan version, you can try aquafaba (the liquid from a can of chickpeas), but that’s a whole different technique and I haven’t tested it with this specific recipe. Stick with the original for best results.
Equipment Needed
You don’t need a professional bakery setup for these ghost meringue cookies. Here’s what you’ll need:
- Stand mixer or hand mixer: A stand mixer with a whisk attachment is ideal, but a hand mixer works perfectly fine. You’ll be whipping for about 8-10 minutes, so your arm might get a workout with a hand mixer.
- Large mixing bowl: Make sure it’s completely clean and dry. Any grease or moisture can prevent the egg whites from whipping up properly. I like using a glass or metal bowl—plastic can sometimes hold onto oils.
- Piping bag with a round tip: I use a Wilton 1A tip for that classic ghost shape. If you don’t have a piping bag, a sturdy zip-top bag with the corner snipped off works in a pinch. Just be careful—the bag can split if you squeeze too hard.
- Baking sheets lined with parchment paper: Parchment is non-negotiable here. Wax paper will stick, and silicone mats can sometimes cause the meringues to spread too much.
- Electric scale (optional but helpful): For precise sugar measurement. I know I said it’s optional, but honestly, weighing your ingredients makes a difference in baking.
Budget-friendly tip: Skip the fancy piping bags and buy a box of disposable ones from the grocery store. They’re cheap and work great. Or just use a zip-top bag—I’ve done it, and it works.
Preparation Method
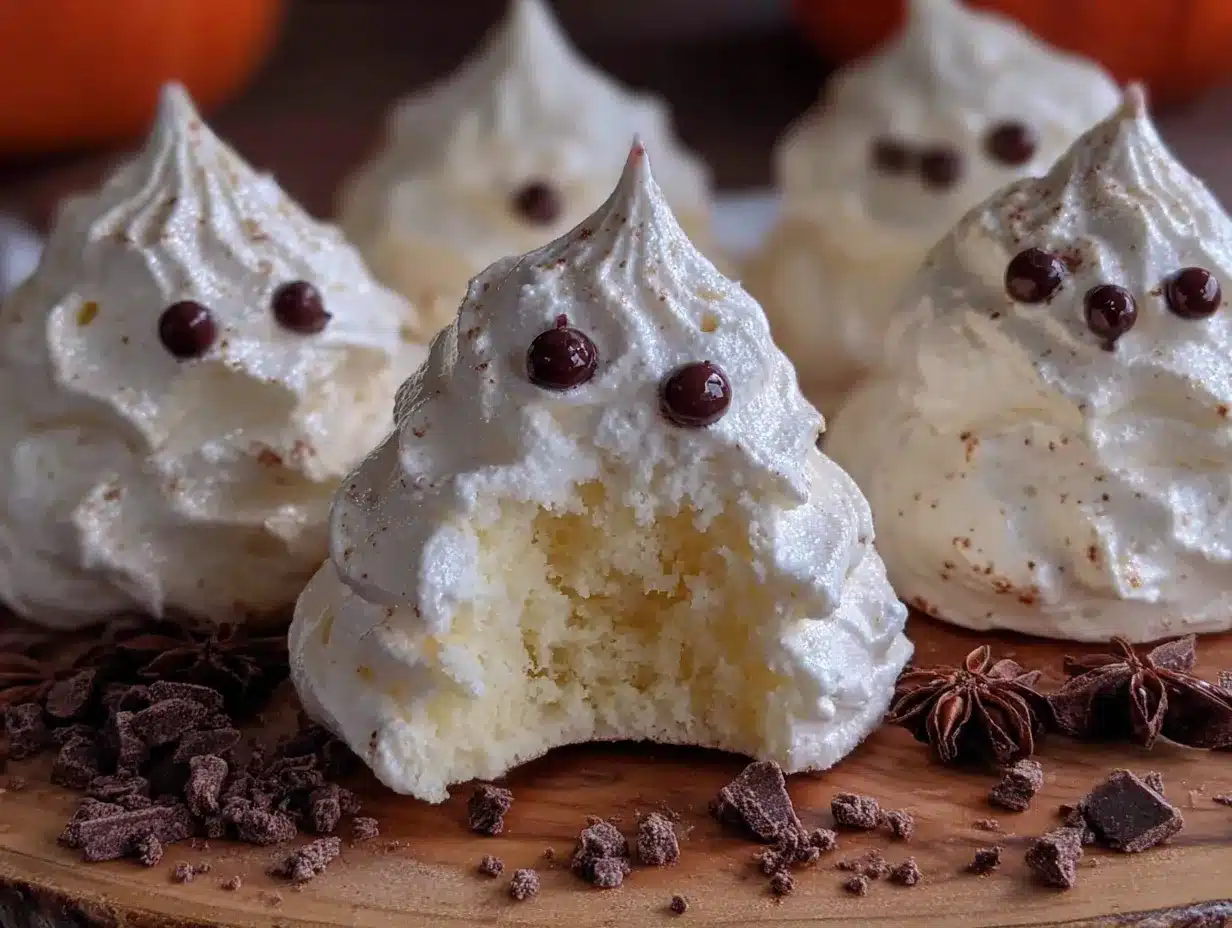
Alright, let’s make some ghosts. Follow these steps carefully, and you’ll have a tray of adorable little spirits in no time.
- Preheat your oven to 200°F (93°C). Yes, that’s low. Meringues bake low and slow to dry out without browning. Line two baking sheets with parchment paper and set them aside.
- Clean your mixing bowl and whisk attachment thoroughly. Wipe them with a little white vinegar on a paper towel to remove any trace of grease. This step sounds fussy, but trust me—even a tiny bit of oil can ruin your meringue.
- Add the room temperature egg whites to the bowl. Start beating on medium speed until they become frothy and bubbly, about 1-2 minutes. You should see lots of small bubbles forming.
- Add the cream of tartar. Continue beating on medium speed until soft peaks form. This means when you lift the whisk, the egg whites form a peak that flops over immediately. This takes about 2-3 minutes.
- Start adding the sugar, one tablespoon at a time. This is the most important step. If you dump all the sugar in at once, your meringue will collapse. Add it slowly, letting each spoonful dissolve before adding the next. Keep beating on medium-high speed.
- After all the sugar is added, increase the speed to high. Beat for another 5-7 minutes until the meringue is thick, glossy, and forms stiff peaks. You’ll know it’s ready when you rub a little between your fingers and it feels smooth, not grainy. The sugar should be completely dissolved.
- Add the vanilla extract. Beat on low speed for just 10-15 seconds until combined. Don’t overmix or you’ll deflate all that beautiful air.
- Transfer the meringue to your piping bag. If using a zip-top bag, snip about 1/2 inch off one corner. Twist the top of the bag to push the meringue down toward the tip.
- Pipe the ghost shapes onto the prepared baking sheets. Hold the bag straight up and down, about 1/2 inch above the parchment. Squeeze out a round base, then lift the bag straight up while continuing to squeeze, creating a tall, wobbly shape. Release pressure and pull the bag away quickly to create a little peak on top. Leave about 1 inch between each ghost—they don’t spread much, but they need a little breathing room.
- Add the faces. If using mini chocolate chips, gently press two for eyes and a little curved line for a mouth into each ghost. Work quickly before the meringue starts to dry. If using decorating gel, wait until after baking.
- Bake for 60-75 minutes. The meringues are done when they are dry to the touch and easily lift off the parchment paper. They should be pale white or very lightly golden on the bottom. Turn off the oven and leave them inside with the door slightly open for another 30 minutes to finish drying out.
- Let them cool completely on the baking sheets. Don’t try to move them while they’re still warm—they’re fragile and will crack.
Sensory cue: When you tap a finished meringue, it should sound hollow, like tapping an empty eggshell. The texture should be crisp all the way through, not chewy or sticky in the center.
Cooking Tips & Techniques
I’ve made these ghost meringue cookies about a dozen times now, and I’ve learned a few things the hard way. Let me save you some trouble.
The humidity problem: Meringues are picky about weather. If it’s a rainy or humid day, your meringues might turn out sticky or chewy instead of crisp. Try to make these on a dry day if possible. If you’re stuck with humidity, add an extra 15-20 minutes to the baking time and leave them in the turned-off oven longer.
The sugar dissolving test: This is the trick that changed my meringue game. Before you stop whipping, take a tiny bit of the meringue between your thumb and forefinger and rub them together. If it feels gritty, keep whipping. If it feels smooth, you’re good to go. Undissolved sugar will cause your meringues to weep (those little brown droplets that form on the surface).
My biggest failure: The first time I made these, I got impatient and added the sugar all at once. The meringue never stiffened properly, and my ghosts spread into flat, sad little pancakes. They tasted fine, but they looked nothing like ghosts. Lesson learned: patience pays off.
Timing strategy: I like to prep all my ingredients before I start whipping. Have your piping bag ready, your parchment lined, and your chocolate chips within reach. Once the meringue is ready, you need to work quickly—it can start to deflate if it sits too long in the bowl.
Consistency tip: If you’re making multiple batches, make sure your bowl and whisk are completely clean and dry between batches. Any residue can affect the next batch.
Variations & Adaptations
Once you’ve mastered the basic ghost shape, there’s so much you can do with this recipe. Here are some of my favorite variations:
- Chocolate Ghosts: Swap 2 tablespoons of the granulated sugar for 2 tablespoons of unsweetened cocoa powder. Sift it into the egg whites with the sugar. The ghosts will be a pale brown, but they taste amazing—like a chocolate meringue kiss.
- Peppermint Ghosts: Add 1/2 teaspoon peppermint extract along with the vanilla. Crush up some candy canes and sprinkle them on top before baking for a festive winter twist. These are great for Christmas parties too.
- Pumpkin Spice Ghosts: Mix in 1 teaspoon pumpkin pie spice with the sugar. The warm spices complement the vanilla beautifully, and the orange-brown flecks look cute against the white meringue.
- Vegan Option: While I haven’t perfected this myself, you can try using aquafaba (the liquid from a can of chickpeas). Whip it just like egg whites, but note that aquafaba takes longer to reach stiff peaks. The texture will be slightly different—a bit more marshmallow-like—but still delicious.
- Different Shapes: Who says you have to make ghosts? Pipe little pumpkins (use orange food coloring), bats (pipe two small wings), or even spiders. The technique is the same—just change the shape of your piping.
I personally love the chocolate version. I made a batch for a Halloween movie night, and they paired perfectly with a hot cup of cocoa. They disappeared before the first scary scene even ended.
Serving & Storage Suggestions
These ghost meringue cookies are best served at room temperature, right after they’ve cooled from the oven. The texture is perfectly crisp, and they practically melt in your mouth.
Presentation ideas: Arrange them on a white platter for a spooky “ghost gathering” effect. You can also stick them upright in a glass jar or vase for a cute centerpiece. For a Halloween party, try placing them around a carved pumpkin or alongside some creamy butter chicken for a sweet-savory contrast on your dessert table. Honestly, they’re so light and airy, they’re perfect after a heavier meal like crispy chicken parmesan.
Storage instructions: Store your meringues in an airtight container at room temperature. Do NOT refrigerate them—the moisture in the fridge will make them sticky and soft. They’ll keep for up to 2 weeks if stored properly, though they’re best within the first week.
Freezer tips: Yes, you can freeze these! Place them in a single layer in a freezer-safe container with parchment paper between layers. They’ll keep for up to 3 months. Thaw at room temperature for about 30 minutes before serving. The texture might be slightly less crisp, but they’re still delicious.
Reheating: If your meringues have gone a bit soft (maybe from humidity), pop them in a 200°F (93°C) oven for 15-20 minutes to crisp them back up. Let them cool completely before storing again.
Flavor development: These meringues actually taste best the day they’re made. The vanilla flavor is brightest, and the texture is at its peak crispness. After a few days, they might soften slightly, but they’re still perfectly good.
Nutritional Information & Benefits
Let’s be real—these are cookies, not health food. But they do have some surprising benefits worth mentioning.
| Per Serving (1 ghost) | Amount |
|---|---|
| Calories | 25 |
| Total Fat | 0g |
| Saturated Fat | 0g |
| Cholesterol | 0mg |
| Sodium | 5mg |
| Total Carbohydrates | 6g |
| Sugars | 6g |
| Protein | 0.5g |
Health highlights: These meringues are naturally fat-free, cholesterol-free, and gluten-free. Egg whites are a good source of high-quality protein, though the amount per cookie is small. They’re also free of common allergens like dairy and nuts (assuming no cross-contamination).
Dietary considerations: This recipe is naturally gluten-free, dairy-free, and nut-free. For a low-sugar option, you can try using a sugar substitute, but the texture will change. For a vegan version, see the variations section above.
My perspective: I love that these are a lighter dessert option. They satisfy that sweet craving without the heaviness of butter or cream. Plus, they’re naturally portion-controlled—one or two ghosts feel like a treat without going overboard. Perfect for when you want something sweet after a lighter meal like shrimp scampi.
Conclusion
These easy Halloween ghost meringue cookies are proof that simple things can be the most fun. Four ingredients, a little bit of patience, and you’ve got a tray full of adorable little spirits that taste as good as they look. They’re light, they’re crispy, they’re sweet, and they bring a smile to everyone’s face.
I love that this recipe doesn’t take itself too seriously. The ghosts are never perfect—some are chubby, some are lopsided, some look more like blobs than spirits—but that’s what makes them special. Each one has its own personality, just like the people who make them.
I’d love to see your ghost creations! Tag me in your photos, leave a comment below telling me how yours turned out, or share your own variations. Did you add sprinkles? Make them chocolate? Pipe them into pumpkins? I want to hear all about it.
So go ahead—preheat that oven, whip up some egg whites, and make a little magic. Your Halloween dessert table will thank you. And honestly? Making these might just become your new favorite October tradition. Happy baking, friend.
Frequently Asked Questions
Can I make these ghost meringue cookies without a piping bag?
Absolutely. Use a sturdy zip-top bag with one corner snipped off. Just be careful not to squeeze too hard, or the bag might split. You can also use two spoons to shape the ghosts, though they won’t be as uniform.
Why did my meringues turn out sticky or chewy?
This usually happens because of humidity or underbaking. Make sure you’re baking on a dry day and leave the meringues in the turned-off oven for an extra 30 minutes to fully dry out. Sticky meringues can be rescued by baking them a bit longer at 200°F.
Can I use liquid egg whites from a carton?
I don’t recommend it. Carton egg whites often have stabilizers that prevent them from whipping up properly. Fresh egg whites from whole eggs give you the best volume and stability for these ghost meringue cookies.
How do I know when the meringue is stiff enough?
Lift the whisk attachment straight up. If the meringue forms a peak that holds its shape without drooping, you’re there. Also, the bowl should be able to be turned upside down without the meringue sliding out. That’s the classic test.
Can I add food coloring to these ghosts?
Yes, but use gel food coloring, not liquid. Liquid coloring will add too much moisture and can deflate your meringue. Add a tiny amount of gel color at the end and fold it in gently. For Halloween, try a pale orange or green for a fun twist.
Pin This Recipe!
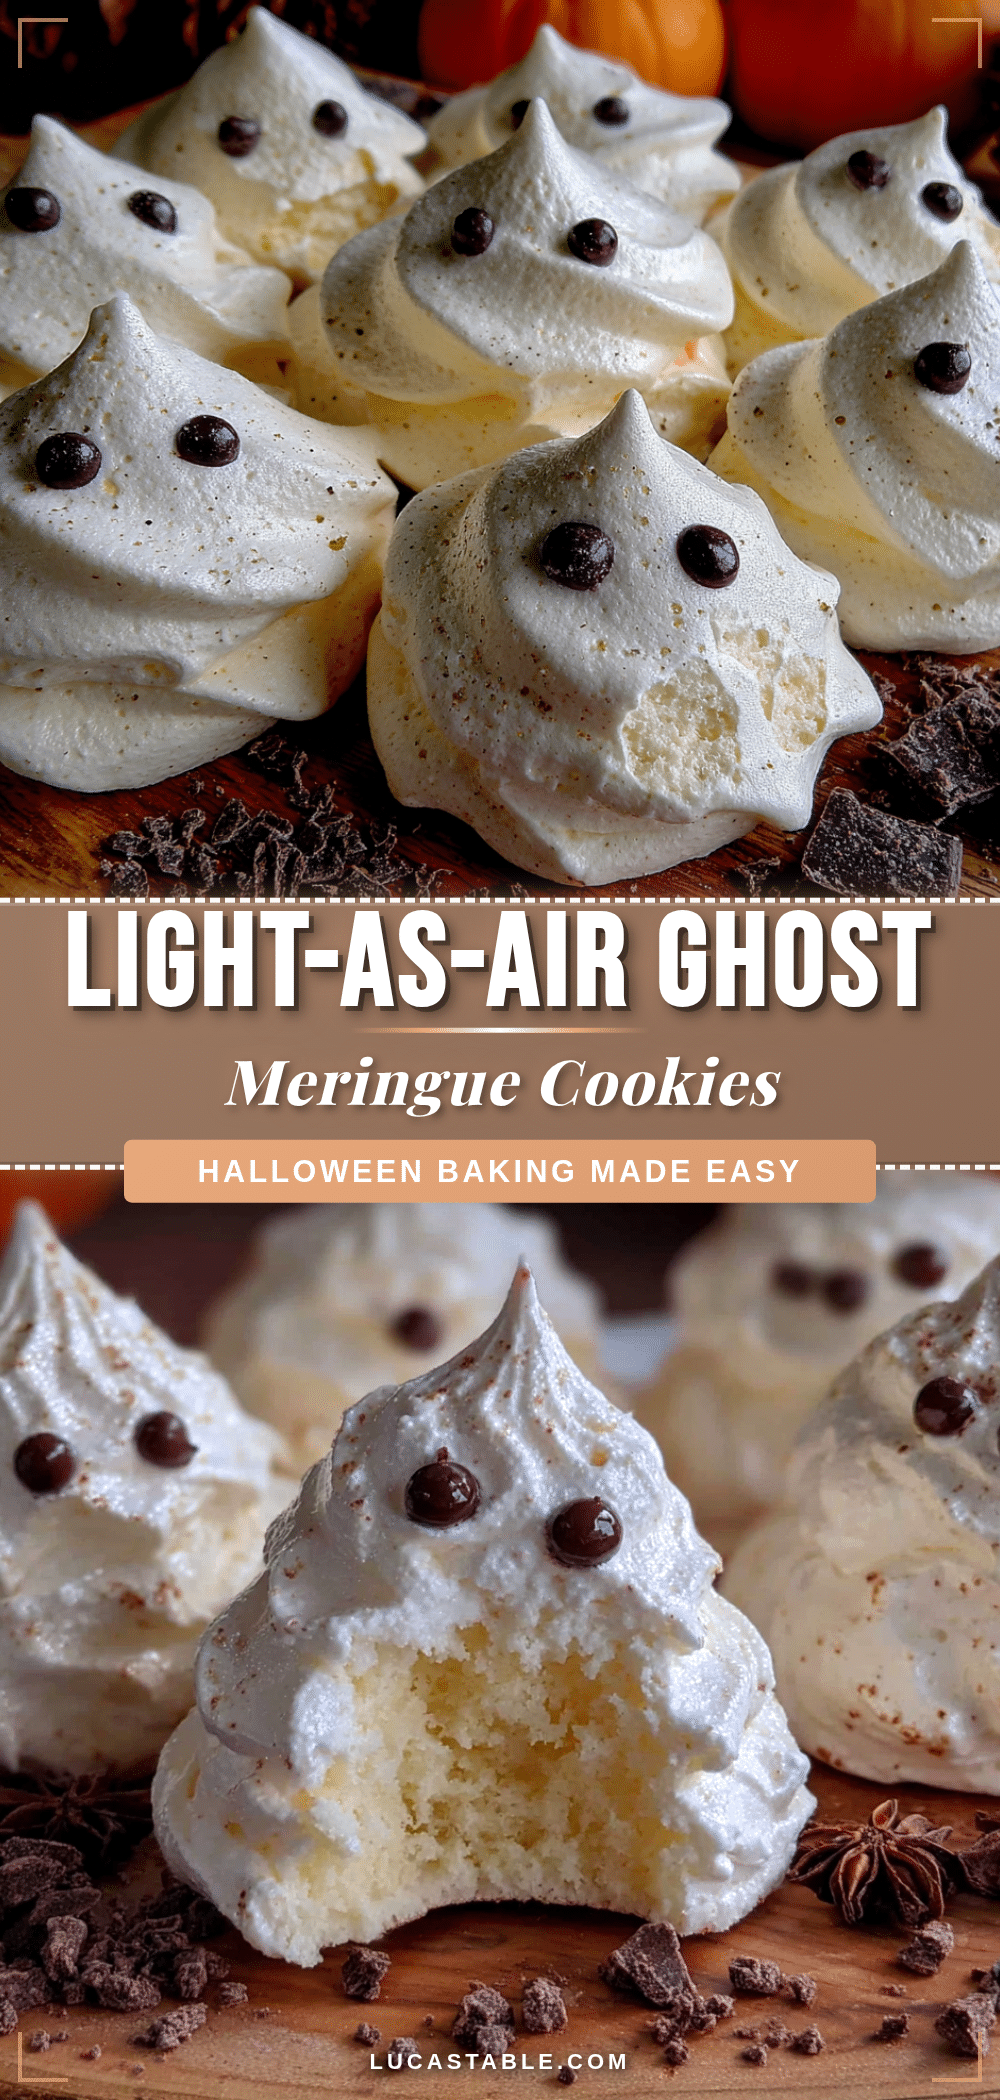
Easy Halloween Ghost Meringue Cookies: Best 4-Ingredient Recipe
These easy Halloween ghost meringue cookies are light, crunchy, and melt in your mouth. Made with just four simple ingredients, they’re a fun and spooky treat perfect for Halloween parties.
- Prep Time: 20 minutes
- Cook Time: 60-75 minutes
- Total Time: 1 hour 35 minutes
- Yield: 24 servings 1x
- Category: Dessert
- Cuisine: American
Ingredients
- 4 large egg whites, at room temperature
- 1 cup (200g) granulated white sugar
- 1/4 teaspoon cream of tartar
- 1 teaspoon pure vanilla extract
- Mini chocolate chips or black decorating gel (for ghost faces, optional)
Instructions
- Preheat your oven to 200°F (93°C). Line two baking sheets with parchment paper.
- Clean your mixing bowl and whisk attachment thoroughly with white vinegar to remove any grease.
- Add the room temperature egg whites to the bowl. Beat on medium speed until frothy and bubbly, about 1-2 minutes.
- Add the cream of tartar. Continue beating on medium speed until soft peaks form, about 2-3 minutes.
- Start adding the sugar, one tablespoon at a time, beating on medium-high speed. Let each spoonful dissolve before adding the next.
- After all sugar is added, increase speed to high and beat for 5-7 minutes until thick, glossy, and stiff peaks form. The meringue should feel smooth between your fingers, not grainy.
- Add the vanilla extract and beat on low speed for 10-15 seconds until combined.
- Transfer the meringue to a piping bag fitted with a round tip (or a zip-top bag with a corner snipped off).
- Pipe ghost shapes onto the prepared baking sheets: squeeze out a round base, then lift the bag straight up while squeezing to create a tall shape. Release pressure and pull away to create a peak.
- If using mini chocolate chips, gently press two for eyes and a curved line for a mouth into each ghost. If using decorating gel, wait until after baking.
- Bake for 60-75 minutes until dry to the touch and easily lift off the parchment. Turn off the oven and leave them inside with the door slightly open for 30 minutes to finish drying.
- Let cool completely on the baking sheets before moving.
Notes
Make sure egg whites are at room temperature. Avoid making meringues on humid days. For best results, add sugar slowly and test for smoothness between fingers. Store in an airtight container at room temperature for up to 2 weeks.
Nutrition
- Serving Size: 1 ghost
- Calories: 25
- Sugar: 6
- Sodium: 5
- Carbohydrates: 6
- Protein: 0.5
Keywords: Halloween cookies, ghost meringue, meringue cookies, easy Halloween treat, 4-ingredient recipe, gluten-free dessert


