The checkout line at the hardware store was moving slower than a snail on a salt flat. I was just there for a new lightbulb — nothing exciting. But the woman in front of me, holding a bag of mulch and wearing what I can only describe as a full cat costume (in October, in a hardware store, at 3 PM), turned around and said, “You look like you need a recipe for ghosts.”
Honestly, I didn’t know what to say. I mean, she wasn’t wrong — I was stressed about an upcoming Halloween party I’d volunteered to host. But a recipe for ghosts? From Cat Lady at the hardware store? She pulled a crumpled receipt from her pocket, scribbled something on the back, and handed it over. “Easy Halloween Rice Krispie Ghost Treats,” she said. “My kids are grown now, but I still make these every year. They’re the only thing that gets my neighbor to talk to me.”
I laughed, thanked her, and stuffed the receipt in my wallet. I honestly forgot about it until three days before the party. I was desperate for something quick, something that didn’t require a trip to the specialty baking store, and something that wouldn’t make me cry. I found that receipt, read the scribbled instructions, and thought, “Well, it can’t be worse than the time I tried to make caramel apples and set off the smoke alarm.”
So I made them. And let me tell you — these Easy Halloween Rice Krispie Ghost Treats saved my party. They were cute, they were simple, and every single guest asked for the recipe. I’ve been making them every October since. Maybe you’ve been in that same spot — needing a Halloween treat that looks impressive but doesn’t require a culinary degree. These little ghosts are exactly that.
Why You’ll Love This Recipe
Let’s be real for a second. Halloween baking can be a nightmare. Between the intricate cookie designs and the Pinterest-perfect cakes that take three days, it’s easy to feel like you’re failing before you even start. These Easy Halloween Rice Krispie Ghost Treats flip the script completely.
- Ready in 20 Minutes: From start to finish, you’re looking at about 20 minutes. That includes melting the marshmallows, shaping the ghosts, and adding the faces. Perfect for last-minute party prep or a school bake sale that snuck up on you.
- Just 4 Simple Ingredients: Rice Krispies cereal, marshmallows, butter, and candy eyes. That’s it. No fancy extracts, no specialty flours, no midnight trips to the grocery store.
- Perfect for Halloween Parties: These are the star of any Halloween spread. Kids adore them, adults sneak them, and they’re easy to grab and go.
- No-Bake Magic: No oven required. If you can use a microwave or stovetop, you can make these. That’s my kind of baking.
- Crowd-Pleaser Guaranteed: I’ve brought these to four different Halloween events, and they’ve disappeared every single time. Even the neighbor who “doesn’t do sweets” ate three.
What makes these different from every other Rice Krispie treat recipe out there? It’s the shape and the timing. Most recipes tell you to press the mixture into a pan and cut shapes. That’s fine, but it wastes so much of the treat. This method has you shape them by hand while they’re still warm, creating three-dimensional ghost shapes that look like they’re floating across the serving platter. No cookie cutters needed, no wasted edges, and honestly — they’re way cuter.
This recipe isn’t just good — it’s the kind that makes you close your eyes after the first bite. The marshmallow-to-cereal ratio is spot on. They’re chewy but not sticky, sweet but not cloying, and the candy eyes add that perfect little crunch. It’s comfort food reimagined for the spookiest time of year.
What Ingredients You Will Need
This recipe uses simple, pantry-friendly ingredients that come together to create something surprisingly adorable. You likely have most of these already, which is exactly the point.
For the Ghost Treats
- 6 cups Rice Krispies cereal — The classic puffed rice cereal. I’ve tried generic versions, and honestly, stick with the name brand. The texture is more consistent, and they hold their shape better. (Pro tip: make sure your cereal is fresh — stale cereal makes sad, flat ghosts.)
- 1 package (10 oz) regular marshmallows — Standard-size marshmallows work best. Mini marshmallows melt faster but can be trickier to measure. If you’re using mini, go with about 4 cups. I’ve used both, and I slightly prefer the regular size because they melt more evenly.
- 3 tablespoons unsalted butter — Salted butter works in a pinch, but unsalted lets you control the salt level. I’ve made these with salted butter before and honestly couldn’t tell the difference, but for purists, unsalted is the way to go.
- Candy eyes — You want the small round ones, about 1/4 inch in diameter. You can find them at any craft store or in the baking aisle of most grocery stores. I’ve also used black icing in a tube to draw eyes, and that works too — just let the treats cool completely before drawing on them.
Optional Add-Ins and Variations
- 1/2 teaspoon vanilla extract — Adds a lovely depth of flavor. I add this about 80% of the time. It’s not essential, but it makes the treats taste more “homemade.”
- Pinch of salt — A tiny sprinkle of flaky sea salt on top before the treats set balances the sweetness beautifully. I started doing this after a friend suggested it, and now I can’t go back.
- Orange food coloring — If you want to make a few pumpkin-shaped treats alongside your ghosts, a drop of orange gel coloring transforms the mixture. Just be careful — a little goes a long way.
- White candy melts — For dipping the bottoms of the ghosts to create a “ghostly base” or for drizzling on top for extra decoration. Not necessary, but definitely cute.
Ingredient Selection Tips
I recommend using Jet-Puffed marshmallows for the most consistent melting results. I’ve tried store-brand marshmallows, and they sometimes leave a grainy texture. For the butter, any standard brand works fine — I usually go with Kerrygold because I like the flavor, but honestly, for this recipe, the butter is more about preventing sticking than adding flavor, so save your fancy butter for toast.
If you’re making these for a school event or party with dietary restrictions, note that Rice Krispies cereal contains malt flavoring, which is not gluten-free. There are gluten-free puffed rice cereals available — just check the label. Also, the candy eyes often contain wheat starch, so look for allergen-free versions if needed.
Equipment Needed
You don’t need much for these Easy Halloween Rice Krispie Ghost Treats, which is part of their charm. Here’s what you’ll want on hand:
- Large pot or microwave-safe bowl — For melting the marshmallows. I use a heavy-bottomed pot on the stovetop because I like the control, but a large glass bowl in the microwave works perfectly too.
- Rubber spatula or wooden spoon — For stirring the marshmallow mixture. A silicone spatula is my go-to because nothing sticks to it. I learned that lesson after ruining a perfectly good wooden spoon.
- 9×13 inch baking dish or large sheet pan — For pressing the mixture into. I actually prefer a sheet pan lined with parchment paper because it gives me more room to work.
- Parchment paper or wax paper — Essential for preventing sticking. Do not skip this. I once tried to press Rice Krispie treats directly onto a counter, and let’s just say it was not my finest kitchen moment.
- Butter or cooking spray — For greasing your hands and the spatula. The mixture is sticky, and you’ll thank me later.
- Small bowl of water — Dip your fingers in water before shaping. This is the secret to working with Rice Krispie treats without losing your mind.
- Cooling rack or extra sheet pan — For letting the shaped ghosts set. Any flat surface works.
If you don’t have a rubber spatula, a wooden spoon works fine — just spray it with cooking spray first to prevent sticking. And if you don’t have parchment paper, aluminum foil lightly greased with butter works in a pinch. I’ve done it. It’s not ideal, but it works.
Preparation Method
Alright, let’s make some ghosts. This process is straightforward, but there are a few tricks that make the difference between “cute” and “oh-my-gosh-these-are-adorable.”
- Prep your workspace. Line a large sheet pan or your countertop with parchment paper. Lightly grease your hands, a rubber spatula, and the inside of a large pot or microwave-safe bowl with butter or cooking spray. This step is non-negotiable — the mixture will stick to everything if you skip it. Ask me how I know.
- Melt the butter. In your large pot over medium-low heat, melt the 3 tablespoons of butter. Stir it occasionally so it doesn’t burn. If using the microwave, melt the butter in a large bowl for about 30 seconds. You want the butter fully melted but not sizzling.
- Add the marshmallows. Pour the entire 10-ounce bag of marshmallows into the pot with the melted butter. Stir constantly until the marshmallows are completely melted and smooth. This takes about 3-4 minutes on the stovetop or about 1-2 minutes in the microwave (stir every 30 seconds). The mixture should be glossy and stretchy when you lift the spatula. If you’re adding vanilla extract, stir it in now.
- Remove from heat and add the cereal. Take the pot off the heat immediately. Pour in the 6 cups of Rice Krispies cereal all at once. Stir gently but thoroughly until all the cereal is coated in the marshmallow mixture. Be patient here — you want every piece of cereal covered, but you don’t want to crush the cereal by stirring too aggressively. I use a folding motion, like I’m folding in egg whites, to keep the cereal intact.
- Let it cool slightly. This is the step most recipes skip, and it’s the most important one. Let the mixture sit in the pot for 2-3 minutes until it’s cool enough to handle but still warm. If you try to shape it immediately, it’s too sticky and will glue itself to your fingers. If you wait too long, it becomes hard and crumbly. You want it warm enough to mold but cool enough to touch without yelping.
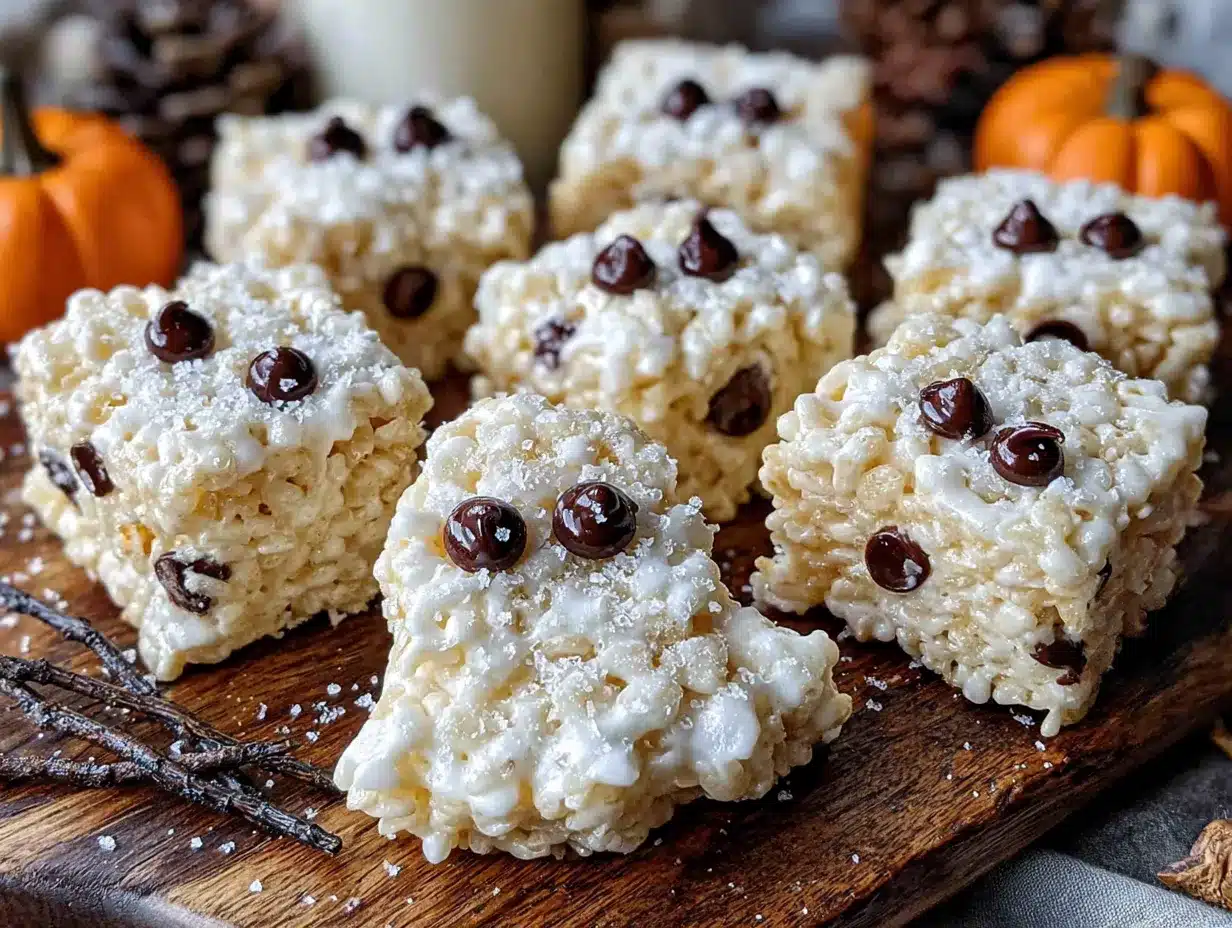
- Shape the ghosts. Dip your hands in a small bowl of water (this is the secret!). Shake off the excess water. Grab a handful of the mixture — about the size of a golf ball for small ghosts or a tennis ball for larger ones. Roll it gently into a ball, then slightly elongate it into an oval or teardrop shape. Pinch the top to create a slight peak for the ghost’s head. Place it on the parchment paper. Repeat with the remaining mixture. You should get about 12-15 medium ghosts from one batch.
- Add the eyes. While the treats are still slightly warm and soft, press two candy eyes into each ghost. Place them close together near the top of the shape. If the mixture has cooled too much and the eyes won’t stick, dip the back of each candy eye in a tiny bit of melted marshmallow mixture before pressing it on. I learned this trick after watching three eyes roll off my first batch.
- Let them set completely. Allow the ghosts to cool and set for at least 30 minutes at room temperature. They’ll firm up as they cool. Don’t try to move them too early — they need time to become stable. I once tried to transfer a ghost too soon, and it literally fell apart in my hands. Sad ghost.
- Optional decoration. If you want to get fancy, you can drizzle a little melted white chocolate over the tops or dust them with powdered sugar for a “spooky” effect. I’ve done both, and the powdered sugar look is especially fun — it makes them look like they’ve been haunting a flour mill.
Cooking Tips & Techniques
I’ve made these Easy Halloween Rice Krispie Ghost Treats more times than I care to count, and I’ve made every mistake in the book. Here’s what I’ve learned so you don’t have to repeat my errors.
The marshmallow-to-cereal ratio is everything. Too many marshmallows and your ghosts will be sticky and saggy. Too few, and they’ll be dry and crumbly. The standard 10-ounce bag to 6 cups of cereal is perfect. Don’t eyeball it — measure it. I tried to “just guess” one year, and I ended up with a batch that looked more like haunted gravel than ghosts.
Low and slow on the heat. Melt your marshmallows over medium-low heat, not high heat. High heat will scorch the marshmallows, leaving you with a brown, bitter mess. I’ve done this exactly once, and the smell lingered in my kitchen for days. The microwave is actually more forgiving here — just use 30-second intervals and stir between each.
Water is your best friend. Keep that small bowl of water nearby and dip your hands frequently. The water creates a barrier between the sticky mixture and your skin. Re-dip between every ghost. If your hands start feeling sticky, you’ve waited too long. I once tried to power through without re-wetting, and I ended up with a marshmallow glove on my left hand.
Work quickly but carefully. The mixture sets fast. Have your parchment paper laid out, your candy eyes ready, and your hands greased before you start shaping. I like to set up a little assembly line: bowl of water, bowl of candy eyes, parchment paper. It makes the process much smoother.
Don’t overwork the mixture. When you’re stirring the cereal into the marshmallow, stop as soon as everything is coated. Over-stirring crushes the cereal and makes the treats dense and hard. You want them light and airy, like a little ghost cloud.
If the mixture gets too hard: Pop it in the microwave for 10-15 seconds to soften it up. This works like a charm. Just don’t overdo it, or you’ll end up with a sticky mess again.
Variations & Adaptations
One of the best things about this recipe is how easy it is to adapt. Here are some variations I’ve tried and loved.
Spooky Pumpkin Treats
Add a few drops of orange food coloring to the marshmallow mixture before adding the cereal. Shape into balls instead of ghosts, and use green candy melts or a bit of green frosting to add a little stem on top. These are adorable alongside the ghosts and take zero extra effort.
Chocolate-Dipped Ghosts
Once the ghosts have set completely, melt about 1/2 cup of dark or white chocolate chips. Dip the bottom of each ghost in the chocolate and place it back on the parchment paper to set. The chocolate adds a nice richness and helps the ghosts stand up straighter. I did this for a Halloween party last year, and people lost their minds.
Gluten-Free Version
Use a gluten-free puffed rice cereal instead of Rice Krispies. The texture is slightly different — a bit more crunchy — but they still taste fantastic. Just double-check that your marshmallows are gluten-free too (most are, but some brands add wheat starch).
Vegan Adaptation
Use vegan marshmallows (Dandies brand works great) and plant-based butter. The texture is a tiny bit different — the vegan marshmallows don’t stretch quite as much — but they still shape beautifully. I’ve made these for a vegan friend’s Halloween party, and they were a hit.
Peanut Butter Ghosts
Stir in 1/4 cup of creamy peanut butter along with the marshmallows. The peanut butter adds a savory note that balances the sweetness perfectly. Just be aware that these will be slightly softer and may not hold their shape as well. I’d recommend making them smaller if you try this version.
Serving & Storage Suggestions
These Easy Halloween Rice Krispie Ghost Treats are best served at room temperature. The texture is perfect — chewy but firm — and the candy eyes stay put. I like to arrange them on a black or orange platter for maximum Halloween effect. A few scattered candy pumpkins or fake spiderwebs around the platter add to the spooky vibe.
For a party, I’ll sometimes put each ghost in a small cupcake liner. It makes them easier to grab and adds a festive touch. White liners work best — they look like little ghost beds.
Storage: Store these in an airtight container at room temperature for up to 5 days. Do not refrigerate them — the cold air makes them hard and stale. If you live in a humid climate, add a piece of bread to the container to absorb excess moisture. I learned this from my grandmother, and it works like magic. Change the bread every day.
Freezing: You can freeze these for up to 3 months. Wrap each ghost individually in plastic wrap, then place them in a freezer bag. Thaw at room temperature for about 30 minutes before serving. The texture won’t be quite as perfect as fresh, but they’re still delicious.
Reheating: If your treats have gone a bit stale (it happens), pop one in the microwave for 5-10 seconds. It softens them right up. Just don’t overdo it, or you’ll have a puddle of marshmallow on your plate.
Flavor-wise, these are actually better the next day. The marshmallow and cereal have time to meld together, creating a more uniform texture. So don’t stress about making them the day before — they’ll be perfect.
Nutritional Information & Benefits
Let’s be honest — these are a treat, not a health food. But here’s the estimated breakdown per ghost (based on 12 ghosts per batch):
| Nutrient | Amount per Ghost |
|---|---|
| Calories | 180 |
| Total Fat | 3g |
| Saturated Fat | 2g |
| Carbohydrates | 36g |
| Sugar | 18g |
| Protein | 2g |
| Sodium | 150mg |
Now, the bright side: Rice Krispies are fortified with iron and B vitamins, so there’s a tiny nutritional silver lining. Marshmallows are made from gelatin, which contains collagen — not that I’m claiming these are a beauty food, but hey, every little bit counts.
For dietary considerations: These are nut-free (assuming you don’t add peanut butter) and egg-free. They are not gluten-free unless you use a certified gluten-free cereal. They are also not vegan unless you use vegan marshmallows and butter.
My personal take? Halloween comes once a year. These treats are about fun, not nutrition. Make them, enjoy them, and don’t stress about the sugar content. Balance is everything, and a few ghosts won’t undo your healthy habits.
Conclusion
These Easy Halloween Rice Krispie Ghost Treats are everything I want in a holiday recipe: quick, simple, adorable, and absolutely delicious. They came from the most unexpected source — a stranger in a cat costume at the hardware store — and they’ve become a staple of my October baking rotation.
What I love most about them is how they bring people together. Every time I make them, someone asks for the recipe. Kids light up when they see them. Adults can’t resist grabbing one (or three). They’re a little bit of Halloween magic that takes almost no effort.
I’d love to hear how yours turn out! Did you add any fun variations? Did your kids help shape the ghosts? Drop a comment below and let me know. And if you’re looking for more easy Halloween treats, I’ve got a few more up my sleeve — just ask the Cat Lady.
Happy haunting, and happy snacking!
Frequently Asked Questions
Can I use mini marshmallows instead of regular ones?
Yes, absolutely. Use about 4 cups of mini marshmallows instead of the 10-ounce bag of regular ones. Mini marshmallows melt faster, so keep an eye on them to avoid scorching.
How do I keep the mixture from sticking to my hands?
Keep a small bowl of water nearby and dip your hands in it before handling the mixture. The water creates a barrier that prevents sticking. Re-dip between every ghost for best results.
Can I make these ahead of time?
Yes! These store beautifully. Make them up to 2 days in advance and keep them in an airtight container at room temperature. They actually taste even better the next day.
My ghosts turned out flat. What did I do wrong?
You likely pressed the mixture too firmly when shaping, or you used too much butter. The mixture should be handled gently — think of it like shaping a snowball. Also, make sure your marshmallow-to-cereal ratio is correct.
Can I use a different cereal?
You can, but the texture will change. Cocoa Krispies make chocolate ghosts (fun!), and Fruity Pebbles create colorful monsters. Just note that different cereals have different densities, so you may need to adjust the amount slightly.
Pin This Recipe!
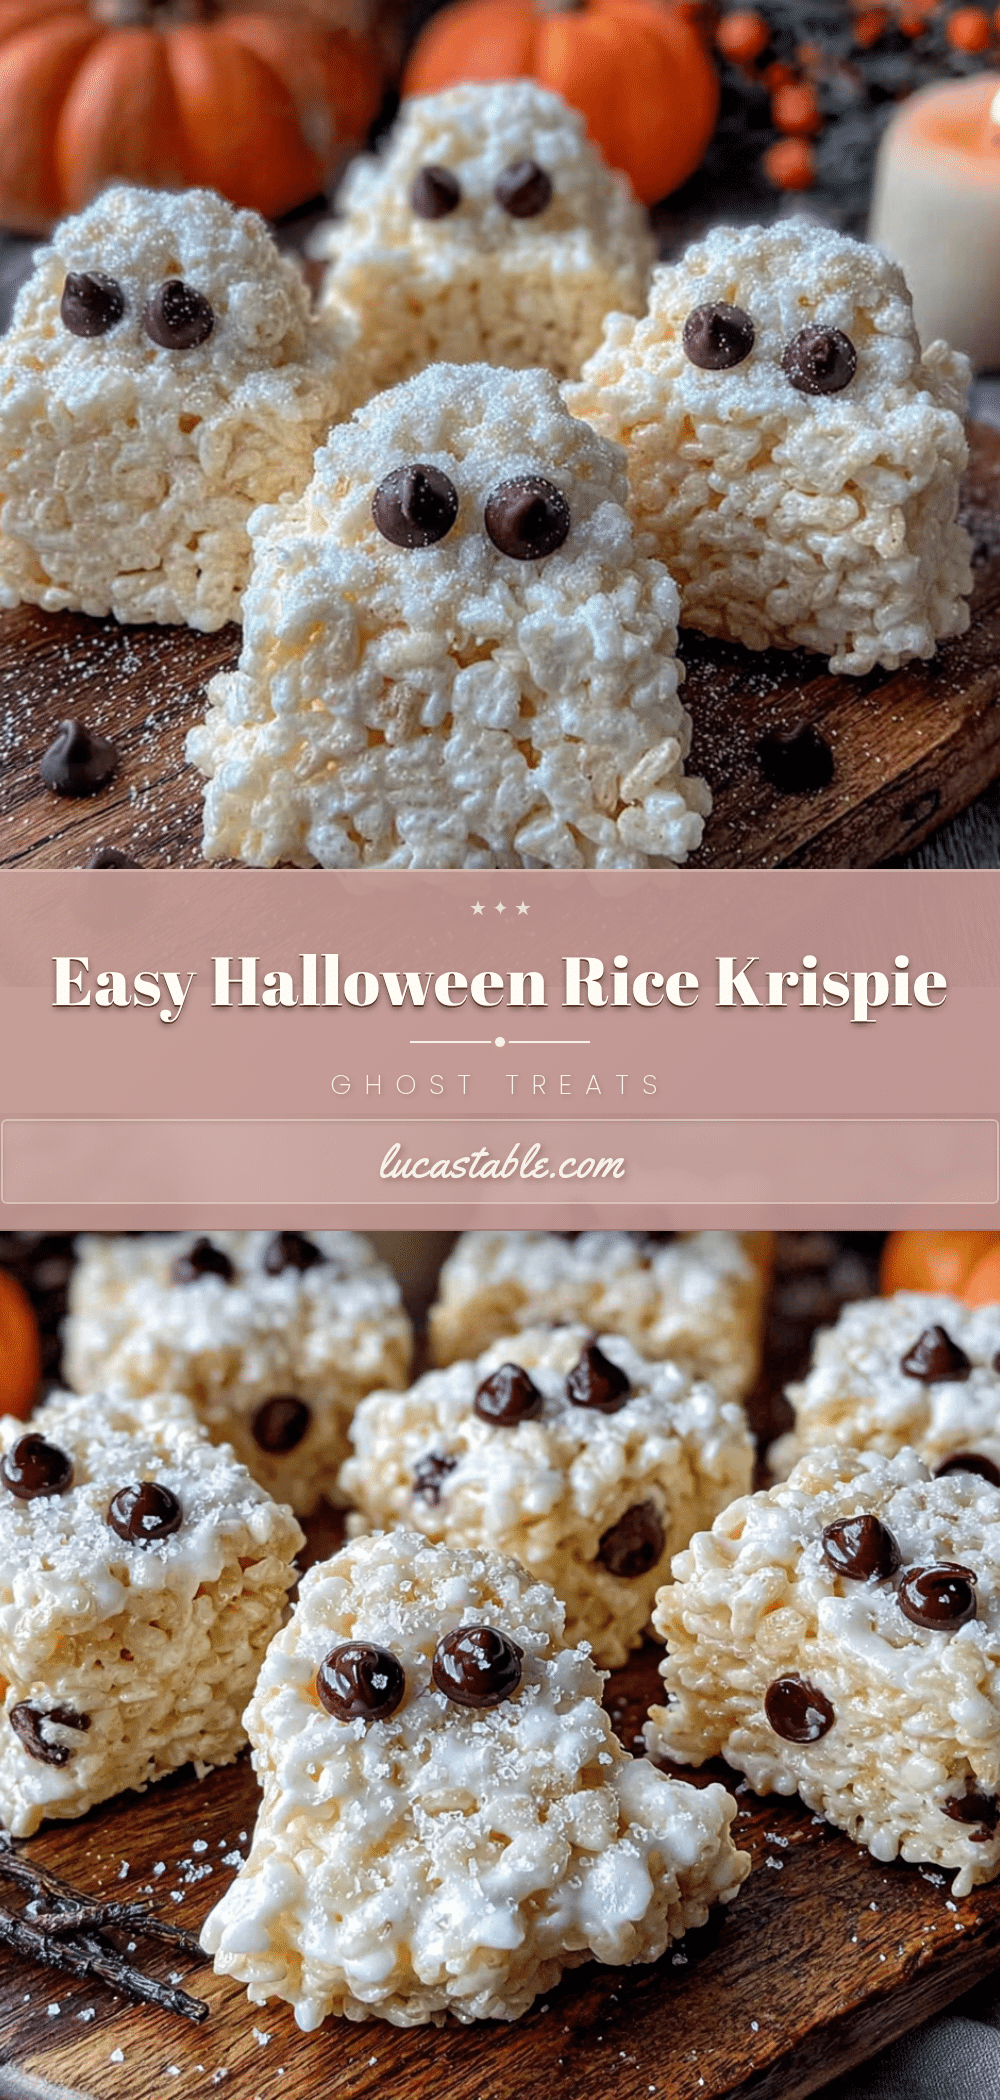
Easy Halloween Rice Krispie Ghost Treats in 20 Minutes
Quick and adorable no-bake Halloween treats made with Rice Krispies, marshmallows, and candy eyes. Perfect for last-minute parties or bake sales, these ghost-shaped treats are ready in just 20 minutes with only 4 simple ingredients.
- Prep Time: 10 minutes
- Cook Time: 10 minutes
- Total Time: 20 minutes
- Yield: 12-15 servings 1x
- Category: Dessert
- Cuisine: American
Ingredients
- 6 cups Rice Krispies cereal
- 1 package (10 oz) regular marshmallows
- 3 tablespoons unsalted butter
- Candy eyes (small round, about 1/4 inch diameter)
- 1/2 teaspoon vanilla extract (optional)
- Pinch of salt (optional)
- Orange food coloring (optional)
- White candy melts (optional)
Instructions
- Prep your workspace: Line a large sheet pan or countertop with parchment paper. Lightly grease your hands, a rubber spatula, and the inside of a large pot or microwave-safe bowl with butter or cooking spray.
- Melt the butter: In a large pot over medium-low heat, melt 3 tablespoons of butter. Stir occasionally so it doesn’t burn. If using the microwave, melt the butter in a large bowl for about 30 seconds.
- Add the marshmallows: Pour the entire 10-ounce bag of marshmallows into the pot with the melted butter. Stir constantly until the marshmallows are completely melted and smooth (about 3-4 minutes on stovetop or 1-2 minutes in microwave, stirring every 30 seconds). If using vanilla extract, stir it in now.
- Remove from heat and add the cereal: Take the pot off the heat immediately. Pour in 6 cups of Rice Krispies cereal all at once. Stir gently but thoroughly until all the cereal is coated in the marshmallow mixture, using a folding motion to keep the cereal intact.
- Let it cool slightly: Let the mixture sit in the pot for 2-3 minutes until it’s cool enough to handle but still warm.
- Shape the ghosts: Dip your hands in a small bowl of water (shake off excess). Grab a handful of mixture (golf ball to tennis ball size). Roll gently into a ball, then slightly elongate into an oval or teardrop shape. Pinch the top to create a slight peak for the ghost’s head. Place on parchment paper. Repeat with remaining mixture (makes about 12-15 medium ghosts).
- Add the eyes: While the treats are still slightly warm and soft, press two candy eyes into each ghost near the top. If the mixture has cooled too much, dip the back of each candy eye in a tiny bit of melted marshmallow mixture before pressing it on.
- Let them set completely: Allow the ghosts to cool and set for at least 30 minutes at room temperature.
- Optional decoration: Drizzle melted white chocolate over the tops or dust with powdered sugar for a spooky effect.
Notes
Keep a small bowl of water nearby and dip your hands frequently to prevent sticking. Work quickly as the mixture sets fast. For best results, use fresh Rice Krispies cereal and Jet-Puffed marshmallows. Store in an airtight container at room temperature for up to 5 days. Do not refrigerate. Can be frozen for up to 3 months.
Nutrition
- Serving Size: 1 ghost
- Calories: 180
- Sugar: 18
- Sodium: 150
- Fat: 3
- Saturated Fat: 2
- Carbohydrates: 36
- Protein: 2
Keywords: Halloween treats, Rice Krispie treats, ghost treats, no-bake desserts, easy Halloween recipes, kid-friendly Halloween, 20-minute recipe


