There used to be this tiny Vietnamese sandwich shop tucked behind a laundromat on Grand Avenue that made the most incredible honey garlic chicken. When they closed—just vanished one day with a handwritten sign taped to the door—I honestly felt a little lost. That sauce was something else. Sticky, savory, with just enough sweetness to make you close your eyes after every bite. After maybe seven tries—some burnt, some way too salty, one that my husband politely called “aggressively garlicky”—I finally got it.
And here’s the thing. This isn’t that restaurant’s recipe. I don’t have their secret. But this version? It’s better in its own way. It’s weeknight-friendly, made with stuff you probably already have in your fridge, and it comes together in about 30 minutes. No marinating overnight. No fancy techniques. Just juicy, golden-brown chicken breasts coated in a glossy honey garlic sauce that clings to every bite.
I remember the night it finally clicked. I was rushing to get dinner on the table after a long Tuesday, and I thought, “What if I just baste the chicken halfway through instead of pouring all the sauce on at once?” That little tweak changed everything. The chicken stayed moist, the sauce caramelized perfectly, and my kid actually asked for seconds—which, let me tell you, never happens. Maybe you’ve been there, standing in front of your oven wondering why your baked chicken always turns out dry. I get it. That’s exactly why I kept testing until this worked every single time.
This recipe has become my go-to for those nights when I need something reliable. It’s not fancy, but it’s honest. And honestly? That’s what makes it worth sharing.
Why You’ll Love This Recipe
Let me tell you why this honey garlic baked chicken has earned a permanent spot in my weekly rotation. After testing this recipe more times than I care to count—including one memorable disaster where I mistook soy sauce for fish sauce—I can confidently say this version delivers every time.
- Quick & Easy: From fridge to table in about 30 minutes. No complicated steps, no waiting around. Perfect for those nights when you walk in the door at 6 and need dinner by 6:30.
- Simple Ingredients: You probably have most of this in your kitchen right now. Honey, soy sauce, garlic, chicken breasts—that’s it. No trips to specialty stores required.
- Perfect for Busy Weeknights: This is the kind of recipe that saves your sanity on a Wednesday. One dish, minimal cleanup, and it pairs with practically any side you have on hand.
- Crowd-Pleaser: My kids devour it. My in-laws ask for the recipe. Even my picky neighbor who “doesn’t really like chicken” came back for seconds.
- Unbelievably Delicious: That sticky, savory-sweet glaze is next-level comfort food. The garlic mellows as it bakes, the honey caramelizes into this gorgeous golden crust, and the chicken stays tender and juicy.
What makes this recipe different from all the other honey garlic chicken recipes out there? It’s the technique. Instead of drowning the chicken in sauce and hoping for the best, you baste it halfway through. This simple step ensures the sauce reduces into a thick, glossy glaze rather than a watery mess. The chicken browns beautifully without drying out. I’ve tried the “dump and bake” method, and honestly? It never works as well.
This recipe isn’t just good—it’s the kind that makes you close your eyes after the first bite. It’s comfort food reimagined: faster, simpler, but with the same soul-soothing satisfaction. Perfect for impressing guests without stress, or turning a regular Tuesday into something memorable.
What Ingredients You Will Need
This recipe uses simple, wholesome ingredients to deliver bold flavor and satisfying texture without the fuss. Most of these are pantry staples you probably already have, which is exactly what you want on a busy weeknight.
For the Chicken
- 4 boneless, skinless chicken breasts (about 1.5 pounds total) – Look for breasts that are similar in size so they cook evenly. If some are much thicker than others, pound them to an even thickness. I use a rolling pin covered in plastic wrap—works like a charm.
- 1 tablespoon olive oil – Helps the seasoning stick and encourages browning. Avocado oil works too if that’s what you have.
- ½ teaspoon salt – I prefer fine sea salt for even distribution.
- ¼ teaspoon black pepper – Freshly ground is best, but pre-ground works in a pinch.
- ½ teaspoon garlic powder – Not the same as fresh garlic, but it adds a nice baseline flavor. I like the McCormick brand for consistency.
For the Honey Garlic Sauce
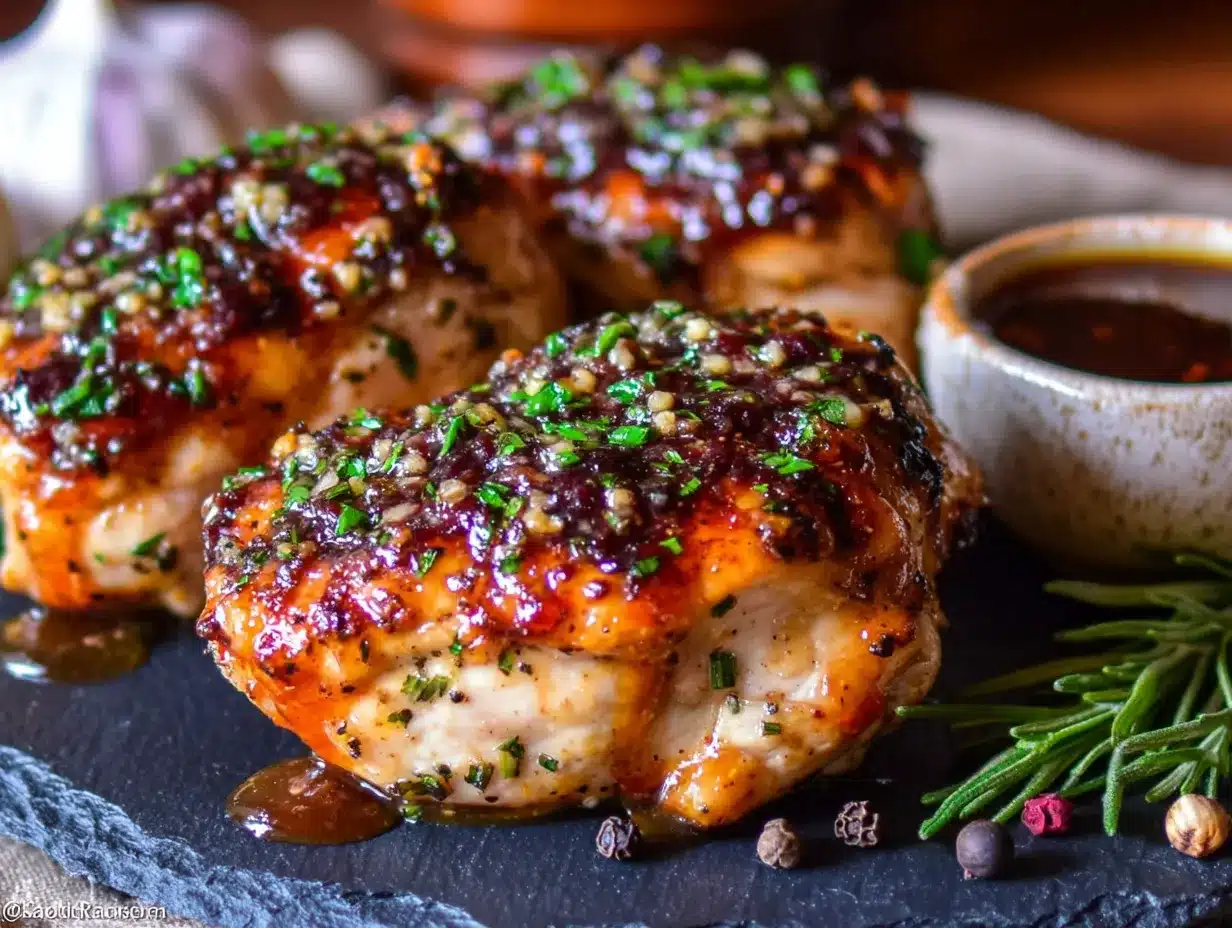
- ⅓ cup honey – Use a runny, liquid honey for the best consistency. If your honey has crystallized, warm it gently in the microwave for 10 seconds. Avoid strong-flavored honeys like buckwheat—they can overpower the dish.
- ¼ cup low-sodium soy sauce – Regular soy sauce works too, but the sauce will be saltier. For a gluten-free option, use tamari or coconut aminos. I’ve tested all three, and tamari is my favorite for its slightly richer flavor.
- 4 cloves garlic, minced – Fresh garlic is non-negotiable here. The pre-minced stuff in a jar? It just doesn’t deliver the same punch. Take the extra 30 seconds to mince fresh cloves—you’ll taste the difference.
- 1 tablespoon rice vinegar – Adds a subtle tang that balances the sweetness. Apple cider vinegar works as a substitute in a pinch.
- 1 teaspoon sesame oil – Optional, but highly recommended. It adds a nutty depth that makes the sauce taste more complex. Look for toasted sesame oil for maximum flavor.
- 1 tablespoon cornstarch mixed with 2 tablespoons cold water (cornstarch slurry) – This thickens the sauce so it clings to the chicken instead of running all over the plate. Don’t skip this—it’s the secret to that glossy, restaurant-quality finish.
For Garnish (Optional but Recommended)
- Sesame seeds – Toasted white or black sesame seeds add a nice visual pop.
- Sliced green onions – Adds freshness and a mild onion kick.
- Fresh parsley or cilantro – A sprinkle of green makes the dish look finished.
Ingredient Selection Tip: For the best texture, choose chicken breasts that are pink, plump, and free of any slimy spots. If you’re using frozen chicken, thaw it completely in the refrigerator overnight. Partially frozen chicken will release too much water and steam instead of browning.
Substitution Guidance: You can swap the chicken breasts for boneless, skinless thighs if you prefer dark meat. Thighs are more forgiving and stay juicy even if you overcook them slightly. Just increase the baking time by 5-7 minutes. For a vegetarian version, try this sauce with firm tofu or cauliflower florets—both work beautifully.
Equipment Needed
You don’t need a fancy kitchen to make this recipe work. Here’s what you’ll need:
- 9×13-inch baking dish – Glass or ceramic works best. Metal pans can react with the acidic ingredients and leave a metallic taste. I use a Pyrex dish that I’ve had for years—it’s never let me down.
- Small mixing bowl – For whisking the sauce ingredients together.
- Whisk or fork – To combine the sauce until smooth.
- Measuring cups and spoons – Accuracy matters with the honey and soy sauce.
- Chef’s knife and cutting board – For mincing the garlic and slicing the green onions.
- Tongs – For flipping the chicken halfway through. A spatula works too, but tongs give you more control.
- Meat thermometer – This is the single most important tool for perfect chicken. Don’t guess—check the temperature. I use a simple instant-read thermometer from ThermoPro, and it cost less than $15.
- Pastry brush (optional) – For basting the sauce onto the chicken. A spoon works fine if you don’t have one.
Budget-Friendly Tip: If you don’t own a meat thermometer, you can check doneness by cutting into the thickest part of the chicken. The juices should run clear, and the meat should be opaque all the way through. But honestly? Spend the few dollars on a thermometer. It’s a game-changer.
Preparation Method
Let’s get cooking. This recipe moves fast, so read through all the steps before you start. Trust me—you don’t want to be scrambling for the cornstarch while your chicken is in the oven.
- Preheat your oven to 400°F (200°C). Position the rack in the center of the oven. While it’s heating, take your chicken breasts out of the fridge and let them sit at room temperature for about 10 minutes. This helps them cook more evenly.
- Prep the chicken. Pat the chicken breasts dry with paper towels. This is crucial—wet chicken won’t brown properly. If any breasts are thicker than 1 inch, place them between two sheets of plastic wrap and gently pound them to an even thickness. Don’t go crazy; you’re not making chicken paper. Just aim for uniform thickness.
- Season the chicken. Drizzle the olive oil over the chicken and rub it in with your hands. Sprinkle both sides with salt, pepper, and garlic powder. Be generous—the seasoning is your foundation.
- Make the sauce. In a small bowl, whisk together the honey, soy sauce, minced garlic, rice vinegar, and sesame oil (if using). Set aside. Do NOT add the cornstarch slurry yet—that comes later.
- Arrange and bake. Place the seasoned chicken breasts in a single layer in your baking dish. Pour the honey garlic sauce evenly over the top. Bake uncovered for 15 minutes. At this point, the chicken will look pale and the sauce will be thin. Don’t worry—that’s normal.
- Flip and baste. After 15 minutes, remove the dish from the oven. Using tongs, carefully flip each chicken breast over. Spoon some of the pan juices over the top. Return to the oven and bake for another 10-12 minutes.
- Check temperature. The chicken is done when it reaches an internal temperature of 165°F (74°C) at the thickest part. Insert your meat thermometer into the center of the largest breast. If it’s not there yet, pop it back in for 2-3 more minutes.
- Make the glaze. Transfer the cooked chicken to a plate and tent loosely with foil. Pour the pan juices into a small saucepan. Whisk in the cornstarch slurry and bring to a simmer over medium heat. Cook for 1-2 minutes, stirring constantly, until the sauce thickens into a glossy glaze. It should coat the back of a spoon.
- Glaze and serve. Pour the thickened glaze over the chicken or brush it on for a more even coating. Sprinkle with sesame seeds and sliced green onions. Serve immediately.
Sensory Cue: When the sauce is ready, it will look like liquid amber—thick enough to cling to the spoon but still pourable. The garlic will smell fragrant and mellow, not sharp or burnt. If you taste a raw flour flavor from the cornstarch, it needs another 30 seconds on the heat.
Personal Tip: I like to reserve a tablespoon of the glaze before adding it to the chicken. I drizzle it over steamed rice or roasted vegetables for extra flavor. It’s a small thing, but it makes the whole meal feel more intentional.
Cooking Tips & Techniques
After making this honey garlic chicken more times than I can count, I’ve learned a few things the hard way. Here’s what I wish someone had told me:
Don’t overcrowd the pan. If your chicken breasts are touching or overlapping, they’ll steam instead of brown. Use a larger dish or bake in batches if needed. I learned this lesson after a particularly sad batch that looked boiled rather than baked.
Patience with the glaze. When you’re thickening the sauce on the stovetop, resist the urge to crank up the heat. Medium heat is your friend. High heat can cause the honey to burn and turn bitter. I once ruined an entire batch because I got impatient—the sauce went from thin to burnt in about 30 seconds flat.
Let it rest. After the chicken comes out of the oven, let it rest for 5 minutes before slicing. This allows the juices to redistribute throughout the meat. If you cut into it immediately, all those lovely juices will end up on the cutting board instead of in your mouth.
Double the sauce. If you’re serving a crowd or just really love sauce, double the honey garlic mixture. The recipe as written gives you enough for a nice coating, but extra sauce is never a bad thing. Just remember to double the cornstarch slurry too.
Common Mistake to Avoid: Adding the cornstarch slurry too early. If you add it before the chicken is done, the sauce will thicken in the oven and burn around the edges. Always wait until after the chicken is cooked.
Timing Strategy: While the chicken bakes, prep your sides. Rice takes about 20 minutes, steamed broccoli takes 5, and a simple salad takes 10. Everything should be ready around the same time the chicken finishes resting.
Variations & Adaptations
One of the best things about this recipe is how adaptable it is. Here are some variations I’ve tried and loved:
Spicy Honey Garlic Chicken: Add ½ teaspoon of red pepper flakes or a tablespoon of sriracha to the sauce before baking. The heat cuts through the sweetness beautifully. My husband prefers this version, and I’ll sometimes make a half-batch of spicy sauce just for his piece.
Garlic Lover’s Version: Use 6-8 cloves of garlic instead of 4. Roasted garlic also works—just mash 3-4 roasted cloves into the sauce for a sweeter, milder garlic flavor. I tried this during a particularly ambitious cooking session, and it was incredible.
Low-Carb/Keto Adaptation: Replace the honey with a sugar-free honey substitute or use 2 tablespoons of monk fruit sweetener mixed with 2 tablespoons of water. The texture won’t be exactly the same, but the flavor is surprisingly close. Serve with cauliflower rice or roasted vegetables.
Slow Cooker Method: Place the seasoned chicken in a slow cooker, pour the sauce over the top (without the cornstarch slurry), and cook on low for 4-5 hours or high for 2-3 hours. Remove the chicken, thicken the sauce on the stovetop with the cornstarch slurry, and serve. This is my go-to for busy Sundays.
Air Fryer Version: Cook at 375°F (190°C) for 12-15 minutes, flipping halfway through. Brush with the thickened glaze after cooking. The air fryer gives you an even crispier exterior. I tested this on a whim and was shocked by how well it worked.
Dairy-Free and Gluten-Free: This recipe is naturally dairy-free. For gluten-free, simply use tamari or coconut aminos instead of soy sauce. Make sure your cornstarch is certified gluten-free if that’s a concern.
Serving & Storage Suggestions
This honey garlic chicken is versatile enough to pair with just about anything. Here’s how I like to serve it:
Serving Temperature: Serve the chicken hot, straight from the oven. The glaze is at its best when it’s warm and glossy. If you’re serving a crowd, keep the chicken in a warm oven (200°F) for up to 20 minutes while you finish the sides.
Perfect Pairings: Steamed jasmine rice or coconut rice soaks up the extra sauce beautifully. For a lighter option, serve with roasted broccoli, green beans, or a simple cucumber salad. Garlic bread is also a fantastic choice for sopping up every last drop of glaze.
Storage Instructions: Store leftover chicken in an airtight container in the refrigerator for up to 4 days. The flavors actually meld and deepen overnight, so leftovers might taste even better. I’ve been known to make extra just for next-day lunch.
Freezer Instructions: You can freeze the cooked chicken for up to 3 months. Place it in a freezer-safe container with some of the glaze. Thaw overnight in the refrigerator before reheating.
Reheating Methods: The best way to reheat is in a 350°F oven for 10-15 minutes, covered with foil to prevent drying. The microwave works in a pinch, but the glaze can become sticky and the chicken might dry out. If using the microwave, cover the chicken with a damp paper towel and heat in 30-second intervals.
Flavor Development: If you’re meal-prepping, consider making the sauce and seasoning the chicken a day ahead. The chicken will absorb more flavor overnight. Just don’t add the cornstarch slurry until you’re ready to bake.
Nutritional Information & Benefits
Here’s the nutritional breakdown for one serving (one chicken breast with glaze, without sides):
| Nutrient | Amount per Serving |
|---|---|
| Calories | 320 |
| Protein | 35g |
| Fat | 8g |
| Saturated Fat | 1.5g |
| Carbohydrates | 28g |
| Fiber | 0g |
| Sugar | 24g |
| Sodium | 680mg |
Health Benefits: Chicken breast is a lean source of high-quality protein, which supports muscle maintenance and keeps you feeling full. Garlic contains compounds like allicin that may support immune health. Honey provides natural energy and contains antioxidants, though it’s still sugar, so enjoy in moderation.
Dietary Considerations: This recipe is naturally dairy-free and nut-free. For a gluten-free version, use tamari. For a lower-sodium option, use low-sodium soy sauce and reduce the added salt. The sugar content comes primarily from honey, so if you’re watching your sugar intake, consider the low-carb adaptation mentioned above.
Personal Wellness Perspective: I love that this recipe feels indulgent without being heavy. It’s the kind of meal that satisfies a takeout craving while being made entirely from real, recognizable ingredients. That’s a win in my book.
FAQs
Can I use chicken thighs instead of breasts?
Absolutely. Boneless, skinless chicken thighs work beautifully in this recipe. They’re more forgiving and stay juicy even if you cook them a few minutes too long. Increase the baking time by 5-7 minutes and check for an internal temperature of 175°F (80°C) for the best texture.
Can I make this recipe without cornstarch?
Yes, you can. The sauce will be thinner, but it will still taste delicious. You can also try reducing the sauce on the stovetop for longer to thicken it naturally, or use arrowroot powder as a 1:1 substitute for cornstarch.
Can I prep this ahead of time?
Definitely. You can season the chicken and mix the sauce (without the cornstarch slurry) up to 24 hours in advance. Store them separately in the refrigerator. When you’re ready to bake, simply pour the sauce over the chicken and proceed with the recipe.
Why is my chicken dry?
The most common cause is overcooking. Use a meat thermometer to ensure you pull the chicken at exactly 165°F (74°C). Also, make sure you’re not skipping the step of letting the chicken rest after baking. Those 5 minutes make a real difference in juiciness.
Can I double this recipe?
Yes, but use two baking dishes instead of one to avoid overcrowding. Overcrowding leads to steaming rather than browning, and you’ll lose that beautiful golden crust. The baking time should remain roughly the same, but always check the internal temperature.
Conclusion
This honey garlic baked chicken has become one of those recipes I turn to again and again. It’s reliable without being boring, quick without sacrificing flavor, and simple enough that I can make it on a Tuesday night without breaking a sweat. That first successful batch—the one that finally tasted like the memory I’d been chasing—was a genuine victory.
I hope this recipe becomes a staple in your kitchen too. Play with the variations, adjust the garlic to your liking, and don’t be afraid to double the sauce. Cooking should feel like an adventure, not a chore. And honestly? There’s something deeply satisfying about pulling a tray of golden, glazed chicken out of the oven and knowing you made it yourself.
If you try this recipe, I’d love to hear how it turned out. Leave a comment below, share your tweaks, or tag me in your photos. Happy cooking, friend. You’ve got this.
Pin This Recipe!
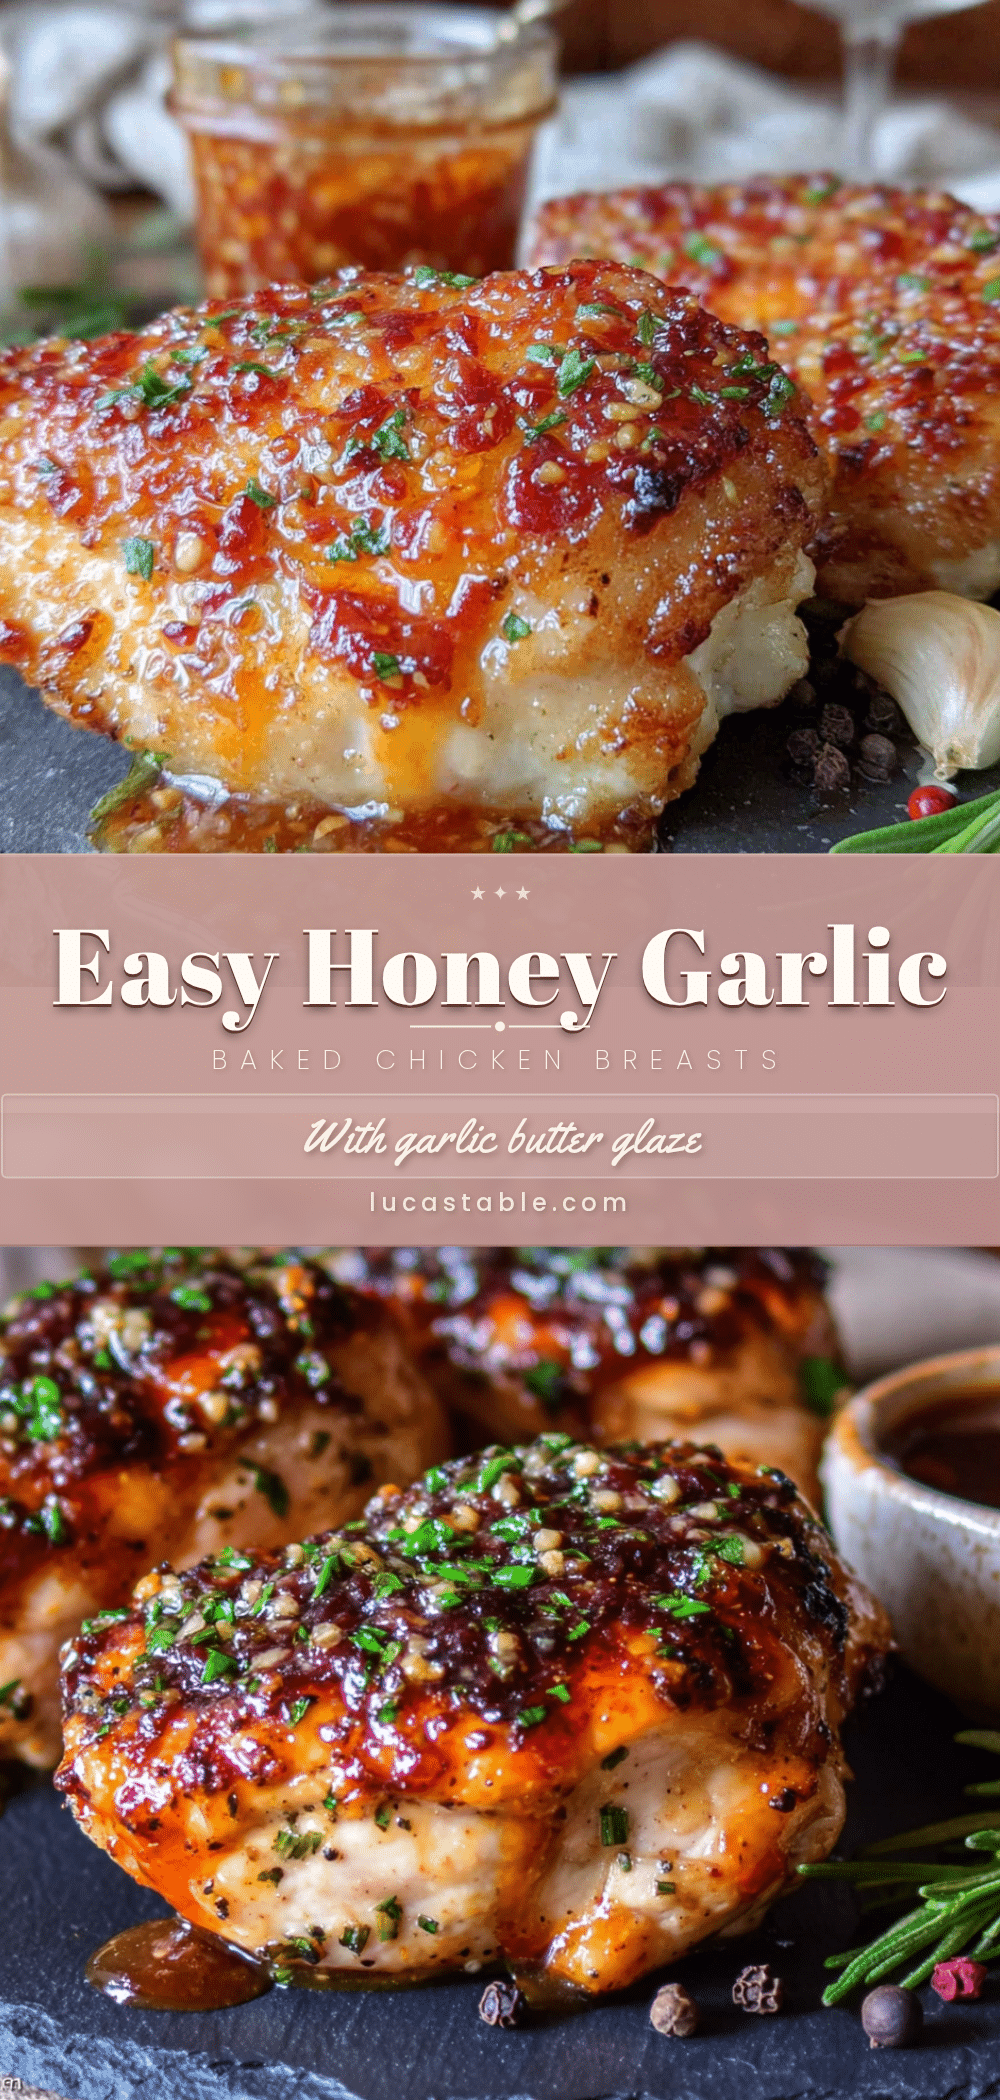
Easy Honey Garlic Baked Chicken Breasts (Best 30-Min Recipe)
Juicy, golden-brown chicken breasts coated in a glossy honey garlic sauce that comes together in about 30 minutes. Perfect for busy weeknights, this recipe uses simple ingredients and a basting technique for a restaurant-quality finish.
- Prep Time: 10 minutes
- Cook Time: 25 minutes
- Total Time: 35 minutes
- Yield: 4 servings 1x
- Category: Main Course
- Cuisine: Asian-inspired
Ingredients
- 4 boneless, skinless chicken breasts (about 1.5 pounds total)
- 1 tablespoon olive oil
- ½ teaspoon salt
- ¼ teaspoon black pepper
- ½ teaspoon garlic powder
- ⅓ cup honey
- ¼ cup low-sodium soy sauce
- 4 cloves garlic, minced
- 1 tablespoon rice vinegar
- 1 teaspoon sesame oil (optional)
- 1 tablespoon cornstarch mixed with 2 tablespoons cold water (cornstarch slurry)
- Sesame seeds (for garnish, optional)
- Sliced green onions (for garnish, optional)
- Fresh parsley or cilantro (for garnish, optional)
Instructions
- Preheat your oven to 400°F (200°C). Position the rack in the center of the oven. Let chicken breasts sit at room temperature for about 10 minutes.
- Pat the chicken breasts dry with paper towels. If any breasts are thicker than 1 inch, pound them to an even thickness.
- Drizzle olive oil over the chicken and rub it in. Sprinkle both sides with salt, pepper, and garlic powder.
- In a small bowl, whisk together honey, soy sauce, minced garlic, rice vinegar, and sesame oil (if using). Set aside. Do not add cornstarch slurry yet.
- Place seasoned chicken in a single layer in a 9×13-inch baking dish. Pour honey garlic sauce evenly over the top. Bake uncovered for 15 minutes.
- After 15 minutes, remove dish from oven. Flip each chicken breast using tongs. Spoon pan juices over the top. Return to oven and bake for another 10-12 minutes.
- Check internal temperature; chicken is done at 165°F (74°C) at the thickest part.
- Transfer cooked chicken to a plate and tent loosely with foil. Pour pan juices into a small saucepan. Whisk in cornstarch slurry and bring to a simmer over medium heat. Cook for 1-2 minutes, stirring constantly, until sauce thickens into a glossy glaze.
- Pour thickened glaze over the chicken or brush it on. Sprinkle with sesame seeds and sliced green onions. Serve immediately.
Notes
For best results, use a meat thermometer to avoid overcooking. Let chicken rest for 5 minutes before slicing. Double the sauce if you like extra glaze. For a gluten-free version, use tamari or coconut aminos instead of soy sauce.
Nutrition
- Serving Size: 1 chicken breast wit
- Calories: 320
- Sugar: 24
- Sodium: 680
- Fat: 8
- Saturated Fat: 1.5
- Carbohydrates: 28
- Protein: 35
Keywords: honey garlic chicken, baked chicken, 30-minute meal, weeknight dinner, easy chicken recipe, honey garlic sauce


