My neighbor, an 80-year-old retired florist named Margie, asked me why I couldn’t just skip peeling the squash. I was in her kitchen, complaining about how my knuckles were raw from wrestling with a butternut squash for a soup I was making for a dinner party that night. I started to explain why that wouldn’t work—the texture would be gritty, the soup would be stringy, it was a cardinal rule of soup-making. Then I stopped. I looked at the pile of honeynut squash on her counter, each one no bigger than my fist, with their thin, delicate skin. I had nothing to lose, honestly. I was already running late and my hand hurt.
So I did it. I halved them, scooped out the seeds, and roasted them skin and all. I mean, I was skeptical. I was ready to tell Margie, “I told you so,” while scraping a fibrous mess into the trash. But the moment I scooped the roasted flesh from the skin—which slipped off like a silk glove—I knew she was right. The flavor was more concentrated, the color a deeper, sunset orange. That was three winters ago, and I haven’t peeled a honeynut squash since. It was one of those humbling moments where the person you’re trying to teach ends up teaching you the most important lesson of the day. This soup, with its nutty brown butter and silky finish, is a direct result of being proven gloriously wrong. It’s the kind of recipe that makes you wonder why you ever did it the hard way.
Why You’ll Love This Recipe
Let’s be real—you’re here because you want a soup that tastes like you spent hours in the kitchen but actually comes together in the time it takes to watch a single episode of your favorite show. This Easy Honeynut Squash Soup with Brown Butter is exactly that. It’s the weeknight hero you didn’t know you needed.
- Quick & Easy: From start to finish, this soup is on the table in about 20 minutes of active time. The oven does most of the heavy lifting while you get on with your evening.
- Simple Ingredients: You likely already have onion, garlic, broth, and butter in your kitchen. The honeynut squash is the star, and it’s easy to find in most grocery stores during fall and winter.
- Perfect for Busy Weeknights: This is the soup you make on a Tuesday when you’re tired and hungry and need something warm and satisfying without a complicated cleanup.
- Crowd-Pleaser: I’ve served this to picky kids, skeptical in-laws, and foodie friends, and every single person has asked for the recipe. It’s that good.
- Unbelievably Delicious: The brown butter adds a nutty, toasty depth that makes this soup taste like it came from a fancy restaurant. It’s comfort food at its finest—rich, creamy, and deeply satisfying.
What makes this recipe different from all the other squash soups out there? It’s the combination of the super-sweet, concentrated flavor of honeynut squash (which is naturally sweeter than butternut) and the nutty, almost caramel-like flavor of brown butter. Plus, the no-peel hack means you get all that flavor with none of the hassle. It’s not just another squash soup—it’s the best version of squash soup, designed for real life.
What Ingredients You Will Need
This recipe uses simple, wholesome ingredients to deliver a bowl of pure comfort. The honeynut squash does the heavy lifting with its naturally sweet, dense flesh, while the brown butter adds a layer of complexity that makes this soup unforgettable.
For the Soup Base
- 3 pounds honeynut squash (about 4-5 small squash) — Look for squash that feel heavy for their size with no soft spots. The skin should be a deep tan-orange color.
- 2 tablespoons olive oil — For roasting the squash. A good quality extra virgin olive oil adds a subtle fruitiness.
- 1 medium yellow onion, roughly chopped — Adds a savory base note that balances the sweetness of the squash.
- 3 cloves garlic, smashed — I prefer using fresh garlic here, but jarred minced garlic works in a pinch (use about 1 teaspoon).
- 3 cups low-sodium vegetable broth — I recommend homemade vegetable broth if you have it, but store-bought works perfectly. Just watch the salt content.
- 1/2 cup full-fat coconut milk (or heavy cream) — For richness. The coconut milk adds a subtle sweetness that pairs beautifully with the squash.
- 1/2 teaspoon ground cinnamon — A warm spice that highlights the natural sweetness of the squash.
- 1/4 teaspoon ground nutmeg — Freshly grated if you have it, but pre-ground works fine.
- Salt and freshly ground black pepper — To taste.
For the Brown Butter

- 4 tablespoons unsalted butter — I prefer Kerrygold or another European-style butter for its higher fat content, which browns more evenly and has a richer flavor.
- 6 fresh sage leaves — Optional, but highly recommended. The sage gets crispy in the brown butter and adds an earthy, aromatic note.
For Garnish (Optional but Recommended)
- 2 tablespoons pepitas (pumpkin seeds) — Toasted for crunch.
- 1 tablespoon maple syrup — For drizzling.
- Flaky sea salt — Like Maldon, for finishing.
Substitution Guidance: If you can’t find honeynut squash, you can substitute butternut squash. Just note that you’ll need to peel it before roasting (sorry, the no-peel hack only works with thin-skinned squash). For a dairy-free version, use a full-fat canned coconut milk and vegan butter for the brown butter. The soup will still be delicious, just slightly less rich.
Equipment Needed
You don’t need a fancy kitchen to make this soup. Here’s what you’ll need:
- Large baking sheet — For roasting the squash. A rimmed sheet pan works best to catch any juices.
- Parchment paper — For easy cleanup. Trust me, roasted squash can be sticky.
- Large heavy-bottomed pot or Dutch oven — I use my 5.5-quart Le Creuset, but any heavy pot will work. The key is even heat distribution to prevent the brown butter from burning.
- Immersion blender — My preferred tool for pureeing soups. It’s less cleanup than a countertop blender and you can blend right in the pot. If you don’t have one, a regular blender works—just be careful with hot liquids.
- Sharp chef’s knife — For halving the squash. A good knife makes this job much safer and easier.
- Measuring cups and spoons — For accuracy.
Budget-Friendly Tip: If you don’t have an immersion blender, let the soup cool slightly before transferring it to a regular blender in batches. Fill the blender no more than halfway, hold the lid down with a towel, and blend on low speed to avoid splattering.
Preparation Method
This soup comes together in about 20 minutes of active time. The key is to let the oven do the work while you prep the other ingredients. Here’s how to make it:
- Preheat your oven to 400°F (200°C). Line a large baking sheet with parchment paper for easy cleanup.
- Prepare the squash: Using a sharp chef’s knife, carefully halve each honeynut squash lengthwise. Scoop out the seeds and stringy bits with a spoon. Don’t bother peeling them—the skin will soften during roasting and blend right into the soup. Place the squash halves cut-side down on the prepared baking sheet. Drizzle with the olive oil and season with a pinch of salt. Roast for 25-30 minutes, until the squash is tender when pierced with a fork and the skin is slightly wrinkled. The flesh should be deep orange and smell sweet and caramelized.
- While the squash roasts, start the soup base: In a large heavy-bottomed pot or Dutch oven, heat 1 tablespoon of olive oil over medium heat. Add the chopped onion and cook, stirring occasionally, until softened and translucent, about 5-7 minutes. Add the smashed garlic cloves and cook for another minute until fragrant. The onions should be soft but not browned.
- Make the brown butter: In a small skillet, melt the butter over medium heat. Swirl the pan occasionally as the butter melts. It will start to foam, then the foam will subside, and you’ll see brown specks forming at the bottom of the pan. This is the milk solids toasting—that’s where the flavor comes from. As soon as the butter smells nutty and turns a golden-brown color (about 3-4 minutes), immediately remove it from the heat. If you’re using sage leaves, add them to the hot butter—they’ll crisp up in about 30 seconds. Set the skillet aside.
- Combine and simmer: When the squash is done roasting, let it cool for a few minutes until you can handle it. Scoop the flesh from the skins—it should come away easily. Add the squash flesh to the pot with the onions and garlic. Pour in the vegetable broth and bring to a simmer over medium heat. Let it cook together for 5 minutes so the flavors meld.
- Blend until silky: Remove the pot from the heat. Using an immersion blender, puree the soup until completely smooth. If using a regular blender, work in batches and be very careful with the hot liquid. The soup should be velvety and thick at this point.
- Finish the soup: Stir in the coconut milk (or heavy cream), cinnamon, and nutmeg. Season with salt and pepper to taste. If the soup is too thick, add a splash more broth or water until it reaches your desired consistency. Taste and adjust seasoning—you want the sweetness of the squash balanced with the savory notes from the broth and the warmth of the spices.
- Serve: Ladle the soup into bowls. Drizzle each serving with the brown butter (and crispy sage leaves, if using). Top with toasted pepitas, a drizzle of maple syrup, and a pinch of flaky sea salt. Serve immediately.
Cooking Tips & Techniques
I’ve made this soup at least two dozen times, and I’ve learned a few things along the way. Here are my best tips for getting it right every time:
Don’t rush the brown butter. This is the one step where patience pays off. The difference between brown butter and burnt butter is about 15 seconds. Watch for the color to turn a deep amber and smell that nutty aroma—then take it off the heat immediately. I’ve definitely had to start over once or twice because I got distracted. It happens. Just start fresh if you burn it.
Roast the squash cut-side down. This creates a caramelized surface on the cut side that adds a deeper, almost roasted flavor to the soup. If you roast them cut-side up, you’ll get more steaming than roasting, and you’ll miss out on that concentrated sweetness.
Season in layers. I add salt at each stage—a pinch on the squash before roasting, a pinch on the onions as they cook, and a final adjustment at the end. This builds flavor throughout the process rather than relying on a single seasoning moment.
Use full-fat coconut milk for the best texture. I’ve tried this with light coconut milk, and the soup just isn’t as creamy. The fat is what gives this soup its luxurious mouthfeel. If you’re watching calories, you can use a little less—about 1/4 cup—but don’t skip it entirely.
Multitasking strategy: While the squash roasts, chop your onion and garlic, measure your broth, and get the brown butter ingredients ready. By the time the squash is done, you’ll have everything prepped and ready to go. This soup comes together in about 20 minutes of active time, so it’s perfect for a weeknight when you’re juggling a million things.
Variations & Adaptations
This soup is endlessly adaptable. Here are some of my favorite variations:
Spicy Honeynut Squash Soup: Add 1/2 teaspoon of red pepper flakes along with the onions, or stir in a minced chipotle pepper in adobo sauce when you add the broth. The heat cuts through the sweetness beautifully.
Curried Honeynut Squash Soup: Swap the cinnamon and nutmeg for 1 tablespoon of curry powder and 1/2 teaspoon of ground ginger. Add it when you sauté the onions for a deeper flavor. Top with a dollop of yogurt and fresh cilantro.
Vegan Version: Use full-fat coconut milk instead of heavy cream, and substitute the butter with a high-quality vegan butter (I like Miyoko’s) for the brown butter. The flavor will be slightly different, but still delicious.
Roasted Garlic Version: When you roast the squash, add a whole head of garlic (cut the top off to expose the cloves, drizzle with olive oil, and wrap in foil) to the baking sheet. Roast alongside the squash, then squeeze the soft garlic cloves into the soup before blending. It adds a sweet, mellow garlic flavor that’s incredible.
Make it a Meal: Stir in 1 cup of cooked white beans or shredded rotisserie chicken after blending for added protein. This turns the soup into a hearty dinner that will keep you full for hours.
I personally love the curried version on cold, rainy days. It feels like a warm hug in a bowl. My husband, on the other hand, swears by the spicy version. We’ve learned to make a batch of the base soup and then divide it to customize our bowls. It’s a win-win.
Serving & Storage Suggestions
This soup is best served hot, straight from the pot. The brown butter should be drizzled on top just before serving so it stays warm and fragrant. I like to serve it in shallow bowls with a generous drizzle of the brown butter and a sprinkle of flaky salt. The contrast of the silky soup, the crunchy pepitas, and the crispy sage leaves is pure magic.
What to serve with it: A simple green salad with a bright vinaigrette is the perfect side to balance the richness of the soup. A crusty baguette or sourdough bread is also great for dipping. For a heartier meal, serve it alongside a simple roasted chicken or a grilled cheese sandwich.
Storage: This soup keeps beautifully in the refrigerator for up to 5 days. Store it in an airtight container. The flavors actually deepen and meld overnight, so it might taste even better the next day. I often make a double batch on Sunday and enjoy it for lunches throughout the week.
Freezing: This soup freezes wonderfully. Let it cool completely, then transfer to freezer-safe containers or zip-top bags. Leave about an inch of headspace for expansion. It will keep for up to 3 months. Thaw overnight in the refrigerator before reheating.
Reheating: Reheat gently on the stovetop over medium-low heat, stirring occasionally. Add a splash of broth or water if the soup has thickened too much. You can also microwave individual portions in 30-second bursts, stirring between each. Just be careful not to overheat it, or the coconut milk can separate.
Make-Ahead Note: You can roast the squash up to 3 days in advance and store the flesh in the refrigerator. When you’re ready to make the soup, just proceed with the recipe as written. This cuts the active time down to about 10 minutes.
Nutritional Information & Benefits
This soup is as nutritious as it is delicious. Here’s the approximate nutritional breakdown per serving (based on 4 servings):
| Nutrient | Amount per Serving |
|---|---|
| Calories | 285 |
| Total Fat | 18g |
| Saturated Fat | 10g |
| Carbohydrates | 28g |
| Fiber | 6g |
| Sugar | 10g |
| Protein | 4g |
| Vitamin A | 350% DV |
| Vitamin C | 35% DV |
Health Benefits: Honeynut squash is packed with beta-carotene, which your body converts into vitamin A for healthy skin, eyes, and immune function. It’s also a good source of fiber, which supports digestive health and keeps you feeling full. The brown butter adds healthy fats that help your body absorb the fat-soluble vitamins in the squash. This soup is naturally gluten-free and can easily be made dairy-free and vegan with a few simple swaps.
Dietary Considerations: This recipe is naturally gluten-free and can be made dairy-free by using coconut milk and vegan butter. It’s also suitable for a low-carb diet in moderation—the squash does contain natural sugars, but the fiber content helps balance blood sugar response.
Conclusion
This Easy Honeynut Squash Soup with Brown Butter is proof that the best recipes often come from the simplest moments—like a neighbor’s offhand suggestion that turned out to be genius. It’s quick enough for a busy weeknight, fancy enough for company, and comforting enough to become a regular in your rotation.
I love this soup because it reminds me that cooking doesn’t have to be complicated to be extraordinary. Sometimes the best thing you can do is let the ingredients shine and get out of their way. The honeynut squash does the heavy lifting, and the brown butter just makes everything better.
I’d love to hear how this soup turns out for you. Did you try any of the variations? Do you have a favorite topping? Drop a comment below and let me know—I read every single one. And if you loved this recipe, please share it with a friend who needs a little comfort in a bowl. Happy cooking!
Frequently Asked Questions
Can I use butternut squash instead of honeynut squash?
Yes, you can substitute butternut squash. However, you’ll need to peel it before roasting because the skin is too tough to blend smoothly. The flavor will be slightly less sweet, so you may want to add a tablespoon of maple syrup or brown sugar to compensate.
How do I store leftover brown butter?
Any leftover brown butter can be stored in an airtight container in the refrigerator for up to 2 weeks. It will solidify, so just reheat it gently before using. It’s amazing drizzled over roasted vegetables, popcorn, or pasta.
Can I make this soup in an Instant Pot?
Absolutely! For a quicker version, sauté the onions and garlic in the Instant Pot using the sauté function. Add the halved squash (cut-side down), broth, and seasonings. Pressure cook on high for 8 minutes, then quick release. Remove the squash skins before blending.
Why is my soup too thin?
If your soup is thinner than you’d like, let it simmer uncovered for 5-10 minutes to reduce and concentrate the flavors. You can also add an extra tablespoon of coconut milk or cream to help thicken it. Alternatively, stir in a tablespoon of almond flour or a cooked potato to add body.
Can I freeze this soup?
Yes, this soup freezes beautifully. Let it cool completely, then transfer to freezer-safe containers. It will keep for up to 3 months. Thaw overnight in the refrigerator and reheat gently on the stovetop. The texture may be slightly thinner after thawing, so you may want to stir in a splash of cream when reheating.
Pin This Recipe!
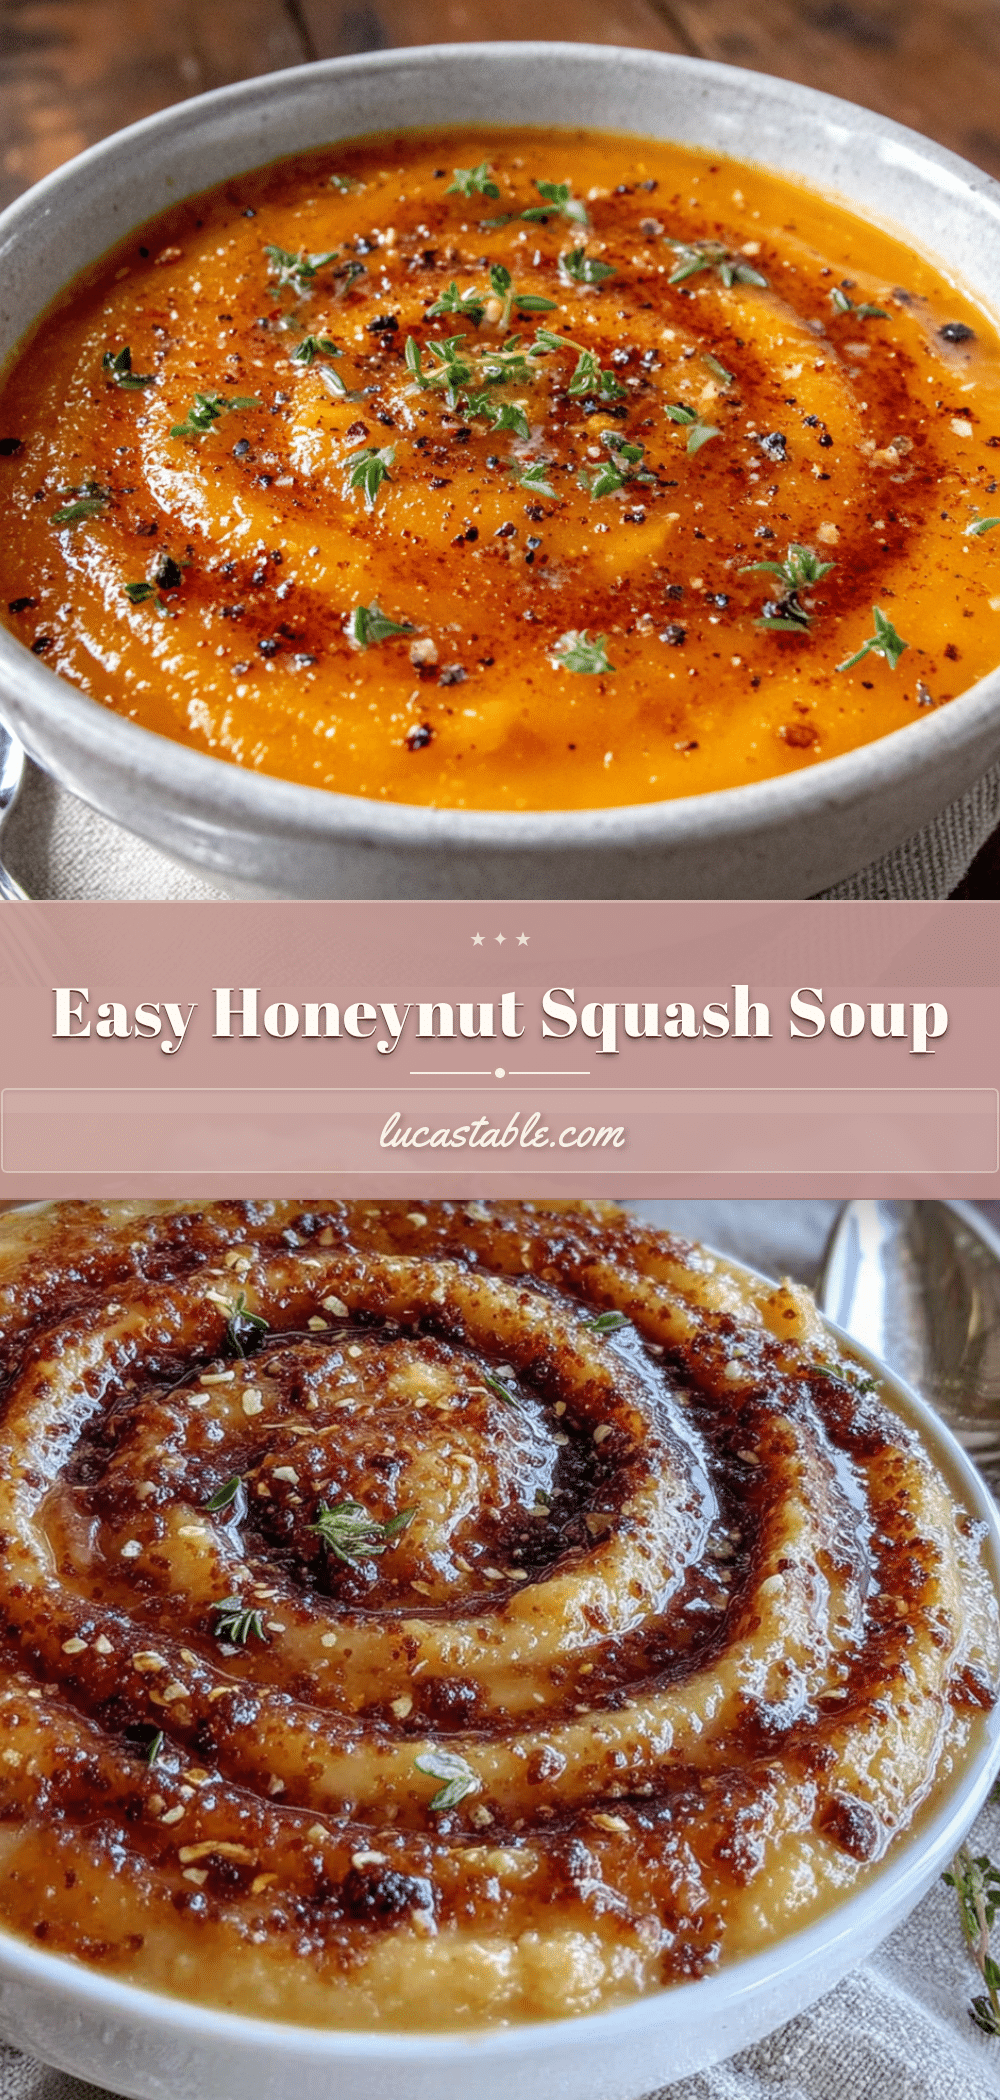
Easy Honeynut Squash Soup with Brown Butter (Best 20-Min Recipe)

This Easy Honeynut Squash Soup with Brown Butter is a quick and delicious weeknight hero, featuring a no-peel hack for the squash and a nutty brown butter finish. It’s silky, comforting, and ready in about 20 minutes of active time.
- Prep Time: 20 minutes
- Cook Time: 30 minutes
- Total Time: 50 minutes
- Yield: 4 servings 1x
- Category: Soup
- Cuisine: American
Ingredients
- 3 pounds honeynut squash (about 4–5 small squash)
- 2 tablespoons olive oil
- 1 medium yellow onion, roughly chopped
- 3 cloves garlic, smashed
- 3 cups low-sodium vegetable broth
- 1/2 cup full-fat coconut milk (or heavy cream)
- 1/2 teaspoon ground cinnamon
- 1/4 teaspoon ground nutmeg
- Salt and freshly ground black pepper, to taste
- 4 tablespoons unsalted butter
- 6 fresh sage leaves (optional)
- 2 tablespoons pepitas (pumpkin seeds), toasted (for garnish)
- 1 tablespoon maple syrup (for garnish)
- Flaky sea salt (for garnish)
Instructions
- Preheat your oven to 400°F (200°C). Line a large baking sheet with parchment paper.
- Using a sharp chef’s knife, carefully halve each honeynut squash lengthwise. Scoop out the seeds and stringy bits with a spoon. Place the squash halves cut-side down on the prepared baking sheet. Drizzle with olive oil and season with a pinch of salt. Roast for 25-30 minutes, until tender when pierced with a fork and the skin is slightly wrinkled.
- While the squash roasts, heat 1 tablespoon of olive oil in a large heavy-bottomed pot or Dutch oven over medium heat. Add the chopped onion and cook, stirring occasionally, until softened and translucent, about 5-7 minutes. Add the smashed garlic cloves and cook for another minute until fragrant.
- In a small skillet, melt the butter over medium heat. Swirl the pan occasionally. It will start to foam, then the foam will subside, and brown specks will form at the bottom. As soon as the butter smells nutty and turns golden-brown (about 3-4 minutes), immediately remove from heat. If using sage leaves, add them to the hot butter—they’ll crisp up in about 30 seconds. Set aside.
- When the squash is done roasting, let it cool for a few minutes. Scoop the flesh from the skins and add to the pot with the onions and garlic. Pour in the vegetable broth and bring to a simmer over medium heat. Cook for 5 minutes.
- Remove the pot from heat. Using an immersion blender, puree the soup until completely smooth. If using a regular blender, work in batches and be careful with hot liquid.
- Stir in the coconut milk (or heavy cream), cinnamon, and nutmeg. Season with salt and pepper to taste. If too thick, add a splash more broth or water until desired consistency.
- Ladle the soup into bowls. Drizzle each serving with the brown butter (and crispy sage leaves, if using). Top with toasted pepitas, a drizzle of maple syrup, and a pinch of flaky sea salt. Serve immediately.
Notes
Don’t rush the brown butter—watch for a deep amber color and nutty aroma, then remove from heat immediately to avoid burning. Roast squash cut-side down for caramelization. Season in layers for best flavor. Use full-fat coconut milk for the creamiest texture. The soup can be stored in the refrigerator for up to 5 days or frozen for up to 3 months.
Nutrition
- Serving Size: 1 serving (about 1.5
- Calories: 285
- Sugar: 10
- Sodium: 480
- Fat: 18
- Saturated Fat: 10
- Carbohydrates: 28
- Fiber: 6
- Protein: 4
Keywords: honeynut squash soup, brown butter, easy soup, fall soup, winter soup, quick soup, no-peel squash, creamy soup, vegetarian soup, gluten-free soup


