I want a Halloween dessert that doesn’t require rolling out dough, piping intricate shapes, or cleaning seventeen bowls. That’s the thought that hit me last October while staring at the candy bowl, watching the kids pick through their haul for the third time that week. I had butter softening on the counter, a bag of candy eyes in the pantry, and exactly zero patience for fussy assembly. So I did what any reasonable person would do—I made one giant cookie and wrapped it up like a mummy.
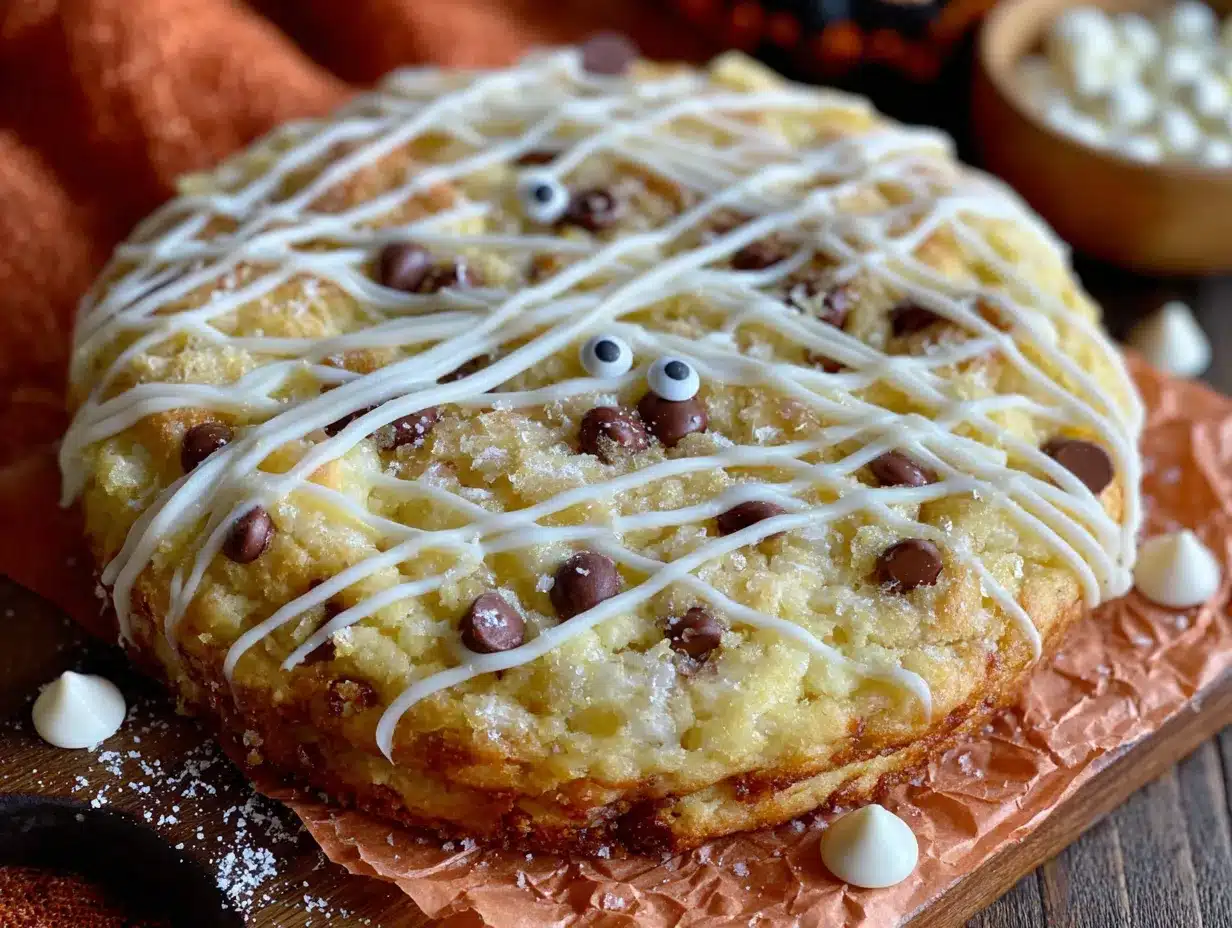
This Easy Mummy Halloween Cookie Cake is the dessert equivalent of wearing pajamas to school pickup. It looks like you tried. It looks festive and clever and like you spent hours. But honestly? It’s one big cookie. You press the dough into a pan, bake it, plop some white icing on top, and stick candy eyes on it. That’s it. No cookie cutters, no chilling dough, no decorating bags that explode in your hand (we’ve all been there).
The first time I made this, my kids stood on chairs watching me drizzle the icing. They kept shouting “more eyes!” like tiny Halloween directors. And you know what? They were right. More eyes make everything better. This cookie cake became our official Halloween tradition that night, and I haven’t looked back since. It’s the kind of recipe that makes you feel like a holiday hero without actually doing that much work. And honestly, that’s my favorite kind of recipe.
Why You’ll Love This Recipe
Let me tell you why this Easy Mummy Halloween Cookie Cake belongs in your October rotation, and I’m not just saying that because I’ve made it four times in the last two weeks alone.
- One Giant Cookie, Zero Stress : No rolling, cutting, or shaping individual cookies. You mix the dough, press it into a pan, and bake. That’s it. Perfect for Halloween parties where you’d rather be socializing than slaving away in the kitchen.
- Simple Pantry Ingredients : You probably have everything already—butter, sugar, flour, vanilla, chocolate chips. The only specialty item is candy eyes, and those are cheap and available everywhere in October. No weird ingredients or expensive specialty items.
- Perfect for Halloween Gatherings : Whether it’s a classroom party, a neighborhood get-together, or just a fun family movie night, this cookie cake serves a crowd. Cut it into wedges like a pizza and watch it disappear.
- Kid-Friendly Fun : My kids help me drizzle the icing and place the eyes. It’s messy in the best way possible. They feel like they made the whole thing themselves, and I get to sip my coffee and supervise.
- Unbelievably Delicious : This isn’t just a pretty face. The cookie is soft in the center, slightly crisp at the edges, and loaded with chocolate chips. The vanilla icing adds sweetness, and the candy eyes give it that spooky-cute factor that everyone loves.
What makes this recipe different from every other Halloween dessert out there? It’s the perfect balance of effort and payoff. You get a showstopping dessert that looks like it came from a bakery, but it takes less than 30 minutes of active work. I’ve tested this with different pans, different frosting techniques, and different baking times. This version is my best version—the one that works every single time without fail.
This is the kind of dessert that makes people close their eyes after the first bite. It’s comfort food dressed up for Halloween—familiar, satisfying, and just a little bit spooky. Perfect for impressing guests without the stress, or turning a regular Tuesday into something memorable.
What Ingredients You Will Need
This recipe uses simple, straightforward ingredients to create a cookie cake that’s soft, chewy, and absolutely irresistible. Most of these are pantry staples, so you can whip this up on a whim without a special grocery run.
For the Cookie Cake
- 1 cup (2 sticks) unsalted butter, softened to room temperature (I use Land O’Lakes for consistent results)
- 1 cup granulated sugar
- ¾ cup packed light brown sugar (adds moisture and that chewy texture)
- 2 large eggs, room temperature
- 2 teaspoons vanilla extract (pure, not imitation, for the best flavor)
- 2 ½ cups all-purpose flour (spooned and leveled—don’t scoop directly from the bag)
- 1 teaspoon baking soda
- ½ teaspoon salt (fine sea salt works great)
- 1 ½ cups semi-sweet chocolate chips (I prefer Ghirardelli, but any brand works)
For the Mummy Decorating
- 1 cup powdered sugar
- 2-3 tablespoons milk (whole milk gives the best consistency, but any milk works)
- ½ teaspoon vanilla extract
- Candy eyes (about 10-12 pairs, depending on how many mummy faces you want)
Ingredient Tips from My Kitchen: For the best texture, make sure your butter is truly softened—you should be able to press a finger into it and leave an indent. If you’re in a rush, cut the butter into small cubes and let it sit for 15 minutes. Don’t microwave it unless you want melted butter, which will make your cookie cake spread too thin.
For the candy eyes, I’ve found that the ones with flat backs stick best to the icing. You can find them at any grocery store in the baking aisle during October, or order them online year-round. If you can’t find candy eyes, you can use white chocolate chips with a tiny dot of melted dark chocolate for the pupil—but honestly, the candy eyes are worth tracking down.
Substitution Guidance: Need this to be gluten-free? Swap the all-purpose flour for a 1:1 gluten-free baking flour blend. I’ve tested this with Bob’s Red Mill and it works beautifully. For a dairy-free version, use vegan butter sticks and dairy-free chocolate chips. The texture will be slightly different but still delicious.
Equipment Needed
You don’t need a fancy kitchen to make this Easy Mummy Halloween Cookie Cake. Here’s what you’ll need:
- 9-inch round cake pan (or an 8-inch square pan—the cookie will just be thicker)
- Electric hand mixer or stand mixer (you can do this by hand with a wooden spoon, but your arm will thank you for the mixer)
- Mixing bowls (one large, one medium)
- Measuring cups and spoons
- Rubber spatula (for scraping down the bowl and spreading the dough)
- Parchment paper (optional but recommended for easy removal)
- Cooling rack
- Small piping bag or zip-top bag (for drizzling the icing)
My Personal Take on Equipment: I’ve made this cookie cake in a cast iron skillet before, and it turned out amazing. The edges got extra crispy and the center stayed perfectly soft. If you have a 10-inch cast iron skillet, use it—just reduce the baking time by 2-3 minutes since it conducts heat differently. Also, don’t stress if you don’t have a piping bag. A zip-top bag with the tiniest corner snipped off works exactly the same way. I’ve done it both ways and honestly prefer the zip-top bag because there’s less cleanup.
If you’re buying a cake pan specifically for this recipe, go for a light-colored metal pan. Dark pans absorb more heat and can make the edges over-brown before the center is done. And please, please line your pan with parchment paper. I forgot once and spent twenty minutes chiseling cookie cake out of the pan. Learn from my mistakes.
Preparation Method
Let’s make this Easy Mummy Halloween Cookie Cake! I’ve broken everything down into clear steps so you can follow along without any confusion.
- Preheat and Prep: Preheat your oven to 350°F (175°C). Grease your 9-inch round cake pan with butter or non-stick spray, then line the bottom with a circle of parchment paper. This step is crucial—I promise you’ll thank me later when the cookie slides right out.
- Cream the Butter and Sugars: In a large mixing bowl, beat the softened butter, granulated sugar, and brown sugar together on medium speed until light and fluffy. This takes about 3-4 minutes with an electric mixer. You’re looking for a pale, airy mixture that looks like sandy clouds. Scrape down the sides of the bowl halfway through.
- Add the Wet Ingredients: Beat in the eggs one at a time, making sure each is fully incorporated before adding the next. Add the vanilla extract and mix until combined. The mixture might look slightly curdled at this point—that’s totally normal, don’t panic.
- Mix the Dry Ingredients: In a separate medium bowl, whisk together the flour, baking soda, and salt. This ensures the leavening agent is evenly distributed so your cookie cake rises evenly. I learned this the hard way after biting into a pocket of baking soda once. Trust me, whisk it.
- Combine Wet and Dry: Gradually add the dry ingredients to the wet mixture, mixing on low speed. Stop as soon as the flour disappears—overmixing makes the cookie cake tough. You want a soft, cohesive dough that’s slightly sticky but holds together.
- Fold in the Chocolate Chips: Using a rubber spatula, gently fold in the chocolate chips until they’re evenly distributed throughout the dough. Reserve about ¼ cup of chips to press onto the top of the cookie cake before baking—this makes it look extra pretty.
- Press into Pan: Transfer the dough to your prepared pan. Using slightly wet hands (this prevents sticking), press the dough into an even layer. The dough will be thick—that’s exactly what you want. Press those reserved chocolate chips onto the surface.
- Bake to Perfection: Bake for 25-30 minutes, or until the edges are golden brown and the center looks set but still slightly soft. A toothpick inserted into the center should come out with a few moist crumbs, not wet batter. The cookie will continue to bake as it cools in the pan.
- Cool Completely: Let the cookie cake cool in the pan for 10 minutes, then transfer to a wire rack to cool completely. This is the hardest part—your kitchen will smell incredible. But if you try to decorate a warm cookie, the icing will melt into a sad puddle. I speak from experience.
- Make the Icing: In a small bowl, whisk together the powdered sugar, milk, and vanilla extract until smooth. You’re looking for a consistency that’s thick but pourable—like school glue. Add more milk a teaspoon at a time if it’s too thick, or more powdered sugar if it’s too thin.
- Decorate the Mummy: Transfer the icing to a small piping bag or zip-top bag with a tiny corner snipped off. Drizzle the icing back and forth across the cookie cake in a zigzag pattern to create mummy “bandages.” Don’t worry about making it perfect—mummies are supposed to look messy. While the icing is still wet, press the candy eyes into the icing. I like to place 4-5 pairs of eyes in different spots so there are multiple mummy faces looking up at you.
- Let the Icing Set: Allow the icing to set for about 15-20 minutes before slicing. This gives the candy eyes time to stick and prevents the icing from smearing when you cut into it.
Sensory Cues to Watch For: When you’re creaming the butter and sugar, listen for the sound to change from a sloshy thump to a lighter, airy whoosh. When you press the dough into the pan, it should feel soft and pliable, like play-dough. When the cookie cake is done baking, the edges will be a deep golden brown and the center will look puffed and slightly cracked. The smell? Pure vanilla and caramel heaven.
Cooking Tips & Techniques
After making this Easy Mummy Halloween Cookie Cake more times than I care to count, I’ve collected some hard-won wisdom. Let me save you from my mistakes.
The Room Temperature Rule: Cold eggs will seize your butter mixture and give you a lumpy dough. If you forgot to take your eggs out of the fridge, place them in a bowl of warm water for 5 minutes. Same goes for the butter—cold butter doesn’t cream properly and leaves you with greasy, flat cookie cake.
The Parchment Paper Trick: Cut a circle of parchment paper for the bottom of your pan, but also cut two strips that cross in the middle (like a plus sign) that hang over the edges. This creates a sling that lets you lift the entire cookie cake out of the pan without any drama. I started doing this after my first cookie cake crumbled into pieces during removal.
Don’t Overbake: This is the number one mistake people make. Cookie cakes continue baking from residual heat after they come out of the oven. Pull it out when the center looks slightly underdone—it should jiggle just a tiny bit when you gently shake the pan. If you wait until the center looks fully baked, you’ll end up with a dry, crumbly cookie that’s more like a biscuit.
Icing Consistency is Everything: Your mummy icing should be thick enough to hold its shape when drizzled, but thin enough to flow smoothly. If it’s too thick, it will blob up and look like white paint splatters. If it’s too thin, it will run off the sides and pool around the bottom. Test it on a plate first—you want a ribbon that slowly settles into itself.
Timing Your Decoration: I’ve learned to make the icing while the cookie cake is cooling. That way, by the time the cookie is completely cool, the icing is ready to go. It’s a small multitasking win that makes the whole process feel faster. Also, decorate the cookie cake on the serving plate or cake stand—moving it after decorating is a recipe for disaster.
My Biggest Failure: The first time I made this, I tried to use store-bought frosting because I was short on time. It was too thick and I ended up with a lumpy, sad-looking mummy that looked more like a ghost with acne. Homemade icing is non-negotiable here. It takes two minutes and makes all the difference in texture and taste.
Variations & Adaptations
One of the best things about this Easy Mummy Halloween Cookie Cake is how customizable it is. Here are some variations I’ve tried and loved.
Chocolate Base: Replace ½ cup of the all-purpose flour with ½ cup of unsweetened cocoa powder. This gives you a chocolate cookie cake with white mummy bandages—the contrast is stunning. I made this for a Halloween party and people couldn’t stop taking photos of it.
Peanut Butter Mummy: Swap ½ cup of the butter for ½ cup of creamy peanut butter. Reduce the granulated sugar to ¾ cup. The peanut butter flavor pairs amazingly with the chocolate chips and vanilla icing. My husband declared this his favorite version, and he’s not even a peanut butter person.
Halloween Candy Mix-In: Instead of chocolate chips, use a mix of chopped candy bars. I’ve tried this with chopped Reese’s cups, Kit Kats, and mini M&Ms. The different textures and flavors make every bite exciting. Just be careful not to overmix—you want chunks of candy, not candy dust.
Gluten-Free Version: Use a 1:1 gluten-free baking flour blend. I’ve tested this with King Arthur Measure for Measure and the texture was indistinguishable from the regular version. Make sure your baking soda is fresh—gluten-free baked goods need all the help they can get with rising.
Mini Mummy Cookies: Instead of one giant cookie, scoop the dough into 2-tablespoon portions and bake for 10-12 minutes. Decorate each mini cookie with a small drizzle of icing and two candy eyes. These are perfect for classroom parties or Halloween treat bags. I did this last year and the mini mummies were a huge hit with the kids.
My Personal Favorite Variation: I add ½ teaspoon of almond extract along with the vanilla. It gives the cookie a subtle, nutty flavor that makes it taste bakery-quality. My mother-in-law asked if I bought the cookie cake from a fancy bakery, and I may have let her believe that for a few minutes before revealing my secret.
Serving & Storage Suggestions
This Easy Mummy Halloween Cookie Cake is best served at room temperature, cut into wedges like a pizza. The texture is perfect—soft and chewy in the center, slightly crisp at the edges. I like to serve it on a cake stand so the mummy face is visible from all angles.
What to Serve With It: A scoop of vanilla ice cream or a dollop of whipped cream takes this over the top. The cold creaminess balances the sweet, buttery cookie perfectly. For a Halloween party, I set out bowls of candy corn and pretzels so people can customize their plate. A glass of cold milk is the classic pairing, but hot apple cider works beautifully too.
Storage Instructions: Store any leftover cookie cake in an airtight container at room temperature for up to 3 days. Do not refrigerate—the cold will dry out the cookie and make it hard. If you need to store it longer, wrap it tightly in plastic wrap and then foil, and freeze for up to 3 months.
Reheating Tips: To bring back that fresh-from-the-oven texture, microwave individual slices for 10-15 seconds. The warmth softens the cookie and makes the chocolate chips melty again. If you’re reheating the whole cookie cake, pop it in a 300°F (150°C) oven for 5-7 minutes. Just keep an eye on the icing—it can melt if it gets too hot.
How Flavors Develop: Honestly, this cookie cake tastes best on day one, when the edges are still a little crisp and the center is perfectly soft. But day two is still fantastic—the flavors meld together and the cookie becomes more uniform in texture. I’ve never had leftovers last past day three in my house, so I can’t speak to how it holds up beyond that.
Nutritional Information & Benefits
Let’s be real—this is a dessert, not a health food. But here’s what you’re working with per slice (assuming 8 slices per cookie cake):
- Calories: Approximately 480-520 per slice
- Fat: 24-28g
- Carbohydrates: 62-68g
- Protein: 6-8g
- Sugar: 38-42g
Health Benefits (Yes, There Are Some): The butter provides fat-soluble vitamins A, D, E, and K. The eggs contribute high-quality protein and choline, which is important for brain health. Dark chocolate chips contain antioxidants called flavonoids that support heart health. And honestly? The mental health benefits of eating something this fun and delicious are real. Life is short—eat the cookie cake.
Dietary Considerations: This recipe contains gluten, dairy, and eggs. For a gluten-free version, use a 1:1 gluten-free flour blend. For a dairy-free version, use vegan butter and dairy-free chocolate chips. For an egg-free version, use flax eggs (1 tablespoon ground flaxseed mixed with 3 tablespoons water per egg). The texture will be slightly different but still delicious.
Allergen Note: Always check your candy eyes for allergen information, as some brands are processed in facilities that handle nuts. If you’re serving this at a school party, check with parents about allergies first.
Conclusion
This Easy Mummy Halloween Cookie Cake is everything I want in a holiday dessert—it’s fun, it’s delicious, and it doesn’t require a degree in pastry arts to pull off. The kids love decorating it, the adults love eating it, and I love that I can make it without breaking a sweat.
I want you to make this your own. Add extra eyes. Use different candy. Make it chocolate or peanut butter or loaded with Halloween candy. The base recipe is forgiving and adaptable, and that’s what makes it so great. It’s not about perfection—it’s about having fun and making something that brings people together.
Personally, I love this recipe because it reminds me that Halloween doesn’t have to be complicated to be special. Sometimes the best memories come from a single cookie cake, a handful of candy eyes, and the people you share it with. So go ahead, make a mummy. Take a photo. Share it with someone you love. And if you come up with a crazy variation, drop it in the comments—I’m always looking for new ideas!
Happy Halloween, and happy baking!
Frequently Asked Questions
Can I make this cookie cake ahead of time?
Absolutely! You can bake the cookie cake up to 2 days in advance. Store it in an airtight container at room temperature, and decorate it with the icing and candy eyes just before serving. The icing needs to be fresh to look its best, and the candy eyes will stay put better on fresh icing.
Can I use a different size pan?
Yes, but you’ll need to adjust the baking time. An 8-inch round pan will give you a thicker cookie cake that needs 5-8 more minutes of baking. A 10-inch round pan or a 9×13-inch pan will give you a thinner cookie that needs 5-7 minutes less. Keep an eye on it and use the toothpick test to check for doneness.
My cookie cake spread too thin. What went wrong?
This usually happens for one of three reasons: your butter was too soft or melted, you overmixed the dough, or your pan was too large. Make sure your butter is softened but not melted, and stop mixing as soon as the flour disappears. If you’re using a larger pan, you may need to increase the recipe by half.
Can I freeze the decorated cookie cake?
I don’t recommend freezing the decorated cookie cake because the icing can become sticky and the candy eyes can fall off. However, you can freeze the undecorated cookie cake for up to 3 months. Wrap it tightly in plastic wrap, then foil. Thaw at room temperature, then decorate fresh.
How do I get clean slices without the icing smearing?
Use a sharp chef’s knife and wipe it clean between each slice. For the cleanest cuts, refrigerate the cookie cake for 15-20 minutes before slicing—the icing will be firmer and less likely to smear. Run the knife under hot water, dry it, then slice for extra clean edges.
Pin This Recipe!
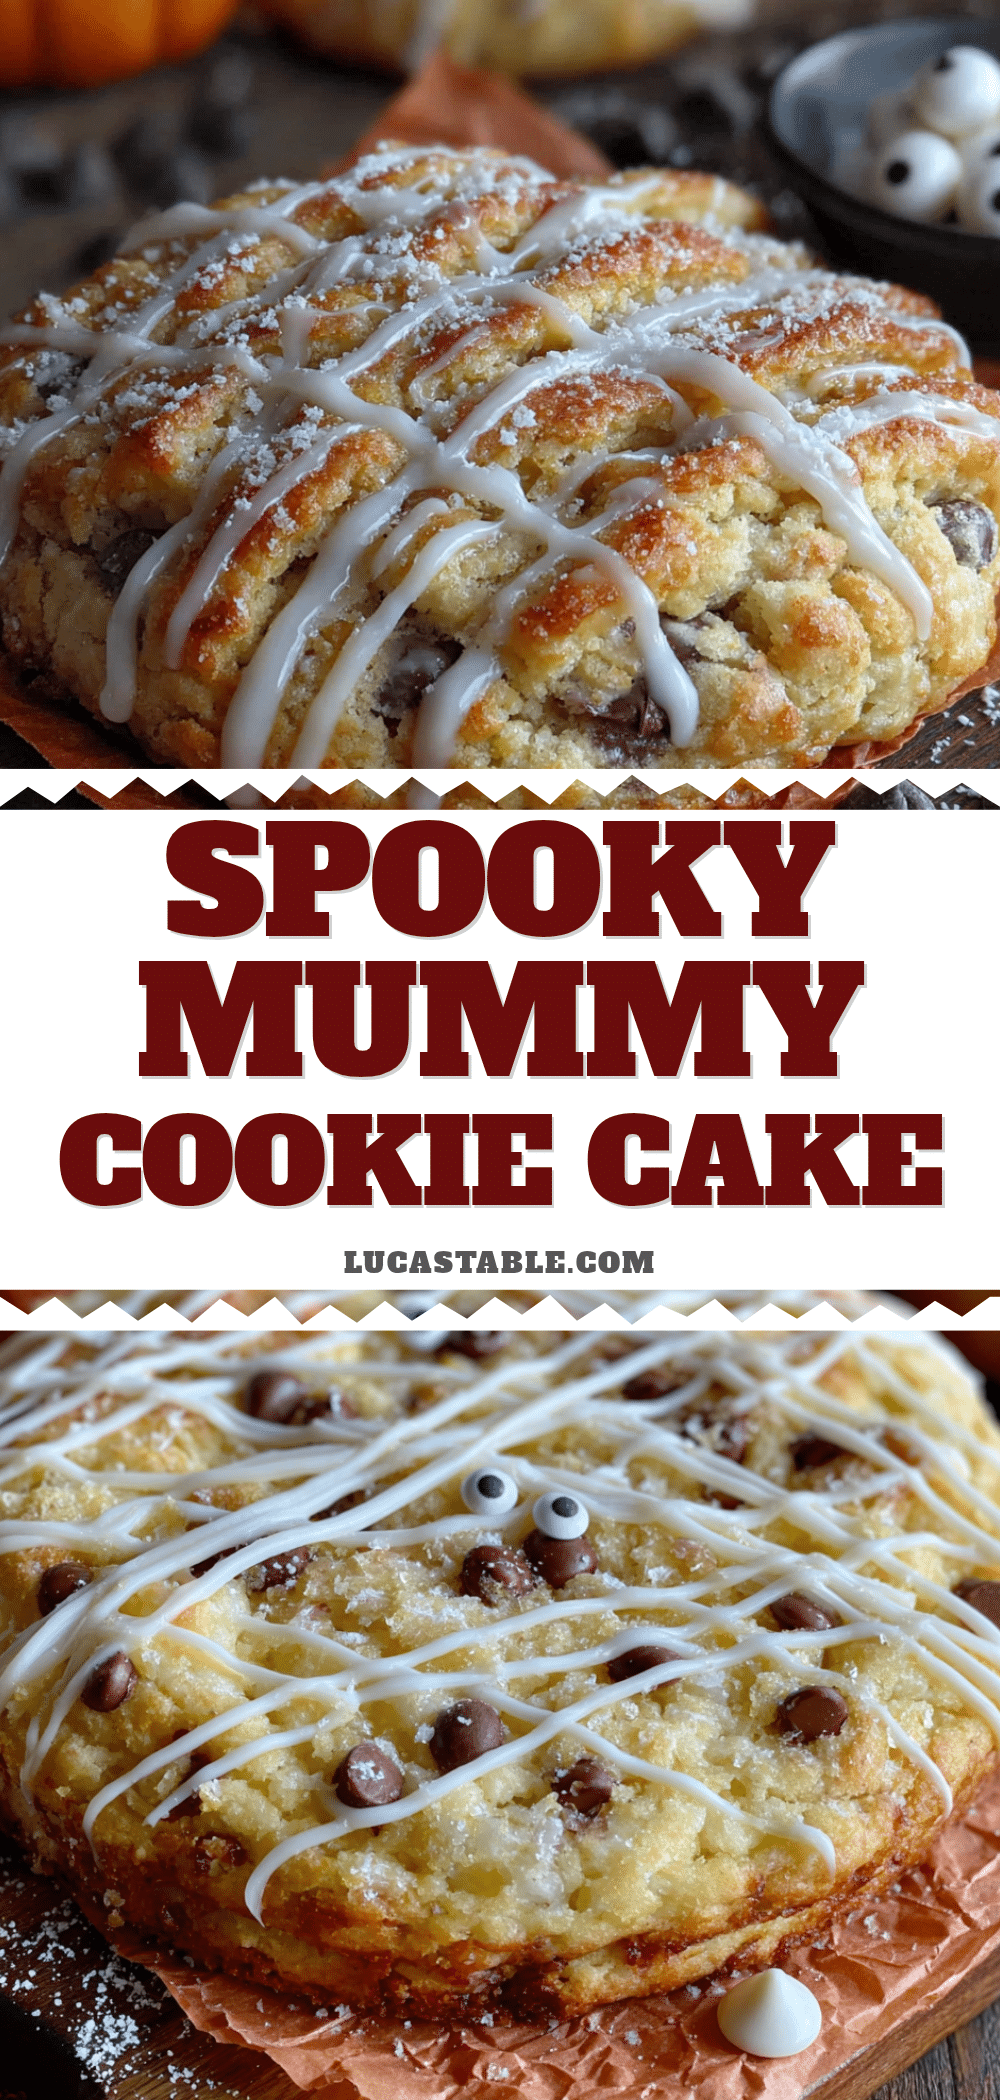
Easy Mummy Halloween Cookie Cake Recipe

A giant, soft-baked chocolate chip cookie cake decorated like a mummy with white icing and candy eyes. This easy Halloween dessert requires no rolling, cutting, or piping—just mix, bake, and decorate for a spooky-cute treat that serves a crowd.
- Prep Time: 15 minutes
- Cook Time: 30 minutes
- Total Time: 45 minutes
- Yield: 8 servings 1x
- Category: Dessert
- Cuisine: American
Ingredients
- 1 cup (2 sticks) unsalted butter, softened
- 1 cup granulated sugar
- 3/4 cup packed light brown sugar
- 2 large eggs, room temperature
- 2 teaspoons vanilla extract
- 2 1/2 cups all-purpose flour
- 1 teaspoon baking soda
- 1/2 teaspoon salt
- 1 1/2 cups semi-sweet chocolate chips
- 1 cup powdered sugar
- 2–3 tablespoons milk
- 1/2 teaspoon vanilla extract
- Candy eyes (about 10-12 pairs)
Instructions
- Preheat oven to 350°F (175°C). Grease a 9-inch round cake pan and line the bottom with parchment paper.
- In a large bowl, beat softened butter, granulated sugar, and brown sugar on medium speed until light and fluffy (3-4 minutes).
- Beat in eggs one at a time, then add vanilla extract and mix until combined.
- In a separate bowl, whisk together flour, baking soda, and salt.
- Gradually add dry ingredients to wet mixture, mixing on low speed just until combined. Do not overmix.
- Fold in chocolate chips with a rubber spatula. Reserve 1/4 cup to press onto the top.
- Transfer dough to prepared pan and press into an even layer using slightly wet hands. Press reserved chocolate chips onto the surface.
- Bake for 25-30 minutes, until edges are golden brown and center looks set but still slightly soft. Cool in pan for 10 minutes, then transfer to a wire rack to cool completely.
- For the icing: whisk together powdered sugar, milk, and vanilla extract until smooth and pourable.
- Transfer icing to a piping bag or zip-top bag with a tiny corner snipped off. Drizzle in a zigzag pattern across the cooled cookie cake to create mummy bandages.
- While icing is still wet, press candy eyes into the icing (4-5 pairs in different spots).
- Let icing set for 15-20 minutes before slicing.
Notes
For best results, use room temperature ingredients. Do not overbake—the center should look slightly underdone when you remove it from the oven. The cookie continues to bake as it cools. For clean slices, refrigerate the decorated cookie cake for 15-20 minutes before cutting. Store leftovers in an airtight container at room temperature for up to 3 days.
Nutrition
- Serving Size: 1 slice (1/8 of cook
- Calories: 500
- Sugar: 40
- Sodium: 280
- Fat: 26
- Saturated Fat: 16
- Carbohydrates: 65
- Fiber: 2
- Protein: 7
Keywords: Halloween cookie cake, mummy cookie cake, easy Halloween dessert, giant cookie cake, chocolate chip cookie cake, Halloween baking, kid-friendly Halloween recipe


