I burned the bottom of a pan of chocolate three times before I finally learned how to melt it properly for these no-bake witch hat cookies. That first batch of hats looked more like sad, melted chocolate puddles than anything you’d want to serve at a Halloween party. But honestly, those early failures taught me exactly what not to do, and now these little treats come together in about fifteen minutes flat with zero oven required.
The idea hit me last October when I was staring down a bag of fudge stripe cookies that were getting stale and a pile of Hershey’s Kisses leftover from some baking project. I wanted something festive for my niece’s costume party, but I was already making a huge batch of crispy chicken quesadillas for the adults and didn’t have the energy for complicated baking. So I grabbed some orange frosting, melted some chocolate chips, and started experimenting on my kitchen counter.
What came out of that messy afternoon was a Halloween treat that looks way more impressive than it actually is. The cookies turn into the brim of a witch hat, a Kiss becomes the pointy top, and a little dab of frosting holds everything together. That’s it. No oven, no stand mixer, no fancy decorating skills required. You get a crunchy, chocolatey, slightly salty-sweet bite that disappears faster than you’d expect at any gathering.
These little hats have become my go-to for Halloween parties, classroom treats, and even just a fun afternoon project with my kids. They’re the kind of recipe that makes you look like a hero without breaking a sweat.
Why You’ll Love This Recipe
Let me tell you why these no-bake witch hat cookies have become my most-requested Halloween recipe year after year. I’ve tested this about a dozen times across different parties and gatherings, and the feedback has been consistent every single time.
- No baking required – We’re talking zero oven time here. If you can melt chocolate and press a cookie onto a candy, you can make these. Perfect for hot October days when you don’t want to heat up the kitchen.
- Comes together in under 20 minutes – From start to finish, including assembly time, you’re looking at about fifteen minutes of active work. The only waiting is for the chocolate to set, which takes maybe ten minutes in the fridge.
- Simple ingredients you can find anywhere – Fudge stripe cookies, chocolate kisses, chocolate chips, and a little frosting. That’s it. No specialty baking stores or weird ingredients needed.
- Perfect for kids to help with – My five-year-old niece can assemble these by herself now. There’s no hot oven, no sharp tools, and the assembly is basically playing with your food.
- Great for parties and gifting – They travel well, look adorable on a platter, and you can easily double or triple the batch without any extra effort.
What makes these different from other Halloween treats I’ve tried is the texture combo. The cookie is buttery and slightly crunchy, the chocolate kiss gives you that smooth, creamy chocolate hit, and the melted chocolate on the bottom adds this extra layer of richness. Plus the orange frosting gives it that festive pop without being overwhelming. I’ve tried making them with white chocolate, dark chocolate kisses, even caramel-filled ones, and they all work beautifully.
This is the kind of recipe that makes you feel like you actually have your life together during the chaos of Halloween season. You know, when you’re juggling costume shopping, pumpkin carving, and somehow still trying to feed your family real food between all the candy.
What Ingredients You Will Need
This recipe uses simple, everyday ingredients that most of you probably already have in your pantry. The beauty of these no-bake witch hat cookies is that there’s nothing fancy or hard to find here.
- Fudge stripe cookies – One standard package (about 9 ounces) gives you roughly 30 cookies. I prefer the Keebler brand for their consistent size and that perfect fudge coating on the bottom. The stripes on top are what make these look like witch hat brims, so don’t substitute with plain shortbread cookies here.
- Chocolate Hershey’s Kisses – You’ll need one per cookie, so about 30 total. I like the milk chocolate ones best, but dark chocolate or even the caramel-filled ones work great too. Make sure they’re unwrapped before you start melting chocolate, because nobody wants to be fumbling with foil wrappers with chocolate on their fingers.
- Semi-sweet chocolate chips – About one cup for melting. This acts as the glue that holds the Kiss to the cookie. I use Ghirardelli or Nestle Toll House, both melt smoothly and set up nicely.
- Orange frosting – A small tub of store-bought works perfectly here. You’ll use this to pipe a little buckle on the hat and to add that festive Halloween touch. If you’re feeling ambitious, you can make your own buttercream, but honestly the canned stuff works great and saves time.
- Halloween sprinkles – Optional but highly recommended. Little orange and black jimmies, star sprinkles, or even edible glitter add that extra pop. I found a mix at Target that has little bats and pumpkins, and my kids go crazy for them.
- Coconut oil or shortening – Just a teaspoon added to your melting chocolate helps it flow smoothly and set with a nice shine. Totally optional but makes a noticeable difference in the final look.
For the frosting, I recommend getting a piping bag with a small round tip, or you can just snip the corner of a ziplock bag. The orange color matters more than the flavor here, so don’t stress about getting fancy buttercream. I’ve used cream cheese frosting in a pinch and it worked fine, just looked a little different.
One thing I learned the hard way – check your cookie package before you start. I once grabbed a bag of generic fudge stripe cookies that were smaller than usual, and my Kisses looked ridiculous on top. Stick with the standard size cookies for the best proportions.
Equipment Needed
You don’t need much for this recipe, which is part of why I love it. Here’s what you’ll want to have on hand:
- Microwave-safe bowl – For melting your chocolate chips. Glass or ceramic both work fine. I use a Pyrex measuring cup because the spout makes pouring easier.
- Baking sheet or large plate – To hold your assembled cookies while the chocolate sets. Line it with parchment paper or wax paper for easy removal.
- Small piping bag or ziplock bag – For the orange frosting. A ziplock with the corner snipped works perfectly if you don’t have piping bags.
- Spatula or butter knife – For spreading a tiny bit of melted chocolate on the bottom of each Kiss. A toothpick also works if you’re feeling precise.
- Parchment paper or wax paper – To line your baking sheet. This prevents sticking and makes cleanup a breeze.
If you don’t have a microwave, you can melt the chocolate in a double boiler on the stovetop. Just put a heat-safe bowl over a pot of simmering water, making sure the bottom of the bowl doesn’t touch the water. Stir until smooth. It takes a few extra minutes but works just as well.
I’ve also used a silicone baking mat instead of parchment paper with great results. The cookies slide right off once the chocolate sets. Budget-wise, you can skip the piping bag entirely and just use a butter knife to dab a tiny bit of frosting on top of each hat – it won’t look as neat, but it’ll still taste the same.
Preparation Method
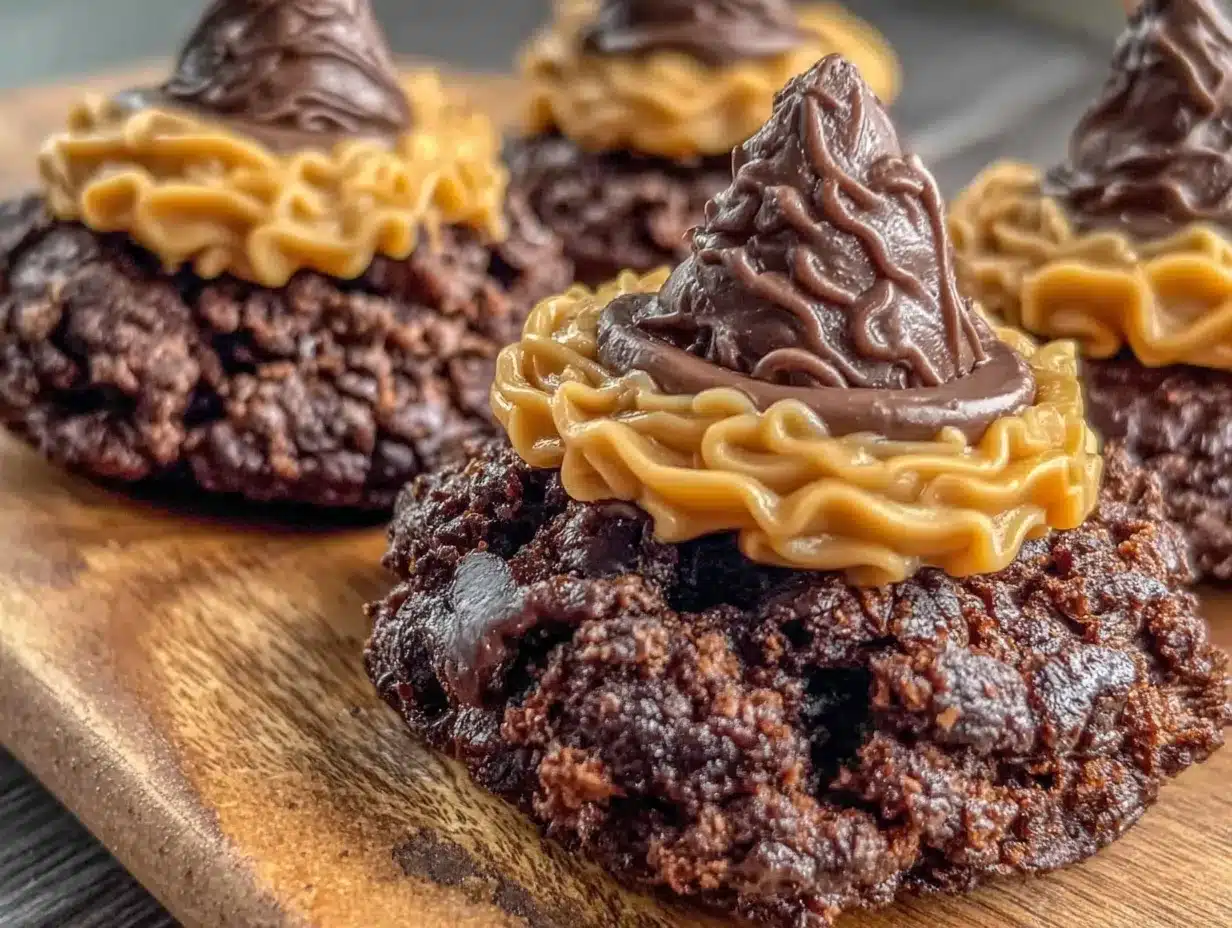
Alright, let’s make some witch hats. This is seriously one of the easiest recipes I’ve ever put together, and I promise you can do this while watching your kids run around in their Halloween costumes.
- Line your baking sheet – Grab a baking sheet or large plate and cover it with parchment paper or wax paper. Set it aside where it can fit in your fridge later. I usually clear a shelf in my fridge beforehand so I’m not scrambling.
- Melt the chocolate chips – Pour your cup of chocolate chips into a microwave-safe bowl. Microwave in 30-second intervals, stirring well after each one. It usually takes about 60 to 90 seconds total. Stop when most of the chips are melted and stir until smooth. If the chocolate looks thick, add half a teaspoon of coconut oil or shortening and stir it in. Be careful not to overheat – burnt chocolate gets grainy and gross, trust me on this one.
- Prepare your Kisses – While the chocolate is cooling slightly, unwrap all your Hershey’s Kisses. I usually do about 30 of them. This is the most tedious part of the whole recipe, honestly. Get the kids to help if you can, because little fingers are faster at unwrapping.
- Attach the Kisses to the cookies – Take a fudge stripe cookie and hold it in your hand with the fudge-coated side facing up. Dip the flat bottom of a chocolate Kiss into the melted chocolate, just enough to coat it, then press it onto the center of the cookie. Hold it there for about 10 seconds so the chocolate starts to set. The melted chocolate acts as glue, bonding the Kiss to the cookie.
- Place on the baking sheet – Gently set the assembled hat onto your parchment-lined baking sheet. The cookie should be on the bottom, with the Kiss pointing up like the pointy top of a witch hat. Repeat this process for all your cookies. Work in batches if you need to, keeping the melted chocolate warm by giving it a quick 10-second zap in the microwave if it starts to thicken.
- Let the chocolate set – Once all your hats are assembled, pop the baking sheet into the refrigerator for about 10 to 15 minutes. You want the chocolate to be completely firm so the Kiss stays attached to the cookie. Don’t skip this step – I tried rushing once and ended up with Kisses rolling off the cookies.
- Pipe the orange frosting – While the hats are chilling, prepare your frosting. Scoop a couple tablespoons of orange frosting into a small piping bag or ziplock bag. Snip a tiny corner off the end. You want a small opening, about the size of a pea.
- Add the hat buckle – Take the chilled hats out of the fridge. Pipe a small dot or a little buckle shape onto the side of each hat where the Kiss meets the cookie. This gives it that classic witch hat look. I usually do a tiny squiggle or just a dot – nothing fancy.
- Add sprinkles – While the frosting is still wet, sprinkle on your Halloween decorations. I like to add a couple orange jimmies or a little star sprinkle right on the frosting dot. Work quickly because the frosting sets fast on the cold chocolate.
- Final chill – Pop the hats back into the fridge for another 5 minutes to set the frosting. After that, they’re ready to serve or store.
The whole process takes about 20 minutes of active work plus 15 minutes of chilling. Your kitchen will smell like chocolate, and you’ll have a platter of adorable witch hats that look like they took way more effort than they actually did.
Cooking Tips & Techniques
I’ve made these no-bake witch hat cookies enough times to learn a few tricks that make the process smoother and the results more consistent. Let me share what I’ve figured out through trial and error.
Don’t overheat your chocolate. This is the biggest mistake I made early on. Chocolate burns easily in the microwave, and once it’s burnt, it gets thick, grainy, and unusable. Always microwave in short bursts and stir between each one. If your chocolate looks like it’s starting to seize up, add a tiny bit of coconut oil and stir vigorously – sometimes you can save it.
Work in small batches. Melt only about half a cup of chocolate chips at a time if you’re making a large batch. The chocolate will start to thicken as it cools, and you’ll struggle to get a nice even coating on the Kisses. I melt a fresh batch halfway through if I’m doing more than 20 hats. It takes an extra minute but makes a huge difference.
Use the right cookie orientation. The fudge stripe cookies have a flat chocolate-coated side and a striped side. Make sure the chocolate side faces up when you attach the Kiss. This gives you a nice dark brim for your witch hat. I accidentally put one together with the stripes facing up and it looked like a sad clown hat instead of a witch hat.
Let the chocolate cool slightly before dipping. If your melted chocolate is too hot, it will melt the fudge coating on the cookie and make everything messy. Let it sit for a minute or two after microwaving. It should be warm but not hot to the touch.
Hold the Kiss in place longer than you think. Count to ten slowly while pressing the Kiss onto the cookie. The chocolate needs that time to start setting, otherwise the Kiss will slide right off when you set it down. I learned this the hard way when I rushed through a batch and ended up with a pile of separated cookies and kisses.
Keep your hands clean. Chocolate gets everywhere, and it’s frustrating when you’re trying to pipe frosting with chocolate-covered fingers. Keep a damp paper towel nearby to wipe your hands between steps. Or better yet, use disposable gloves if you have them.
Variations & Adaptations
One of the best things about this recipe is how easy it is to adapt. I’ve tried several variations over the years, and they all turned out great in their own way.
White chocolate witch hats – Swap the semi-sweet chocolate chips for white chocolate chips and use white chocolate Kisses instead of milk chocolate. The white chocolate gives these a ghostly, ethereal look that’s perfect for a spooky theme. I add a little purple food coloring to the white chocolate before melting for a more magical vibe.
Dark chocolate version – Use dark chocolate Kisses and dark chocolate chips for a richer, more intense chocolate flavor. This version is less sweet and pairs beautifully with the buttery cookie. My husband prefers this version because he’s a dark chocolate purist.
Gluten-free option – Look for gluten-free fudge stripe cookies at your local grocery store. Several brands make them now, and they work exactly the same way. Just double-check the ingredients on your Kisses too, though most chocolate kisses are naturally gluten-free.
Peanut butter twist – Replace the chocolate Kisses with peanut butter cups. You’ll need to cut them in half or use the mini ones. The peanut butter and chocolate combo is always a crowd-pleaser. I made these for a Halloween party last year and they were gone in ten minutes.
Vegan adaptation – Use vegan chocolate chips, vegan chocolate kisses (or another vegan chocolate candy), and a vegan-friendly cookie. Most fudge stripe cookies are accidentally vegan, but check the label. Use a vegan buttercream or store-bought vegan frosting for the buckle.
I’ve also tried adding a tiny pinch of sea salt to the melted chocolate before dipping, and it really enhances the flavor. The salt cuts through the sweetness and makes the chocolate taste even more chocolatey. It’s a small tweak that makes a big difference.
Serving & Storage Suggestions
These no-bake witch hat cookies are best served chilled or at room temperature, depending on your preference. I like them straight from the fridge because the chocolate stays firm and the cookie stays crunchy. If you leave them out for more than an hour, the cookie might start to soften slightly from the moisture in the air.
For presentation, arrange them on a platter or cake stand with the hats pointing up. I like to scatter a few extra Halloween sprinkles around the plate for color. They look amazing next to a bowl of candy corn or alongside a batch of chicken lo mein for a fun Halloween dinner spread. The contrast between the savory noodles and the sweet chocolate hats is surprisingly good.
These pair beautifully with cold milk, hot chocolate, or even a glass of red wine for the adults. I served them at a Halloween movie night with a big bowl of popcorn and some apple slices, and everyone loved the mix of sweet and salty.
Storage instructions: Keep your witch hat cookies in an airtight container in the refrigerator. They’ll stay fresh for up to a week, though honestly they never last that long in my house. Layer them between sheets of parchment paper to prevent the frosting from smudging.
Freezer instructions: You can freeze these for up to three months. Place them in a single layer on a baking sheet and freeze until solid, then transfer to a freezer-safe container or ziplock bag. Thaw in the refrigerator for about 30 minutes before serving. The cookies might soften slightly after freezing, but they still taste great.
One thing I’ve noticed – the flavors actually develop a bit after a day in the fridge. The chocolate and cookie meld together somehow, and the second day they taste even better than the first. If you’re making these for a party, I recommend assembling them the day before and letting them chill overnight.
Nutritional Information & Benefits
Let’s be real here – these are cookies, not health food. But I always appreciate knowing what I’m eating, so here’s the breakdown for one witch hat cookie made with standard ingredients.
Estimated nutrition per cookie: Approximately 120 calories, 7 grams of fat, 15 grams of carbohydrates, 10 grams of sugar, and 2 grams of protein. These numbers will vary depending on the specific brands you use and whether you add sprinkles or extra frosting.
On the positive side, dark chocolate does contain antioxidants and flavonoids that can be beneficial in small amounts. The cookies provide a quick energy boost, which is perfect for powering through a Halloween party or a long evening of trick-or-treating.
Dietary considerations: This recipe contains dairy, gluten, and soy (from the chocolate). It’s not suitable for vegans unless you use the substitutions I mentioned earlier. If you have nut allergies, check your chocolate Kisses label – some varieties are processed in facilities that handle nuts.
I personally see these as a treat-you-want-to-enjoy kind of recipe. They’re perfect for special occasions and holidays when you want something festive without the guilt of eating something that took hours to make. One or two of these with a glass of milk makes for a perfect Halloween indulgence.
Conclusion
These easy no-bake witch hat chocolate cookies have become a staple in my Halloween rotation for good reason. They’re quick, they’re cute, and they taste genuinely delicious. No complicated techniques, no expensive ingredients, and no oven required. Just a little melted chocolate, some cookies, and a handful of candy kisses.
I love that this recipe lets you be creative without the pressure of perfection. Your hats don’t have to look identical – in fact, the slightly uneven ones have more character. My kids fought over the ones with the most sprinkles, and the adults kept sneaking them off the platter when they thought nobody was looking.
If you make these, I’d love to hear how they turn out. Did you try a variation? Did your kids help with the assembly? Did you add your own twist with different sprinkles or frosting colors? Drop a comment below and let me know. And if you’re looking for more quick and easy recipes for your Halloween celebration, check out my BBQ chicken pizza or these zesty shrimp tacos for a full party menu.
Happy Halloween, and happy snacking!
Frequently Asked Questions
Can I make these witch hat cookies ahead of time?
Absolutely! These are actually better when made a day ahead. The flavors meld together overnight in the fridge, and the chocolate sets up perfectly. Just store them in an airtight container in the refrigerator and they’ll stay fresh for up to a week.
Why did my chocolate seize up when I melted it?
Chocolate seizes when it comes into contact with even a tiny amount of water. Make sure your bowl and utensils are completely dry before you start melting. If your chocolate does seize, try adding a teaspoon of coconut oil or vegetable shortening and stirring vigorously – sometimes you can save it.
Can I use different cookies instead of fudge stripe cookies?
You can, but the results will be different. Shortbread cookies work in a pinch, but they don’t have the chocolate coating that makes the hat brim look dark and witchy. Oreos are too thick and don’t have the right shape. Stick with fudge stripe cookies for the best visual effect.
How do I keep the Kisses from falling off the cookies?
Make sure you’re using enough melted chocolate as glue, and hold the Kiss in place for a full 10 seconds before setting it down. The chocolate needs that time to start setting. Also, don’t skip the refrigeration step – it’s essential for keeping everything firmly attached.
Can I freeze these witch hat cookies?
Yes, you can freeze them for up to three months. Freeze them in a single layer on a baking sheet first, then transfer to a freezer-safe container. Thaw in the refrigerator for about 30 minutes before serving. The cookies might soften slightly, but they’ll still taste great.
Pin This Recipe!
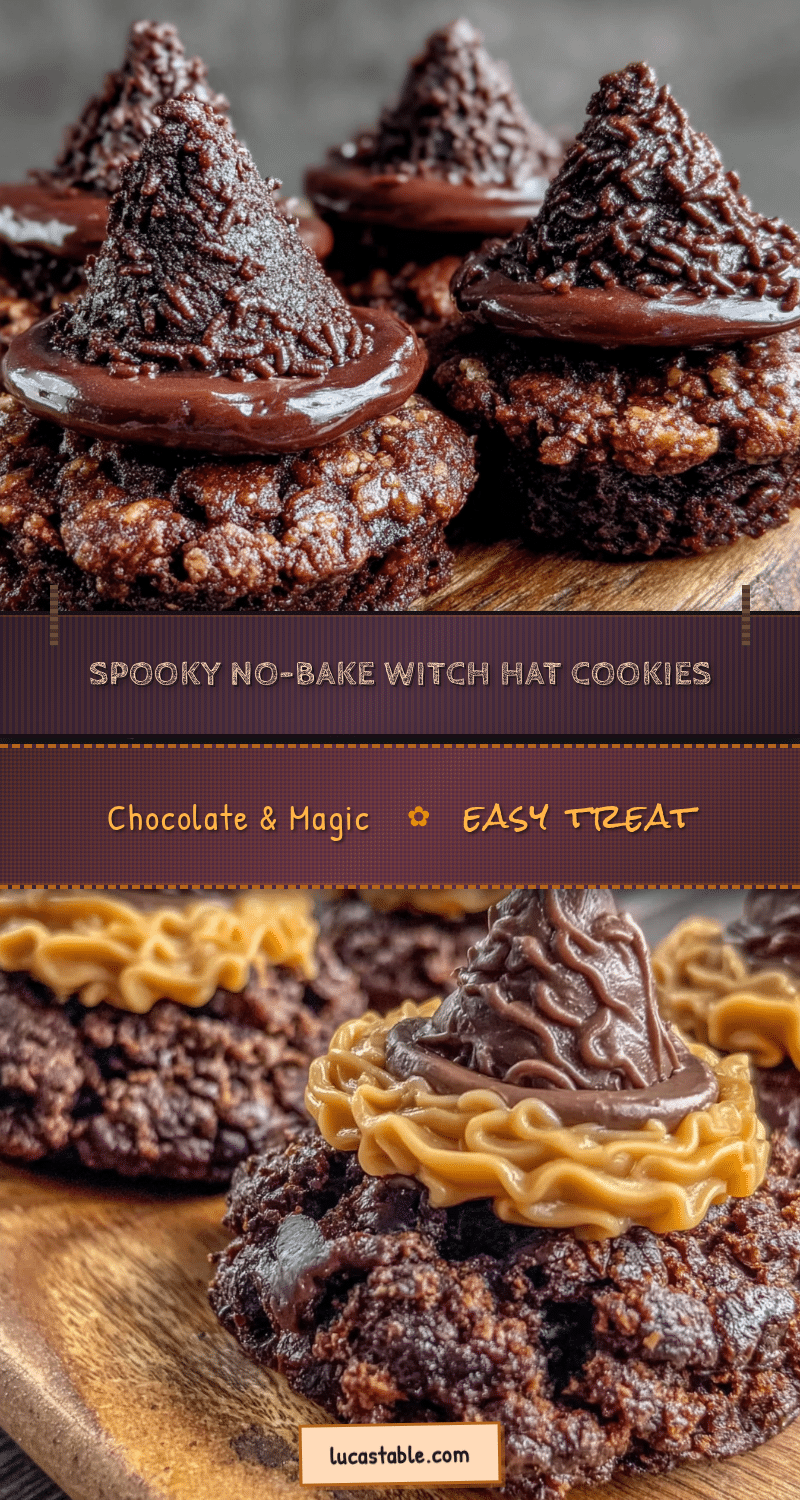
Easy No-Bake Witch Hat Cookies: Best Halloween Treat
These no-bake witch hat cookies are a quick and easy Halloween treat made with fudge stripe cookies, chocolate kisses, and orange frosting. They come together in about 15 minutes with no oven required, making them perfect for parties, classroom treats, or a fun project with kids.
- Prep Time: 15 minutes
- Cook Time: 0 minutes
- Total Time: 30 minutes (includes 15 minutes chilling)
- Yield: 30 cookies 1x
- Category: Dessert
- Cuisine: American
Ingredients
- 1 package (about 9 ounces) fudge stripe cookies (about 30 cookies)
- 30 chocolate Hershey’s Kisses (milk chocolate recommended)
- 1 cup semi-sweet chocolate chips
- 2–3 tablespoons orange frosting (store-bought or homemade)
- Halloween sprinkles (optional, for decoration)
- 1 teaspoon coconut oil or shortening (optional, for melting chocolate)
Instructions
- Line a baking sheet or large plate with parchment paper or wax paper. Set aside where it can fit in the refrigerator.
- Place the chocolate chips in a microwave-safe bowl. Microwave in 30-second intervals, stirring well after each, until melted and smooth (about 60-90 seconds total). If the chocolate is thick, stir in 1/2 teaspoon coconut oil or shortening. Let cool slightly.
- Unwrap all Hershey’s Kisses.
- Hold a fudge stripe cookie with the fudge-coated side facing up. Dip the flat bottom of a Kiss into the melted chocolate, then press it onto the center of the cookie. Hold for about 10 seconds to allow the chocolate to start setting.
- Place the assembled hat on the prepared baking sheet, cookie side down, Kiss pointing up. Repeat for all cookies, working in batches if needed. If the melted chocolate thickens, microwave for 10 seconds to warm it.
- Refrigerate the assembled hats for 10-15 minutes until the chocolate is completely firm.
- While the hats chill, spoon the orange frosting into a small piping bag or ziplock bag. Snip a tiny corner off the end (about the size of a pea).
- Remove the hats from the fridge. Pipe a small dot or buckle shape onto the side of each hat where the Kiss meets the cookie.
- Immediately add Halloween sprinkles to the frosting while it is still wet.
- Return the hats to the refrigerator for another 5 minutes to set the frosting. Serve chilled or at room temperature.
Notes
For best results, use standard-size fudge stripe cookies. Work in small batches to keep the melted chocolate from thickening. Hold the Kiss in place for a full 10 seconds to ensure it sticks. The flavors develop after a day in the fridge, so making them ahead is recommended. Store in an airtight container in the refrigerator for up to a week, or freeze for up to 3 months.
Nutrition
- Serving Size: 1 cookie
- Calories: 120
- Sugar: 10
- Sodium: 60
- Fat: 7
- Saturated Fat: 4
- Carbohydrates: 15
- Fiber: 1
- Protein: 2
Keywords: no-bake witch hat cookies, Halloween treats, easy Halloween cookies, no-bake cookies, witch hat cookies, fudge stripe cookies, chocolate kisses, Halloween dessert


