I was standing in the dairy aisle of our local Aldi last Tuesday, staring at a half-gallon of heavy cream that was on sale, when the smell of burnt sugar hit me—not from the store, but from somewhere deep in my memory. And suddenly I was seven years old, standing on a wobbly wooden stool in my Aunt Lena’s tiny apartment kitchen, watching her swirl a copper pan of sugar over a gas flame until it turned the color of a dark penny. She’d let me lick the wooden spoon afterward, and I remember thinking that nothing in the world could possibly taste that good and not be a secret.
Aunt Lena passed away three years ago, and I never did get her recipe for salted caramel. She was the kind of cook who worked by feel—a pinch of this, a splash of that, a lifetime of knowing exactly when to pull the pan off the heat. So for years, I’ve been trying to recreate that exact flavor, that perfect balance of sweet and salt that somehow felt like a hug you could eat. Honestly, I’ve had more failures than successes. Burnt caramel that tasted like regret. Ice cream bases that turned into ice shards instead of creamy scoops. Let me tell you, nothing humbles you quite like a freezer full of crystallized failure.
But then, on a whim last month, I decided to abandon the traditional custard-based approach entirely. No eggs. No tempering. No standing over a stove stirring for twenty minutes. I grabbed a can of sweetened condensed milk (the same one Aunt Lena used in her magic fudge), whipped some cream until it formed soft peaks, and folded in a simple salted caramel sauce I’d made in under ten minutes. The result? The creamiest, most decadent no-churn ice cream I’ve ever had. Maybe you’ve been there—chasing a flavor from your childhood that you can’t quite name but can almost taste on the back of your tongue. This is that flavor. And honestly, I think Aunt Lena would approve.
Why You’ll Love This Recipe
This easy no-churn salted caramel ice cream is the kind of recipe that makes you wonder why you ever bothered with complicated custards or expensive ice cream machines. I’ve tested this version at least a dozen times, tweaking the salt ratio, the whipping time, and the caramel temperature until everything clicked. Here’s why it’s become my go-to dessert:
- No Ice Cream Maker Needed: Seriously, zero special equipment required. Just a bowl, a whisk or mixer, and a freezer. That’s it.
- Ready in Under 30 Minutes of Active Time: The hardest part is waiting for it to freeze. The actual hands-on work takes less than half an hour.
- Panty-Simple Ingredients: Heavy cream, sweetened condensed milk, sugar, butter, and salt. You probably have most of these in your kitchen right now.
- Perfect for Summer Gatherings: July 4th barbecues, lazy Sunday afternoons, or just a Tuesday night when you need something sweet—this ice cream fits every occasion.
- Rich, Creamy, and Absolutely Indulgent: The texture is so smooth and scoopable, you’d never guess there’s no machine involved.
- Foolproof Caramel: I’ve included my tested tips for making caramel without a candy thermometer. No more guessing games.
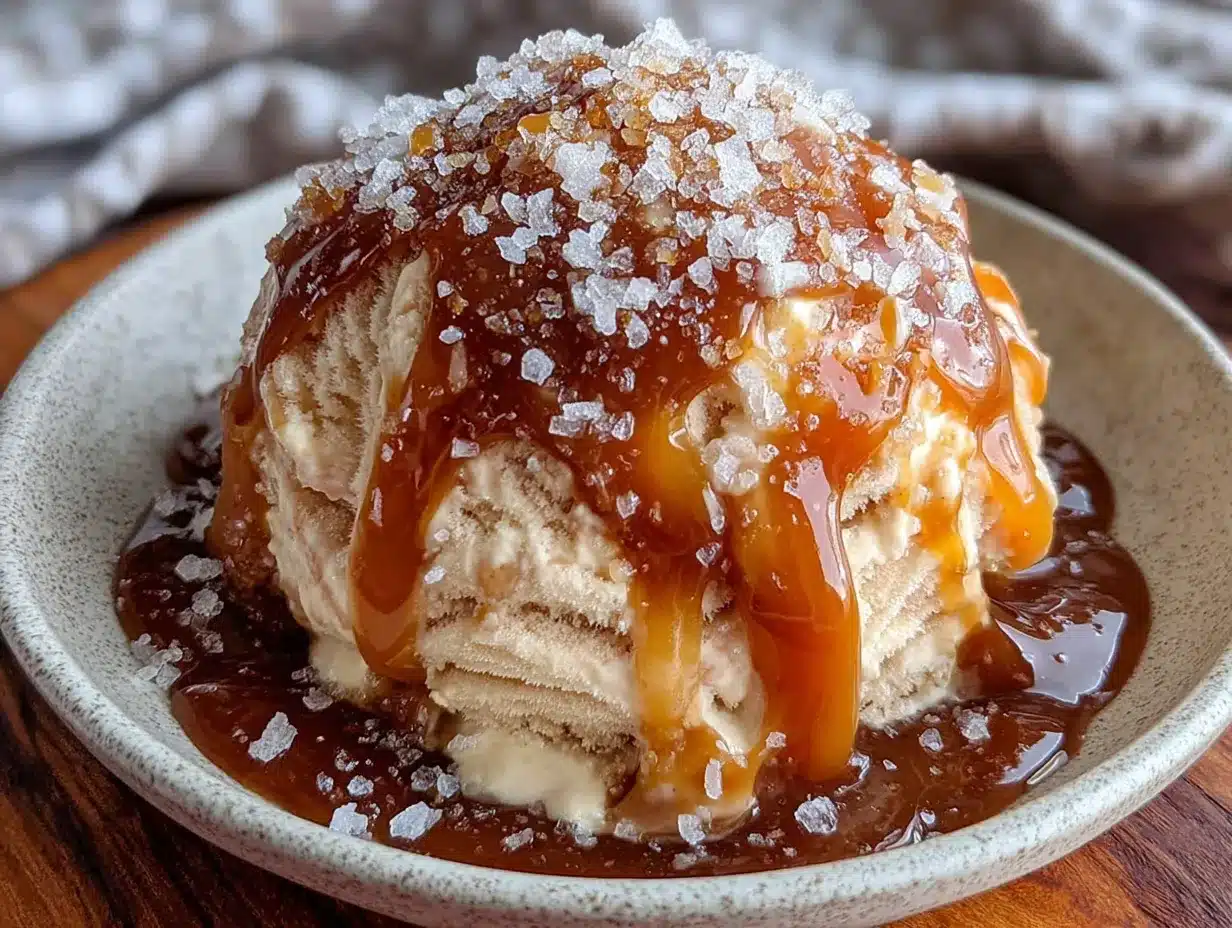
What makes this recipe different from the dozens of other no-churn ice creams out there? It’s the way the caramel ribbons stay soft and swirly even after freezing, thanks to the butter and cream in the sauce. And the salt—we’re using flaky sea salt here, not table salt—creates these little bursts of savory goodness that make each bite more interesting than the last. This isn’t just another dessert; it’s the kind that makes you close your eyes after the first spoonful. Trust me, I’ve done it more times than I care to admit.
What Ingredients You Will Need
This recipe uses simple, wholesome ingredients that come together to create something truly special. The beauty of no-churn ice cream is that it relies on the natural emulsifying power of sweetened condensed milk, so you don’t need any eggs or stabilizers. Here’s everything you’ll need:
For the Salted Caramel Sauce
- 1 cup (200g) granulated sugar – Regular white sugar works best here. Don’t substitute brown sugar; it has too much moisture and can cause crystallization.
- 6 tablespoons (85g) unsalted butter, cut into small cubes – I prefer Kerrygold for its rich flavor, but any good-quality unsalted butter will do.
- 1/2 cup (120ml) heavy cream, at room temperature – This is crucial. Cold cream can cause the hot caramel to seize up and form lumps.
- 1 1/2 teaspoons flaky sea salt, plus more for sprinkling – Maldon is my go-to, but any flaky sea salt works beautifully.
- 1 teaspoon vanilla extract – Pure vanilla extract adds depth; avoid imitation vanilla here.
For the Ice Cream Base
- 2 cups (480ml) heavy cream, cold – Look for cream with at least 36% milk fat for the best texture.
- 1 can (14 ounces / 397g) sweetened condensed milk – I’ve tested this with both Eagle Brand and store brands; they all work fine. Just make sure it’s sweetened, not evaporated milk.
- 1 teaspoon vanilla extract – This enhances the caramel flavor without overpowering it.
- Pinch of salt – Just a tiny pinch to balance the sweetness.
Ingredient Selection Tips: For the flakiest, most luxurious texture, use cold heavy cream straight from the fridge. Room temperature cream won’t whip properly. And when it comes to the sweetened condensed milk, don’t be tempted to use the low-fat version—the full-fat variety gives the ice cream its signature creaminess and prevents ice crystals from forming.
Substitution Guidance: If you’re dairy-free, you can substitute full-fat coconut cream for the heavy cream (chill the can overnight and scoop out the solid part) and use a dairy-free sweetened condensed milk alternative. The texture will be slightly different—more coconut-forward—but still delicious. For a vegan version, use coconut oil instead of butter in the caramel sauce.
Equipment Needed
One of the best things about this recipe is how little equipment it requires. Here’s what you’ll need:
- Medium saucepan – For making the caramel sauce. A light-colored pan (stainless steel or enameled) is best so you can see the color of the caramel as it cooks.
- Large mixing bowl – For whipping the cream. Make sure it’s big enough to accommodate the whipped cream and the condensed milk without overflowing.
- Hand mixer or stand mixer – You can whip the cream by hand with a whisk, but it’ll take about 8-10 minutes of vigorous work. A mixer makes it much easier.
- Rubber spatula – For folding everything together gently.
- 9×5-inch loaf pan – This is the perfect size for freezing the ice cream. You can also use a 2-quart freezer-safe container.
- Parchment paper or plastic wrap – For lining the pan and covering the surface of the ice cream.
- Digital kitchen scale (optional but helpful) – For precise measurements, especially with the sugar and butter.
Budget-Friendly Options: Don’t have a hand mixer? A whisk and some elbow grease work perfectly fine. Just make sure your cream is very cold and your arm is ready for a mini workout. I’ve done it both ways, and honestly, the hand-whipped version has a slightly airier texture that I sometimes prefer.
Preparation Method
Let’s get to the fun part. I’ve broken this down into two stages: making the caramel sauce and assembling the ice cream. Take your time with the caramel—it’s the heart of this recipe.
Stage 1: Make the Salted Caramel Sauce
- Prepare your ingredients: Measure out the sugar, cube the butter, and have the heavy cream and salt ready. This is not the time to be hunting for ingredients—caramel moves fast.
- Heat the sugar: Place the granulated sugar in a medium saucepan over medium heat. Stir it gently with a wooden spoon or heatproof spatula as it starts to melt. You’ll see clumps forming at first—that’s normal. Keep stirring until the sugar dissolves completely and turns a deep amber color, about 6-8 minutes. Watch it carefully: caramel can go from perfect to burnt in seconds. The color should be the shade of a new copper penny.
- Add the butter: Once the sugar is melted and amber, add the cubed butter all at once. The mixture will bubble up vigorously—don’t panic. Stir continuously until the butter is fully melted and incorporated, about 1-2 minutes.
- Pour in the cream: Slowly drizzle in the room-temperature heavy cream while stirring constantly. Again, the mixture will bubble up. Keep stirring until the sauce is smooth and all the caramel has dissolved into the cream, about 1 minute.
- Season and cool: Remove the pan from heat. Stir in the vanilla extract and 1 1/2 teaspoons of flaky sea salt. Let the caramel cool in the pan for 10 minutes, then transfer it to a heatproof jar or bowl. Let it cool completely to room temperature—about 1 hour. Don’t rush this step. Warm caramel will melt your whipped cream base.
Stage 2: Assemble the Ice Cream
- Whip the cream: Pour the cold heavy cream into a large mixing bowl. Using a hand mixer or stand mixer fitted with the whisk attachment, whip the cream on medium-high speed until soft peaks form. This takes about 3-4 minutes. You’re looking for peaks that flop over slightly when you lift the beaters—not stiff, not runny.
- Fold in the condensed milk: Pour the sweetened condensed milk and vanilla extract over the whipped cream. Add a tiny pinch of salt. Using a rubber spatula, gently fold everything together until no white streaks remain. Be gentle—you want to keep as much air in the mixture as possible.
- Layer the caramel: Spoon about one-third of the cream mixture into your prepared loaf pan. Drizzle about one-third of the cooled salted caramel sauce over the top. Use a butter knife or skewer to gently swirl the caramel into the cream—just a few figure-eight motions, don’t overmix. Repeat with the remaining cream and caramel, creating three layers of swirls.
- Freeze: Press a piece of parchment paper or plastic wrap directly onto the surface of the ice cream (this prevents ice crystals from forming). Cover the pan with foil or a lid and freeze for at least 6 hours, but preferably overnight. The longer it freezes, the better the texture.
- Serve: Let the ice cream sit at room temperature for 5-10 minutes before scooping. This softens it just enough for easy scooping without melting. Sprinkle each serving with a tiny pinch of flaky sea salt right before serving—it makes all the difference.
Cooking Tips & Techniques
After making this recipe more times than I can count, I’ve learned a few things the hard way. Here are my best tips for perfect no-churn salted caramel ice cream:
Don’t skip the room-temperature cream in the caramel. I learned this lesson when I poured cold cream into hot caramel and ended up with a lumpy, grainy mess. The temperature shock causes the caramel to seize. Let your cream sit out for 20 minutes before adding it to the pan.
Use a light-colored pan for the caramel. Dark pans make it nearly impossible to see the color change, which is your only visual cue for doneness. I ruined three batches before switching to a stainless steel saucepan. Trust me on this one.
Whip the cream to soft peaks, not stiff peaks. Over-whipped cream can turn grainy and separate when you fold in the condensed milk. Stop when the cream holds its shape but still looks silky and smooth. If you see little specks of butter forming, you’ve gone too far.
Let the caramel cool completely. I know it’s tempting to speed things up, but warm caramel will deflate your whipped cream and create a thin, icy texture. Make the caramel first, then let it cool while you prepare everything else. I usually make it the day before and refrigerate it overnight—just let it come back to room temperature before swirling it in.
Swirl, don’t stir. When you add the caramel to the cream base, use a gentle figure-eight motion with a knife or skewer. Overmixing will incorporate the caramel completely into the base, and you’ll lose those beautiful ribbons of salted caramel goodness.
Timing strategy: Make the caramel sauce in the morning, let it cool while you’re at work, then assemble the ice cream in the evening. By the next afternoon, it’s ready to serve. Perfect for weekend entertaining!
Variations & Adaptations
One of the best things about this recipe is how easily it adapts to different tastes and dietary needs. Here are some variations I’ve tried and loved:
Chocolate Salted Caramel Ice Cream: Add 1/4 cup of unsweetened cocoa powder to the sweetened condensed milk before folding it into the whipped cream. Whisk it until smooth, then proceed with the recipe. The chocolate-caramel combination is absolutely divine.
Vegan Version: Substitute the heavy cream with two cans of full-fat coconut cream (chilled overnight, scoop out the solid part). Use a dairy-free sweetened condensed milk alternative and replace the butter with coconut oil in the caramel sauce. The coconut flavor pairs surprisingly well with the salted caramel.
Nutella Swirl Variation: After layering the caramel, add spoonfuls of Nutella and swirl it in with the caramel. The hazelnut-chocolate-caramel combo is dangerously good. I made this for a friend’s birthday party, and it disappeared in ten minutes.
Lower Sugar Option: Use a sugar-free sweetened condensed milk alternative and reduce the sugar in the caramel to 3/4 cup. The texture will be slightly less creamy, but it’s still a satisfying treat for those watching their sugar intake.
Seasonal Twist: In the fall, add 1 teaspoon of pumpkin pie spice to the cream base and use bourbon instead of vanilla in the caramel sauce. It’s like autumn in a bowl.
Serving & Storage Suggestions
This ice cream is best served slightly softened, about 5-10 minutes out of the freezer. Scoop it into chilled bowls or cones and finish with a final sprinkle of flaky sea salt—that last-minute salt really wakes up the caramel flavor.
Perfect Pairings: Serve alongside warm brownies or a slice of apple pie for an over-the-top dessert. A drizzle of extra caramel sauce and a dollop of whipped cream takes it to another level. For a simpler option, just enjoy it on its own—it’s that good.
Storage Instructions: Keep the ice cream in an airtight container, pressing a piece of parchment paper directly onto the surface before sealing. This prevents ice crystals from forming and keeps the texture creamy for up to two weeks. Honestly, it never lasts that long in my house.
Reheating Notes: If the ice cream gets too hard after a few days, let it sit at room temperature for 10-15 minutes before scooping. If you’re serving a crowd, transfer the container to the refrigerator for 20 minutes before scooping—it softens more evenly that way.
Flavor Development: The caramel flavor actually deepens after a day or two in the freezer. I’ve noticed that the salt mellows out slightly, and the caramel becomes more buttery and complex. So if you can resist eating it immediately, it’s even better the next day.
Nutritional Information & Benefits
While this is definitely an indulgence, here’s the estimated nutritional breakdown per serving (based on 8 servings):
- Calories: Approximately 480
- Total Fat: 32g
- Saturated Fat: 20g
- Carbohydrates: 44g
- Sugar: 40g
- Protein: 5g
- Sodium: 380mg
Health Benefits of Key Ingredients: Heavy cream contains fat-soluble vitamins A, D, E, and K, which are important for immune function and bone health. The butter in the caramel provides butyrate, a short-chain fatty acid that supports gut health. And yes, there’s even a tiny amount of calcium from the dairy. But let’s be real—this is a treat, not a health food. It’s meant to be enjoyed in moderation, preferably with a smile.
Dietary Considerations: This recipe contains dairy and is not suitable for vegans (unless using the substitutions above). It is gluten-free and contains no nuts, but check your ingredients for potential cross-contamination if allergies are a concern.
Conclusion
This easy no-churn salted caramel ice cream is more than just a dessert—it’s a little piece of nostalgia that you can recreate in your own kitchen without any fancy equipment or culinary school training. Every time I make it, I think about Aunt Lena and her magic copper pan, and I feel like I’ve finally captured that elusive flavor I’ve been chasing all these years.
I’d love for you to try this recipe and make it your own. Maybe you’ll add a splash of bourbon, or swirl in some chocolate, or just enjoy it exactly as written. Whatever you do, don’t forget that final sprinkle of salt—it’s the secret that takes this from good to unforgettable. If you make it, drop a comment below and let me know how it turned out. Did you try a variation? Did it bring back a memory? I’d genuinely love to hear about it. Happy scooping!
Frequently Asked Questions
Can I use store-bought caramel sauce instead of making my own?
You can, but I really recommend making the homemade version. Store-bought caramel sauces often contain preservatives and corn syrup that can affect the texture of the ice cream, making it icier. Plus, homemade salted caramel is so much more flavorful—it’s worth the extra 10 minutes.
Why did my caramel crystallize?
Crystallization usually happens when sugar granules splash onto the sides of the pan during cooking. To prevent this, use a clean, dry pan and avoid stirring too vigorously once the sugar starts melting. You can also brush down the sides of the pan with a wet pastry brush to dissolve any stray crystals.
Can I use a different type of salt?
Absolutely, but the texture matters. Flaky sea salt gives you those little bursts of salty goodness that make each bite interesting. Table salt is too fine and can make the caramel taste overly salty. If you only have kosher salt, use about half the amount and add it gradually to taste.
How long does this ice cream keep in the freezer?
Properly stored, this ice cream will stay creamy and delicious for up to two weeks. After that, it may start to develop ice crystals and lose some of its smooth texture. The good news is, it rarely lasts that long—my family usually finishes it within a few days.
Can I make this recipe without a mixer?
Yes! You can whip the cream by hand using a whisk and a large bowl. It takes about 8-10 minutes of steady whisking, but it’s a great arm workout. Just make sure the cream is very cold, and use a bowl that’s deep enough to prevent splashing. I’ve done it many times when I didn’t feel like dragging out the mixer.
Pin This Recipe!
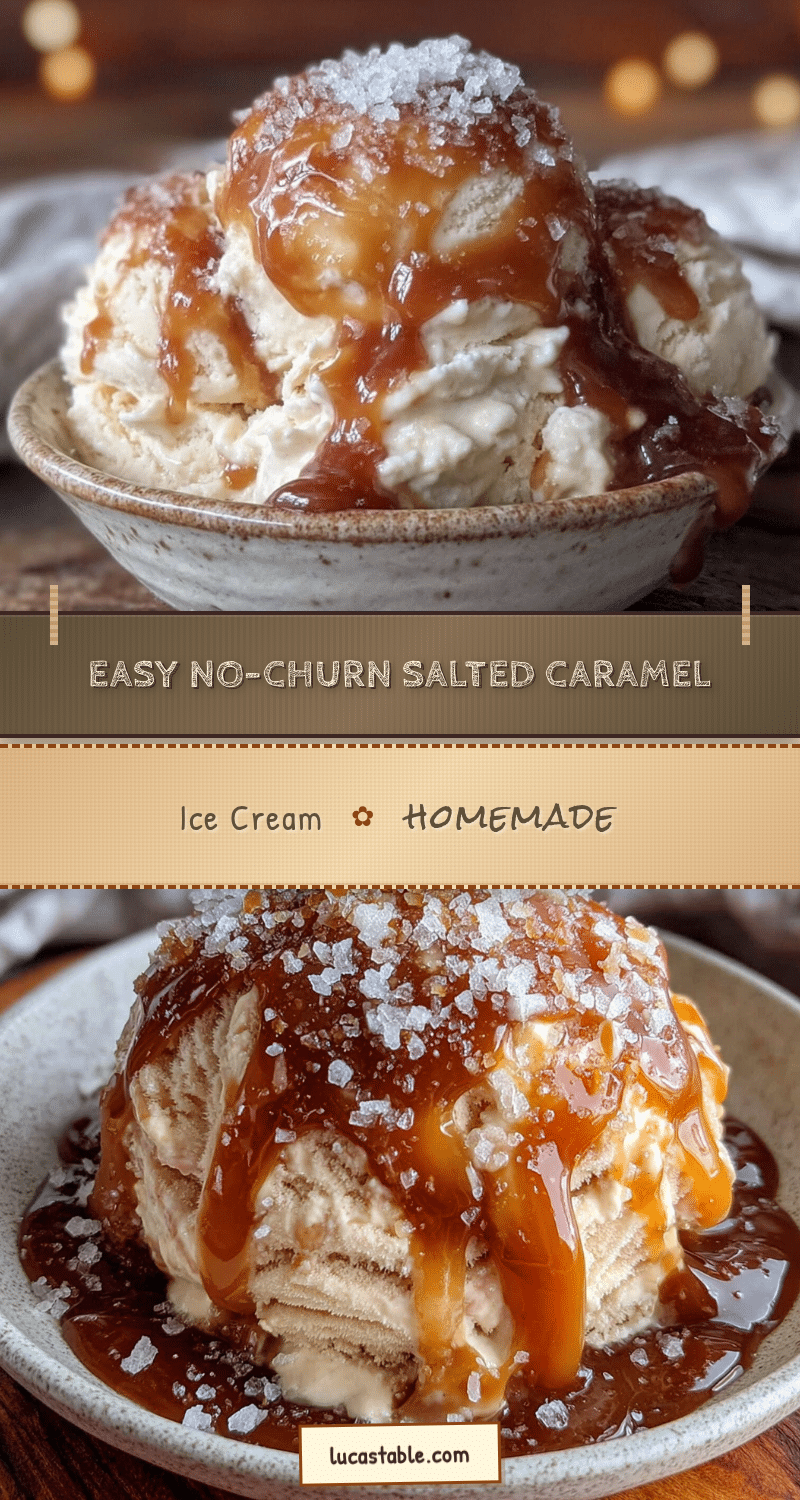
Easy No-Churn Salted Caramel Ice Cream – Best Homemade Recipe
This easy no-churn salted caramel ice cream is the kind of recipe that makes you wonder why you ever bothered with complicated custards or expensive ice cream machines. It’s the creamiest, most decadent no-churn ice cream you’ll ever have, with soft caramel ribbons and bursts of flaky sea salt in every bite.
- Prep Time: 20 minutes
- Cook Time: 10 minutes
- Total Time: 6 hours 30 minutes (including freezing time)
- Yield: 8 servings 1x
- Category: Dessert
- Cuisine: American
Ingredients
- 1 cup (200g) granulated sugar
- 6 tablespoons (85g) unsalted butter, cut into small cubes
- 1/2 cup (120ml) heavy cream, at room temperature
- 1 1/2 teaspoons flaky sea salt, plus more for sprinkling
- 1 teaspoon vanilla extract
- 2 cups (480ml) heavy cream, cold
- 1 can (14 ounces / 397g) sweetened condensed milk
- 1 teaspoon vanilla extract
- Pinch of salt
Instructions
- Prepare your ingredients: Measure out the sugar, cube the butter, and have the heavy cream and salt ready.
- Heat the sugar: Place the granulated sugar in a medium saucepan over medium heat. Stir gently as it starts to melt. Keep stirring until the sugar dissolves completely and turns a deep amber color, about 6-8 minutes.
- Add the butter: Once the sugar is melted and amber, add the cubed butter all at once. Stir continuously until the butter is fully melted and incorporated, about 1-2 minutes.
- Pour in the cream: Slowly drizzle in the room-temperature heavy cream while stirring constantly. Keep stirring until the sauce is smooth, about 1 minute.
- Season and cool: Remove from heat. Stir in the vanilla extract and 1 1/2 teaspoons of flaky sea salt. Let cool in the pan for 10 minutes, then transfer to a heatproof jar or bowl. Let cool completely to room temperature—about 1 hour.
- Whip the cream: Pour the cold heavy cream into a large mixing bowl. Using a hand mixer or stand mixer fitted with the whisk attachment, whip the cream on medium-high speed until soft peaks form, about 3-4 minutes.
- Fold in the condensed milk: Pour the sweetened condensed milk and vanilla extract over the whipped cream. Add a tiny pinch of salt. Gently fold everything together until no white streaks remain.
- Layer the caramel: Spoon about one-third of the cream mixture into your prepared loaf pan. Drizzle about one-third of the cooled salted caramel sauce over the top. Use a butter knife or skewer to gently swirl the caramel into the cream. Repeat with the remaining cream and caramel, creating three layers of swirls.
- Freeze: Press a piece of parchment paper or plastic wrap directly onto the surface of the ice cream. Cover the pan with foil or a lid and freeze for at least 6 hours, but preferably overnight.
- Serve: Let the ice cream sit at room temperature for 5-10 minutes before scooping. Sprinkle each serving with a tiny pinch of flaky sea salt right before serving.
Notes
Don’t skip the room-temperature cream in the caramel—cold cream can cause the caramel to seize. Use a light-colored pan for the caramel to see the color change. Whip the cream to soft peaks, not stiff peaks. Let the caramel cool completely before swirling into the cream base. Swirl gently with a figure-eight motion to create ribbons. For best texture, freeze overnight. The caramel flavor deepens after a day or two in the freezer.
Nutrition
- Serving Size: 1 serving (about 1/2
- Calories: 480
- Sugar: 40
- Sodium: 380
- Fat: 32
- Saturated Fat: 20
- Carbohydrates: 44
- Protein: 5
Keywords: no-churn ice cream, salted caramel, homemade ice cream, easy dessert, no ice cream maker, summer dessert, caramel ice cream


