This was supposed to be a perfectly respectable batch of classic Rice Krispie treats for my niece’s birthday party. I mean, you can’t go wrong with the original, right? But somewhere between answering the door for the mailman and trying to pry my toddler’s fingers out of the marshmallow bag, I grabbed the wrong box of cereal from the pantry. It was the fruity, colorful kind my kids beg for but I never buy. The marshmallows were already melting, the butter was bubbling, and I was already running late. What came out was a sticky, neon-pink mess that looked nothing like the plan — and somehow, it was better. Honestly, it was a total accident that turned into our new favorite Halloween tradition.
The first batch was gone before I could even figure out what I’d done. The kids didn’t care that the color was off or that the texture was a little different. They just kept grabbing handfuls and grinning with sticky teeth. That’s when the idea hit me — what if I leaned into the chaos? What if I made them intentionally spooky, with candy eyes and creepy colors, and called them Halloween monster treats? So I tried again the next week, armed with green food coloring and a bag of googly eyes. Let me tell you, it was a game changer.
Now, these kid-approved Halloween Rice Krispie treats with candy eyes are a staple in our house every October. They’re the kind of recipe that makes you feel like a Pinterest mom even when you’re barely holding it together. Maybe you’ve been there — staring at a half-melted marshmallow mess, wondering how you got here. Trust me, this is the happy ending you didn’t know you needed.
Why You’ll Love This Recipe
Let’s be real — most Halloween treats are either way too complicated or taste like cardboard. These are neither. They’re the perfect mix of fun and easy, and they actually taste amazing. I’ve tested this recipe at least a dozen times (yes, really), and every single batch has been devoured by kids and adults alike. Here’s why you’ll keep coming back to it:
- Quick & Easy: From start to finish, these come together in under 15 minutes. No baking, no fancy equipment, no stress. Perfect for busy weeknights or last-minute Halloween parties.
- Simple Ingredients: You probably already have everything in your pantry. Butter, marshmallows, Rice Krispies cereal, and candy eyes. That’s it. No weird extracts or hard-to-find items.
- Perfect for Halloween: Whether you’re hosting a spooky soiree or just want to surprise the kids after school, these treats fit the bill. They’re festive without being fussy.
- Crowd-Pleaser: I’ve brought these to school parties, neighborhood gatherings, and family dinners. They always get rave reviews — even from the pickiest eaters.
- Unbelievably Delicious: The marshmallow-to-cereal ratio is spot on. They’re chewy, buttery, and just sweet enough. The candy eyes add a fun crunch that kids absolutely love.
What makes this recipe different from the rest? It’s the technique. Most recipes tell you to melt the butter and marshmallows together, then dump in the cereal. But I’ve found that letting the marshmallows get a little brown around the edges gives the treats a deeper, almost caramel-like flavor. It’s a small tweak, but it makes a huge difference. Plus, the candy eyes aren’t just for decoration — they add a subtle crunch that makes every bite interesting.
This recipe isn’t just good — it’s the kind that makes you close your eyes after the first bite. It’s comfort food reimagined for the spookiest season, and it’s guaranteed to put a smile on everyone’s face.
What Ingredients You Will Need
This recipe uses simple, wholesome ingredients to deliver bold flavor and satisfying texture without the fuss. You don’t need to hunt down specialty items — just grab these staples from your kitchen or the grocery store on your way home.
- 3 tablespoons unsalted butter (adds richness; I recommend Land O’Lakes for consistent results)
- 1 package (10 ounces) regular marshmallows (or 4 cups mini marshmallows; Jet-Puffed works great)
- 6 cups Rice Krispies cereal (or any crispy rice cereal; store brands work fine)
- 1/2 teaspoon vanilla extract (optional, but adds warmth; use pure vanilla if you have it)
- 1/4 teaspoon salt (balances the sweetness; don’t skip it)
- 1-2 drops green or orange food coloring (optional, for a spooky look; gel food coloring works best)
- 1/2 cup candy eyes (the little white and black ones; found in the baking aisle or online)
- Non-stick cooking spray (for greasing the pan and your hands)
Ingredient Tips: For the best texture, use fresh marshmallows. If they’re old and hard, they won’t melt as smoothly. I always buy a new bag when I’m making these. For the cereal, any crispy rice cereal will do, but I’ve found that name-brand Rice Krispies hold their crunch a little longer. If you’re using store brand, just be careful not to overmix — it can get mushy.
Substitution Guidance: Need a vegan version? Use vegan butter and vegan marshmallows (Dandies is a great brand). The candy eyes are usually vegan, but double-check the package. For a gluten-free option, most crispy rice cereals are naturally gluten-free, but always check the label — some brands use malt flavoring that contains gluten. If you’re avoiding artificial colors, skip the food coloring and use natural alternatives like spinach powder for green or beet powder for red.
Equipment Needed
You don’t need a fancy kitchen to make these treats. Here’s what you’ll need:
- Large pot or Dutch oven: You need something big enough to stir everything without spilling. A 5-quart pot works perfectly.
- Wooden spoon or silicone spatula: For stirring the marshmallow mixture. Silicone is great because it doesn’t scratch your pot.
- 9×13-inch baking dish: This gives you the perfect thickness. If you want thicker treats, use an 8×8-inch dish.
- Parchment paper or wax paper: Lining the pan makes cleanup a breeze. Trust me, you don’t want to scrape hardened marshmallow off your dish.
- Measuring cups and spoons: For accurate measurements. Eyeballing works, but precision helps with consistency.
- Small bowl: For the candy eyes. Keeps them handy while you work.
Budget-Friendly Options: Don’t have a 9×13-inch dish? Use a rimmed baking sheet or even a large casserole dish. No parchment paper? Grease the pan generously with butter or cooking spray. I’ve used both, and they work fine — just be careful when cutting the treats.
Personal Experience: I once tried making these in a non-stick pot that was too small. The marshmallow mixture bubbled over, and I spent 20 minutes scrouting the stovetop. Learn from my mistake — use a big pot!
Preparation Method
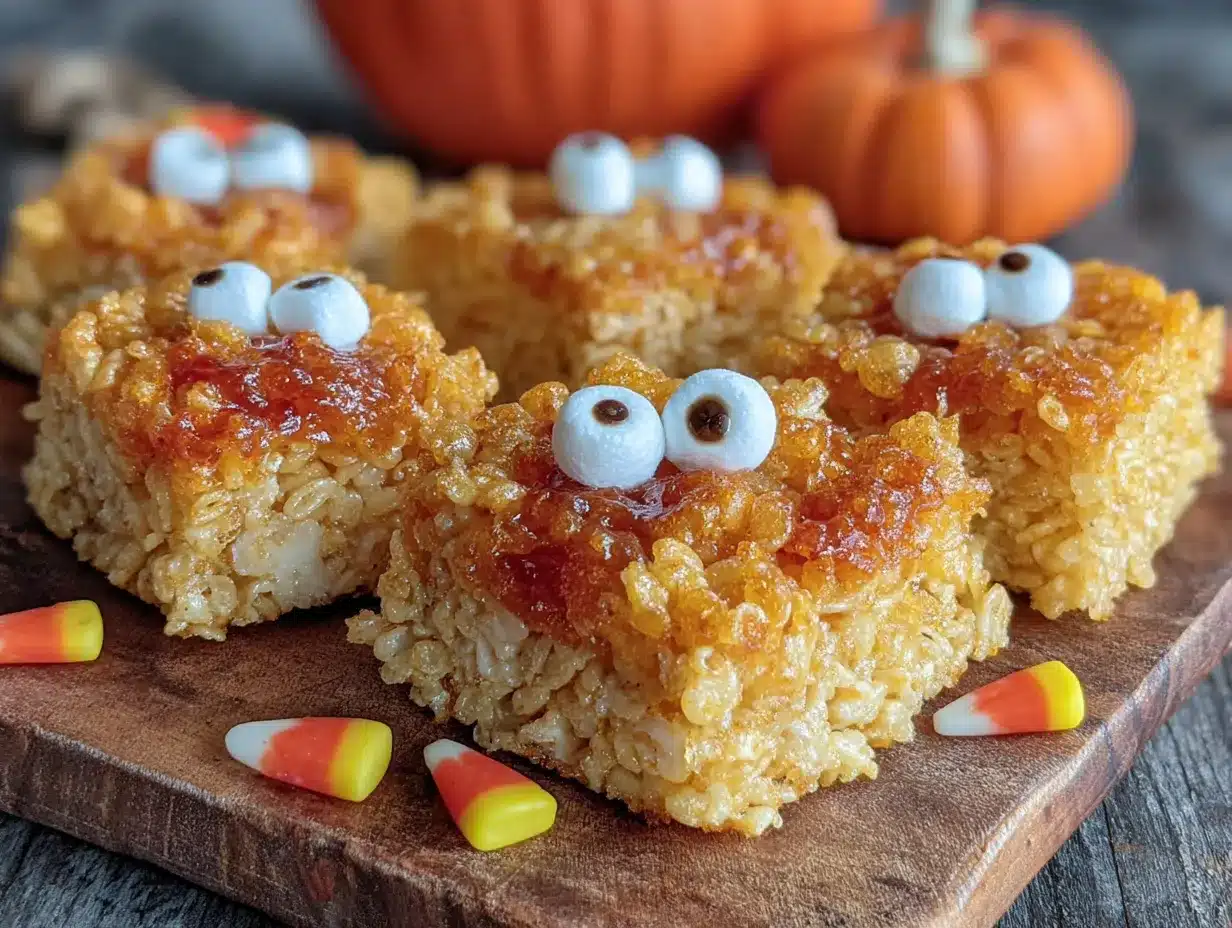
Follow these steps carefully, and you’ll have perfect Halloween treats every time. I’ve included all the little details that make a difference.
- Prep the pan: Line your 9×13-inch baking dish with parchment paper, leaving some overhang on the sides. This makes it easy to lift the treats out later. Spray the parchment lightly with non-stick cooking spray. Set aside.
- Melt the butter: Place the 3 tablespoons unsalted butter in a large pot over medium-low heat. Let it melt slowly — don’t rush this. You want it fully melted but not browned. (If it starts to brown, that’s okay — it adds a nutty flavor, but it’s not traditional.)
- Add the marshmallows: Pour in the entire package of marshmallows (10 ounces). Stir constantly with a wooden spoon or silicone spatula until they’re completely melted. This takes about 3-4 minutes. Don’t walk away — marshmallows can burn quickly!
- Season the mixture: Remove the pot from the heat. Stir in the 1/2 teaspoon vanilla extract and 1/4 teaspoon salt. The salt is crucial — it cuts the sweetness and makes the treats taste more balanced.
- Add color (optional): If you’re using food coloring, add 1-2 drops of green or orange gel food coloring now. Stir until the color is evenly distributed. Start with one drop and add more if you want a deeper shade. Remember, the color will lighten slightly when you add the cereal.
- Fold in the cereal: Add the 6 cups Rice Krispies cereal to the pot. Gently fold it into the marshmallow mixture using a folding motion — don’t stir vigorously, or the cereal will break apart. You want the cereal coated evenly without crushing it.
- Add the candy eyes: Sprinkle in about 1/3 cup of the candy eyes (reserve the rest for topping). Fold them in gently, just until distributed. Don’t overmix, or the eyes might melt slightly.
- Press into the pan: Transfer the mixture to the prepared baking dish. Spray your hands with non-stick cooking spray (or grease them with butter) and press the mixture evenly into the pan. Press firmly but gently — you want them compact enough to hold together but not so dense that they’re hard.
- Top with remaining eyes: While the mixture is still warm, press the remaining candy eyes into the top. Arrange them in a fun pattern — clustered together like a monster face, or scattered randomly for a creepy look.
- Cool completely: Let the treats cool at room temperature for at least 30 minutes. Don’t rush this — if you cut them while they’re warm, they’ll fall apart. Once cool, use the parchment overhang to lift the block out of the pan.
- Cut into squares: Use a sharp knife to cut into 12-16 squares. For cleaner cuts, spray the knife with non-stick spray between cuts. Wipe the blade clean after each slice to avoid sticky buildup.
Sensory Cues: When the marshmallows are fully melted, the mixture should be smooth and glossy, with no lumps. When you fold in the cereal, you’ll hear a soft crackling sound — that’s the cereal absorbing the marshmallow. The final mixture should look like a sticky, gooey mess that holds together when pressed.
Troubleshooting: If the mixture is too dry, you probably overcooked the marshmallows. Next time, take them off the heat a little earlier. If it’s too sticky, you might have added too much marshmallow — try using 9 ounces next time.
Cooking Tips & Techniques
I’ve made these treats more times than I can count, and I’ve learned a few things along the way. Here are my best tips for success.
Don’t Overcook the Marshmallows: This is the most common mistake. If you cook the marshmallows too long, the treats will be hard and brittle instead of soft and chewy. As soon as the marshmallows are melted and smooth, take the pot off the heat. I’ve ruined batches by getting distracted — the marshmallows turned brown and the treats were rock hard. Learn from my failure.
Work Quickly: The marshmallow mixture sets fast. Once you add the cereal, you have about 2-3 minutes to get everything pressed into the pan. Have your pan prepped and ready before you start melting. I keep a timer on my phone to remind myself to move fast.
Use Room Temperature Ingredients: Cold butter takes longer to melt, which increases the risk of burning the marshmallows. Let your butter sit out for 10 minutes before you start. It’s a small step that makes a big difference.
Press Gently: When pressing the mixture into the pan, use gentle, even pressure. If you press too hard, the treats will be dense and hard. If you press too lightly, they’ll fall apart. Aim for a firm but gentle touch — like you’re patting a baby’s back.
Timing and Multitasking: I like to prep all my ingredients before I start. Measure the cereal, unwrap the butter, and have the candy eyes ready in a bowl. This way, I’m not scrambling when the marshmallows are melting. It saves time and reduces stress.
Consistency Tips: For chewier treats, use slightly less cereal (about 5 1/2 cups). For crunchier treats, add a little more (about 6 1/2 cups). I prefer the standard 6 cups for the perfect balance.
Variations & Adaptations
One of the best things about this recipe is how easy it is to customize. Here are some of my favorite variations.
Spooky Spider Treats: Instead of pressing the candy eyes into the top, use black licorice strings to create spider legs. Press eight legs into each treat, then add two eyes on top. My kids went crazy for these last Halloween — they looked like real spiders!
Chocolate Drizzle: Melt 1/2 cup of chocolate chips with 1 teaspoon of coconut oil in the microwave. Drizzle the melted chocolate over the cooled treats, then add the candy eyes. The chocolate adds a rich flavor that pairs perfectly with the marshmallow.
Pumpkin Spice Version: Add 1 teaspoon of pumpkin pie spice to the marshmallow mixture along with the vanilla. Use orange food coloring instead of green. The warm spices make these taste like fall in every bite.
Dietary Adaptations: For a dairy-free version, use vegan butter and vegan marshmallows. For a lower-sugar option, use sugar-free marshmallows (they’re harder to find, but they work). For a nut-free version, just skip any nut-based toppings — the base recipe is naturally nut-free.
My Personal Variation: I once added a handful of crushed pretzels to the mixture for a salty-sweet twist. It was a hit with the adults, but the kids weren’t as impressed. Now I save the pretzels for a separate batch — some things are better for grown-ups only!
Serving & Storage Suggestions
These treats are best served at room temperature, but they’re delicious straight from the fridge too. Here’s how to serve and store them.
Serving Temperature: Let the treats sit out for 10 minutes after cutting to come to room temperature. This softens them slightly and makes them easier to bite into. If you’re serving them at a party, arrange them on a platter with other Halloween treats — they look amazing next to pumpkin-shaped cookies or ghost cupcakes.
Presentation Ideas: For a spooky look, arrange the treats on a black serving platter. Add some fake spider webs or plastic spiders around the edges for extra flair. My kids love when I serve them on a “graveyard” platter with crushed Oreo “dirt” around the edges.
Complementary Dishes: These pair perfectly with warm apple cider or hot chocolate. For a complete Halloween snack spread, serve them alongside caramel apples, popcorn balls, and pumpkin-shaped cheese crackers.
Storage Instructions: Store the treats in an airtight container at room temperature for up to 3 days. Don’t refrigerate them — the cold air makes them hard and dry. If you need to store them longer, wrap each treat individually in plastic wrap and place them in a freezer-safe bag. They’ll keep in the freezer for up to 2 months.
Reheating Tips: To bring frozen treats back to life, let them thaw at room temperature for about 30 minutes. If you want them extra soft, microwave a single treat for 5-10 seconds. Don’t overheat, or they’ll turn into a sticky mess.
Flavor Development: These treats actually taste better the next day. The marshmallow and cereal have time to meld together, creating a softer, more cohesive texture. I always make them a day ahead for parties.
Nutritional Information & Benefits
Let’s be honest — these are a treat, not a health food. But they’re made with simple ingredients, and there are a few nutritional bright spots.
Estimated Nutritional Values (per serving, based on 12 servings):
- Calories: 210
- Total Fat: 6g
- Saturated Fat: 3.5g
- Carbohydrates: 38g
- Sugar: 20g
- Protein: 2g
- Sodium: 180mg
Health Benefits: The Rice Krispies cereal is fortified with iron and B vitamins, which support energy metabolism. The butter provides a small amount of vitamin A, important for eye health. The marshmallows are made from sugar and gelatin, which is a source of protein (though minimal). The candy eyes add a fun crunch without significant nutritional impact.
Dietary Considerations: This recipe is naturally nut-free and egg-free, making it safe for many common allergies. For gluten-free, check your cereal label. For dairy-free, use vegan alternatives. For lower sugar, use sugar-free marshmallows.
Potential Allergens: Contains dairy (butter) and may contain traces of gluten depending on the cereal brand. The candy eyes are typically made from sugar and cornstarch, but check the package for allergen warnings.
Personal Wellness Perspective: I believe in balance. These treats are a special occasion food, not an everyday snack. When I make them for Halloween, I focus on the joy they bring — the smiles, the sticky fingers, the memories. That’s worth every calorie.
Conclusion
These kid-approved Halloween Rice Krispie treats with candy eyes are more than just a recipe — they’re a tradition in the making. They’re quick enough for a last-minute party, simple enough for kids to help with, and fun enough to make everyone smile. Whether you’re hosting a spooky gathering or just want to surprise your family, these treats deliver every time.
I love this recipe because it reminds me that the best things in life are often unplanned. That first accidental batch taught me to embrace the chaos and have fun in the kitchen. Now, every time I make these, I think of my kids’ sticky fingers and happy giggles. That’s what cooking is all about.
So go ahead — grab a bag of marshmallows and some candy eyes, and make a mess. Your family will thank you. And when you do, come back and tell me about it in the comments. I’d love to hear how your treats turned out, what variations you tried, and how many candy eyes your kids ate before they made it into the pan.
Happy Halloween, and happy cooking!
Frequently Asked Questions
Can I use mini marshmallows instead of regular-sized ones?
Yes, absolutely! Use 4 cups of mini marshmallows instead of one 10-ounce bag of regular marshmallows. Mini marshmallows melt faster, so keep a close eye on them to avoid burning.
How do I keep the treats from getting too hard?
The key is not overcooking the marshmallows. As soon as they’re melted and smooth, remove the pot from the heat. Also, don’t press the mixture too firmly into the pan — gentle pressure keeps them soft and chewy.
Can I make these ahead of time for a party?
Definitely! These treats actually taste better the next day. Make them up to 2 days in advance and store them in an airtight container at room temperature. For longer storage, freeze them for up to 2 months.
My treats always fall apart. What am I doing wrong?
This usually happens when there isn’t enough marshmallow mixture to hold the cereal together. Make sure you’re using the full 10-ounce bag of marshmallows and pressing the mixture firmly (but gently) into the pan. Also, let them cool completely before cutting.
Can I use different types of candy for the eyes?
Of course! You can use M&M’s, chocolate chips, or even small gummy candies. Just keep in mind that different candies have different melting points, so add them after the mixture has cooled slightly to prevent them from melting.
Pin This Recipe!
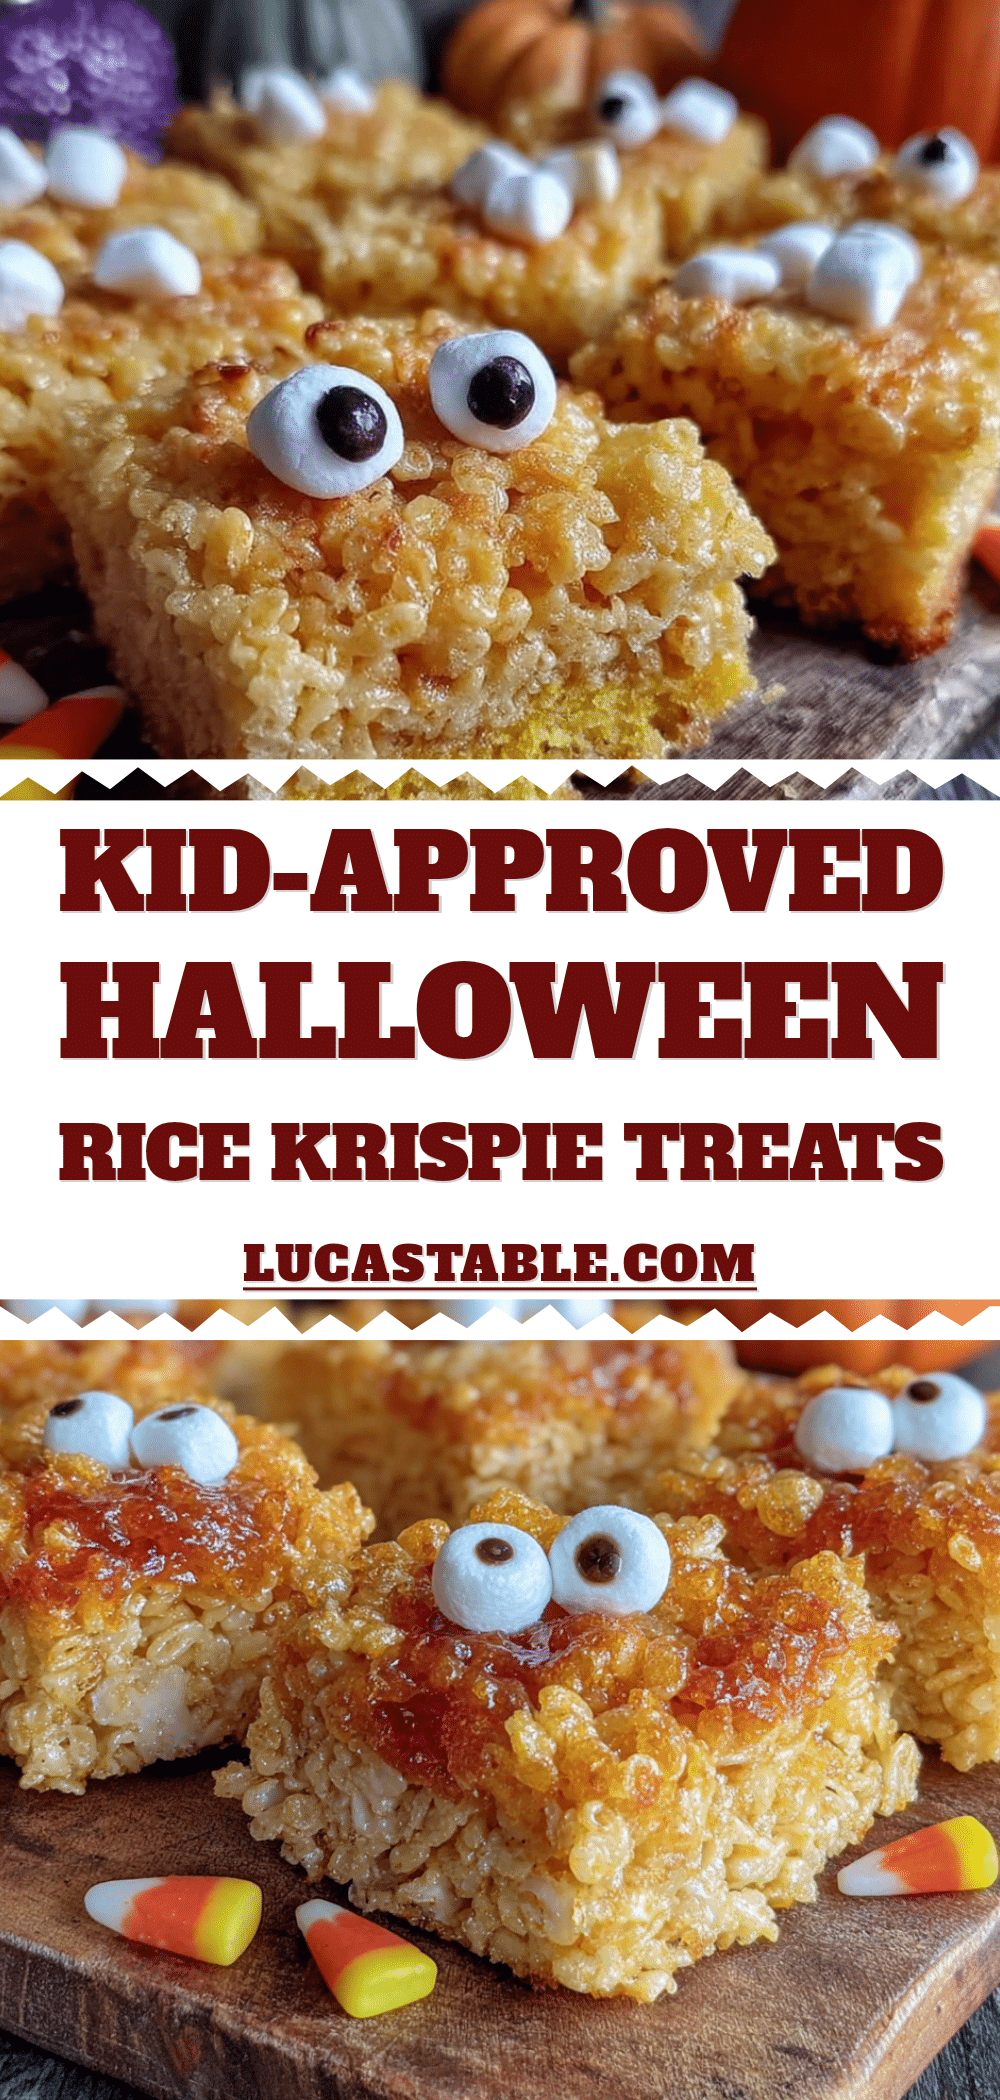
Kid-Approved Halloween Rice Krispie Treats with Candy Eyes
These spooky and fun Halloween Rice Krispie treats are quick, easy, and perfect for parties. Made with simple ingredients and topped with candy eyes, they’re a crowd-pleasing treat that kids and adults love.
- Prep Time: 10 minutes
- Cook Time: 5 minutes
- Total Time: 15 minutes
- Yield: 12-16 servings 1x
- Category: Dessert
- Cuisine: American
Ingredients
- 3 tablespoons unsalted butter
- 1 package (10 ounces) regular marshmallows (or 4 cups mini marshmallows)
- 6 cups Rice Krispies cereal (or any crispy rice cereal)
- 1/2 teaspoon vanilla extract (optional)
- 1/4 teaspoon salt
- 1–2 drops green or orange food coloring (optional)
- 1/2 cup candy eyes
- Non-stick cooking spray
Instructions
- Line a 9×13-inch baking dish with parchment paper, leaving overhang on the sides. Spray lightly with non-stick cooking spray. Set aside.
- Place 3 tablespoons unsalted butter in a large pot over medium-low heat. Melt slowly until fully melted but not browned.
- Add the entire package of marshmallows (10 ounces). Stir constantly until completely melted, about 3-4 minutes.
- Remove pot from heat. Stir in 1/2 teaspoon vanilla extract and 1/4 teaspoon salt.
- If using food coloring, add 1-2 drops of green or orange gel food coloring and stir until evenly distributed.
- Add 6 cups Rice Krispies cereal to the pot. Gently fold into the marshmallow mixture using a folding motion until evenly coated.
- Sprinkle in about 1/3 cup of the candy eyes and fold gently until just distributed.
- Transfer mixture to the prepared baking dish. Spray hands with non-stick cooking spray and press mixture evenly into the pan with gentle, firm pressure.
- While still warm, press the remaining candy eyes into the top in a fun pattern.
- Cool at room temperature for at least 30 minutes. Use parchment overhang to lift the block out of the pan.
- Cut into 12-16 squares using a sharp knife. Spray knife with non-stick spray between cuts for cleaner slices.
Notes
For best texture, use fresh marshmallows. Don’t overcook the marshmallows or the treats will be hard. Work quickly as the mixture sets fast. For chewier treats, use 5 1/2 cups cereal; for crunchier, use 6 1/2 cups. These taste even better the next day.
Nutrition
- Serving Size: 1 square (based on 1
- Calories: 210
- Sugar: 20
- Sodium: 180
- Fat: 6
- Saturated Fat: 3.5
- Carbohydrates: 38
- Protein: 2
Keywords: Halloween treats, Rice Krispie treats, candy eyes, no-bake dessert, kid-friendly, spooky treats, quick dessert


