My friend Jen asked why I couldn’t just throw the rice in the same pan as the chicken. I started to explain why that wouldn’t work—something about cooking times and liquid ratios and the chicken releasing too much moisture. Then I stopped. Honestly, I had no good reason. I’d just never tried it.
So we did. She dumped the rice right in there, right on top of the browning chicken thighs, and I stood there mentally bracing for a gummy, sad disaster. Twenty minutes later, we pulled off the lid and the rice was fluffy, the chicken was tender, and the whole thing smelled like the best garlic butter you’ve ever had. I mean, it was embarrassing how good it was. I’ve been cooking for years, and a beginner’s hunch out-cooked my entire method.
That moment changed how I make weeknight dinners. This lightened-up garlic butter chicken and rice isn’t just convenient—it’s genuinely better than the fussy stovetop version I used to make. The rice absorbs all that savory garlic butter goodness as it cooks, soaking up every drop of chicken juice. And because we’re scaling back on the butter and using a few smart swaps, it feels indulgent without the heavy aftermath. You know that feeling when a meal is satisfying but doesn’t leave you sluggish? This is that dinner.
I’ve made this at least twice a month since that night. It’s become my go-to for busy Tuesdays, for nights when I want something cozy but don’t have the energy for a project. And honestly, I love that Jen was right. It keeps me humble in the kitchen—and it keeps this recipe on my table.
Why You’ll Love This Recipe
This isn’t just another chicken and rice dinner. I’ve tested this one over a dozen times, tweaking the liquid ratios, the garlic amount, and the butter quantity until it hit that sweet spot between rich and light. Here’s what makes it stand out:
- Quick & Easy: From start to finish, this meal comes together in about 30 minutes. No complicated steps, no separate pots—just one skillet and a little patience.
- Simple Ingredients: You probably have everything in your kitchen right now. Chicken, rice, garlic, butter, broth, and a few pantry staples. No fancy grocery runs required.
- Perfect for Busy Weeknights: This is the kind of dinner that saves you on those days when you’re running late but still want something homemade and satisfying.
- Crowd-Pleaser: My kids clean their plates. My husband asks for leftovers for lunch. Even my picky-eating friend (you know the one) asked for the recipe.
- Unbelievably Delicious: The rice absorbs all the garlic butter and chicken drippings as it cooks, creating this deeply savory, almost risotto-like texture. It feels luxurious without being heavy.
What makes this recipe different from all the other garlic butter chicken and rice recipes out there? It’s the balance. We’re using just enough butter to get that rich flavor, but we’re leaning on garlic, fresh herbs, and a good-quality broth to carry the dish. The technique of cooking the rice directly in the same pan as the chicken means every grain gets infused with flavor. It’s not just another version—it’s the version I keep coming back to.
This is the kind of meal that makes you close your eyes after the first bite. It’s comfort food reimagined—lighter, faster, but with the same soul-soothing satisfaction. Perfect for impressing guests without stress, or turning a simple Tuesday into something memorable.
What Ingredients You Will Need
This recipe uses simple, wholesome ingredients to deliver bold flavor without the fuss. Most of these are pantry staples, and I’ve included substitution notes so you can adapt based on what you have on hand.
For the Chicken
- 1 ½ pounds boneless, skinless chicken thighs (or chicken breasts, if you prefer white meat—just watch the cooking time so they don’t dry out)
- 1 teaspoon salt
- ½ teaspoon black pepper
- ½ teaspoon garlic powder
- 1 tablespoon olive oil (for browning the chicken)
For the Garlic Butter Rice
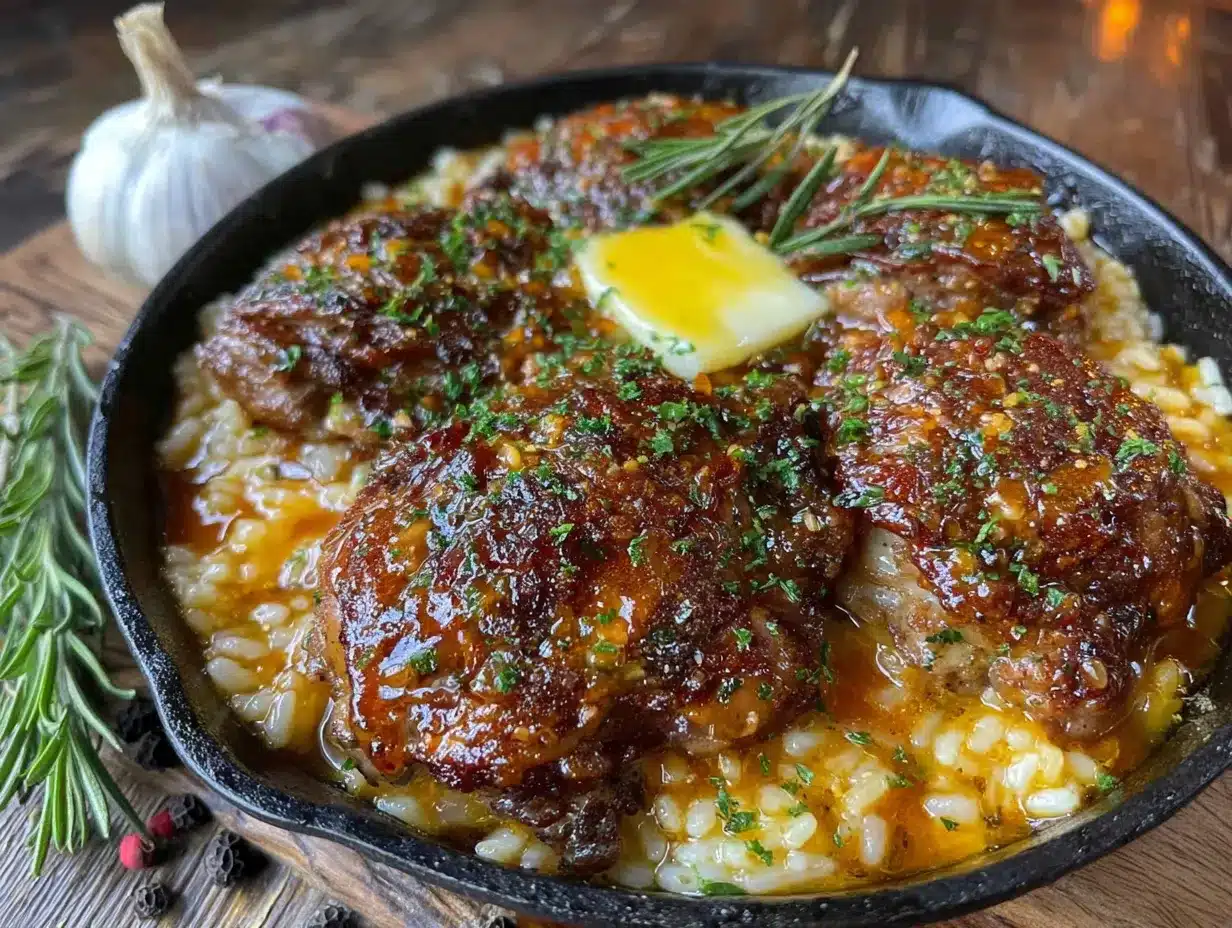
- 2 tablespoons unsalted butter (I use Kerrygold for the best flavor, but any good-quality butter works)
- 5 cloves garlic, minced (fresh is non-negotiable here—pre-minced jarred garlic won’t give you the same punch)
- 1 cup long-grain white rice (basmati or jasmine work beautifully; avoid short-grain rice as it can get too sticky)
- 2 cups low-sodium chicken broth (or bone broth for extra protein and richness)
- ½ cup water
- ½ teaspoon dried thyme
- ¼ teaspoon red pepper flakes (optional, for a little warmth)
For the Finish
- 2 tablespoons fresh parsley, chopped
- 1 tablespoon fresh lemon juice (this brightens everything up—don’t skip it)
- Optional: ¼ cup grated Parmesan cheese (adds a salty, savory finish if you’re not strictly dairy-free)
Ingredient Tips: Look for chicken thighs that are roughly the same size so they cook evenly. If you’re using chicken breasts, pound them to an even thickness first. For the broth, I recommend Swanson or Pacific Foods—they have a clean flavor without being too salty. If you’re watching your sodium, use unsalted butter and low-sodium broth so you can control the salt level yourself.
Substitution Guidance: To make this dairy-free, swap the butter for a high-quality vegan butter or use an extra tablespoon of olive oil. For a gluten-free version, just double-check your broth label (most broths are gluten-free, but some contain additives). You can also swap the white rice for brown rice, but you’ll need to increase the cooking time to about 40-45 minutes and add an extra ½ cup of liquid.
Equipment Needed
You don’t need a lot of fancy equipment for this one. Here’s what I use:
- A large, deep skillet with a tight-fitting lid (12-inch is ideal—you need room for the chicken and rice to spread out)
- Tongs (for flipping the chicken without piercing it)
- A sharp chef’s knife (for mincing garlic and chopping parsley)
- Cutting board
- Measuring cups and spoons
- A wooden spoon or silicone spatula (for stirring the rice)
Tool Tips: If you don’t have a lid that fits your skillet, you can use a sheet of aluminum foil crimped tightly around the edges. I’ve done this more times than I’d like to admit, and it works perfectly. A cast-iron skillet also works beautifully here—it holds heat evenly and gives the chicken a nice sear. Just be careful with the acidity from the lemon juice if your cast iron isn’t well-seasoned.
Budget-friendly option: You don’t need a fancy All-Clad pan for this. I’ve made it in a $20 non-stick skillet from Target, and it turned out great. The most important thing is that the pan is deep enough to hold the rice and has a lid that seals well.
Preparation Method
Let’s get cooking. This comes together in about 30 minutes, and I’ve included sensory cues so you know exactly what to look for at each stage.
- Prep the chicken. Pat the chicken thighs dry with paper towels. This is important—wet chicken won’t brown properly. Season both sides with salt, pepper, and garlic powder. Let them sit at room temperature for 10 minutes while you prep the other ingredients.
- Brown the chicken. Heat the olive oil in your skillet over medium-high heat. When the oil shimmers (that’s your cue—it should look like it’s moving across the pan), add the chicken thighs in a single layer. Don’t crowd the pan—work in batches if needed. Cook for 4-5 minutes per side until golden brown and crispy. The chicken won’t be cooked through yet, and that’s fine. Transfer to a plate and set aside.
- Build the garlic butter base. Reduce the heat to medium. Add the butter to the same skillet. Let it melt and foam slightly, then add the minced garlic. Stir constantly for about 30 seconds—just until it smells amazing and starts to turn golden. Don’t let it burn, or it will turn bitter. You’ll know it’s ready when the kitchen smells like the best garlic bread you’ve ever made.
- Toast the rice. Add the rice to the skillet and stir it around in the garlic butter for 1-2 minutes. You want the grains to become translucent at the edges and smell slightly nutty. This step is easy to skip, but don’t—it makes a huge difference in the final texture.
- Add the liquid. Pour in the chicken broth, water, dried thyme, and red pepper flakes (if using). Stir everything together, scraping up any browned bits from the bottom of the pan. Those bits are pure flavor.
- Return the chicken. Nestle the chicken thighs back into the rice. They should be partially submerged. Bring the liquid to a gentle boil, then reduce the heat to low, cover the skillet with the lid, and let it simmer undisturbed for 18-20 minutes. Don’t peek—lifting the lid releases steam and messes with the cooking time.
- Rest and finish. After 18 minutes, turn off the heat and let the skillet sit, still covered, for 5 minutes. This resting time allows the rice to absorb any remaining liquid and become perfectly fluffy. Remove the lid, fluff the rice with a fork, and squeeze the fresh lemon juice over everything. Sprinkle with parsley and Parmesan if using.
Troubleshooting Tip: If your rice is still a little crunchy after 20 minutes, add 2-3 tablespoons of hot water, re-cover, and let it steam for another 5 minutes. This happens sometimes with different pans or stovetops—don’t panic, just give it a little more time.
Cooking Tips & Techniques
I’ve made this recipe enough times to know exactly where things can go wrong. Here are my best tips for getting it right every time:
Don’t skip the browning step. I know it’s tempting to just dump everything in the pan and save time, but browning the chicken first creates that deep, savory flavor that makes this dish special. Those golden-brown bits on the bottom of the pan? That’s called fond, and it’s the foundation of the whole dish. Scrape it up when you add the broth.
Use a timer for the rice. I’m guilty of lifting the lid to “just check on it,” and every time I do, the rice ends up slightly uneven. Trust the process. Set a timer for 18 minutes and walk away. The steam does the work.
Season in layers. This is a pro tip that makes a huge difference. Season the chicken before browning, add salt to the broth, and finish with a sprinkle of flaky salt at the end. Each layer builds on the last, creating a dish that’s well-seasoned all the way through instead of just salty on the surface.
My biggest failure with this recipe was the time I used pre-minced garlic from a jar. I was in a rush and thought it wouldn’t matter. It mattered. The garlic flavor was weak and slightly bitter, and the whole dish felt flat. Fresh garlic makes a real difference here—don’t compromise on it.
Multitasking strategy: While the chicken browns, mince your garlic and chop your parsley. While the rice cooks, set the table or make a quick side salad. This recipe is designed to be hands-off once it’s covered, so use that time wisely.
Variations & Adaptations
This recipe is flexible, and I’ve tried several variations over the months. Here are my favorites:
Lemon Herb Version
Add the zest of one lemon along with the garlic, and swap the dried thyme for a tablespoon of fresh rosemary. The lemon brightens everything up, and the rosemary gives it a more sophisticated flavor. I make this version when I’m trying to impress someone.
Creamy Garlic Butter Chicken and Rice
If you want something a little richer (without going overboard), stir in ¼ cup of plain Greek yogurt or light cream cheese at the very end, after the rice is cooked. It adds a creamy texture without the heaviness of heavy cream. This is my husband’s favorite variation.
Vegetable-Packed Version
Add a cup of frozen peas and carrots during the last 5 minutes of cooking. You can also stir in a handful of fresh spinach right before serving—it wilts into the rice beautifully. This is a great way to sneak in extra veggies without anyone noticing.
Dietary Adaptations
- Dairy-Free: Use olive oil or vegan butter instead of regular butter. The flavor will be slightly different but still delicious.
- Lower Carb: Swap the rice for cauliflower rice. Cook the cauliflower rice separately and serve the chicken on top—it won’t absorb the liquid the same way, so it’s better to cook them separately.
- Gluten-Free: This recipe is naturally gluten-free as written, but double-check your broth label to be safe.
Serving & Storage Suggestions
This dish is best served warm, straight from the skillet. The rice is at its fluffiest right after the resting period, and the chicken is perfectly tender. I like to serve it in shallow bowls with a side of steamed green beans or a simple arugula salad dressed with lemon and olive oil.
What to serve with it:
- A crisp green salad with a simple vinaigrette (the acidity cuts through the richness)
- Roasted broccoli or asparagus
- A slice of crusty bread to soak up any leftover garlic butter sauce
- A glass of crisp white wine, like Sauvignon Blanc or Pinot Grigio
Storage: Leftovers keep well in an airtight container in the refrigerator for up to 4 days. The rice will absorb some of the liquid as it sits, so it will be slightly less fluffy the next day—but the flavor actually gets better. I love this dish even more the next day for lunch.
Reheating: The best way to reheat this is in a skillet over medium-low heat with a splash of chicken broth or water. Cover and let it steam for 5-7 minutes until warmed through. The microwave works in a pinch, but it tends to dry out the chicken. If you’re using the microwave, cover the bowl with a damp paper towel to add moisture.
Freezing: You can freeze this dish for up to 3 months. Let it cool completely, then transfer to a freezer-safe container. Thaw overnight in the refrigerator and reheat as directed above. The rice texture will change slightly after freezing, but it’s still a great option for meal prep.
Nutritional Information & Benefits
Here’s the estimated nutritional breakdown per serving (based on 4 servings, using chicken thighs and the recipe as written):
- Calories: 485
- Protein: 35g
- Fat: 18g
- Saturated Fat: 7g
- Carbohydrates: 42g
- Fiber: 1g
- Sugar: 1g
- Sodium: 720mg
Health Benefits: Chicken thighs are a great source of protein and iron, and using boneless, skinless cuts keeps the saturated fat in check. Garlic is known for its anti-inflammatory properties and immune-boosting benefits. By using low-sodium broth and scaling back the butter, this version is significantly lighter than traditional garlic butter chicken and rice recipes while still delivering on flavor.
Dietary Considerations: This recipe is naturally gluten-free and can easily be made dairy-free. It’s not low-carb due to the rice, but you can use the cauliflower rice variation if you’re watching your carbs. For a lower-sodium option, use unsalted butter and no-salt-added broth.
I love that this recipe feels indulgent but fits into a balanced eating plan. It’s proof that you don’t have to sacrifice flavor to eat well.
Conclusion
This lightened-up garlic butter chicken and rice has become a staple in my kitchen for good reason. It’s quick, it’s forgiving, and it tastes like something you’d order at a cozy restaurant. The fact that it comes together in one skillet in 30 minutes? That’s just the cherry on top.
I hope you give this recipe a try and make it your own. Add extra vegetables, swap the herbs, or dial up the garlic if that’s your thing. The beauty of this dish is that it’s a starting point—a really delicious starting point.
I’d love to hear how it turns out for you. Did you make any changes? Did your family love it as much as mine does? Drop a comment below and let me know—I read every single one, and your feedback helps me create better recipes for you.
Until next time, happy cooking—and don’t be afraid to let someone else take the lead in the kitchen. You never know what you might learn.
Frequently Asked Questions
Can I use chicken breasts instead of thighs?
Yes, you can. Chicken breasts will work, but they cook faster and can dry out more easily. Use boneless, skinless breasts and check for doneness at the 15-minute mark. If they’re cooked through, remove them from the pan and let the rice finish cooking on its own.
Can I make this in a slow cooker or Instant Pot?
This recipe is designed for the stovetop, but you can adapt it. For the Instant Pot, use the sauté function to brown the chicken and toast the rice, then pressure cook on high for 5 minutes with a natural release. For the slow cooker, brown the chicken first, then cook on low for 2-3 hours—but the rice may turn out softer than the stovetop version.
Why is my rice still crunchy after 20 minutes?
This usually happens if the heat was too low or the lid wasn’t sealed properly. Add a few tablespoons of hot water, cover tightly, and let it steam for another 5 minutes. Next time, make sure your liquid is at a gentle boil before you reduce the heat and cover.
Can I double this recipe?
Absolutely. Use a larger skillet (14-inch or wider) and increase the ingredients by 1.5 times. You may need to brown the chicken in batches to avoid overcrowding. The cooking time for the rice stays about the same.
How do I make this dairy-free?
Swap the butter for a high-quality vegan butter or use an extra tablespoon of olive oil. The flavor will be slightly different—more olive oil-forward—but still delicious. Skip the Parmesan at the end or use a dairy-free alternative.
Pin This Recipe!
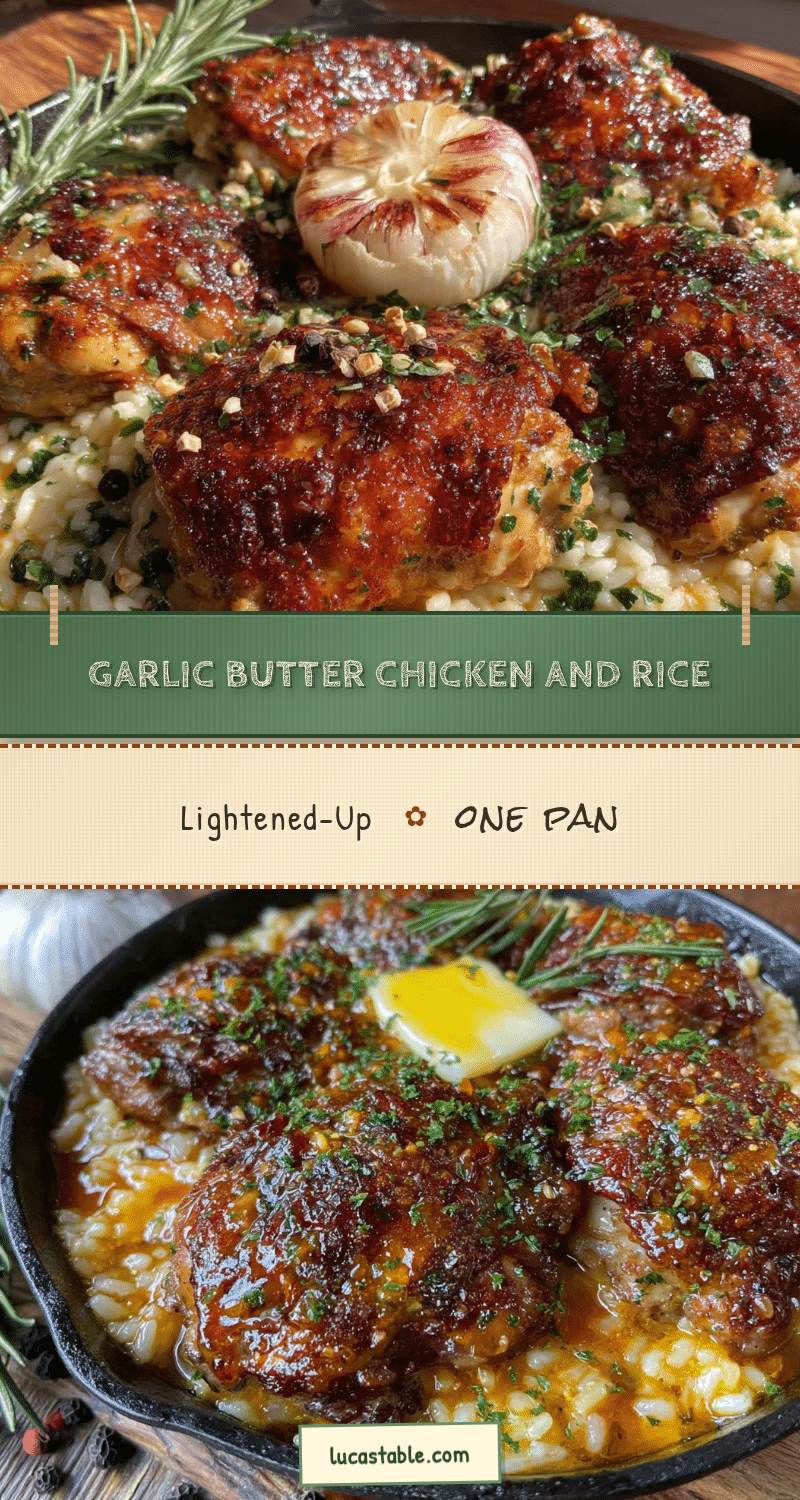
Lightened-Up Garlic Butter Chicken and Rice: Easy 30-Minute Dinner

A quick and easy one-skillet dinner featuring tender chicken thighs and fluffy rice cooked in a savory garlic butter broth. This lightened-up version is ready in 30 minutes and perfect for busy weeknights.
- Prep Time: 10 minutes
- Cook Time: 20 minutes
- Total Time: 30 minutes
- Yield: 4 servings 1x
- Category: Main Course
- Cuisine: American
Ingredients
- 1 ½ pounds boneless, skinless chicken thighs
- 1 teaspoon salt
- ½ teaspoon black pepper
- ½ teaspoon garlic powder
- 1 tablespoon olive oil
- 2 tablespoons unsalted butter
- 5 cloves garlic, minced
- 1 cup long-grain white rice
- 2 cups low-sodium chicken broth
- ½ cup water
- ½ teaspoon dried thyme
- ¼ teaspoon red pepper flakes (optional)
- 2 tablespoons fresh parsley, chopped
- 1 tablespoon fresh lemon juice
- ¼ cup grated Parmesan cheese (optional)
Instructions
- Pat the chicken thighs dry with paper towels. Season both sides with salt, pepper, and garlic powder. Let sit at room temperature for 10 minutes.
- Heat olive oil in a large deep skillet over medium-high heat. When the oil shimmers, add chicken thighs in a single layer. Cook for 4-5 minutes per side until golden brown. Transfer to a plate and set aside.
- Reduce heat to medium. Add butter to the same skillet. Once melted and foamy, add minced garlic and stir constantly for about 30 seconds until fragrant.
- Add rice to the skillet and stir for 1-2 minutes until grains become translucent at the edges and smell nutty.
- Pour in chicken broth, water, dried thyme, and red pepper flakes (if using). Stir, scraping up any browned bits from the bottom of the pan.
- Nestle the chicken thighs back into the rice. Bring to a gentle boil, then reduce heat to low, cover, and simmer undisturbed for 18-20 minutes.
- Turn off heat and let the skillet sit, covered, for 5 minutes. Remove lid, fluff rice with a fork, squeeze lemon juice over everything, and sprinkle with parsley and Parmesan (if using).
Notes
Don’t skip browning the chicken—it creates deep flavor. Use fresh garlic, not pre-minced. For best results, don’t lift the lid while the rice cooks. If rice is still crunchy after 20 minutes, add 2-3 tablespoons hot water, cover, and steam for 5 more minutes.
Nutrition
- Serving Size: 1 serving
- Calories: 485
- Sugar: 1
- Sodium: 720
- Fat: 18
- Saturated Fat: 7
- Carbohydrates: 42
- Fiber: 1
- Protein: 35
Keywords: garlic butter chicken, chicken and rice, one skillet dinner, 30 minute meal, lightened up, easy dinner, weeknight dinner


