Lisa wasn’t throwing a party. She was just trying to get through a Tuesday in November with three kids under seven, a sink full of dishes, and a leftover turkey that was staring at her from the fridge. I’d stopped by to drop off a book I’d borrowed, and the smell hit me before I even got through the door. Buttery pastry. Something savory and warm. The kind of smell that makes you forget why you came in the first place.
“It’s nothing,” she said, pulling a tray of these adorable little pies out of the oven. “Just using up the bird.”
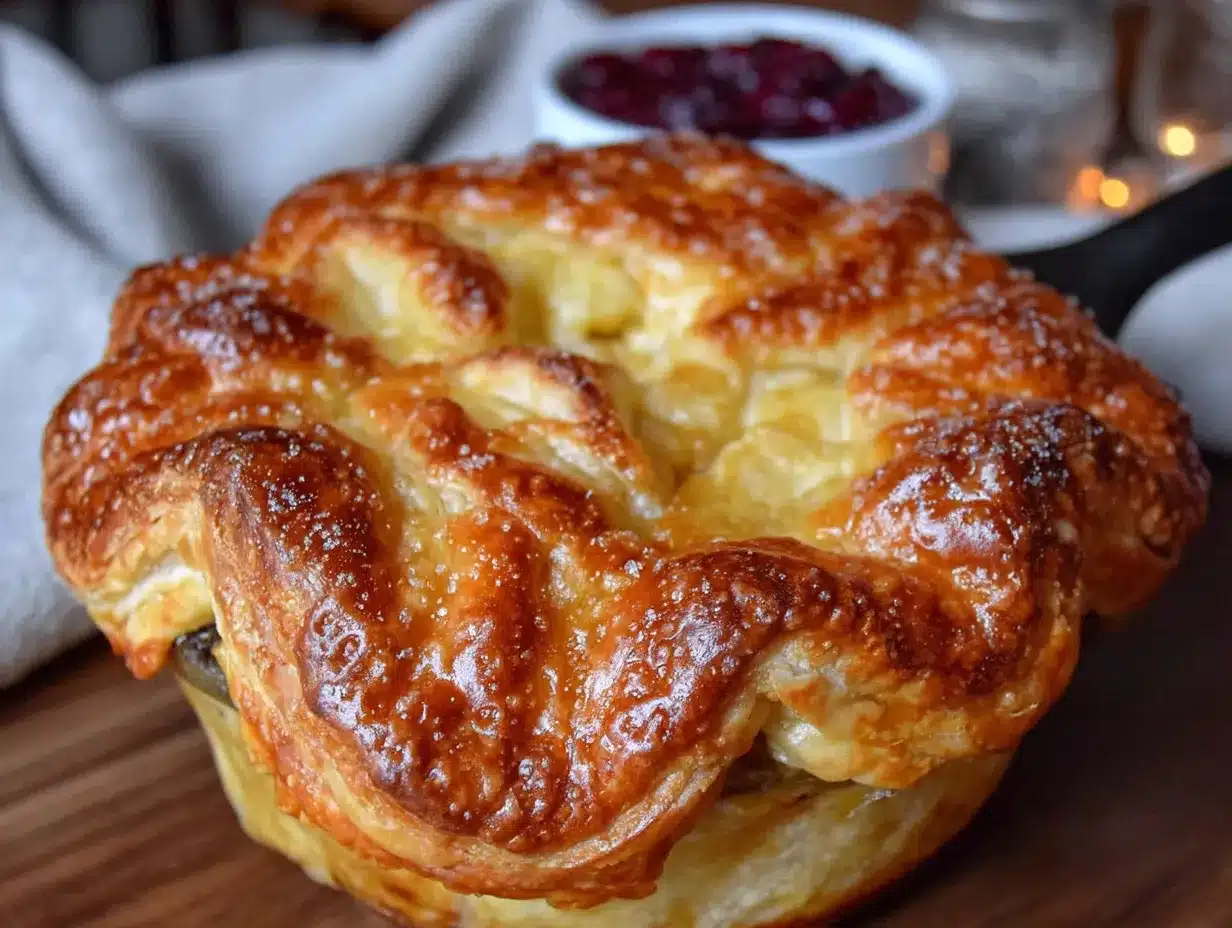
Just using up the bird. I stood there, honestly a little offended on behalf of these golden, flaky, perfectly portioned mini pies. They were beautiful — each one a little pocket of comfort, with steam curling up through the vents. Her kids were already grabbing theirs, not even waiting for plates. And Lisa was just wiping down the counter like she hadn’t just created magic from leftovers.
That’s the thing about the best recipes, right? They never come from a fancy dinner party or a chef’s kitchen. They come from someone who’s just trying to feed their family without losing their mind. Maybe you’ve been there — staring at leftover turkey and wondering what on earth to do with it that isn’t another sad sandwich.
These mini turkey pot pies changed how I think about Friendsgiving, honestly. They’re small enough for little hands, forgiving enough for busy schedules, and cheap enough that you don’t feel guilty making a double batch. I’ve been making them every Friendsgiving since that Tuesday, and they’re always the first thing to disappear. Let me tell you, there’s something special about watching a room full of adults and kids fighting over the last mini pie.
Why You’ll Love This Recipe
Let me be real with you — I’ve tested this recipe about seven times before I got it just right. I wanted something that would work for a crowd, please the picky eaters, and not break the bank. Here’s why these mini turkey pot pies are worth every minute in the kitchen:
- Budget-Friendly Feast: This recipe is designed to use up leftover turkey or rotisserie chicken, making it incredibly affordable. You’re turning yesterday’s dinner into today’s showstopper, and that’s smart cooking.
- Kid-Approved: My own kids, who usually push vegetables around their plates, actually ask for seconds of these. The creamy filling hides the carrots and peas so well they don’t even notice. It’s a win-win for parents.
- Perfect for Friendsgiving: Individual portions mean no fighting over who gets the bigger piece. Plus, they’re adorable on a buffet table and easy for guests to grab and go.
- Make-Ahead Magic: You can assemble these completely ahead of time and pop them in the oven when guests arrive. No last-minute stress, no frantic chopping. Just pure hosting confidence.
- Foolproof Results: Even if you’re not a pastry expert, these come out perfect every time. The filling is forgiving, the crust is forgiving, and the whole thing comes together in under an hour.
What makes these different from every other pot pie recipe out there? It’s the little things — a splash of lemon juice to brighten the filling, a pinch of thyme that makes everything taste like Thanksgiving, and a technique for the pastry that gives you that perfect golden crust without any fuss. This isn’t just another version of pot pie. It’s the one you’ll come back to year after year.
Ingredients You Will Need
This recipe uses simple, wholesome ingredients that you probably already have in your kitchen. The beauty of these mini turkey pot pies is that they’re designed to be flexible — use what you have, swap what you need, and don’t stress about perfection.
For the Filling
- 2 cups cooked turkey, diced (leftover Thanksgiving turkey works perfectly; rotisserie chicken is a great substitute)
- 1 cup frozen mixed vegetables (peas, carrots, corn — the classic mix. No need to thaw)
- 1/2 cup onion, finely diced (yellow or sweet onion works best)
- 1/3 cup unsalted butter (I prefer Kerrygold for its rich flavor, but any brand works)
- 1/3 cup all-purpose flour (this thickens the gravy beautifully)
- 1 3/4 cups chicken broth (low-sodium is best so you can control the salt)
- 2/3 cup whole milk (adds richness; 2% works too, but avoid skim)
- 1 teaspoon dried thyme (or 1 tablespoon fresh, if you have it)
- 1/2 teaspoon garlic powder
- Salt and pepper to taste
- 1 tablespoon lemon juice (this is my secret ingredient — it brightens everything)
For the Crust
- 2 sheets refrigerated pie crust (I use Pillsbury in a pinch, but homemade is even better if you have time)
- 1 large egg, beaten (for the egg wash that gives that golden shine)
- 1 tablespoon water
If you’re using leftover turkey, make sure it’s diced into small, even pieces — about half-inch cubes. This ensures every bite has a bit of meat. For the vegetables, I’ve tried fresh and frozen, and honestly, frozen works better here. They hold their shape and don’t get mushy during baking. Look for a bag of “mixed vegetables” with peas, carrots, corn, and green beans for the most classic flavor.
For a dairy-free version, you can substitute the butter with a plant-based alternative and use oat milk instead of whole milk. The texture will be slightly different, but still delicious. And if you’re gluten-free, swap the all-purpose flour for a 1:1 gluten-free flour blend and use a gluten-free pie crust. I’ve tested this with King Arthur’s gluten-free blend and it worked beautifully.
Equipment Needed
You don’t need a fancy kitchen to make these mini turkey pot pies. Here’s what you’ll need:
- 12-cup muffin tin (standard size, not mini — this is the key to perfect individual portions)
- Large skillet or saucepan (for making the filling)
- Mixing bowls (one medium, one small)
- 2 1/2-inch round cookie cutter (or a drinking glass with a similar diameter)
- 1 1/2-inch round cookie cutter (optional, for the top vents)
- Pastry brush (for the egg wash)
- Rolling pin (if using homemade dough)
If you don’t have a cookie cutter, don’t worry. I’ve used the rim of a juice glass in a pinch, and it worked perfectly. For the smaller cutter, a bottle cap works great. Honestly, the shape doesn’t matter — these pies are forgiving. Just make sure your muffin tin is non-stick or well-greased, because nobody wants to fight with stuck pot pies on Friendsgiving.
Preparation Method
Let’s get cooking. These mini turkey pot pies come together in about 45 minutes, and I promise you can handle this even if you’re not a confident baker.
- Preheat your oven to 400°F (200°C). Generously grease your 12-cup muffin tin with butter or non-stick spray. Don’t skip this step — trust me, I learned the hard way.
- Make the filling. In a large skillet over medium heat, melt the 1/3 cup butter. Add the diced onion and cook for about 3-4 minutes until it’s soft and translucent. You’ll know it’s ready when the kitchen starts smelling amazing.
- Add the flour. Sprinkle the 1/3 cup flour over the butter and onions, stirring constantly. Cook for about 1-2 minutes until the mixture turns a light golden color. This is called a roux, and it’s the secret to a thick, creamy filling that won’t be runny.
- Pour in the liquids. Slowly whisk in the chicken broth and milk, stirring constantly to prevent lumps. Keep stirring for about 3-4 minutes until the mixture thickens enough to coat the back of a spoon. It should look like a thick gravy at this point.
- Add the good stuff. Stir in the diced turkey, frozen vegetables, dried thyme, garlic powder, salt, and pepper. Let everything simmer together for about 2 minutes. The frozen vegetables will thaw and warm through perfectly. Remove from heat and stir in the lemon juice. Taste it — yes, right now — and adjust the seasoning. It should be creamy, savory, and just a little bright from the lemon.
- Prepare the crust. On a lightly floured surface, roll out your pie crusts to about 1/8-inch thickness. Using your 2 1/2-inch round cutter, cut out 12 circles. These will be the bottoms of your mini pies. Press each circle gently into the greased muffin cups, making sure they go up the sides a little.
- Fill the pies. Spoon the turkey filling into each crust-lined muffin cup, filling them almost to the top. Don’t overfill — leave about 1/4 inch of space for the top crust.
- Add the tops. Roll out the remaining dough and cut another 12 circles with the same cutter. Place one on top of each filled cup. Press the edges gently to seal. If you have a smaller cutter or a knife, cut a small slit or shape in the center of each top crust to let steam escape. This prevents soggy tops — a lesson I learned after my first batch came out looking like sad little balloons.
- Egg wash time. In a small bowl, beat the egg with 1 tablespoon of water. Brush this mixture over the tops of each mini pie. This gives them that beautiful golden-brown finish that makes everyone think you spent hours in the kitchen.
- Bake. Place the muffin tin on the middle rack of your preheated oven. Bake for 18-22 minutes, or until the crusts are golden brown and the filling is bubbling up through the vents. You’ll know they’re done when your kitchen smells like Thanksgiving and the tops look like little edible jewels.
- Cool and serve. Let the pies cool in the tin for about 5 minutes. This is important — the filling needs to set a little so it doesn’t run everywhere. Then carefully remove them with a fork or small spatula. Serve warm, and watch them disappear.
Cooking Tips & Techniques
I’ve made these mini turkey pot pies more times than I can count, and I’ve definitely made my share of mistakes. Here’s what I’ve learned so you don’t have to repeat my errors.
Don’t skip the lemon juice. I know it sounds weird in a pot pie, but that little splash of acidity cuts through the richness and makes everything taste brighter. The first time I made these without it, the filling felt heavy and one-note. The lemon wakes everything up.
Watch your filling consistency. If your filling looks too thick before you add the turkey and vegetables, add a splash more broth. If it looks too thin, let it simmer an extra minute or two. The perfect filling should be thick enough to hold its shape but still creamy. I once made it too thin, and the pies turned into a soupy mess that leaked everywhere. Not my finest moment.
Cold dough is your friend. If your pie crust feels too soft or sticky, pop it in the fridge for 10 minutes. Cold dough is much easier to work with and gives you a flakier crust. I learned this after wrestling with sticky dough that tore every time I tried to lift it.
Multitask like a pro. While your filling is simmering, you can cut out your crust circles. And while the pies are baking, you can clean up the kitchen or prep a salad. This recipe is perfect for busy cooks because the active time is only about 20 minutes.
Make extra. Seriously. These freeze beautifully, and having a stash of mini pot pies in your freezer is like having a secret weapon for busy weeknights or unexpected guests. I always double the batch and freeze half.
Variations & Adaptations
One of the best things about this recipe is how flexible it is. Here are some ways to make it your own:
Dietary Variations
- Gluten-Free: Use a gluten-free pie crust and swap the all-purpose flour for a 1:1 gluten-free flour blend. I’ve tested this with Bob’s Red Mill and it works great.
- Dairy-Free: Substitute the butter with a plant-based butter, use oat milk or almond milk, and check your pie crust for dairy. Miyoko’s makes an excellent dairy-free butter that works perfectly here.
- Vegetarian: Skip the turkey and double the vegetables. Mushrooms, potatoes, and extra peas make a hearty filling that even meat-eaters will love.
Flavor Twists
- Cheesy Pot Pies: Stir in 1/2 cup of shredded cheddar cheese right before filling the crusts. The cheese melts into the filling and adds a whole new level of comfort.
- Herb Garden: Add 2 tablespoons of fresh chopped parsley and 1 tablespoon of fresh rosemary to the filling. It gives the pies a more sophisticated flavor that adults love.
- Spicy Kick: Add 1/4 teaspoon of cayenne pepper or a dash of hot sauce to the filling. It’s subtle enough that kids won’t notice but adds warmth for grown-up palates.
Different Cooking Methods
If you don’t have a muffin tin, you can make these in ramekins or even a regular pie dish. Just adjust the baking time — ramekins need about 25 minutes, and a full-size pie needs 35-40 minutes. I’ve even made these in a toaster oven when my main oven was full of other dishes, and they turned out perfectly.
Serving & Storage Suggestions
These mini turkey pot pies are best served warm, right out of the oven. The contrast between the flaky, golden crust and the creamy, steaming filling is pure comfort food magic.
For Friendsgiving: Arrange the pies on a large platter or wooden board. They look gorgeous nestled together, and guests can grab their own. I like to serve them with a simple green salad dressed with lemon vinaigrette — the acidity cuts through the richness beautifully. Cranberry sauce on the side is also a fantastic addition, especially if you’re using leftover turkey.
For leftovers: Store any uneaten pies in an airtight container in the refrigerator for up to 4 days. The crust will soften slightly, but they’re still delicious. To reheat, pop them in a 350°F oven for about 10 minutes, or until heated through. The microwave works in a pinch, but the crust won’t be as crispy.
Freezing instructions: These freeze like a dream. Assemble the pies completely but don’t bake them. Place the muffin tin in the freezer for about 2 hours, or until the pies are frozen solid. Then pop them out and transfer to a freezer bag or container. They’ll keep for up to 3 months. When you’re ready to bake, place the frozen pies in a muffin tin (no need to thaw) and bake at 400°F for about 25-28 minutes. The extra time accounts for the frozen filling.
I’ve found that the flavors actually develop and deepen after a day in the fridge. So if you can make these a day ahead, do it. The filling gets even more flavorful, and the crust absorbs just a little of that savory goodness. It’s a beautiful thing.
Nutritional Information & Benefits
Each mini turkey pot pie (based on 12 servings) contains approximately:
- Calories: 285
- Protein: 16g
- Fat: 14g
- Carbohydrates: 22g
- Fiber: 2g
- Sugar: 4g
- Sodium: 480mg
These numbers will vary depending on your specific ingredients and portion sizes. The good news is that these pies are packed with protein from the turkey, which keeps everyone full and satisfied. The vegetables add fiber and essential vitamins — vitamin A from the carrots, vitamin C from the peas, and a decent dose of iron from the green beans.
If you’re watching your sodium, use low-sodium broth and skip the added salt until the end. You can also reduce the butter by a tablespoon or two without sacrificing too much flavor. And for a lighter option, use a single crust on top only — skip the bottom crust entirely and just fill the greased muffin cups directly. It’s not as traditional, but it cuts the calories significantly.
I love that this recipe feels indulgent without being over-the-top. It’s the kind of meal that fills you up without weighing you down, which is exactly what you want after a long day of hosting.
Frequently Asked Questions
Can I use rotisserie chicken instead of turkey?
Absolutely. Rotisserie chicken works perfectly in this recipe. Just shred or dice the meat, and you’re good to go. In fact, I often make these with rotisserie chicken when turkey isn’t in season.
Can I make these ahead of time for a party?
Yes, and I highly recommend it. Assemble the pies completely, cover the muffin tin with plastic wrap, and refrigerate for up to 24 hours. When you’re ready to bake, add an extra 5 minutes to the baking time. Your guests will think you slaved away all day.
My filling is too runny. What did I do wrong?
This usually happens if the roux wasn’t cooked long enough, or if too much liquid was added. Next time, make sure you cook the flour and butter mixture for at least 1-2 minutes until it’s golden. And let the filling simmer until it’s thick enough to coat a spoon. If your filling is already runny, you can stir in a slurry of 1 tablespoon cornstarch mixed with 2 tablespoons cold water and simmer for another minute.
Can I use puff pastry instead of pie crust?
Yes, and it’s delicious. Puff pastry gives the pies a lighter, flakier texture. Just cut it into squares instead of circles and press them into the muffin cups. Keep in mind that puff pastry puffs up more, so leave a little extra room in each cup. Bake time stays about the same.
How do I prevent the bottoms from getting soggy?
Soggy bottoms happen when the filling is too wet, or when the pies aren’t baked long enough. Make sure your filling is thick before spooning it into the crusts. Also, baking the pies on the middle rack of a properly preheated oven helps the bottoms crisp up. If you’re really worried, you can pre-bake the bottom crusts for 5 minutes before adding the filling.
Conclusion
These mini turkey pot pies have become a staple at my Friendsgiving table, and I hope they become one at yours too. They’re proof that the best recipes don’t come from fancy cookbooks or complicated techniques — they come from real life, from the moments when someone just needs to feed their family something good.
What I love most about this recipe is how it brings people together. There’s something about individual pies that makes everyone feel special, like they’re getting their own little gift. Kids feel grown-up having their own pie, and adults appreciate the thoughtful presentation. And when you’re hosting Friendsgiving, anything that makes your guests feel cared for is a win.
So go ahead — use up that leftover turkey, grab a bag of frozen vegetables, and make these little beauties. Customize them however you like, make a mess in the kitchen, and don’t forget to save one for yourself. I promise you’ll be glad you did.
Have you tried these mini turkey pot pies? I’d love to hear how they turned out! Drop a comment below and let me know what variations you tried, or tag me in your photos on social media. Happy cooking, friends!
Pin This Recipe!
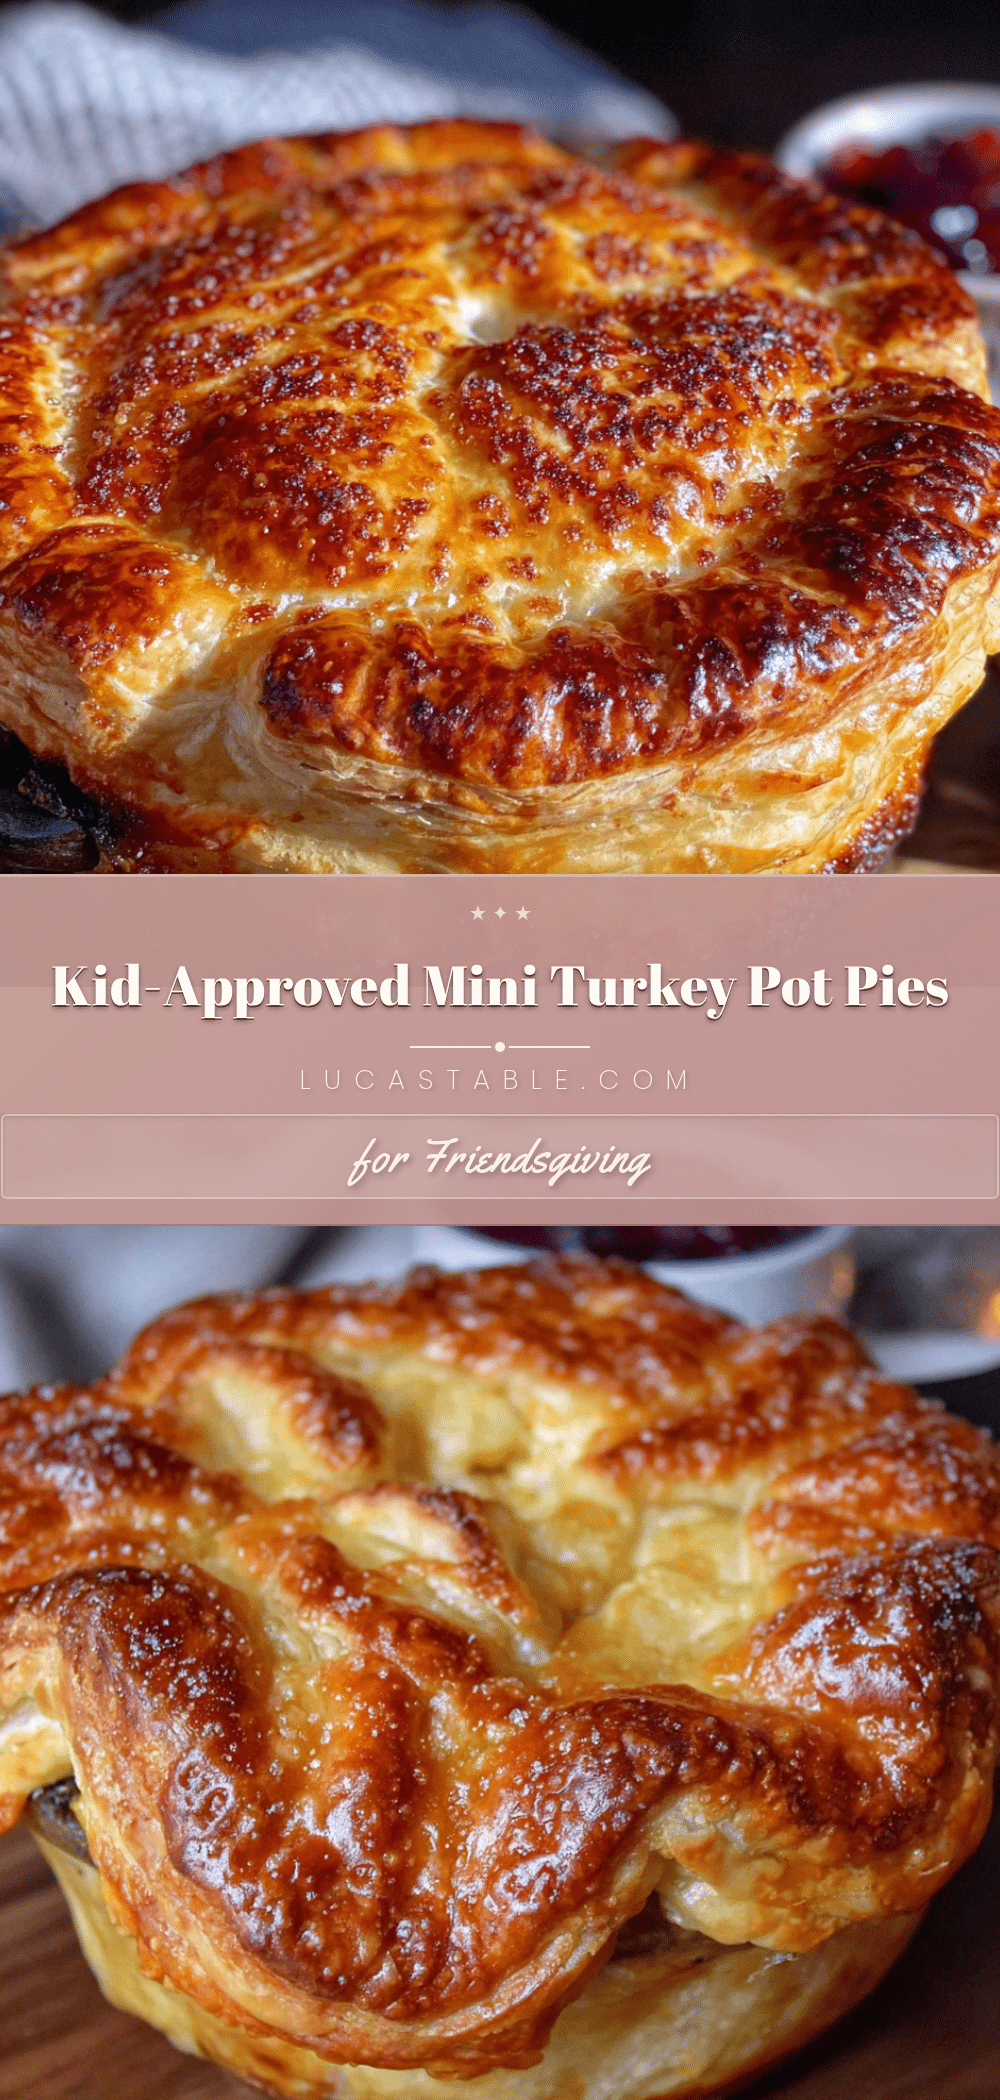
Mini Turkey Pot Pies for Easy Friendsgiving

These adorable mini turkey pot pies are the perfect way to use up leftover turkey, featuring a creamy, savory filling and a golden, flaky crust. Ideal for Friendsgiving, they’re kid-approved, budget-friendly, and can be made ahead of time.
- Prep Time: 20 minutes
- Cook Time: 22 minutes
- Total Time: 42 minutes
- Yield: 12 servings 1x
- Category: Main Course
- Cuisine: American
Ingredients
- 2 cups cooked turkey, diced
- 1 cup frozen mixed vegetables (peas, carrots, corn)
- 1/2 cup onion, finely diced
- 1/3 cup unsalted butter
- 1/3 cup all-purpose flour
- 1 3/4 cups chicken broth, low-sodium
- 2/3 cup whole milk
- 1 teaspoon dried thyme
- 1/2 teaspoon garlic powder
- Salt and pepper to taste
- 1 tablespoon lemon juice
- 2 sheets refrigerated pie crust
- 1 large egg, beaten
- 1 tablespoon water
Instructions
- Preheat your oven to 400°F (200°C). Generously grease a 12-cup muffin tin with butter or non-stick spray.
- Make the filling: In a large skillet over medium heat, melt the 1/3 cup butter. Add the diced onion and cook for about 3-4 minutes until soft and translucent.
- Add the flour: Sprinkle the 1/3 cup flour over the butter and onions, stirring constantly. Cook for about 1-2 minutes until the mixture turns a light golden color.
- Pour in the liquids: Slowly whisk in the chicken broth and milk, stirring constantly to prevent lumps. Keep stirring for about 3-4 minutes until the mixture thickens enough to coat the back of a spoon.
- Add the good stuff: Stir in the diced turkey, frozen vegetables, dried thyme, garlic powder, salt, and pepper. Let everything simmer together for about 2 minutes. Remove from heat and stir in the lemon juice. Taste and adjust seasoning.
- Prepare the crust: On a lightly floured surface, roll out your pie crusts to about 1/8-inch thickness. Using a 2 1/2-inch round cutter, cut out 12 circles. Press each circle gently into the greased muffin cups, making sure they go up the sides a little.
- Fill the pies: Spoon the turkey filling into each crust-lined muffin cup, filling them almost to the top, leaving about 1/4 inch of space.
- Add the tops: Roll out the remaining dough and cut another 12 circles with the same cutter. Place one on top of each filled cup. Press the edges gently to seal. Cut a small slit or shape in the center of each top crust to let steam escape.
- Egg wash time: In a small bowl, beat the egg with 1 tablespoon of water. Brush this mixture over the tops of each mini pie.
- Bake: Place the muffin tin on the middle rack of your preheated oven. Bake for 18-22 minutes, or until the crusts are golden brown and the filling is bubbling up through the vents.
- Cool and serve: Let the pies cool in the tin for about 5 minutes. Then carefully remove them with a fork or small spatula. Serve warm.
Notes
Don’t skip the lemon juice—it brightens the filling. For a dairy-free version, substitute butter with plant-based butter and use oat milk. For gluten-free, use a 1:1 gluten-free flour blend and gluten-free pie crust. These freeze beautifully: assemble without baking, freeze solid, then bake from frozen at 400°F for 25-28 minutes.
Nutrition
- Serving Size: 1 mini pie
- Calories: 285
- Sugar: 4
- Sodium: 480
- Fat: 14
- Saturated Fat: 7
- Carbohydrates: 22
- Fiber: 2
- Protein: 16
Keywords: mini turkey pot pies, Friendsgiving, leftover turkey, pot pie, individual pot pies, turkey pot pie, comfort food, Thanksgiving leftovers


