I want garlic butter chicken and rice, and I want it now, and I want it from one pan because I have exactly zero patience for extra dishes tonight. That’s the whole thought. No fancy preamble. Just the craving, the need, and the absolute refusal to scrub more than one skillet afterward. This One-Pan Garlic Butter Chicken and Rice isn’t a recipe I planned to develop—it’s a recipe that happened because I was hungry, tired, and staring at a pack of chicken thighs like they owed me something.
The first time I made this, I was skeptical. One pan? No pre-cooking the rice? No draining? It felt like a kitchen magic trick that would end in crunchy, undercooked rice and sad, dry chicken. But I was too lazy to care, so I threw everything in, crossed my fingers, and let the oven do the work. Twenty-five minutes later, I pulled out a pan of the most absurdly tender chicken, sitting on a bed of buttery, garlicky rice that had soaked up every drop of flavor. I ate straight from the pan. No plate. No shame. That was the moment I knew this one had to be shared.
Here’s the thing about this recipe—it’s not just easy. It’s the kind of easy that feels like cheating. The chicken comes out juicy, the rice is perfectly fluffy, and the garlic butter situation is, honestly, life-changing. You don’t need to be a pro to nail this. You just need one pan, a little patience, and a deep love for garlic. Let’s get into it.
Why You’ll Love This Recipe
Let me tell you why this One-Pan Garlic Butter Chicken and Rice has become my go-to for busy weeknights, lazy Sundays, and everything in between. I’ve tested this recipe more times than I can count, tweaking the liquid ratio, the cooking time, and the garlic quantity (always more garlic), and I can confidently say this version is the winner.
- One Pan, Minimal Cleanup : Everything cooks in a single skillet or baking dish. No boiling rice separately, no sautéing chicken in one pan and making rice in another. Just one pan to wash. That’s it.
- Simple Pantry Ingredients : You likely have most of these ingredients already. Chicken, rice, garlic, butter, broth, and a few seasonings. No fancy grocery store trips required.
- Perfect for Busy Weeknights : From start to finish, this dish comes together in about 40 minutes. Most of that time is hands-off, letting the oven do the heavy lifting.
- Crowd-Pleaser : I’ve served this to picky eaters, garlic lovers, and even folks who claim they don’t like rice. It gets devoured every single time.
- Juicy Chicken, Fluffy Rice : The magic here is in the cooking method. The chicken stays incredibly moist thanks to the butter and broth, while the rice absorbs all those savory flavors and cooks to perfection.
- Customizable : You can swap the chicken thighs for breasts, add vegetables, or adjust the seasoning to your liking. This recipe is forgiving and adaptable.
What makes this recipe different from the rest? It’s the garlic butter situation. Most one-pan chicken and rice recipes rely on cream-of-something soup or bland seasoning. This one uses real butter, fresh garlic, and a simple blend of herbs that creates a deeply flavorful, comforting dish. It’s not just another version—it’s the version you’ll come back to again and again. Honestly, the first time I made this, I closed my eyes after the first bite. It’s comfort food at its finest, without the stress.
What Ingredients You Will Need
This recipe uses simple, wholesome ingredients that work together to create something truly special. Most of these are pantry staples, which makes this dish perfect for those nights when you need dinner on the table without a lot of fuss.
For the Chicken
- 4 bone-in, skin-on chicken thighs (about 1.5 pounds) – The bone and skin keep the meat incredibly moist during cooking. You can use boneless, skinless thighs or breasts, but adjust the cooking time slightly.
- 2 tablespoons unsalted butter, softened – For rubbing under the skin. This adds richness and helps the seasoning stick.
- 4 cloves garlic, minced – Fresh garlic is non-negotiable here. It provides that pungent, aromatic base that defines this dish.
- 1 teaspoon salt – I prefer kosher salt for its clean flavor.
- ½ teaspoon black pepper – Freshly ground is best.
- 1 teaspoon paprika – Adds a subtle smokiness and beautiful color.
- ½ teaspoon dried thyme – Earthy and slightly floral. Pairs beautifully with garlic and butter.
For the Rice
- 1 cup long-grain white rice – Basmati or jasmine work wonderfully. Avoid short-grain rice, which can become too sticky.
- 1 ½ cups chicken broth – Low-sodium is best so you can control the salt level. I prefer Swanson or Pacific Foods for consistent flavor.
- 2 tablespoons unsalted butter – Adds richness and helps prevent the rice from sticking.
- 3 cloves garlic, minced – Yes, more garlic. Trust the process.
- ½ cup finely chopped onion – About half a medium onion. Adds sweetness and depth.
- ¼ teaspoon salt – Adjust based on your broth’s saltiness.
- ¼ teaspoon black pepper – A little goes a long way.
- Optional: ¼ cup dry white wine – For deglazing the pan. Adds a subtle acidity that balances the richness. You can skip it or use extra broth.
For Garnish
- 2 tablespoons fresh parsley, chopped – Adds a pop of color and freshness.
- Lemon wedges – A squeeze of lemon juice right before serving brightens the whole dish.
Ingredient Tips: For the best texture, use chicken thighs with the skin on. The skin gets beautifully crispy in the oven while the meat stays tender. If you’re using chicken breasts, reduce the cooking time by about 5-7 minutes and check for doneness with a meat thermometer (165°F). For the rice, rinsing it before cooking removes excess starch and helps it stay fluffy, not gummy. I recommend Lundberg or Royal basmati rice for consistent results.
Equipment Needed
You don’t need a lot of fancy equipment for this recipe, which is part of its charm. Here’s what you’ll need:
- A large oven-safe skillet – A 10- or 12-inch cast-iron skillet is ideal. It heats evenly and goes from stovetop to oven seamlessly. If you don’t have cast iron, any oven-safe skillet or even a 9×13-inch baking dish will work.
- Sharp knife – For mincing garlic and chopping onion and parsley. A dull knife makes prep frustrating.
- Cutting board – Preferably one for meat and one for vegetables to avoid cross-contamination.
- Measuring cups and spoons – Accuracy matters, especially for the rice-to-liquid ratio.
- Tongs – For flipping the chicken and handling it without piercing the skin.
- Meat thermometer – Not strictly necessary, but highly recommended for perfectly cooked chicken.
- Foil – For tenting the pan during resting, if needed.
Budget-Friendly Tip: If you don’t own an oven-safe skillet, you can sear the chicken in a regular skillet, then transfer everything to a baking dish. It adds one extra dish to wash, but the results are just as good. I’ve done this many times when my cast iron was already in use.
Preparation Method
Let’s get cooking. This method is straightforward, but I’ll walk you through each step with the details that matter.
Step 1: Preheat and Prep
Preheat your oven to 375°F (190°C). While it’s heating, pat the chicken thighs dry with paper towels. This is crucial for crispy skin. Season both sides generously with salt, pepper, paprika, and dried thyme. Then, gently lift the skin on each thigh and rub about ½ tablespoon of softened butter under the skin. This step is the secret to incredibly moist, flavorful meat. Don’t skip it.
Step 2: Sear the Chicken
Place your oven-safe skillet over medium-high heat. Add 1 tablespoon of butter and let it melt until it’s foaming but not browning. Carefully place the chicken thighs skin-side down in the skillet. Let them sear undisturbed for 4-5 minutes until the skin is deep golden brown and crispy. Flip and sear the other side for 2-3 minutes. The chicken won’t be cooked through yet—that’s fine. Transfer the chicken to a plate and set aside.
Step 3: Build the Rice Base
Reduce the heat to medium. Add the remaining 2 tablespoons of butter to the skillet. Once melted, add the chopped onion and cook for 2-3 minutes until softened and translucent. Add the minced garlic and cook for 30 seconds until fragrant—be careful not to burn it. If you’re using white wine, pour it in now and scrape up any browned bits from the bottom of the pan. Let it simmer for 1 minute until mostly evaporated.
Step 4: Add the Rice and Broth
Add the rinsed and drained rice to the skillet. Stir it around for 1 minute to coat it in the buttery garlic mixture. This toasting step adds a subtle nuttiness that elevates the whole dish. Pour in the chicken broth, add the remaining salt and pepper, and give everything a good stir. Bring it to a gentle simmer.
Step 5: Assemble and Bake
Nestle the seared chicken thighs back into the rice, skin-side up. Any juices that accumulated on the plate should go into the pan too—that’s flavor. The rice should be mostly submerged in liquid, with the chicken sitting on top. Transfer the skillet to the preheated oven. Bake uncovered for 25-30 minutes, or until the rice is tender and has absorbed most of the liquid, and the chicken registers 165°F (74°C) at the thickest part.
Step 6: Rest and Serve
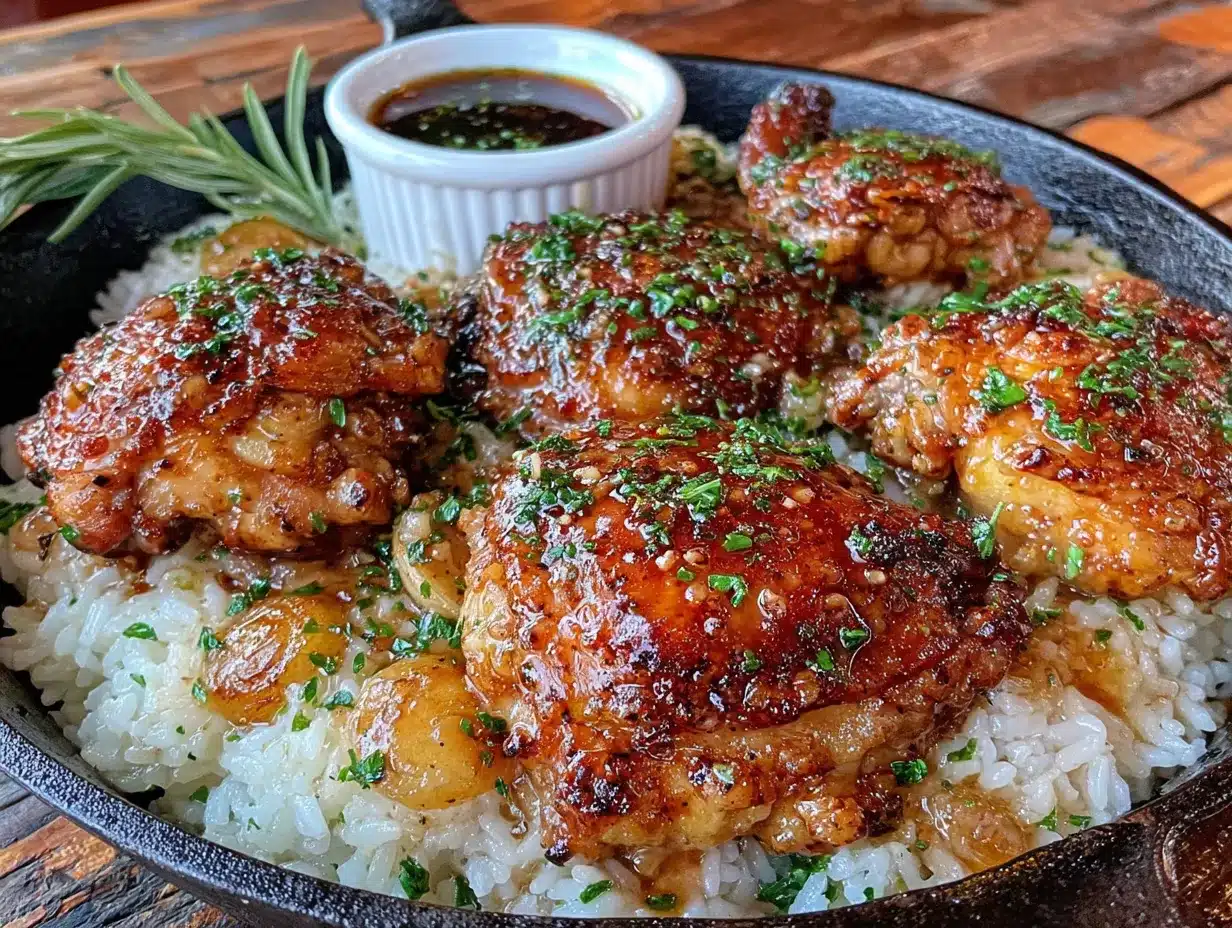
Remove the skillet from the oven. Let it rest for 5-10 minutes—this allows the rice to finish absorbing any remaining liquid and makes it easier to serve. During this time, the chicken skin will stay crispy. Sprinkle with fresh parsley and serve with lemon wedges on the side. A squeeze of lemon right before eating cuts through the richness beautifully.
Sensory Cues: When the chicken is done, the skin should be deeply golden and crackling. The rice should look fluffy and separate, not mushy or soupy. You should smell garlic, butter, and herbs—a combination that fills your kitchen with pure comfort. If the rice is still a bit firm after 25 minutes, add a splash of broth or water, cover the skillet loosely with foil, and bake for another 5 minutes.
Cooking Tips & Techniques
I’ve made this recipe more times than I can count, and I’ve learned a few things the hard way. Here are my best tips for success:
Don’t Skip the Butter Under the Skin. This is the single most important step for juicy chicken. The butter melts as it cooks, basting the meat from the inside. It also helps the seasoning penetrate deeper. I learned this after making a dry, sad version of this dish early on. Never again.
Rinse Your Rice. I know it’s an extra step, but rinsing the rice until the water runs clear removes excess starch. Starchy rice turns gummy and clumpy. Rinsed rice stays fluffy and separate, even when cooked in a single pan with chicken on top.
Patience with the Sear. Don’t rush the browning. Let the chicken skin get deep golden brown before flipping. If you try to move it too soon, the skin will tear and stick to the pan. A good sear adds flavor and texture that can’t be replicated.
Check Your Liquid Ratio. Different rice varieties absorb liquid differently. If you’re using a different type of rice (like brown rice or jasmine), adjust the broth amount accordingly. Brown rice needs more liquid and a longer cooking time. Jasmine rice cooks faster and needs slightly less liquid. When in doubt, follow the package instructions for liquid ratios and adjust the baking time.
Let It Rest. I know it’s tempting to dig in immediately, but letting the dish rest for 5-10 minutes makes a huge difference. The rice finishes absorbing liquid, the chicken relaxes, and everything comes together. Plus, you won’t burn your mouth on steaming-hot rice.
Multitasking Tip: While the chicken is searing, mince your garlic and chop your onion. While the rice is baking, tidy up your kitchen. This recipe is forgiving enough that you can prep as you go, but having everything ready before you start makes the process smoother.
Variations & Adaptations
This recipe is a fantastic base for customization. Here are some of my favorite variations:
Vegetable-Loaded Version: Add 1 cup of frozen peas and carrots to the rice during the last 10 minutes of baking. Or toss in a handful of fresh spinach right before serving—it will wilt into the rice beautifully. I’ve also added sliced mushrooms with the onions for an earthy twist.
Spicy Kick: Add ½ teaspoon of red pepper flakes or a diced jalapeño along with the garlic. The heat cuts through the richness of the butter and pairs surprisingly well with the garlic. For a smoky heat, try chipotle powder instead of paprika.
Herb-Forward Version: Swap the thyme for rosemary or oregano. Add a sprig of fresh rosemary to the rice while it bakes, then remove it before serving. Fresh herbs add a brightness that dried herbs can’t quite match.
Creamy Version: Stir in ¼ cup of heavy cream or cream cheese into the rice before baking. It makes the rice extra rich and velvety. This is my go-to when I want something truly indulgent.
Dietary Adaptations: For a gluten-free version, this recipe is naturally gluten-free as written—just ensure your chicken broth is certified gluten-free. For a dairy-free version, use olive oil or a high-quality plant-based butter instead of regular butter. The flavor changes slightly, but it’s still delicious. For a lower-carb option, swap the rice for cauliflower rice, but reduce the broth to ½ cup and bake for only 15-20 minutes.
My Personal Favorite Variation: I once added a tablespoon of harissa paste to the butter before rubbing it under the chicken skin. The result was incredible—spicy, smoky, and deeply flavorful. It’s become my secret weapon for impressing dinner guests.
Serving & Storage Suggestions
This dish is best served warm, straight from the pan. The contrast between the crispy chicken skin and the tender, buttery rice is something special. Here’s how to make the most of it:
Serving Temperature: Serve immediately after resting. The rice should be warm and fluffy, the chicken hot and juicy. A squeeze of fresh lemon juice right before eating brightens all the flavors.
Presentation: Serve directly from the skillet for a rustic, family-style meal. Garnish with fresh parsley and lemon wedges. If you’re feeling fancy, sprinkle some flaky sea salt over the chicken right before serving.
Complementary Dishes: A simple green salad with a lemon vinaigrette is the perfect side—it cuts through the richness. Steamed green beans or roasted asparagus also pair beautifully. For a heartier meal, serve with crusty bread to soak up any leftover garlic butter sauce.
Storage: Store leftovers in an airtight container in the refrigerator for up to 3 days. The rice will absorb more liquid as it sits, so it might be slightly softer the next day, but the flavor only gets better. I actually love the leftovers—the garlic and herb flavors meld together beautifully overnight.
Reheating: The best way to reheat is in a skillet over medium-low heat with a splash of broth or water. Cover and cook for 5-7 minutes, stirring occasionally, until heated through. You can also microwave individual portions, but the rice might be a bit drier. For crispy chicken skin, reheat in a 375°F oven for 10 minutes.
Freezing: This dish freezes well for up to 2 months. Let it cool completely, then transfer to a freezer-safe container. To reheat, thaw overnight in the refrigerator, then reheat in a skillet or oven as directed above.
Flavor Development: The flavors actually deepen and meld together after a day in the fridge. I’ve made this dish on a Sunday and enjoyed it for lunch throughout the week, and each day it tasted a little better. It’s one of those rare recipes that’s almost as good (if not better) as leftovers.
Nutritional Information & Benefits
Here’s an approximate nutritional breakdown per serving (based on 4 servings):
| Nutrient | Amount |
|---|---|
| Calories | 520 |
| Protein | 32g |
| Fat | 28g |
| Saturated Fat | 12g |
| Carbohydrates | 38g |
| Fiber | 1g |
| Sugar | 2g |
| Sodium | 680mg |
Health Benefits: This dish offers a good balance of protein, healthy fats, and carbohydrates. Chicken thighs are rich in B vitamins, particularly niacin and B6, which support energy metabolism. Garlic is known for its immune-boosting properties and potential cardiovascular benefits. The butter provides fat-soluble vitamins A, D, E, and K, though it should be enjoyed in moderation.
Dietary Considerations: This recipe is naturally gluten-free and can be made dairy-free with substitutions. It’s not suitable for low-carb or keto diets due to the rice, but the cauliflower rice variation works well. For those watching sodium, use low-sodium broth and reduce the added salt.
My Personal Perspective: I believe in balance. This dish is comfort food, plain and simple. It’s not a health food, but it’s made with real, wholesome ingredients. I serve it alongside a big green salad or roasted vegetables to round out the meal. It’s the kind of dinner that nourishes both body and soul—and sometimes, that’s exactly what you need.
Conclusion
This One-Pan Garlic Butter Chicken and Rice is the kind of recipe that becomes a staple. It’s reliable, forgiving, and deeply satisfying. Whether you’re cooking for a busy weeknight, a lazy Sunday, or just because you’re craving something warm and comforting, this dish delivers every single time.
I love this recipe because it reminds me that good food doesn’t have to be complicated. With a few simple ingredients and one pan, you can create something that feels special. It’s the kind of meal that makes you slow down, take a bite, and actually enjoy the moment.
I’d love to hear how this turns out for you. Did you add any variations? Did you serve it with something unexpected? Drop a comment below and let me know. And if you try this recipe, tag me in your photos—I absolutely love seeing your creations. If you’re looking for other quick and delicious dinner ideas, you might enjoy this Easy 15-Minute Honey Garlic Chicken or this Quick Creamy Butter Chicken for another one-pan wonder. Happy cooking, friends!
Frequently Asked Questions
Can I use chicken breasts instead of thighs?
Absolutely. Boneless, skinless chicken breasts work well, but they cook faster and can dry out more easily. Reduce the baking time by 5-7 minutes and check for doneness at 165°F. I recommend using bone-in, skin-on chicken breasts for the best results, as the bone and skin help retain moisture.
Why is my rice still crunchy after baking?
This usually happens for one of three reasons: not enough liquid, the baking time was too short, or the oven temperature was too low. Make sure you’re using exactly 1 ½ cups of broth for 1 cup of rice. If the rice is still firm after 30 minutes, add a splash of broth, cover the pan loosely with foil, and bake for another 5-10 minutes.
Can I make this recipe in a slow cooker or Instant Pot?
This recipe is designed for the oven, but you can adapt it. For a slow cooker, sear the chicken first, then add everything to the slow cooker and cook on low for 3-4 hours. The rice might be softer. For an Instant Pot, use the sauté function for searing, then pressure cook on high for 5 minutes with a natural release. Adjust liquid ratios accordingly.
How do I prevent the chicken skin from getting soggy?
The key is to sear the chicken skin-side down until it’s deeply golden and crispy before baking. Also, make sure the chicken sits on top of the rice, not submerged in the liquid. The skin will stay crispy as it bakes above the steaming rice. Letting the dish rest uncovered after baking also helps maintain crispiness.
Can I add vegetables directly to the pan?
Yes! Vegetables like peas, carrots, bell peppers, or mushrooms work well. Add them to the rice before baking. For vegetables that cook quickly (like peas or spinach), add them during the last 10 minutes of baking. For heartier vegetables (like carrots or bell peppers), add them at the beginning. Just be mindful of the liquid content—some vegetables release water and might make the rice slightly wetter.
Pin This Recipe!

One-Pan Garlic Butter Chicken and Rice: Easy Weeknight Dinner

This One-Pan Garlic Butter Chicken and Rice is a simple, comforting weeknight dinner featuring juicy chicken thighs and fluffy rice cooked together in a single skillet with garlic, butter, and herbs. Minimal cleanup and maximum flavor make it a go-to recipe for busy nights.
- Prep Time: 15 minutes
- Cook Time: 30 minutes
- Total Time: 45 minutes
- Yield: 4 servings 1x
- Category: Main Course
- Cuisine: American
Ingredients
- 4 bone-in, skin-on chicken thighs (about 1.5 pounds)
- 2 tablespoons unsalted butter, softened
- 4 cloves garlic, minced
- 1 teaspoon salt
- ½ teaspoon black pepper
- 1 teaspoon paprika
- ½ teaspoon dried thyme
- 1 cup long-grain white rice (basmati or jasmine)
- 1 ½ cups chicken broth (low-sodium)
- 2 tablespoons unsalted butter
- 3 cloves garlic, minced
- ½ cup finely chopped onion
- ¼ teaspoon salt
- ¼ teaspoon black pepper
- Optional: ¼ cup dry white wine
- 2 tablespoons fresh parsley, chopped
- Lemon wedges for serving
Instructions
- Preheat oven to 375°F (190°C). Pat chicken thighs dry with paper towels. Season both sides with salt, pepper, paprika, and dried thyme. Gently lift the skin on each thigh and rub about ½ tablespoon of softened butter under the skin.
- Place an oven-safe skillet over medium-high heat. Add 1 tablespoon of butter and let it melt until foaming. Place chicken thighs skin-side down in the skillet. Sear undisturbed for 4-5 minutes until deep golden brown. Flip and sear the other side for 2-3 minutes. Transfer chicken to a plate and set aside.
- Reduce heat to medium. Add remaining 2 tablespoons of butter to the skillet. Once melted, add chopped onion and cook for 2-3 minutes until softened. Add minced garlic and cook for 30 seconds until fragrant. If using white wine, pour it in and scrape up browned bits; simmer for 1 minute until mostly evaporated.
- Add rinsed and drained rice to the skillet. Stir for 1 minute to coat in the buttery garlic mixture. Pour in chicken broth, add remaining salt and pepper, and stir. Bring to a gentle simmer.
- Nestle seared chicken thighs back into the rice, skin-side up. Pour any accumulated juices from the plate into the pan. Transfer skillet to the preheated oven. Bake uncovered for 25-30 minutes, until rice is tender and liquid is absorbed, and chicken registers 165°F (74°C) at the thickest part.
- Remove skillet from oven. Let rest for 5-10 minutes. Sprinkle with fresh parsley and serve with lemon wedges. Squeeze lemon juice over the dish before eating.
Notes
For best results, use bone-in, skin-on chicken thighs. Rinse rice before cooking to remove excess starch. Let the dish rest after baking for fluffier rice. If rice is still firm after 30 minutes, add a splash of broth, cover loosely with foil, and bake for another 5-10 minutes.
Nutrition
- Serving Size: 1 serving (1 chicken
- Calories: 520
- Sugar: 2
- Sodium: 680
- Fat: 28
- Saturated Fat: 12
- Carbohydrates: 38
- Fiber: 1
- Protein: 32
Keywords: one-pan chicken and rice, garlic butter chicken, easy weeknight dinner, skillet chicken recipe, comfort food


