I want a pumpkin chocolate chip cookie that actually tastes like fall, not like a spice cabinet exploded in butter. That’s the thought that hit me last October while staring at a half-used can of pumpkin puree in my fridge. I had everything—the flour, the sugar, the chocolate chips—but every recipe I tried left me disappointed. Too cakey. Too bland. The pumpkin flavor was always a whisper when I wanted it to be the main character.
So I did what any reasonable person would do on a rainy Tuesday afternoon. I started messing around. I wanted that slight chew on the outside, that soft, almost fudgy center, and a cinnamon-sugar coating that crackles when you bite into it. Honestly, I went through four batches before I got it right. The first batch spread into sad, flat discs. The second batch was practically a muffin top pretending to be a cookie. But the third? That was the one. And this recipe right here—these Perfect Cinnamon Sugar Pumpkin Chocolate Chip Cookies—that’s the version I’ve been making ever since.
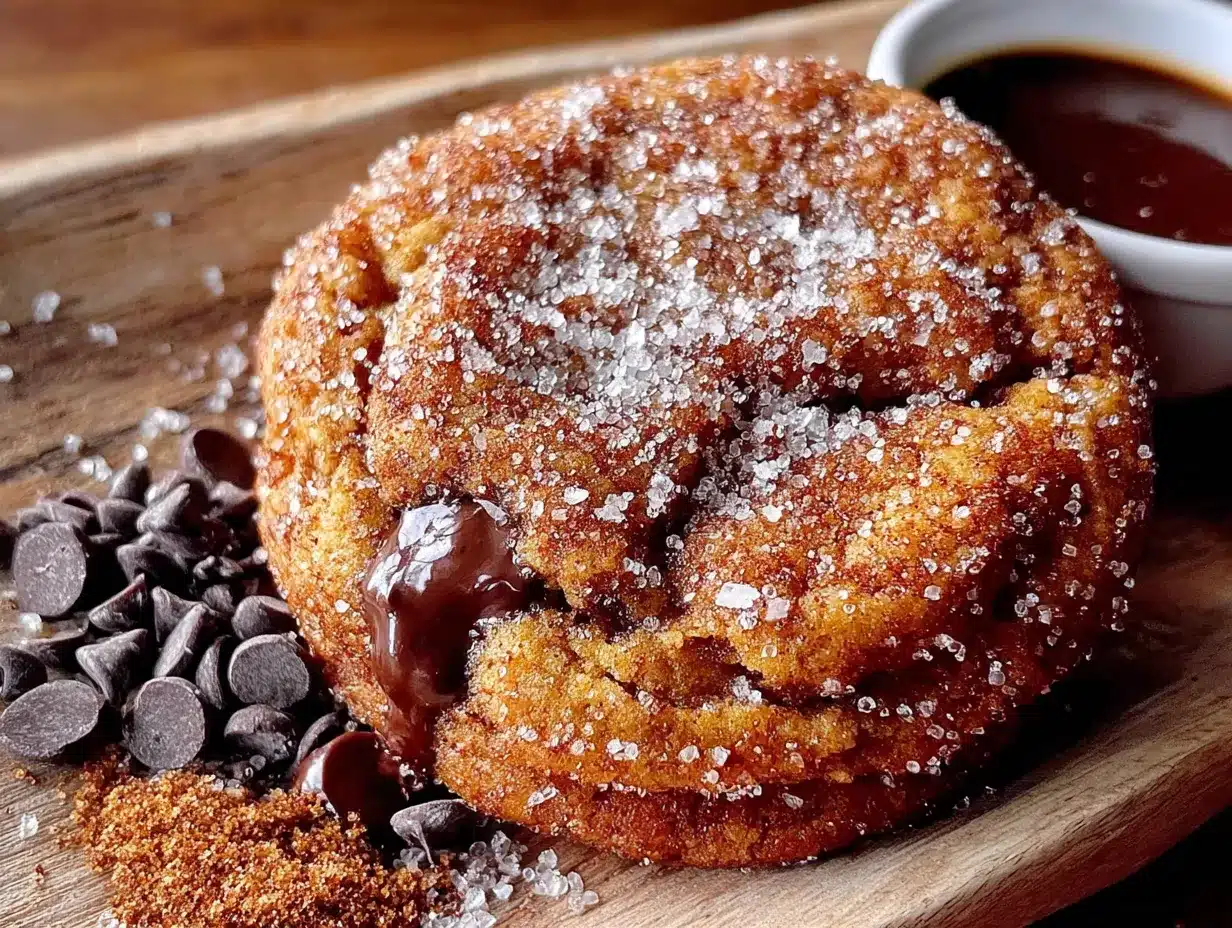
These cookies have a secret, and it’s not complicated. It’s the way the cinnamon-sugar coating meets the soft, pumpkin-spiced dough. It’s the melty chocolate chips that balance the warm spices. It’s the kind of cookie that makes you close your eyes after the first bite, not because you’re being dramatic, but because it genuinely tastes that good. I’ve brought these to potlucks, shared them with neighbors, and hidden a few in my freezer for “emergencies.” Trust me on this one.
Why You’ll Love This Recipe
These aren’t your average pumpkin cookies. I’ve tested this recipe more times than I care to admit, and here’s what makes it stand out from the crowd.
- Quick & Easy : From start to finish, these cookies come together in about 30 minutes. No chilling required. No complicated techniques. Perfect for those sudden fall baking cravings.
- Simple Ingredients : You probably have most of these in your pantry right now. Pumpkin puree, flour, sugar, butter, eggs, chocolate chips. Nothing fancy, nothing hard to find.
- Perfect for Fall Gatherings : These cookies are made for Thanksgiving dessert tables, Halloween parties, or cozy Sunday afternoons with a cup of coffee. They disappear fast.
- Crowd-Pleaser : Kids love the chocolate chips. Adults love the sophisticated spice blend. Everyone loves that crackly cinnamon-sugar coating. I’ve never seen a plate of these last more than 20 minutes.
- Unbelievably Delicious : The texture is what gets people. Soft in the middle, slightly crisp on the edges, with that sugary crunch on the outside. It’s next-level comfort food in cookie form.
What makes this recipe different? It’s the technique. Most pumpkin cookie recipes turn out cakey because pumpkin puree adds so much moisture. I solved that problem by adjusting the flour ratio and adding a specific mixing method that keeps these cookies dense and chewy instead of fluffy. Plus, that cinnamon-sugar coating? It’s not just for looks. It creates a caramelized crust that locks in moisture and adds a layer of texture you won’t find in any other pumpkin cookie.
This is the kind of recipe that makes you look forward to pumpkin season. It’s comfort food reimagined—faster, simpler, but with the same soul-soothing satisfaction. Perfect for impressing guests without stress, or turning a simple Tuesday into something memorable.
What Ingredients You Will Need
This recipe uses simple, wholesome ingredients to deliver bold fall flavor and satisfying texture without any fuss. Most of these are pantry staples, which makes these cookies dangerously easy to whip up on a whim.
For the Cookie Dough
- 1 ¾ cups all-purpose flour (spooned and leveled—don’t scoop directly from the bag or you’ll pack in too much)
- 1 teaspoon baking soda (make sure it’s fresh for proper lift)
- ½ teaspoon baking powder (helps with that slight puff)
- 1 teaspoon ground cinnamon (I prefer Saigon cinnamon for its warm, bold flavor)
- ½ teaspoon ground nutmeg (freshly grated if you have it, but pre-ground works fine)
- ¼ teaspoon ground ginger (adds a subtle warmth without overpowering)
- ¼ teaspoon ground cloves (just a hint—cloves are strong)
- ½ teaspoon salt (balances the sweetness and enhances the spices)
- ½ cup unsalted butter, softened to room temperature (adds richness and tenderness)
- ¾ cup granulated sugar (for sweetness and structure)
- ¼ cup packed light brown sugar (adds moisture and a hint of molasses flavor)
- 1 large egg, room temperature (helps bind everything together)
- 1 teaspoon vanilla extract (pure, not imitation—trust me on this)
- ¾ cup pumpkin puree (not pumpkin pie filling—make sure it’s 100% pure pumpkin)
- 1 cup semi-sweet chocolate chips (I like Ghirardelli for consistent melting, but any good brand works)
For the Cinnamon Sugar Coating
- ¼ cup granulated sugar
- 1 tablespoon ground cinnamon
Ingredient Tips: When choosing pumpkin puree, look for Libby’s or store-brand 100% pure pumpkin. Avoid pumpkin pie filling which has added sugar and spices. For the chocolate chips, semi-sweet is my go-to because it balances the sweet pumpkin dough perfectly, but dark chocolate works beautifully if you prefer less sweetness. If you’re dairy-free, use vegan butter and dairy-free chocolate chips—I’ve tested this with Miyoko’s butter and Enjoy Life chips, and the results were fantastic. For a gluten-free option, swap the all-purpose flour with a 1:1 gluten-free baking flour blend. I’ve had great luck with Bob’s Red Mill.
Equipment Needed
You don’t need a fancy bakery setup for these cookies. Here’s what you’ll need:
- Large mixing bowl (for the dry ingredients)
- Medium mixing bowl (for the wet ingredients)
- Electric hand mixer or stand mixer (a hand mixer works perfectly—I actually prefer it for this recipe because it’s easier to control)
- Rubber spatula (for folding in the chocolate chips)
- Baking sheets (I use light-colored metal sheets for even browning)
- Parchment paper or silicone baking mat (parchment paper is my favorite—easy cleanup and prevents sticking)
- Cookie scoop or tablespoon (a 1.5-tablespoon scoop gives you consistent cookies every time)
- Small shallow bowl (for the cinnamon-sugar coating)
- Wire cooling rack (essential for crispy edges)
If you don’t have a cookie scoop, just use two spoons. The cookies won’t be perfectly round, but they’ll taste just as good. I actually like the rustic look of spoon-dropped cookies. For the baking sheets, avoid dark non-stick pans if you can—they absorb more heat and can cause the bottoms to brown too quickly. Light-colored sheets give you more control.
Preparation Method
Let’s get baking. I’ve broken this down into clear steps so you can follow along without any guesswork.
- Preheat your oven to 350°F (175°C). Line two baking sheets with parchment paper or silicone mats. This is non-negotiable—these cookies have a bit of spread, and parchment paper makes cleanup a breeze.
- Whisk the dry ingredients together. In a large bowl, combine the flour, baking soda, baking powder, cinnamon, nutmeg, ginger, cloves, and salt. Whisk until everything is evenly distributed. This takes about 30 seconds. Set aside.
- Cream the butter and sugars. In a medium bowl, beat the softened butter, granulated sugar, and brown sugar together with an electric mixer on medium speed until light and fluffy. This should take about 2-3 minutes. Scrape down the sides of the bowl halfway through. You’ll know it’s ready when the mixture looks pale and slightly increased in volume.
- Add the egg and vanilla. Beat in the egg and vanilla extract until fully incorporated. The mixture might look a little separated at this point—that’s normal. Don’t worry.
- Mix in the pumpkin puree. Add the pumpkin puree and beat on low speed until just combined. The batter will look curdled and weird. I promise this is normal. Pumpkin puree has a lot of water, and it doesn’t fully emulsify with the butter. Just mix until it’s mostly combined, then stop.
- Fold in the dry ingredients. Add the flour mixture to the wet ingredients in two additions, mixing on low speed after each addition until just combined. Overmixing at this stage will make the cookies tough. You want to see a few streaks of flour remaining.
- Fold in the chocolate chips. Use a rubber spatula to gently fold in the chocolate chips. Make sure they’re evenly distributed throughout the dough. The dough will be soft and slightly sticky—that’s exactly what you want.
- Make the cinnamon-sugar coating. In a small shallow bowl, stir together the granulated sugar and cinnamon until well combined.
- Scoop and coat the cookies. Using a 1.5-tablespoon cookie scoop or a heaping tablespoon, scoop portions of dough. Drop each scoop into the cinnamon-sugar mixture and roll gently to coat all sides. Place the coated dough balls on the prepared baking sheets, spacing them about 2 inches apart. They will spread, so give them room.
- Bake for 10-12 minutes. Bake one sheet at a time in the center of the oven. The cookies are done when the edges are set and lightly golden, but the centers still look slightly soft and underdone. This is crucial—if you wait until the centers look fully baked, they’ll be overdone. For softer cookies, bake for 10 minutes. For slightly crispier edges, go for 12 minutes.
- Cool on the baking sheet. Let the cookies rest on the baking sheet for 5 minutes. They will continue to set as they cool. After 5 minutes, transfer them to a wire cooling rack to cool completely.
Pro Tip: If your dough feels too sticky to handle, pop it in the fridge for 15 minutes. But honestly, I rarely need to do that with this recipe. The cinnamon-sugar coating helps absorb a bit of moisture, making the dough easier to work with.
Cooking Tips & Techniques
I’ve made these cookies more times than I can count, and I’ve learned a few things the hard way. Here are my best tips for perfect results every time.
Don’t overmix the dough. This is the number one mistake I see. Once you add the flour, mix only until it disappears. Overmixing develops gluten, which leads to tough, dense cookies. You want these to be soft and tender. I learned this after my first batch came out like hockey pucks. Not my finest moment.
Use room temperature ingredients. Cold butter won’t cream properly with the sugar, and cold egg can seize up the batter. Take your butter and egg out of the fridge about 30 minutes before you start baking. If you forget (which I do all the time), you can soften the butter in the microwave in 10-second bursts, and place the egg in a bowl of warm water for 5 minutes.
The cinnamon-sugar coating is your best friend. Don’t skip this step. It’s not just for decoration—it creates a caramelized crust that adds texture and locks in moisture. Make sure you coat each dough ball thoroughly. I use my fingers to press the coating into the dough slightly so it sticks better.
Watch the baking time carefully. Every oven is different. My oven runs a bit hot, so I start checking at 9 minutes. The cookies should look slightly underdone in the center when you take them out. They’ll continue cooking on the hot baking sheet. If you wait until they look fully baked in the oven, they’ll be overdone and dry. I’ve ruined plenty of batches this way.
Bake one sheet at a time. I know it’s tempting to cram both sheets in the oven, but it leads to uneven baking. The heat circulates better with one sheet. If you’re in a hurry, you can prep the second sheet while the first one bakes. It adds maybe 10 extra minutes total, and the results are worth it.
Let them cool properly. Those 5 minutes on the baking sheet are essential. The cookies are fragile when they come out of the oven, and moving them too soon can cause them to break. Be patient. I speak from experience when I say that a broken cookie is still delicious, but it’s not as pretty.
Variations & Adaptations
This recipe is wonderfully flexible. Here are some variations I’ve tried and loved.
Dark Chocolate & Sea Salt: Swap the semi-sweet chocolate chips for dark chocolate chunks (60-70% cacao works beautifully). After baking, sprinkle a tiny pinch of flaky sea salt on each cookie while they’re still warm. The salt cuts through the sweetness and makes the chocolate flavor pop. This is my personal favorite variation for adult gatherings.
White Chocolate & Cranberry: Replace the semi-sweet chips with white chocolate chips and add ½ cup dried cranberries. The tartness of the cranberries balances the sweet white chocolate perfectly. This version looks gorgeous on a holiday cookie platter—the red and white against the orange pumpkin dough is very festive.
Nutty Crunch: Fold in ½ cup chopped pecans or walnuts along with the chocolate chips. Toast the nuts first in a dry pan over medium heat for 3-4 minutes until fragrant. This adds a wonderful crunch and a toasty flavor that complements the pumpkin spices. I made this version for Thanksgiving last year, and my uncle ate six of them before dinner.
Gluten-Free Adaptation: Use a 1:1 gluten-free baking flour blend. I’ve tested this with Bob’s Red Mill and King Arthur Measure for Measure, and both worked well. The texture is slightly more delicate, so handle the dough gently. No other adjustments needed.
Vegan Adaptation: Replace the butter with vegan butter (I like Miyoko’s or Earth Balance), use a flax egg (1 tablespoon ground flaxseed mixed with 3 tablespoons water, let sit for 5 minutes), and use dairy-free chocolate chips. The cookies will be slightly less tender but still delicious. I’ve brought these to a vegan potluck and they were gone in minutes.
Spice It Up: If you like a stronger spice profile, add ¼ teaspoon cardamom and a pinch of black pepper to the dry ingredients. The cardamom adds an aromatic quality, and the black pepper (trust me) enhances the pumpkin flavor without making the cookies spicy. It sounds weird, but it works.
Serving & Storage Suggestions
These cookies are best served slightly warm, when the chocolate chips are still melty and the cinnamon-sugar coating is at its crispiest. If you’re serving them at a party, you can warm them in a 300°F oven for 3-4 minutes before serving. They’re fantastic with a cold glass of milk, a hot cup of coffee, or a chai latte.
For a fun dessert board, arrange these cookies on a platter with apple slices, caramel dip, and a few extra chocolate chips scattered around. They also pair beautifully with vanilla ice cream—just crumble a warm cookie over a scoop and thank me later.
Storage: Store the cookies in an airtight container at room temperature for up to 5 days. Place a slice of bread in the container to keep them soft—the bread absorbs excess moisture and releases it slowly. Replace the bread slice every other day if you’re keeping them that long. I usually don’t have to worry about storage because they disappear so fast.
Freezing: These cookies freeze beautifully. You have two options. Freeze the baked cookies in a single layer on a baking sheet, then transfer to a freezer bag for up to 3 months. Thaw at room temperature for about 30 minutes. Or, freeze the unbaked dough balls (before coating in cinnamon sugar) on a baking sheet, then transfer to a freezer bag. When you’re ready to bake, roll the frozen dough balls in the cinnamon-sugar mixture and bake directly from frozen, adding 2-3 minutes to the baking time. This is my go-to method for having fresh cookies on demand.
Flavor Development: Here’s a secret—these cookies actually taste better the next day. The spices have time to meld and deepen. If you can resist eating them all on day one, you’ll be rewarded with even more flavorful cookies on day two. Not that I’ve ever managed to wait that long.
Nutritional Information & Benefits
Let’s be real—these are cookies, not health food. But they do have some redeeming qualities. Here’s the estimated nutritional breakdown per cookie (based on 24 cookies):
| Nutrient | Amount per Cookie |
|---|---|
| Calories | 165 |
| Total Fat | 8g |
| Saturated Fat | 5g |
| Carbohydrates | 23g |
| Sugar | 14g |
| Fiber | 1g |
| Protein | 2g |
| Vitamin A | 15% DV |
The pumpkin puree is the nutritional star here. It’s packed with vitamin A (in the form of beta-carotene), which supports eye health and immune function. It also adds fiber and moisture, which means you can use less butter than in a traditional cookie recipe. The cinnamon has anti-inflammatory properties, and dark chocolate (if you use it) is rich in antioxidants. Not bad for a cookie, right?
Dietary Considerations: This recipe contains gluten, dairy, and eggs. For gluten-free, dairy-free, or vegan adaptations, see the variations section above. The cookies are nut-free as written, but check your chocolate chips for potential cross-contamination if you have severe allergies. They’re also egg-free if you use the vegan adaptation with a flax egg.
Conclusion
These Perfect Cinnamon Sugar Pumpkin Chocolate Chip Cookies are everything I want in a fall cookie. They’re soft, chewy, warmly spiced, and coated in that irresistible cinnamon-sugar crunch. They come together quickly with simple ingredients, and they always get rave reviews. Whether you’re baking for a holiday party, a cozy night in, or just because you have a can of pumpkin puree that needs using up, this recipe delivers.
I love that this recipe is forgiving enough for beginners but impressive enough for experienced bakers. It’s the kind of cookie that makes people ask for the recipe. And I love that you can customize it so easily—swap the chocolate chips, add some nuts, or dial up the spices to your liking. Make it your own. That’s the beauty of baking.
I’d love to hear how these turn out for you. Did you try a variation? Did you add something unexpected? Drop a comment below and let me know. And if you’re looking for more quick and easy dinner ideas to balance out all this cookie baking, check out this quick zesty lemon chicken recipe or this easy 15-minute spaghetti aglio olio for a simple weeknight meal. Happy baking, friends!
Frequently Asked Questions
Can I use pumpkin pie filling instead of pumpkin puree?
No, please don’t. Pumpkin pie filling has added sugar and spices, which will throw off the balance of this recipe. Stick with 100% pure pumpkin puree. The difference is important—pumpkin pie filling will make your cookies overly sweet and the texture will be off.
Why did my cookies turn out cakey?
This usually happens when the dough is overmixed or there’s too much moisture. Make sure you’re measuring your flour correctly (spoon and level, don’t scoop), and don’t overmix once you add the dry ingredients. Also, make sure your pumpkin puree isn’t too watery—if it looks runny, pat it dry with a paper towel before using.
Can I make these cookies without the cinnamon-sugar coating?
You can, but you’ll lose that signature crackly crust and extra layer of flavor. The coating is what makes these cookies special. If you’re cutting back on sugar, try a lighter dusting instead of a full roll. But honestly, the coating is worth every grain of sugar.
How do I keep the cookies from spreading too much?
If your cookies are spreading into flat discs, your butter might be too soft or your oven might be too cool. Make sure your butter is softened but not melted. Also, chill the dough balls in the fridge for 15-20 minutes before baking if you notice excessive spreading. This solidifies the butter and helps the cookies hold their shape.
Can I double this recipe?
Absolutely. This recipe doubles beautifully. Just make sure you’re using a large enough bowl for the dough, and bake in batches. The dough keeps well in the fridge for up to 3 days, so you can bake fresh cookies whenever the craving strikes. I often make a double batch and freeze half the dough balls for later.
Pin This Recipe!
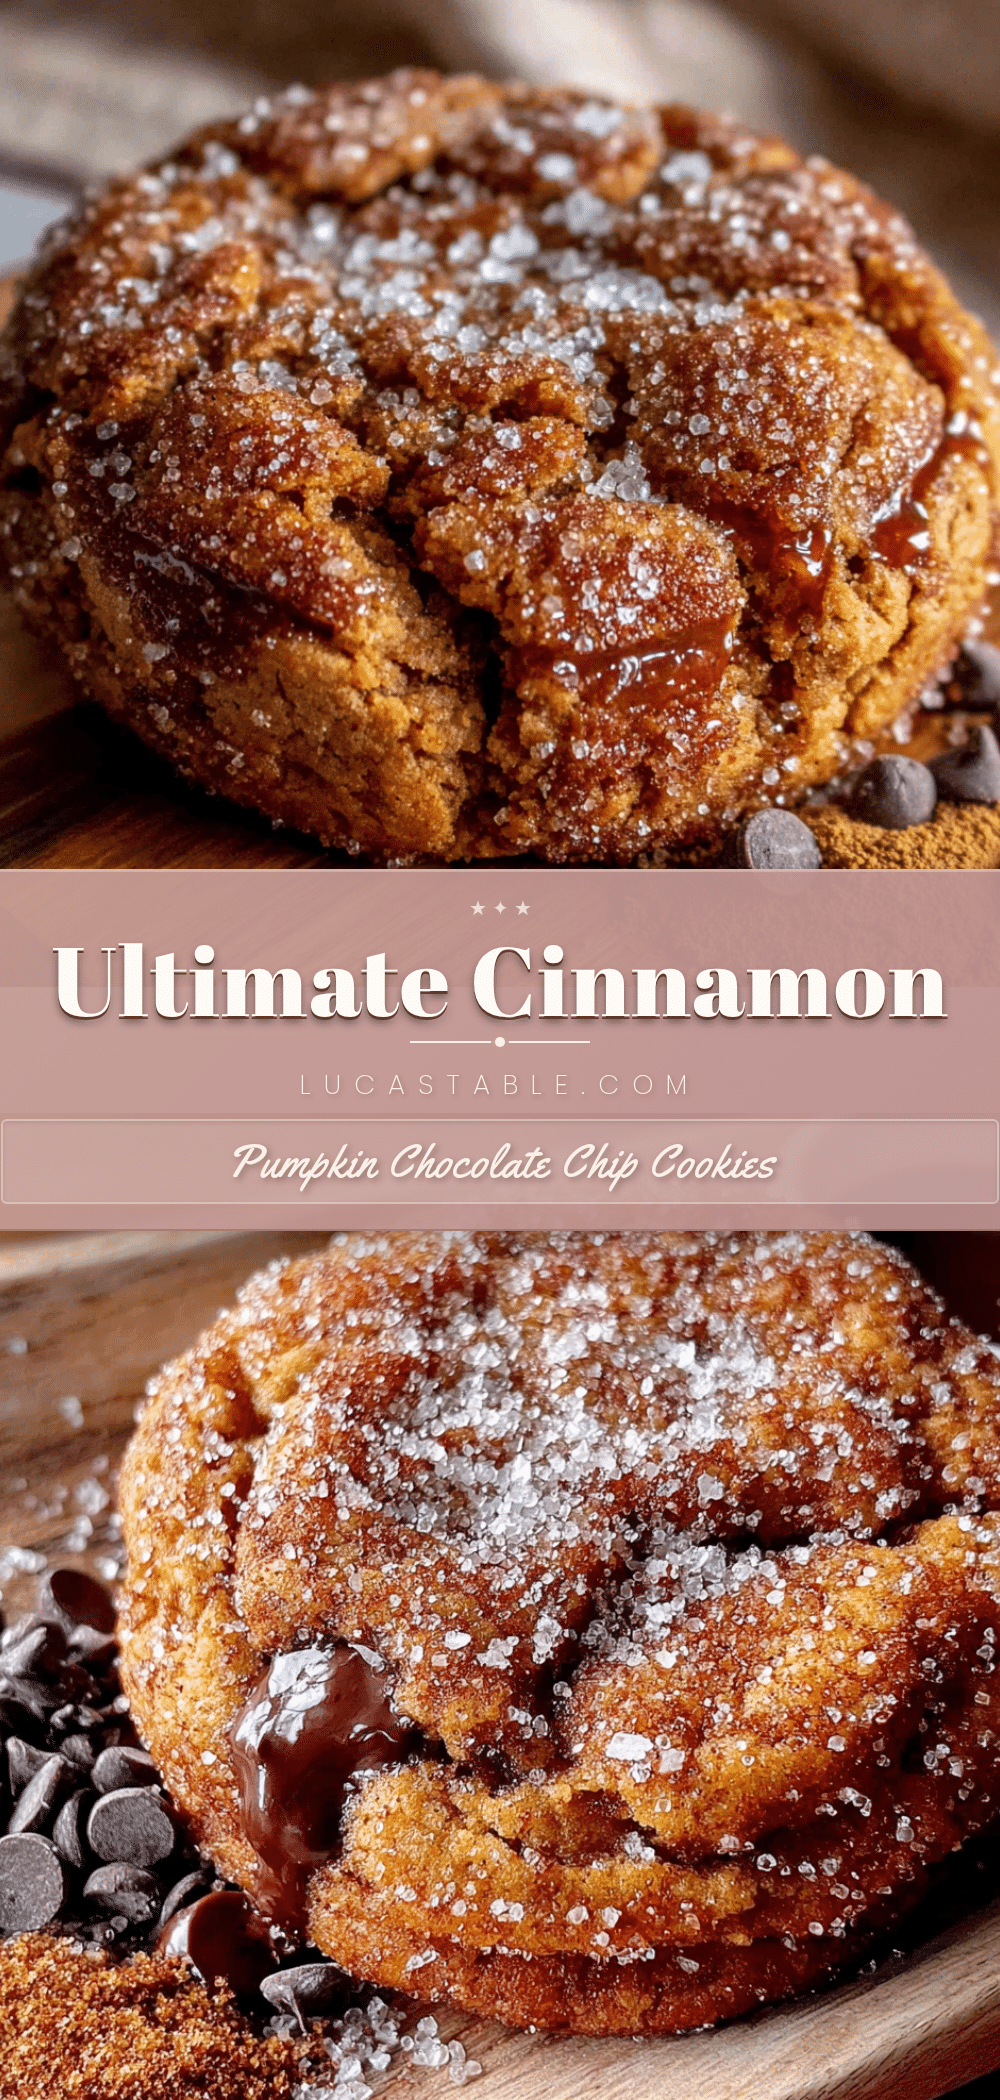
Perfect Cinnamon Sugar Pumpkin Chocolate Chip Cookies
Soft, chewy pumpkin chocolate chip cookies with a crackly cinnamon-sugar coating. These easy, no-chill cookies come together in about 30 minutes and are perfect for fall gatherings.
- Prep Time: 15 minutes
- Cook Time: 12 minutes
- Total Time: 27 minutes
- Yield: 24 cookies 1x
- Category: Dessert
- Cuisine: American
Ingredients
- 1 ¾ cups all-purpose flour (spooned and leveled)
- 1 teaspoon baking soda
- ½ teaspoon baking powder
- 1 teaspoon ground cinnamon (preferably Saigon cinnamon)
- ½ teaspoon ground nutmeg
- ¼ teaspoon ground ginger
- ¼ teaspoon ground cloves
- ½ teaspoon salt
- ½ cup unsalted butter, softened to room temperature
- ¾ cup granulated sugar
- ¼ cup packed light brown sugar
- 1 large egg, room temperature
- 1 teaspoon vanilla extract (pure)
- ¾ cup pumpkin puree (100% pure pumpkin, not pumpkin pie filling)
- 1 cup semi-sweet chocolate chips
- ¼ cup granulated sugar (for coating)
- 1 tablespoon ground cinnamon (for coating)
Instructions
- Preheat your oven to 350°F (175°C). Line two baking sheets with parchment paper or silicone mats.
- In a large bowl, whisk together the flour, baking soda, baking powder, cinnamon, nutmeg, ginger, cloves, and salt until evenly distributed. Set aside.
- In a medium bowl, beat the softened butter, granulated sugar, and brown sugar together with an electric mixer on medium speed until light and fluffy, about 2-3 minutes. Scrape down the sides halfway through.
- Beat in the egg and vanilla extract until fully incorporated. The mixture may look slightly separated—this is normal.
- Add the pumpkin puree and beat on low speed until just combined. The batter will look curdled; this is normal.
- Add the flour mixture to the wet ingredients in two additions, mixing on low speed after each addition until just combined. Do not overmix; a few streaks of flour should remain.
- Use a rubber spatula to gently fold in the chocolate chips until evenly distributed. The dough will be soft and slightly sticky.
- In a small shallow bowl, stir together the ¼ cup granulated sugar and 1 tablespoon cinnamon for the coating.
- Using a 1.5-tablespoon cookie scoop or a heaping tablespoon, scoop portions of dough. Drop each scoop into the cinnamon-sugar mixture and roll gently to coat all sides. Place the coated dough balls on the prepared baking sheets, spacing them about 2 inches apart.
- Bake one sheet at a time in the center of the oven for 10-12 minutes. The cookies are done when the edges are set and lightly golden, but the centers still look slightly soft and underdone.
- Let the cookies rest on the baking sheet for 5 minutes. They will continue to set as they cool. After 5 minutes, transfer them to a wire cooling rack to cool completely.
Notes
For softer cookies, bake for 10 minutes; for crispier edges, bake for 12 minutes. If dough feels too sticky, refrigerate for 15 minutes. Cookies taste even better the next day as flavors meld. Store in an airtight container at room temperature for up to 5 days. Freeze baked cookies for up to 3 months or unbaked dough balls for up to 3 months.
Nutrition
- Serving Size: 1 cookie
- Calories: 165
- Sugar: 14
- Sodium: 120
- Fat: 8
- Saturated Fat: 5
- Carbohydrates: 23
- Fiber: 1
- Protein: 2
Keywords: pumpkin cookies, chocolate chip cookies, cinnamon sugar, fall cookies, easy cookie recipe, pumpkin dessert, no-chill cookies


