For a while, I just accepted that pumpkin cheesecake was a dessert you had to compromise on. The filling was either too dense, too sweet, or it cracked so badly it looked like a topographical map. And the crust? Usually a sad, soggy graham cracker situation that couldn’t hold up to the weight of all that creamy filling. I’d order it at restaurants hoping for something different, but it was always the same story—good flavor, but the texture was never quite right. It felt like the perfect version of this dessert was something other people got to eat, but I never seemed to find.
So I started tinkering at home. I tested different cream cheese ratios (Philadelphia is non-negotiable, by the way), tried water baths, no water baths, slow cooling, rapid cooling. I made a lot of mistakes. But somewhere around the fourth attempt, I swapped out the graham crackers for a crunchy, spiced gingersnap crust. And honestly? That was the moment everything clicked. The deep molasses warmth of the ginger and cloves paired with the smooth pumpkin filling—it wasn’t just a crust anymore. It was the backbone of the whole thing.
This Perfect Pumpkin Cheesecake with Gingersnap Crust is the result of all those trials. It’s the one I keep going back to. Not because it’s fancy, but because it actually delivers on what I was looking for all along—a slice that holds together beautifully, tastes like fall in every single bite, and doesn’t require a pastry degree to pull off. That first clean slice out of the pan still makes me quietly happy every time.
Why You’ll Love This Recipe
This isn’t just another pumpkin cheesecake recipe you’ll scroll past. It’s the one you’ll bookmark, text to your sister, and make for every holiday gathering from now on. Here’s why it stands out from the rest:
- No Water Bath Needed: I know, I know—water baths are supposed to prevent cracking. But honestly, they’re a pain. This recipe uses a lower oven temperature and a slow cooling method that gives you a silky, crack-free top without the hassle of wrapping your pan in foil and praying it doesn’t leak.
- That Gingersnap Crust: The crust isn’t just a vessel for the filling. It’s crunchy, buttery, and packed with warm spices that complement the pumpkin perfectly. It holds its shape and doesn’t get soggy, even after a day in the fridge.
- Perfectly Balanced Flavor: This cheesecake is creamy without being heavy, sweet without being cloying, and spiced just right. The pumpkin flavor shines through without tasting like a pumpkin pie in disguise.
- Make-Ahead Friendly: This is a dream for holiday hosting. You can make it a day or two ahead, and it actually tastes better after the flavors have had time to meld together in the fridge.
- Crowd-Pleaser: I’ve brought this to Thanksgiving dinners, Friendsgiving potlucks, and casual fall get-togethers. It disappears fast. People who say they don’t like cheesecake? They ask for seconds of this one.
There’s something special about a dessert that looks impressive but is actually pretty straightforward to make. This Perfect Pumpkin Cheesecake with Gingersnap Crust delivers on both fronts. It’s the kind of dessert that makes you close your eyes after the first bite—not because it’s complicated, but because it just tastes like exactly what you wanted.
What Ingredients You Will Need
This recipe uses simple, wholesome ingredients to deliver bold flavor and satisfying texture without the fuss. Most of these are pantry staples, especially if you do a lot of fall baking. Let’s break down what you’ll need and why each ingredient matters.
For the Gingersnap Crust
- 2 cups (about 8 ounces) gingersnap cookie crumbs: You can buy pre-crushed crumbs or pulse whole gingersnaps in a food processor. I prefer using Nabisco or a similar brand with a strong molasses flavor. The spicier the cookie, the better the crust.
- 5 tablespoons unsalted butter, melted: This binds the crumbs together and adds richness. Use melted butter, not margarine, for the best texture.
- 2 tablespoons granulated sugar: Just a touch to balance the spices in the gingersnaps. You can skip this if your cookies are already very sweet.
- 1/4 teaspoon salt: A tiny pinch to enhance all the flavors and cut through the sweetness.
For the Pumpkin Cheesecake Filling
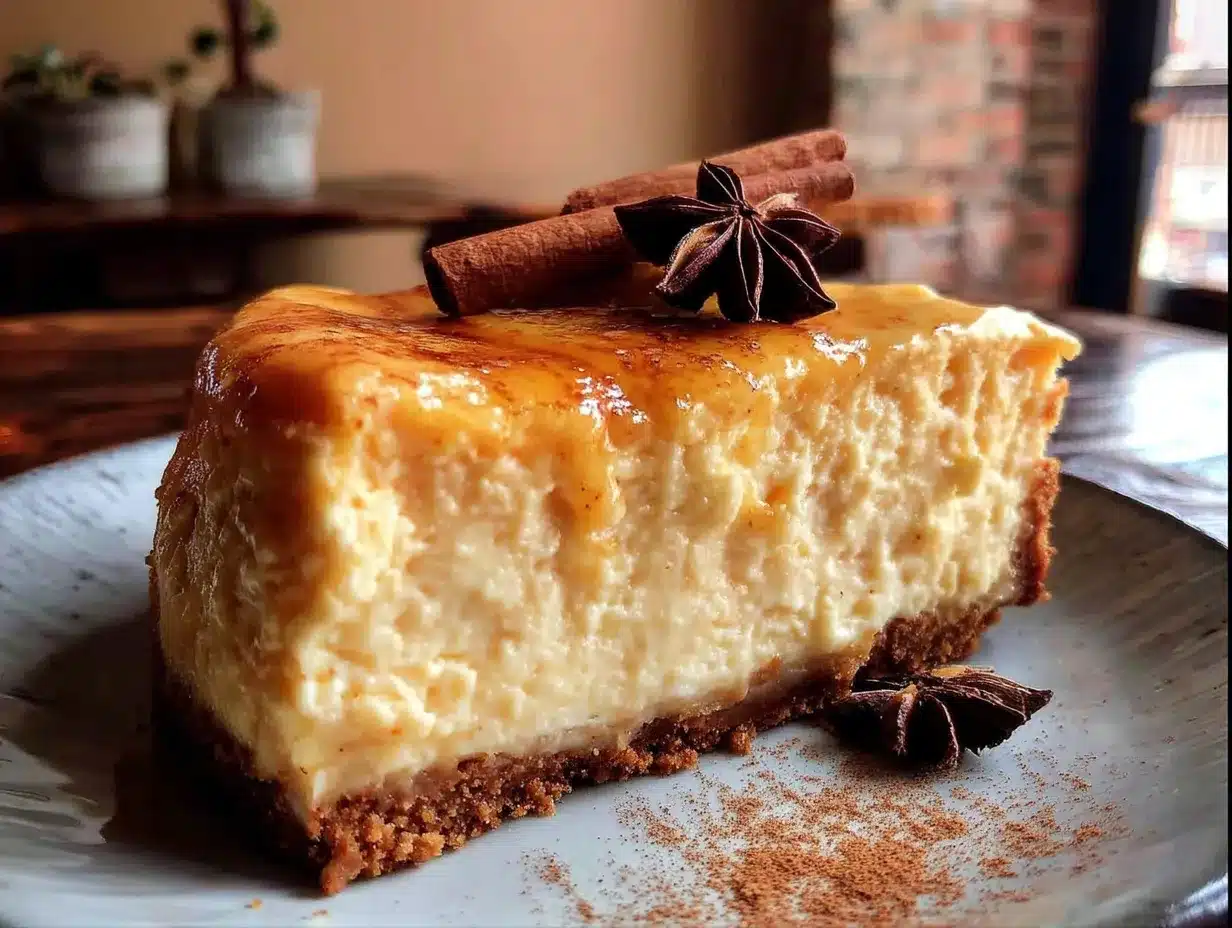
- 24 ounces (three 8-ounce blocks) cream cheese, softened: Full-fat, block-style cream cheese is essential here. Do not use whipped or spreadable cream cheese—it has too much air and water, which will mess with the texture. Let it sit on the counter for at least an hour before you start.
- 1 cup granulated sugar: Standard white sugar works perfectly. It dissolves easily and doesn’t add any unwanted flavors.
- 1/2 cup packed light brown sugar: This adds a subtle molasses note that plays beautifully with the pumpkin and spices. Dark brown sugar works too, but it will make the filling slightly darker and more caramel-like.
- 1 can (15 ounces) pumpkin puree: Make sure you’re buying 100% pure pumpkin, not pumpkin pie filling. Libby’s is my go-to brand for consistent texture and flavor.
- 3 large eggs, room temperature: Room temperature eggs incorporate more smoothly into the batter, which helps prevent lumps. If you forget to take them out ahead of time, place them in a bowl of warm water for 5 minutes.
- 1 teaspoon vanilla extract: Pure vanilla extract adds depth. Imitation vanilla will work, but the flavor won’t be as rich.
- 1/4 cup sour cream: This is my secret ingredient for extra creamy cheesecake. It adds moisture and a slight tang that balances the sweetness. Full-fat works best.
- 2 tablespoons all-purpose flour: Just a little bit helps stabilize the filling and prevents cracking. You can substitute cornstarch if you’re gluten-free.
- 2 teaspoons pumpkin pie spice: If you don’t have a blend, mix 1 teaspoon cinnamon, 1/2 teaspoon ginger, 1/4 teaspoon nutmeg, and 1/4 teaspoon cloves.
- 1/2 teaspoon ground cinnamon: Because you can never have too much cinnamon in a pumpkin dessert.
- 1/4 teaspoon salt: Salt is crucial in cheesecake—it balances the sweetness and enhances the pumpkin flavor.
Equipment Needed
You don’t need a ton of fancy equipment for this recipe, but having the right tools makes the process smoother. Here’s what I recommend:
- 9-inch springform pan: This is non-negotiable for cheesecake. The removable sides make it easy to release the cheesecake without damaging the crust or filling. I use a non-stick one, but any standard springform pan works.
- Electric hand mixer or stand mixer: You can mix by hand, but an electric mixer makes it much easier to get a smooth, lump-free batter. Just be careful not to overmix once you add the eggs.
- Food processor or rolling pin: For crushing the gingersnaps. A food processor gives you fine, even crumbs in seconds. If you don’t have one, place the cookies in a zip-top bag and crush them with a rolling pin—it’s a good arm workout.
- Medium mixing bowl: For the crust ingredients.
- Large mixing bowl: For the cheesecake filling.
- Rubber spatula: For scraping down the sides of the bowl and smoothing the top of the cheesecake.
- Measuring cups and spoons: For accurate measurements.
- Large roasting pan or baking dish: Only if you decide to use a water bath. I don’t use one for this recipe, but some people prefer it for extra insurance against cracking.
- Aluminum foil: To wrap the bottom of the springform pan if you do use a water bath.
- Cooling rack: For cooling the cheesecake gradually.
Preparation Method
Let’s walk through this step by step. I’ll include time estimates and sensory cues so you know exactly what to look for at each stage.
- Preheat your oven to 325°F (163°C). Position a rack in the middle of the oven. While it’s heating up, you can start on the crust.
- Make the gingersnap crust: In a medium bowl, combine 2 cups gingersnap crumbs, 5 tablespoons melted butter, 2 tablespoons sugar, and 1/4 teaspoon salt. Stir with a fork until the mixture looks like wet sand and holds together when you squeeze it. If it’s too dry, add another tablespoon of melted butter. If it’s too wet, add a tablespoon more crumbs.
- Press the crust into the pan: Transfer the crumb mixture to your 9-inch springform pan. Use the bottom of a measuring cup or a flat-bottomed glass to press the crumbs firmly and evenly into the bottom of the pan. Don’t press them up the sides—this is a single-layer bottom crust. The crust should feel compact and solid, not loose or crumbly.
- Bake the crust: Place the pan in the preheated oven and bake for 10 minutes. You’ll know it’s done when it’s fragrant and the edges just start to darken slightly. Remove from the oven and set aside to cool while you make the filling. Leave the oven on.
- Soften the cream cheese: In a large mixing bowl, beat the softened cream cheese with an electric mixer on medium speed until it’s smooth and creamy, about 2 minutes. Scrape down the sides and bottom of the bowl with a rubber spatula. There should be no lumps at this point.
- Add the sugars: Add 1 cup granulated sugar and 1/2 cup packed light brown sugar to the cream cheese. Beat on medium speed until well combined, about 2 more minutes. The mixture will look light and fluffy. Scrape the bowl again.
- Add the pumpkin puree: Add the entire 15-ounce can of pumpkin puree and beat on low speed until just combined. Don’t overmix—you just want the pumpkin to be evenly distributed. The batter will turn a beautiful orange color.
- Add the eggs one at a time: Crack one egg into the batter and beat on low speed until just incorporated. Repeat with the remaining two eggs, scraping the bowl after each addition. Overmixing at this stage incorporates too much air, which can cause cracks later. The batter should look smooth and glossy, not frothy.
- Add the remaining ingredients: Add 1 teaspoon vanilla extract, 1/4 cup sour cream, 2 tablespoons all-purpose flour, 2 teaspoons pumpkin pie spice, 1/2 teaspoon ground cinnamon, and 1/4 teaspoon salt. Beat on low speed until everything is combined. Scrape the bowl one last time and give it a few gentle stirs with the spatula to make sure there are no hidden lumps at the bottom.
- Pour the filling over the crust: Pour the cheesecake filling into the prepared crust. Use a spatula to spread it evenly. Tap the pan gently on the counter a few times to release any air bubbles that might be hiding in the batter.
- Bake the cheesecake: Place the pan in the oven and bake at 325°F (163°C) for 50 to 60 minutes. The edges should look set and slightly puffed, but the center should still jiggle like Jell-O when you gently shake the pan. Don’t worry if it looks underdone in the middle—it will continue to set as it cools.
- Turn off the oven and crack the door: This is the most important step for preventing cracks. Turn off the oven and leave the cheesecake inside with the oven door cracked open about 2 inches (use a wooden spoon handle to prop it open). Let it sit in the cooling oven for 1 hour. This slow cooling helps the cheesecake settle without sudden temperature changes.
- Cool completely at room temperature: After an hour, remove the cheesecake from the oven and place it on a cooling rack. Let it cool to room temperature, about 1 to 2 hours. You’ll notice the top will look smooth and slightly domed.
- Chill in the refrigerator: Once the cheesecake is at room temperature, cover it loosely with plastic wrap or foil and refrigerate for at least 4 hours, but preferably overnight. Chilling firms up the texture and makes it much easier to slice cleanly.
- Serve: When you’re ready to serve, run a thin knife around the edge of the pan to loosen the cheesecake from the sides. Release the springform clasp and remove the ring. Slice with a sharp knife, wiping the blade clean between cuts for neat slices.
Cooking Tips & Techniques
I’ve made this cheesecake more times than I can count, and I’ve learned a few things along the way. Here are the tips that make the biggest difference:
- Room temperature ingredients are not optional. Cold cream cheese creates lumps that are nearly impossible to get rid of without overmixing. Set everything out at least an hour before you start. Eggs, cream cheese, and sour cream all need to be at room temperature for the smoothest batter.
- Don’t overmix the batter. Once you add the eggs, mix on low speed and stop as soon as the streaks disappear. Overmixing incorporates air, which expands during baking and then collapses, leaving you with cracks. I learned this the hard way after making a cheesecake that looked like the Grand Canyon.
- Trust the jiggle test. The center of the cheesecake should wobble when you shake the pan. If it’s completely firm, it’s overbaked. If it’s liquidy, it needs more time. That gentle jiggle in the center is exactly what you want.
- Let it cool slowly. The gradual cooling in the oven with the door cracked is the best trick I’ve found for a crack-free top. It prevents the sudden temperature drop that causes the cheesecake to contract and split.
- Use a sharp knife for slicing. A dull knife will drag through the cheesecake and make messy slices. Dip the knife in hot water, wipe it dry, and make one clean cut. Repeat for each slice.
Honestly, the biggest lesson I’ve learned is patience. Cheesecake is a dessert that rewards you for taking your time. Rushing the cooling process or skipping the chill time will give you a sad, runny slice. Wait it out—it’s worth it.
Variations & Adaptations
One of the best things about this recipe is how easy it is to customize. Here are some variations I’ve tried and loved:
- Gluten-Free Version: Use gluten-free gingersnap cookies for the crust (many brands are naturally gluten-free). Replace the all-purpose flour in the filling with an equal amount of cornstarch or a gluten-free flour blend. The texture stays just as creamy.
- Dairy-Free Adaptation: Use dairy-free cream cheese and sour cream alternatives. I’ve had good luck with Kite Hill or Violife brands. The texture will be slightly softer, but the flavor is still fantastic. Use coconut oil or a dairy-free butter substitute for the crust.
- Pecan Praline Topping: After the cheesecake has chilled, top it with a layer of candied pecans. Melt 1/4 cup butter with 1/2 cup brown sugar, stir in 1 cup chopped pecans, and spread over the top. Let it set before slicing. It adds a wonderful crunch.
- Maple Pumpkin Cheesecake: Replace the granulated sugar with 3/4 cup maple syrup and reduce the sour cream to 2 tablespoons. The maple flavor pairs beautifully with the pumpkin and ginger. Just note that the filling will be slightly softer.
- Chocolate Gingersnap Crust: Mix 1 cup gingersnap crumbs with 1 cup chocolate wafer crumbs for a double-crunch experience. The chocolate adds a rich depth that works surprisingly well with pumpkin.
- Mini Cheesecakes: Use a muffin tin with paper liners instead of a springform pan. Press the crust into the bottom of each liner, fill with batter, and bake for 18 to 22 minutes. Perfect for parties or portion control.
I personally love the pecan praline topping. It turns an already impressive dessert into something truly special. The crunch contrasts beautifully with the creamy filling, and it looks stunning on a dessert table.
Serving & Storage Suggestions
This cheesecake is best served cold, straight from the refrigerator. The texture is firm and creamy, and the flavors are perfectly balanced. Here are my serving and storage tips:
- Serving Temperature: Remove the cheesecake from the refrigerator about 15 to 20 minutes before serving. This takes the chill off just enough to let the flavors shine without making it too soft.
- Presentation: For a simple but elegant look, dust the top with a light sprinkle of cinnamon or pumpkin pie spice before slicing. You can also add a dollop of whipped cream and a few candied pecans on each slice.
- Pairing Suggestions: This cheesecake pairs beautifully with a cup of hot coffee, spiced chai, or a glass of dessert wine like a late-harvest Riesling. For a non-alcoholic option, try a warm apple cider.
- Storage: Store leftover cheesecake in the refrigerator, covered, for up to 5 days. The flavors actually deepen and meld together over time, so day two or three can be even better than day one.
- Freezing: This cheesecake freezes beautifully. Wrap the entire cheesecake (or individual slices) tightly in plastic wrap, then in a layer of aluminum foil. Freeze for up to 3 months. Thaw overnight in the refrigerator before serving.
- Reheating: Don’t reheat this cheesecake—it’s meant to be served cold. If you’re serving it after freezing, just make sure it’s fully thawed in the fridge before slicing.
One thing I love about this dessert is that it’s even better the next day. The spices have time to settle, and the texture becomes perfectly creamy. If you’re making it for a holiday, I highly recommend preparing it a day ahead.
Nutritional Information & Benefits
While this is definitely a treat, there are a few nutritional highlights worth noting. Here’s an approximate breakdown per slice (based on 12 servings):
- Calories: 420
- Fat: 28g
- Carbohydrates: 38g
- Protein: 7g
- Sugar: 28g
- Fiber: 1g
- Sodium: 350mg
Pumpkin is a great source of vitamin A and fiber, which supports eye health and digestion. The cream cheese provides calcium and protein, while the ginger in the crust has natural anti-inflammatory properties. Of course, this is still a dessert, so enjoy it in moderation.
For those watching their sugar intake, you can reduce the granulated sugar to 3/4 cup without significantly affecting the texture. The brown sugar adds moisture, so I wouldn’t recommend reducing that.
Conclusion
This Perfect Pumpkin Cheesecake with Gingersnap Crust is the dessert I turn to every fall, and for good reason. It’s creamy, spiced, and has that unforgettable crunch from the gingersnap crust. No water bath, no complicated techniques—just honest, delicious results every single time.
I love that this recipe is forgiving enough for beginners but impressive enough for holiday tables. Whether you’re making it for Thanksgiving, a fall potluck, or just because you’re craving something cozy, this cheesecake delivers. Feel free to customize it with your favorite toppings or adaptations—that’s the beauty of a good base recipe.
If you give this recipe a try, I’d love to hear how it turns out. Leave a comment below or tag me in your photos. And if you’re looking for more seasonal desserts, check out my crispy chicken parmesan for a savory counterpoint, or my quick shrimp scampi for a lighter option. Happy baking, friends!
Frequently Asked Questions
Can I use fresh pumpkin instead of canned?
Yes, you can use fresh pumpkin puree. Just make sure to strain it well through a cheesecloth or fine-mesh sieve to remove excess water. Fresh pumpkin tends to be more watery than canned, which can make the filling too soft. Roast the pumpkin, puree it, and let it drain for at least an hour before using.
Why did my cheesecake crack?
Cracks usually happen from overmixing the batter (too much air), overbaking, or cooling too quickly. Make sure you mix on low speed after adding the eggs, pull the cheesecake out when the center still jiggles, and let it cool slowly in the oven with the door cracked. If it still cracks, don’t worry—a dollop of whipped cream hides everything.
Can I make this cheesecake without a springform pan?
You can use a deep-dish pie plate or a 9-inch round cake pan lined with parchment paper. Just note that it will be harder to remove the cheesecake cleanly without the removable sides. If using a cake pan, line the bottom and sides with parchment strips for easier lifting.
How do I know when the cheesecake is done baking?
The edges should look set and slightly puffed, but the center should still jiggle when you gently shake the pan. It will look a bit underdone in the middle, but that’s exactly what you want. Overbaking is the most common mistake—it leads to a dry, cracked cheesecake.
Can I use a different crust?
Absolutely. Graham cracker crust, vanilla wafer crust, or even a shortbread crust all work well. Just keep the butter-to-crumb ratio the same (5 tablespoons melted butter per 2 cups crumbs). If you’re using a sweeter cookie, you can reduce or skip the added sugar in the crust.
Pin This Recipe!
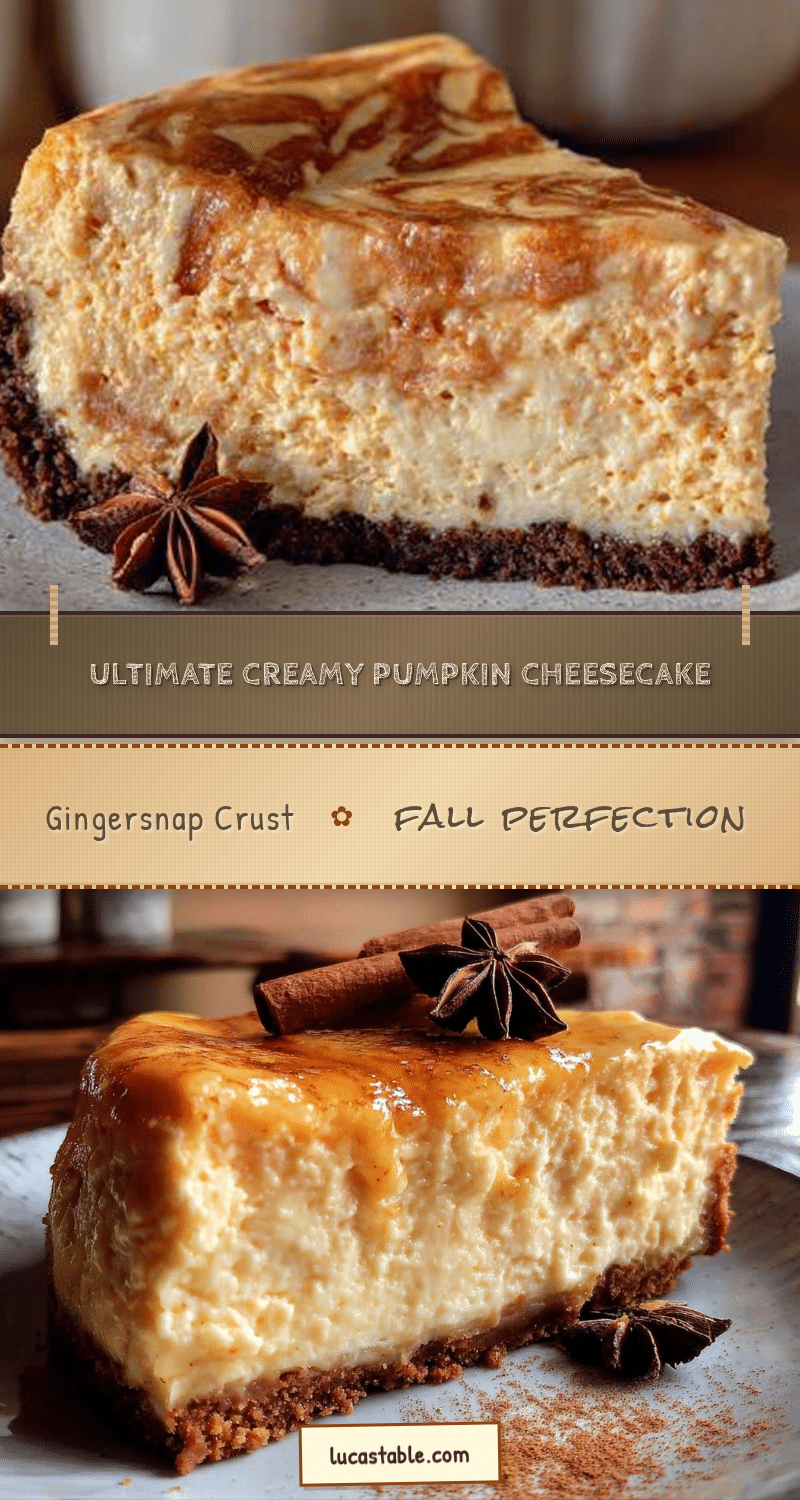
Perfect Pumpkin Cheesecake with Gingersnap Crust
This creamy, spiced pumpkin cheesecake features a crunchy gingersnap crust and a silky, crack-free top—no water bath required. It’s the ultimate fall dessert that’s make-ahead friendly and always a crowd-pleaser.
- Prep Time: 30 minutes
- Cook Time: 60 minutes
- Total Time: 5 hours 30 minutes (includes cooling and chilling)
- Yield: 12 servings 1x
- Category: Dessert
- Cuisine: American
Ingredients
- 2 cups (about 8 ounces) gingersnap cookie crumbs
- 5 tablespoons unsalted butter, melted
- 2 tablespoons granulated sugar
- 1/4 teaspoon salt
- 24 ounces (three 8-ounce blocks) cream cheese, softened
- 1 cup granulated sugar
- 1/2 cup packed light brown sugar
- 1 can (15 ounces) pumpkin puree
- 3 large eggs, room temperature
- 1 teaspoon vanilla extract
- 1/4 cup sour cream
- 2 tablespoons all-purpose flour
- 2 teaspoons pumpkin pie spice
- 1/2 teaspoon ground cinnamon
- 1/4 teaspoon salt
Instructions
- Preheat your oven to 325°F (163°C). Position a rack in the middle of the oven.
- Make the gingersnap crust: In a medium bowl, combine 2 cups gingersnap crumbs, 5 tablespoons melted butter, 2 tablespoons sugar, and 1/4 teaspoon salt. Stir with a fork until the mixture looks like wet sand and holds together when squeezed.
- Press the crust into the pan: Transfer the crumb mixture to a 9-inch springform pan. Use the bottom of a measuring cup or a flat-bottomed glass to press the crumbs firmly and evenly into the bottom of the pan. Do not press them up the sides.
- Bake the crust: Place the pan in the preheated oven and bake for 10 minutes, until fragrant and edges just start to darken. Remove from the oven and set aside to cool while you make the filling. Leave the oven on.
- Soften the cream cheese: In a large mixing bowl, beat the softened cream cheese with an electric mixer on medium speed until smooth and creamy, about 2 minutes. Scrape down the sides and bottom of the bowl.
- Add the sugars: Add 1 cup granulated sugar and 1/2 cup packed light brown sugar to the cream cheese. Beat on medium speed until well combined, about 2 minutes. Scrape the bowl again.
- Add the pumpkin puree: Add the entire 15-ounce can of pumpkin puree and beat on low speed until just combined.
- Add the eggs one at a time: Crack one egg into the batter and beat on low speed until just incorporated. Repeat with the remaining two eggs, scraping the bowl after each addition.
- Add the remaining ingredients: Add 1 teaspoon vanilla extract, 1/4 cup sour cream, 2 tablespoons all-purpose flour, 2 teaspoons pumpkin pie spice, 1/2 teaspoon ground cinnamon, and 1/4 teaspoon salt. Beat on low speed until combined. Scrape the bowl one last time and stir gently with a spatula.
- Pour the filling over the crust: Pour the cheesecake filling into the prepared crust. Use a spatula to spread it evenly. Tap the pan gently on the counter a few times to release air bubbles.
- Bake the cheesecake: Place the pan in the oven and bake at 325°F (163°C) for 50 to 60 minutes. The edges should look set and slightly puffed, but the center should still jiggle like Jell-O when gently shaken.
- Turn off the oven and crack the door: Turn off the oven and leave the cheesecake inside with the oven door cracked open about 2 inches. Let it sit in the cooling oven for 1 hour.
- Cool completely at room temperature: After an hour, remove the cheesecake from the oven and place it on a cooling rack. Let it cool to room temperature, about 1 to 2 hours.
- Chill in the refrigerator: Once the cheesecake is at room temperature, cover it loosely with plastic wrap or foil and refrigerate for at least 4 hours, but preferably overnight.
- Serve: When ready to serve, run a thin knife around the edge of the pan to loosen the cheesecake. Release the springform clasp and remove the ring. Slice with a sharp knife, wiping the blade clean between cuts.
Notes
Room temperature ingredients are essential for a smooth batter. Do not overmix once eggs are added. The jiggle test is key: the center should wobble when done. Cool slowly in the oven with the door cracked to prevent cracks. For best results, chill overnight before serving.
Nutrition
- Serving Size: 1 slice
- Calories: 420
- Sugar: 28
- Sodium: 350
- Fat: 28
- Carbohydrates: 38
- Fiber: 1
- Protein: 7
Keywords: pumpkin cheesecake, gingersnap crust, fall dessert, Thanksgiving dessert, no water bath cheesecake, pumpkin dessert, cheesecake recipe


