The can of pumpkin puree sat on my counter for three days, staring at me every time I walked past. I’d bought it for a pie I never got around to making, and honestly, the thought of rolling out pastry dough after a long week just felt like too much. My husband kept eyeing it too, dropping hints about wanting something sweet. I had a block of cream cheese in the fridge, some butter, and a box of graham crackers that were dangerously close to getting stale. That’s when it hit me—why not combine the two best parts of fall dessert into one easy bar? No fussy crust, no water bath, just creamy cheesecake swirled with spiced pumpkin on a crunchy graham cracker base. These Perfect Pumpkin Pie Cheesecake Bars with Graham Crust were born from that very moment of lazy inspiration.
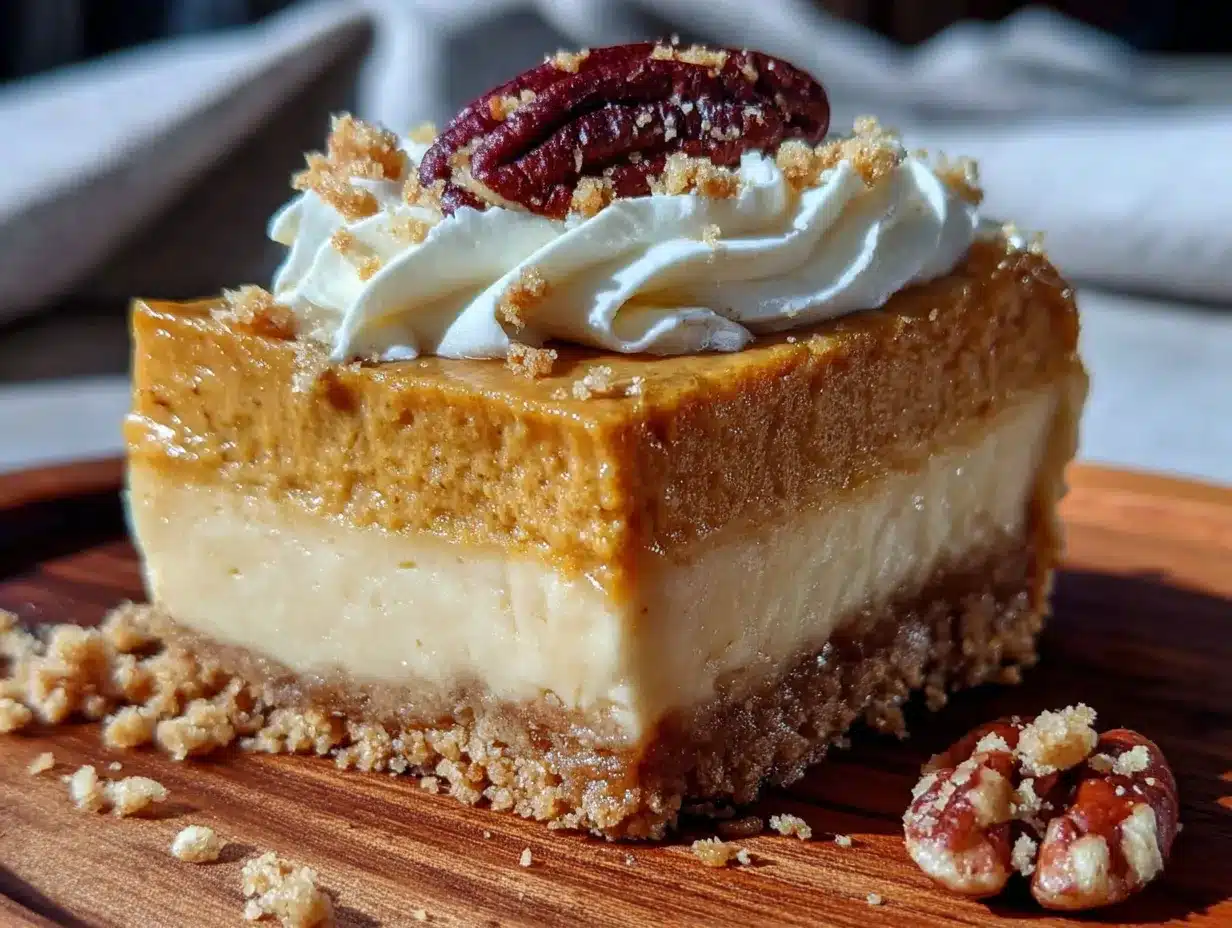
The first time I made them, I wasn’t sure if the layers would hold together or if the pumpkin would overwhelm the cheesecake. But when I pulled that pan out of the oven, the kitchen smelled like a Thanksgiving dream. The top had these beautiful little cracks, the edges were perfectly set, and the center still had that slight jiggle that tells you it’s going to be silky. I let them cool, then chilled them overnight—which, let me tell you, is the hardest part. The next day, I cut into them and saw that perfect stripe of creamy cheesecake against the spiced pumpkin layer, all sitting on that buttery, crunchy crust. It was exactly what I wanted. No rolling pin, no stress, just pure fall flavor in every bite. These bars have become my go-to for fall gatherings, and I have a feeling they’re about to become yours too.
Why You’ll Love This Recipe
These bars are the kind of dessert that makes people think you spent hours in the kitchen when you really just threw things together. They have that wow factor without the stress. Here is why they work so well:
- No Pie Crust Hassle : Forget rolling out dough or dealing with a soggy bottom. The graham cracker crust presses right into the pan, no fuss needed.
- Two Desserts in One : You get the rich, tangy creaminess of cheesecake and the warm, spiced comfort of pumpkin pie in every single bite. It is the best of both worlds.
- Perfect for Crowds : These bars cut cleanly and serve beautifully, making them ideal for potlucks, Friendsgiving, or holiday dessert tables. No slicing a delicate pie in front of guests.
- Make-Ahead Friendly : They actually taste better after a day in the fridge. The flavors meld together, and the texture gets even creamier. You can make them two days ahead without any issues.
- Simple Ingredients : You probably already have most of these in your pantry. No weird extracts or hard-to-find spices.
What really sets these bars apart is the texture. The graham crust stays crunchy even after a day in the fridge—I found that brushing the crust with a little melted butter before adding the filling helps seal it. The cheesecake layer is dense but smooth, and the pumpkin layer is light and almost mousse-like from the whipped egg whites. It’s a texture party in your mouth, honestly. And the flavor? That perfect balance of tangy cream cheese, sweet pumpkin, and warm fall spices. It is the kind of dessert that makes you close your eyes after the first bite.
What Ingredients You Will Need
This recipe uses simple, wholesome ingredients that come together to create something truly special. Most of these are pantry staples, especially during the fall months. Here is everything you will need:
For the Graham Cracker Crust
- Graham cracker crumbs – 1 ½ cups (about 12 full sheets, crushed finely). You can use store-bought crumbs to save time, but I prefer crushing my own for a fresher flavor. The texture is better, too.
- Granulated sugar – ¼ cup (adds just enough sweetness to balance the salty butter)
- Unsalted butter – 6 tablespoons, melted. I use salted butter in a pinch, just reduce the added salt elsewhere. Kerrygold is my go-to for baking because of its rich flavor.
- Pinch of salt – Only if using unsalted butter. It helps bring out the toasty notes in the graham crackers.
For the Cheesecake Layer
- Cream cheese – 16 ounces (two 8-ounce blocks), softened to room temperature. This is non-negotiable. Cold cream cheese gives you lumpy cheesecake. Leave it out for at least an hour.
- Granulated sugar – ½ cup
- Large eggs – 2, at room temperature
- Vanilla extract – 1 teaspoon. Pure vanilla extract makes a difference here. Imitation works, but you will taste the difference.
- Sour cream – ¼ cup, full-fat for the creamiest texture. Greek yogurt works as a substitute if needed.
For the Pumpkin Layer
- Pumpkin puree – 1 cup (not pumpkin pie filling). Libby’s is my go-to brand because it has the right moisture content. Fresh pumpkin puree can be too watery; if using it, strain it through cheesecloth first.
- Granulated sugar – ⅓ cup
- Light brown sugar – ¼ cup, packed. This adds a deeper molasses note that pairs beautifully with the spices.
- Large egg – 1, plus 1 egg yolk (the extra yolk adds richness and helps the layer set firmly)
- Heavy cream – ¼ cup (adds a luxurious texture)
- Pumpkin pie spice – 1 ½ teaspoons. You can make your own with 1 teaspoon cinnamon, ½ teaspoon ginger, ¼ teaspoon nutmeg, and a pinch of cloves.
- Cinnamon – ½ teaspoon (because you can never have too much cinnamon)
- Salt – ¼ teaspoon (balances the sweetness and enhances the spices)
For the Swirl (Optional but Recommended)
- Reserved pumpkin mixture – About ¼ cup, set aside before pouring the rest over the cheesecake layer
- Caramel sauce – Store-bought or homemade, for drizzling (optional but highly recommended)
Equipment Needed
You do not need a fancy kitchen to pull these off. Here is what you will need:
- 9×9-inch baking pan – A metal pan works best for even baking. Glass pans can work, but you may need to add 5-10 minutes to the baking time.
- Parchment paper – Cut two strips to create a sling for easy removal. Trust me on this one.
- Food processor or zip-top bag – For crushing graham crackers. A rolling pin over a bag works great if you need to release some frustration.
- Electric hand mixer or stand mixer – For the cheesecake and pumpkin layers. A whisk and some elbow grease work too, but your arm will thank you for using a mixer.
- Large mixing bowls – At least two, one for each layer
- Rubber spatula – For scraping down the bowls and spreading the layers evenly
- Measuring cups and spoons – For accuracy
- Offset spatula – Optional, but helpful for smoothing the layers
I have made these bars with just a bowl and a whisk before, and they still turned out great. The mixer just makes the process faster and ensures a smoother texture. If you are using a hand mixer, make sure your cream cheese is truly softened to avoid lumps.
Preparation Method
Let us walk through this step by step. Take your time, and do not rush the chilling steps—they are crucial for clean slices.
- Preheat and Prep the Pan – Preheat your oven to 325°F (163°C). Line your 9×9-inch pan with parchment paper, leaving an overhang on two opposite sides. This creates a sling that lets you lift the entire block of bars out after they chill. Lightly grease the parchment with butter or non-stick spray.
- Make the Crust – In a medium bowl, combine 1 ½ cups graham cracker crumbs, ¼ cup granulated sugar, and a pinch of salt. Pour in 6 tablespoons of melted butter and stir with a fork until the mixture looks like wet sand. It should hold together when you squeeze a handful. Press this mixture firmly into the bottom of your prepared pan. I use the bottom of a measuring cup to get it even and compact. Bake for 10 minutes, then set aside to cool slightly while you make the fillings.
- Make the Cheesecake Layer – In a large bowl, beat 16 ounces of softened cream cheese with ½ cup granulated sugar until smooth and creamy, about 2 minutes. Scrape down the sides and bottom of the bowl. Add 2 large eggs one at a time, beating on low speed after each addition until just combined. Do not overmix. Add 1 teaspoon vanilla extract and ¼ cup sour cream, then mix until smooth. Set aside.
- Make the Pumpkin Layer – In a separate large bowl, whisk together 1 cup pumpkin puree, ⅓ cup granulated sugar, and ¼ cup packed light brown sugar until smooth. Whisk in 1 large egg and 1 egg yolk, then add ¼ cup heavy cream, 1 ½ teaspoons pumpkin pie spice, ½ teaspoon cinnamon, and ¼ teaspoon salt. Whisk until everything is fully combined and silky. Set aside about ¼ cup of this mixture for the swirl.
- Layer the Fillings – Pour the cheesecake mixture over the pre-baked crust and spread it into an even layer with a spatula. Gently spoon the pumpkin mixture over the cheesecake layer, starting from the edges and working toward the center. Do not pour it all in one spot—you want to avoid disturbing the cheesecake layer too much. Spread it gently to cover the top evenly.
- Create the Swirl – Take the reserved ¼ cup of pumpkin mixture and drop small spoonfuls over the top. Use a butter knife or a skewer to gently swirl the pumpkin into the cheesecake layer. Do not over-swirl or you will lose the distinct layers. A few figure-eight motions are enough.
- Bake – Place the pan in the preheated oven and bake for 35-40 minutes. The edges should be set and slightly puffed, but the center will still have a slight jiggle when you gently shake the pan. That is exactly what you want. Overbaking will cause cracks. If the top is browning too quickly after 25 minutes, tent loosely with foil.
- Cool and Chill – Remove the pan from the oven and place it on a wire rack to cool completely at room temperature, about 1 hour. Once cool, cover the pan with plastic wrap and refrigerate for at least 4 hours, but overnight is better. This is the hardest part, I know, but it is essential for clean slices.
- Slice and Serve – Once fully chilled, use the parchment sling to lift the entire block out of the pan. Place it on a cutting board and use a sharp chef’s knife to slice into 16 squares. Wipe the knife clean between cuts for the neatest edges. Serve cold or at room temperature with a drizzle of caramel sauce and a dollop of whipped cream.
Cooking Tips & Techniques
I have made these bars probably a dozen times now, and I have learned a few things the hard way. Here are my best tips for perfect results every time:
Room Temperature Ingredients Matter – This is not just a suggestion. Cold cream cheese creates lumps that no amount of mixing can fully fix. Cold eggs can cause the batter to curdle. Set everything out on the counter at least an hour before you start. If you are in a rush, cut the cream cheese into small cubes and microwave it in 10-second bursts until it is soft but not melted.
Do Not Overmix the Cheesecake Batter – Overmixing incorporates too much air, which can cause the cheesecake to puff up and then collapse, leaving cracks. Mix on low speed and stop as soon as the ingredients are combined. A few tiny lumps are okay—they will bake out.
The Jiggle Test – This is your best friend. When you gently shake the pan, the center should wobble like Jell-O, not slosh like liquid. If the whole thing is still liquidy, give it 5 more minutes. If the edges are pulling away from the pan, you have gone too far.
Prevent Cracks – Besides not overmixing and not overbaking, you can place a shallow pan of hot water on the oven rack below the cheesecake bars. The steam helps the cheesecake bake more gently and reduces the chance of cracking. I do not always do this, but it helps if your oven runs hot.
Sharp Knife, Clean Cuts – For those beautiful, Instagram-worthy slices, use a long, sharp knife. Run it under hot water, wipe it dry, then make a clean cut. Wipe the blade between each cut. This prevents the layers from smearing together.
Variations & Adaptations
One of the best things about this recipe is how versatile it is. Here are some ways to make it your own:
Gluten-Free Version – Use gluten-free graham crackers or crushed gluten-free shortbread cookies for the crust. The rest of the ingredients are naturally gluten-free, just double-check your pumpkin puree and spices.
Dairy-Free Adaptation – Substitute the cream cheese with a high-quality dairy-free version (I like Miyoko’s). Use coconut cream instead of sour cream, and a plant-based butter for the crust. The texture will be slightly different, but still delicious.
Bourbon Maple Twist – Add 1 tablespoon of bourbon and 2 tablespoons of maple syrup to the pumpkin layer, reducing the granulated sugar by 2 tablespoons. The bourbon adds a warm, smoky depth that pairs beautifully with the spices. I tried this for a Friendsgiving and it was a hit.
Chocolate Lover’s Version – Add ¼ cup of melted dark chocolate to the cheesecake layer before adding the pumpkin. Swirl in some chocolate chips along with the pumpkin for extra texture. It sounds weird, but chocolate and pumpkin are a surprisingly good match.
Mini Bar Bites – Press the crust into a mini muffin tin (lined with paper liners) and reduce the baking time to about 15-18 minutes. These are perfect for parties or holiday cookie trays. Just make sure to chill them thoroughly before removing from the tin.
Serving & Storage Suggestions
These bars are incredibly versatile when it comes to serving. Here is how I like to do it:
Serving Temperature – I prefer these bars cold, straight from the fridge. The texture is firmer and the flavors are more pronounced. If you prefer a softer, creamier texture, let them sit at room temperature for 15-20 minutes before serving.
Presentation Ideas – A drizzle of salted caramel sauce and a dollop of lightly sweetened whipped cream is my go-to. For a more elegant look, dust the tops with a little cinnamon or pumpkin pie spice right before serving. A few candied pecans on top add a lovely crunch.
Complementary Dishes – These bars pair beautifully with a cup of hot apple cider or a spiced chai latte. For a full fall dessert spread, serve them alongside some easy creamy chicken marsala for a sweet and savory dinner combo, or after a bowl of quick and flavorful fried rice for a cozy night in.
Storage – Store the bars in an airtight container in the refrigerator for up to 5 days. Layer them between sheets of parchment paper to prevent sticking. They actually taste better on day two, as the flavors have time to meld together.
Freezing Instructions – These freeze beautifully. Wrap the entire block (or individual bars) tightly in plastic wrap, then in a layer of aluminum foil. Freeze for up to 3 months. Thaw overnight in the refrigerator before serving. Do not thaw at room temperature, as condensation can make the crust soggy.
Flavor Development – The spices in the pumpkin layer will continue to deepen over time. I have found that bars made three days ahead taste even more aromatic and well-rounded than fresh ones. Just keep them tightly covered in the fridge.
Nutritional Information & Benefits
Let us be real—this is a dessert, so it is not exactly health food. But there are some redeeming qualities worth noting. Here is the approximate nutritional breakdown per bar (based on 16 servings):
| Nutrient | Amount Per Bar |
|---|---|
| Calories | 285 |
| Total Fat | 18g |
| Saturated Fat | 10g |
| Cholesterol | 85mg |
| Sodium | 210mg |
| Total Carbohydrates | 28g |
| Dietary Fiber | 1g |
| Sugars | 20g |
| Protein | 5g |
| Vitamin A | 70% DV |
| Calcium | 6% DV |
| Iron | 4% DV |
Pumpkin is actually a nutritional powerhouse. It is packed with vitamin A (over 200% of your daily needs per cup), which supports eye health and immune function. It also contains fiber, potassium, and antioxidants. The cream cheese provides calcium and protein, while the eggs add high-quality protein and healthy fats. Of course, this is balanced out by the sugar and butter, but hey—everything in moderation, right?
Dietary Considerations – This recipe contains gluten (from the graham crackers), dairy (butter, cream cheese, sour cream, heavy cream), and eggs. It is not suitable for vegans or those with dairy or egg allergies without significant modifications. See the variations section for gluten-free and dairy-free options.
Conclusion
These Perfect Pumpkin Pie Cheesecake Bars with Graham Crust are everything I want in a fall dessert—easy to make, stunning to look at, and absolutely delicious to eat. They have that nostalgic pumpkin pie flavor we all crave, but with a creamy cheesecake twist that makes them feel special. No rolling pin, no water bath, no stress. Just pure, uncomplicated dessert joy.
I love that this recipe is forgiving enough for a beginner baker but impressive enough to serve at a holiday gathering. It is the kind of dessert that makes people ask for the recipe, and honestly, I love sharing it. Whether you are making these for a Thanksgiving potluck, a cozy weekend treat, or just because you have a can of pumpkin staring at you from the counter, I think you are going to love them.
So go ahead, preheat that oven, and make these bars. Trust me, your kitchen is about to smell amazing. And when you take that first bite, with the crunchy crust and the creamy, spiced layers, you will understand exactly why this recipe has become my fall go-to. I would love to hear how yours turn out—drop a comment below and let me know if you tried any fun variations. Happy baking!
Frequently Asked Questions
Can I use a different crust instead of graham crackers?
Absolutely. Crushed ginger snaps, shortbread cookies, or even vanilla wafers work beautifully. Ginger snaps add an extra layer of warm spice that complements the pumpkin perfectly. Just use the same ratio of crumbs to butter.
Why did my cheesecake layer crack?
Cracks usually happen from overbaking or overmixing. Make sure you pull the bars out when the center still has a slight jiggle. Also, avoid mixing the batter on high speed—low and slow is the way to go. A water bath can also help prevent cracking.
Can I make these bars in advance?
Yes, and I actually recommend it. These bars need at least 4 hours to chill, but overnight is better. They will keep well in the fridge for up to 5 days, and the flavors deepen over time. You can also freeze them for up to 3 months.
Can I use fresh pumpkin instead of canned?
You can, but you need to strain it first. Fresh pumpkin puree has a much higher water content than canned. Place the puree in a cheesecloth-lined strainer over a bowl and let it drain for at least an hour. Squeeze out as much liquid as possible before using.
How do I get clean, neat slices?
Chill the bars completely—at least 4 hours, but overnight is best. Use a sharp chef’s knife and run it under hot water, wiping it clean between each cut. This prevents the layers from smearing and gives you those beautiful, photogenic squares.
Pin This Recipe!
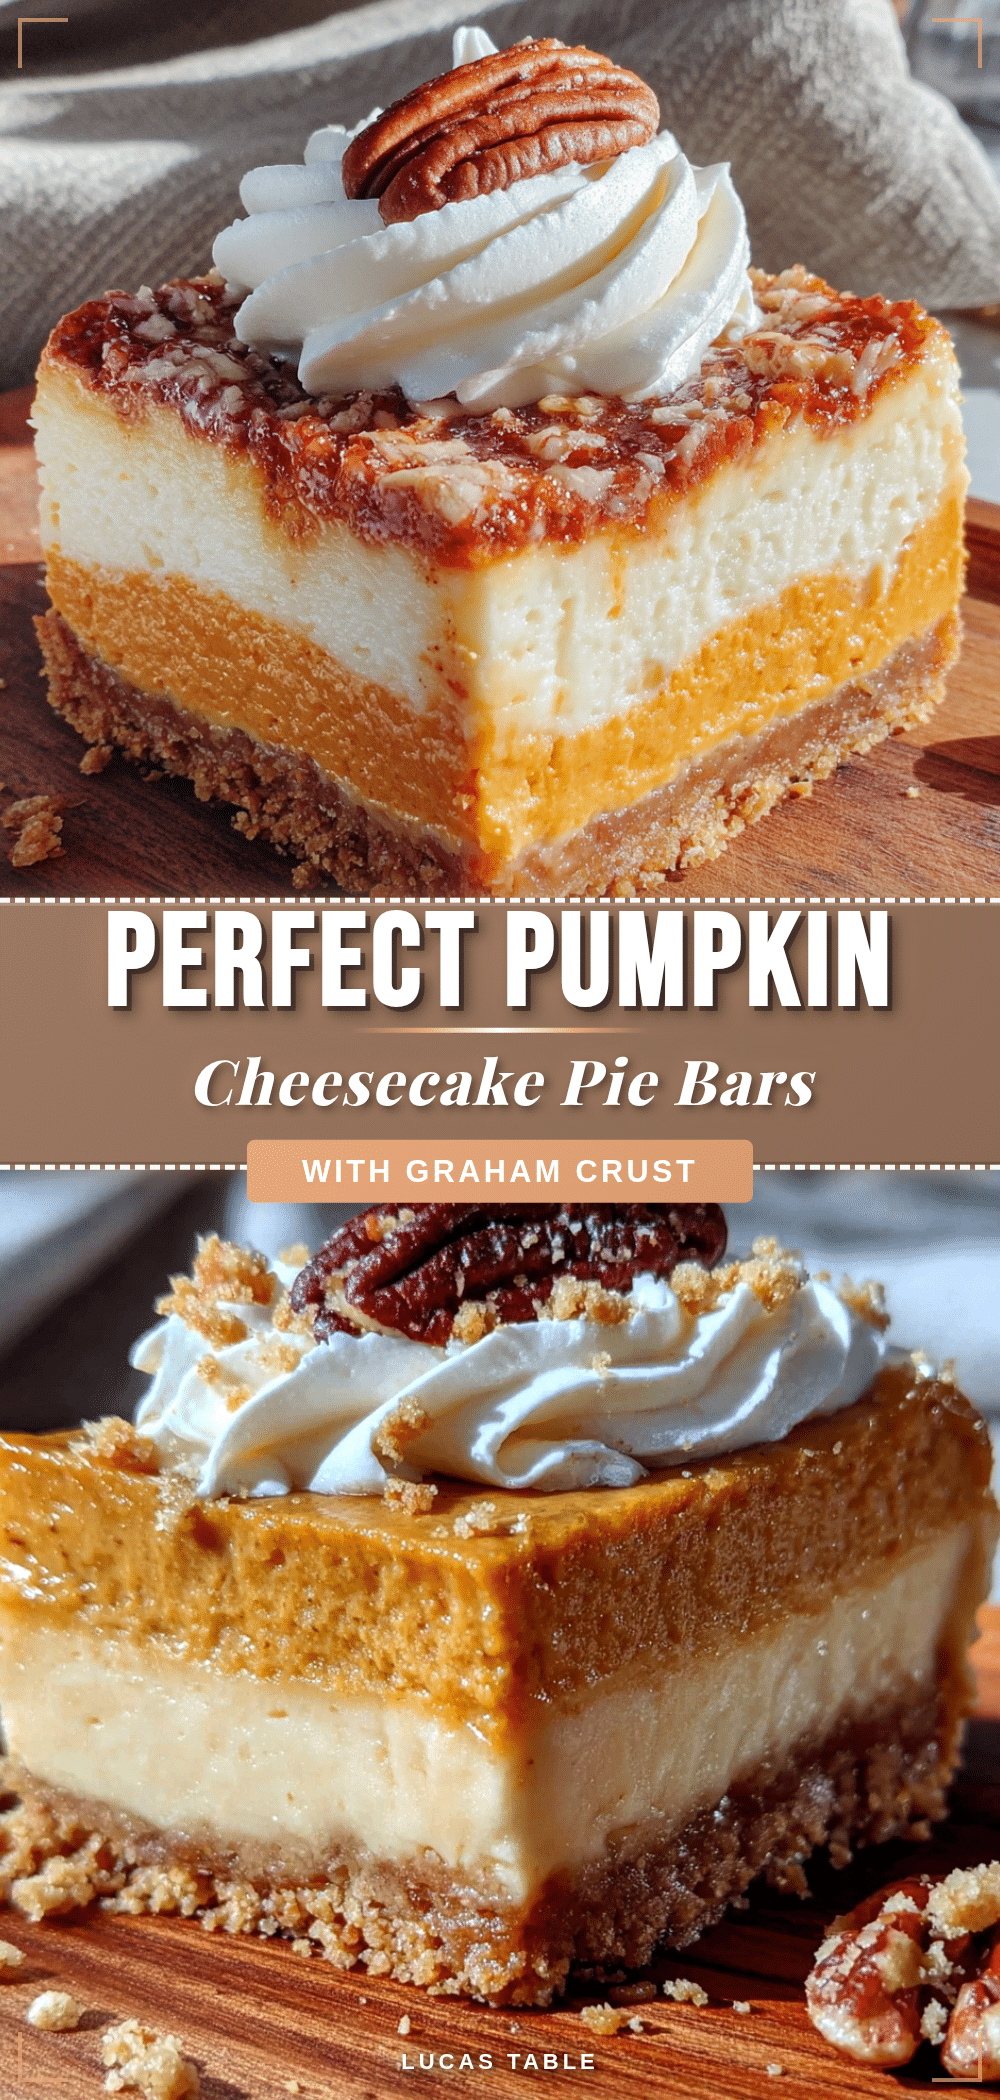
Perfect Pumpkin Pie Cheesecake Bars: Easy Fall Dessert
These Perfect Pumpkin Pie Cheesecake Bars with Graham Crust combine creamy cheesecake and spiced pumpkin on a crunchy graham cracker base. No fussy crust, no water bath, just pure fall flavor in every bite.
- Prep Time: 20 minutes
- Cook Time: 35 minutes
- Total Time: 4 hours 55 minutes (includes chilling)
- Yield: 16 servings 1x
- Category: Dessert
- Cuisine: American
Ingredients
- 1 ½ cups graham cracker crumbs (about 12 full sheets, crushed finely)
- ¼ cup granulated sugar
- 6 tablespoons unsalted butter, melted
- Pinch of salt (if using unsalted butter)
- 16 ounces cream cheese, softened to room temperature
- ½ cup granulated sugar
- 2 large eggs, at room temperature
- 1 teaspoon vanilla extract
- ¼ cup sour cream, full-fat
- 1 cup pumpkin puree (not pumpkin pie filling)
- ⅓ cup granulated sugar
- ¼ cup light brown sugar, packed
- 1 large egg
- 1 egg yolk
- ¼ cup heavy cream
- 1 ½ teaspoons pumpkin pie spice
- ½ teaspoon cinnamon
- ¼ teaspoon salt
- Reserved ¼ cup pumpkin mixture for swirl (optional)
- Caramel sauce for drizzling (optional)
Instructions
- Preheat oven to 325°F (163°C). Line a 9×9-inch baking pan with parchment paper, leaving an overhang on two opposite sides. Lightly grease the parchment.
- In a medium bowl, combine graham cracker crumbs, ¼ cup granulated sugar, and a pinch of salt. Pour in melted butter and stir until mixture resembles wet sand. Press firmly into the bottom of the prepared pan. Bake for 10 minutes, then set aside to cool slightly.
- In a large bowl, beat cream cheese and ½ cup granulated sugar until smooth, about 2 minutes. Add eggs one at a time, beating on low after each addition. Mix in vanilla and sour cream until smooth. Set aside.
- In a separate large bowl, whisk together pumpkin puree, ⅓ cup granulated sugar, and brown sugar until smooth. Whisk in egg and egg yolk, then add heavy cream, pumpkin pie spice, cinnamon, and salt. Whisk until fully combined. Set aside about ¼ cup of this mixture for the swirl.
- Pour cheesecake mixture over the pre-baked crust and spread evenly. Gently spoon the pumpkin mixture over the cheesecake layer, starting from the edges and working toward the center. Spread gently to cover.
- Drop small spoonfuls of the reserved pumpkin mixture over the top. Use a butter knife or skewer to gently swirl the pumpkin into the cheesecake layer with a few figure-eight motions.
- Bake for 35-40 minutes, until edges are set and center has a slight jiggle. If browning too quickly after 25 minutes, tent loosely with foil.
- Remove from oven and cool completely on a wire rack, about 1 hour. Cover with plastic wrap and refrigerate for at least 4 hours, preferably overnight.
- Use parchment sling to lift the block out of the pan. Slice into 16 squares with a sharp knife, wiping clean between cuts. Serve cold or at room temperature with caramel sauce and whipped cream if desired.
Notes
Room temperature ingredients are crucial for a smooth texture. Do not overmix the cheesecake batter to avoid cracks. The jiggle test is key: center should wobble like Jell-O when done. For clean slices, chill thoroughly and use a sharp knife wiped clean between cuts. Bars can be made up to 2 days ahead and taste even better after a day in the fridge.
Nutrition
- Serving Size: 1 bar
- Calories: 285
- Sugar: 20
- Sodium: 210
- Fat: 18
- Saturated Fat: 10
- Carbohydrates: 28
- Fiber: 1
- Protein: 5
Keywords: pumpkin pie cheesecake bars, fall dessert, graham cracker crust, easy cheesecake bars, pumpkin dessert, Thanksgiving dessert


