“Hey, are you bringing those sugar cookies again this year?” my neighbor called out over the fence just as I was pulling a tray out of the oven. Honestly, I wasn’t sure if I wanted to go through the fuss of decorating those star-spangled sugar cookies with royal icing again. But once the scent of vanilla and butter filled the kitchen, and the first batch came out perfectly golden, I knew this recipe had earned its spot in my holiday tradition.
It wasn’t always this way. I used to think royal icing was too tricky—too much fuss for a few cookies. But after a few attempts (and a good number of learning curves), I found the sweet spot between ease and that classic crisp finish everyone loves. The star shapes, the red, white, and blue icing—it all feels like a small, edible celebration you can share with friends or just enjoy quietly with a cup of tea.
The simple joy of decorating these cookies, especially with the kids gathered around the kitchen table, wins me over every time. It’s not just about the final look, but those little moments—sticky fingers, bursts of laughter, and the occasional icing mishap. If you’ve ever doubted your decorating skills or felt overwhelmed by fancy cookie recipes, this is the one you’ll come back to. It’s approachable, festive, and, well, kind of perfect in its own charmingly imperfect way.
So, if you’re ready to make star-spangled sugar cookies with royal icing that taste as good as they look, and that bring a little sparkle to your next gathering, you’re in the right spot. Let me share what makes this recipe a keeper, and how it’s become my go-to for every patriotic holiday and beyond.
Why You’ll Love This Recipe
After countless batches tested in my kitchen, I can say this recipe for star-spangled sugar cookies with royal icing is a keeper for many reasons. Here’s what makes it stand out:
- Quick & Easy: From mixing to decorating, you can pull these together in under two hours. Perfect for last-minute celebrations or when you want festive treats without endless prep.
- Simple Ingredients: Nothing fancy here—just pantry staples like flour, sugar, butter, and eggs. I usually have everything on hand, which cuts down on extra trips to the store.
- Perfect for Holidays & Parties: Whether it’s the Fourth of July, Memorial Day, or a summer BBQ, these cookies bring a splash of festive flair that everyone appreciates.
- Crowd-Pleaser: Kids love helping with the icing, and adults can’t get enough of that buttery, soft-but-crisp cookie base.
- Unbelievably Delicious: The balance of vanilla and buttery richness with the sweet, smooth royal icing is just the right combo for comfort food that feels special.
What sets this recipe apart is the royal icing tutorial included—no guesswork, no guessy globs. The icing dries to that perfect matte finish, and it’s firm enough to stack cookies without smudging. Plus, the star-spangled decoration is simple enough for beginners but looks impressive, making it ideal if you want to impress guests without stress.
Honestly, these cookies have become my quiet tradition: a little ritual that feels like a sweet nod to the season. Whether you’re planning a full patriotic spread or just want a fun baking project, this recipe delivers that satisfying, homemade touch every time.
What Ingredients You Will Need
This recipe uses simple, wholesome ingredients to deliver bold flavor and satisfying texture without the fuss. Most are pantry staples, and substitutions are easy if you need them.
- For the Sugar Cookie Dough:
- 2 ¾ cups (345g) all-purpose flour, sifted (King Arthur flour works great)
- 1 teaspoon baking powder
- ½ teaspoon salt
- 1 cup (227g) unsalted butter, softened (Room temp butter makes for the best texture)
- 1 ½ cups (300g) granulated sugar
- 1 large egg, room temperature
- 2 teaspoons pure vanilla extract
- 2 tablespoons heavy cream or whole milk (adds tenderness)
- For the Royal Icing:
- 3 cups (360g) powdered sugar, sifted
- 2 large egg whites or 4 tablespoons meringue powder mixed with water (safer option if preferred)
- 1 teaspoon lemon juice or vanilla extract (for flavor)
- Food coloring: red and blue gel colors recommended for vibrant hues
- For Decorating:
- Star-shaped cookie cutters (about 3 inches wide)
- Optional sprinkles: white nonpareils or edible glitter for added sparkle
If you want a gluten-free version, swapping the flour for a gluten-free all-purpose blend works well (just check the blend’s xanthan gum content). For dairy-free, use coconut oil or a vegan butter substitute and a non-dairy milk alternative. I’ve found that gel food coloring gives deeper, richer colors without affecting the icing’s consistency.
Equipment Needed
- Mixing bowls – large and medium-sized for dough and icing
- Electric hand mixer or stand mixer – makes cream and icing mixing much smoother
- Rolling pin – a smooth, even roller helps keep cookies uniform
- Star-shaped cookie cutters – I like a set with a few sizes for variety
- Baking sheets lined with parchment paper or silicone mats – prevents sticking and promotes even baking
- Cooling racks – essential for letting cookies cool completely before icing
- Piping bags and fine tips – for precise royal icing decoration (or use plastic bags with a small corner snipped)
- Small bowls or cups – to divide and color the icing
If you don’t have a stand mixer, a sturdy hand mixer works just fine. I’ve even used a whisk and some elbow grease when needed! For piping bags, disposable ones are budget-friendly and less cleanup, but a reusable silicone bag is a great investment if you bake often.
Keeping your cookie cutters lightly dusted with flour helps prevent sticking, and cleaning your piping tips right after use saves a lot of frustration later on.
Preparation Method
- Mix Dry Ingredients: In a medium bowl, whisk together the sifted all-purpose flour, baking powder, and salt. Set aside. (About 5 minutes)
- Cream Butter and Sugar: In a large bowl, beat the softened butter and granulated sugar using an electric mixer on medium speed until pale and fluffy—about 3-4 minutes. You’ll notice the texture lighten and the kitchen smell wonderfully buttery and sweet.
- Add Egg and Vanilla: Beat in the egg, then the vanilla extract and heavy cream. Mix until fully combined. (About 2 minutes)
- Combine Wet and Dry: Gradually add the dry ingredients into the wet mixture, mixing on low speed until the dough just comes together. Avoid overmixing to keep cookies tender.
- Chill the Dough: Divide the dough into two disks, wrap tightly in plastic wrap, and refrigerate for at least 1 hour. This step stops the dough from spreading too much while baking and makes rolling easier.
- Preheat Oven and Prepare Baking Sheets: Set your oven to 350°F (175°C). Line baking sheets with parchment paper or silicone mats.
- Roll and Cut: On a lightly floured surface, roll one dough disk to about ¼ inch (6 mm) thickness. Use the star-shaped cookie cutter to cut out shapes, placing them 1 inch apart on the baking sheet.
- Bake: Bake for 8-10 minutes or until the edges just begin to turn golden. Keep a close eye; you want soft centers, not crisp edges. (Ovens vary, so rotate sheets halfway if needed.)
- Cool Completely: Transfer cookies to a wire rack to cool fully before icing. This prevents your royal icing from melting or sliding off.
- Prepare Royal Icing: Combine powdered sugar, egg whites (or meringue powder mix), and lemon juice in a bowl. Beat on medium-high for about 5-7 minutes until stiff peaks form and the icing is glossy. Divide into three bowls for coloring.
- Color Icing: Add red gel food coloring to one bowl, blue to another, and leave one white. Stir gently to avoid bubbles.
- Decorate: Using piping bags with fine tips, outline the cookie edges with white icing, flood the inside with the same, then add stars or stripes in red and blue. Let each color dry slightly between layers to avoid bleeding.
- Drying: Allow decorated cookies to dry at room temperature for at least 4 hours or overnight for the best results.
Pro tip: If your royal icing feels too thick while decorating, add a drop of water at a time to loosen it. And if it’s too runny, add a bit more powdered sugar. I learned this the hard way after one too many watery disasters!
Cooking Tips & Techniques
Making star-spangled sugar cookies with royal icing seems intimidating at first, but these tips will help you nail it every time.
- Don’t Skip Chilling: The dough needs that chill time. It firms up the butter, which helps cookies keep their shape and creates that tender crumb.
- Rolling Thickness Matters: Roll your dough evenly to about ¼ inch. Thinner cookies tend to burn or crisp too much, thicker ones take longer and might stay doughy inside.
- Practice Royal Icing Consistency: The icing should be thick enough to hold shape but fluid enough to flood areas smoothly. Test on parchment before piping your cookies.
- Layer Your Colors: Let the white base dry before adding red and blue details. Otherwise, colors can blend or run.
- Work Quickly but Calmly: Royal icing dries fast, so have your colors ready and tools nearby. If your icing crusts over, add water and mix again.
- Use Parchment Paper for Practice: Before decorating cookies, pipe some shapes on parchment to get a feel for flow and pressure.
I once tried rushing the drying time by using a fan—big mistake. The icing cracked and chipped. Patience is key here, honestly. Also, when I first tried the red gel food coloring, it stained everything, so gloves are a must if you want to keep your fingers clean!
Variations & Adaptations
These star-spangled sugar cookies are versatile and easy to tailor to your preferences or dietary needs.
- Gluten-Free Option: Substitute the all-purpose flour with a 1-to-1 gluten-free baking blend. I recommend Bob’s Red Mill for reliable results.
- Vegan Adaptation: Use vegan butter and a flax egg (1 tablespoon flaxseed meal + 3 tablespoons water, chilled) instead of regular eggs. For royal icing, use meringue powder mixed with aquafaba instead of egg whites.
- Flavor Twists: Add citrus zest (lemon or orange) to the dough for a fresh zing or swap vanilla for almond extract for a nutty note.
- Alternative Shapes: While stars are perfect here, try heart or flag-shaped cutters for other holidays or occasions.
- Decorating Styles: Try marbled royal icing by swirling red and blue together, or skip flooding and pipe simple outlines with sprinkles for a rustic look.
Personally, I tried adding a pinch of cinnamon to the dough last year—it was unexpectedly delicious, giving a warm undertone to the sweet cookies. If you’re interested in a savory-sweet combo, that’s one to try!
Serving & Storage Suggestions
These star-spangled sugar cookies are best served at room temperature, once the royal icing has fully dried. They make a festive centerpiece for summer parties or a sweet treat alongside a cool lemonade or iced tea.
For storing, place cookies in an airtight container with parchment paper layered between to prevent sticking. They keep well at room temperature for up to 5 days. If you’d like to keep them longer, store in the refrigerator for up to 2 weeks or freeze the undecorated cookies for up to 3 months.
When reheating, avoid the microwave as it can soften the icing. Instead, let frozen cookies thaw in the container at room temperature. Flavors often deepen after a day or two, so if you plan ahead, these cookies have even better taste a little later.
These also pair nicely with simple dishes like my quick zesty lemon chicken or a light pasta to balance a summer meal. For a casual gathering, I often serve them alongside spaghetti aglio e olio—the perfect combo of fresh and comforting flavors.
Nutritional Information & Benefits
Each star-spangled sugar cookie with royal icing roughly contains around 150-180 calories depending on size and icing amount. They provide a moderate source of carbohydrates and fats, mainly from butter and sugar. While these are definitely a treat, the homemade nature means you control the ingredients—no preservatives or artificial fillers.
Key ingredients like butter add richness and a bit of vitamin A, while the egg whites in royal icing contribute some protein without fat. If you choose to add citrus zest, you get a small boost of antioxidants and vitamin C. For those mindful of allergies, note these cookies contain gluten, dairy, and eggs, but adaptations can be made as mentioned earlier.
Personally, I see these cookies as an occasional indulgence that brings joy and connection, which is just as important to wellness as the nutrients on the plate.
Conclusion
Perfect star-spangled sugar cookies with royal icing are more than just a festive treat—they’re a chance to slow down, enjoy the process, and share something sweet with the people you care about. From the buttery cookie base to the crisp, glossy icing, this recipe hits all the right notes for flavor, texture, and that all-important celebratory look.
Feel free to customize the colors, shapes, or flavors to make it your own. Whether you’re a seasoned baker or just starting, this recipe welcomes you to join in the fun without stress.
I love how these cookies bring a little sparkle to any occasion, and I hope you’ll feel the same way after trying them. Don’t hesitate to leave a comment sharing your decorating adventures or any tweaks you’ve made—I’m always curious about new twists!
Happy baking and here’s to sweet celebrations ahead.
Frequently Asked Questions
Can I make the sugar cookie dough ahead of time?
Yes! You can prepare the dough, wrap it tightly, and refrigerate for up to 3 days or freeze for up to 3 months. Just thaw in the fridge overnight before rolling.
What if my royal icing is too runny or too stiff?
If it’s too runny, add a bit more powdered sugar until you reach the right consistency. If too stiff, add a few drops of water and mix well.
Can I use store-bought royal icing instead?
While you can, homemade royal icing provides better texture and flavor with a creamier finish. Plus, you control the sweetness and color.
How do I prevent the colors from bleeding when decorating?
Let each layer of icing dry slightly before adding another color. Using gel food coloring also helps keep colors vibrant and separate.
Are these cookies suitable for freezing after baking?
Absolutely. Freeze undecorated cookies in an airtight container and decorate after thawing. Decorated cookies can also be frozen but may lose some icing texture.
Pin This Recipe!

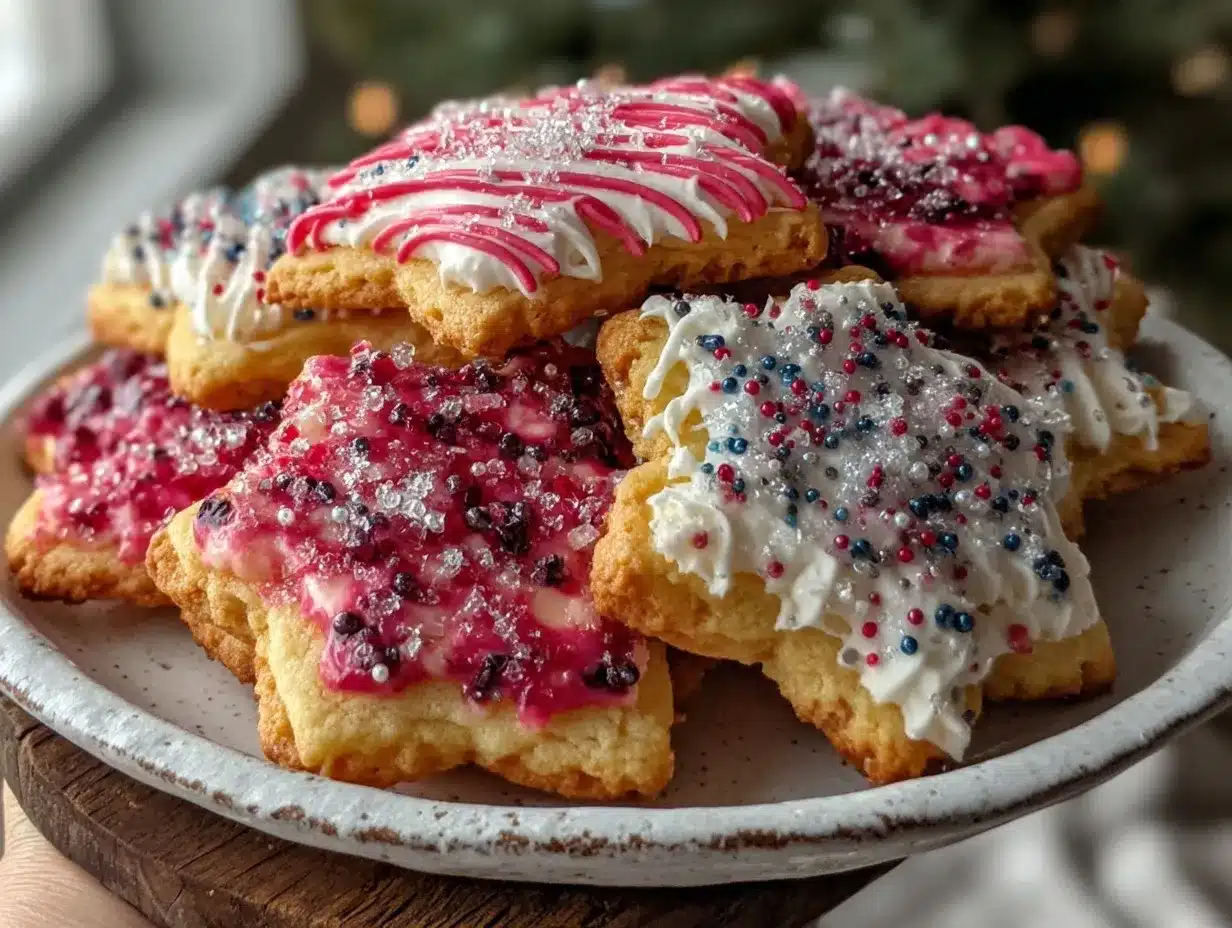
Perfect Star-Spangled Sugar Cookies with Royal Icing
These star-spangled sugar cookies feature a buttery, soft-but-crisp base decorated with easy homemade royal icing, perfect for patriotic holidays and festive gatherings.
- Prep Time: 20 minutes
- Cook Time: 10 minutes
- Total Time: 1 hour 30 minutes
- Yield: 24 cookies 1x
- Category: Dessert
- Cuisine: American
Ingredients
- 2 ¾ cups (345g) all-purpose flour, sifted
- 1 teaspoon baking powder
- ½ teaspoon salt
- 1 cup (227g) unsalted butter, softened
- 1 ½ cups (300g) granulated sugar
- 1 large egg, room temperature
- 2 teaspoons pure vanilla extract
- 2 tablespoons heavy cream or whole milk
- 3 cups (360g) powdered sugar, sifted
- 2 large egg whites or 4 tablespoons meringue powder mixed with water
- 1 teaspoon lemon juice or vanilla extract
- Red and blue gel food coloring
- Star-shaped cookie cutters (about 3 inches wide)
- Optional sprinkles: white nonpareils or edible glitter
Instructions
- Mix sifted all-purpose flour, baking powder, and salt in a medium bowl; set aside.
- Beat softened butter and granulated sugar in a large bowl with an electric mixer on medium speed until pale and fluffy, about 3-4 minutes.
- Beat in the egg, vanilla extract, and heavy cream until fully combined.
- Gradually add dry ingredients to wet mixture on low speed until dough just comes together; avoid overmixing.
- Divide dough into two disks, wrap tightly in plastic wrap, and refrigerate for at least 1 hour.
- Preheat oven to 350°F (175°C). Line baking sheets with parchment paper or silicone mats.
- Roll one dough disk on a lightly floured surface to about ¼ inch (6 mm) thickness. Cut out star shapes and place 1 inch apart on baking sheet.
- Bake for 8-10 minutes until edges just begin to turn golden; rotate sheets halfway if needed.
- Transfer cookies to a wire rack to cool completely before icing.
- Prepare royal icing by combining powdered sugar, egg whites (or meringue powder mix), and lemon juice; beat on medium-high for 5-7 minutes until stiff peaks form and icing is glossy.
- Divide icing into three bowls; color one red, one blue, and leave one white.
- Using piping bags with fine tips, outline cookie edges with white icing, flood inside with white, then add red and blue stars or stripes. Let each color dry slightly between layers.
- Allow decorated cookies to dry at room temperature for at least 4 hours or overnight.
Notes
Chill dough for at least 1 hour to prevent spreading and ensure tender cookies. Let each icing color dry before adding another to prevent bleeding. Adjust royal icing consistency by adding water or powdered sugar as needed. Gloves recommended when using red gel food coloring to avoid staining.
Nutrition
- Serving Size: 1 cookie
- Calories: 165
- Sugar: 15
- Sodium: 90
- Fat: 7
- Saturated Fat: 4
- Carbohydrates: 25
- Fiber: 0.5
- Protein: 2
Keywords: sugar cookies, royal icing, star-shaped cookies, patriotic cookies, holiday cookies, easy sugar cookies, homemade cookies, festive treats