For a while, I just accepted that homemade pumpkin muffins weren’t going to taste like the ones from the coffee shop. The bakery case version had this specific moistness—dense but somehow light, with that ribbon of tangy cream cheese running through the middle and a top that crunched just so. I tried a dozen recipes, and they all came out either too dry, too cakey, or missing that signature swirl that makes you close your eyes after the first bite. It wasn’t a dramatic search, just a quiet, persistent thing I kept coming back to every fall. Then, after tweaking the ratios one more time (more pumpkin, less flour, a touch of brown sugar magic), I finally pulled a tray out of the oven that smelled exactly right. The cream cheese hadn’t sunk to the bottom. The tops were domed and golden. And honestly? They were better than the original. (It’s the kind of thing you keep to yourself, but I’m sharing it anyway.)
Why You’ll Love This Recipe
These muffins aren’t just another copycat recipe floating around the internet. I tested these at three different altitudes, used two different ovens, and even swapped the pumpkin brand once just to see if it mattered. (It did—Libby’s is the way to go.) What came out of that testing was a muffin that hits every single note the Starbucks version does, but with a cream cheese filling that doesn’t disappear into the batter.
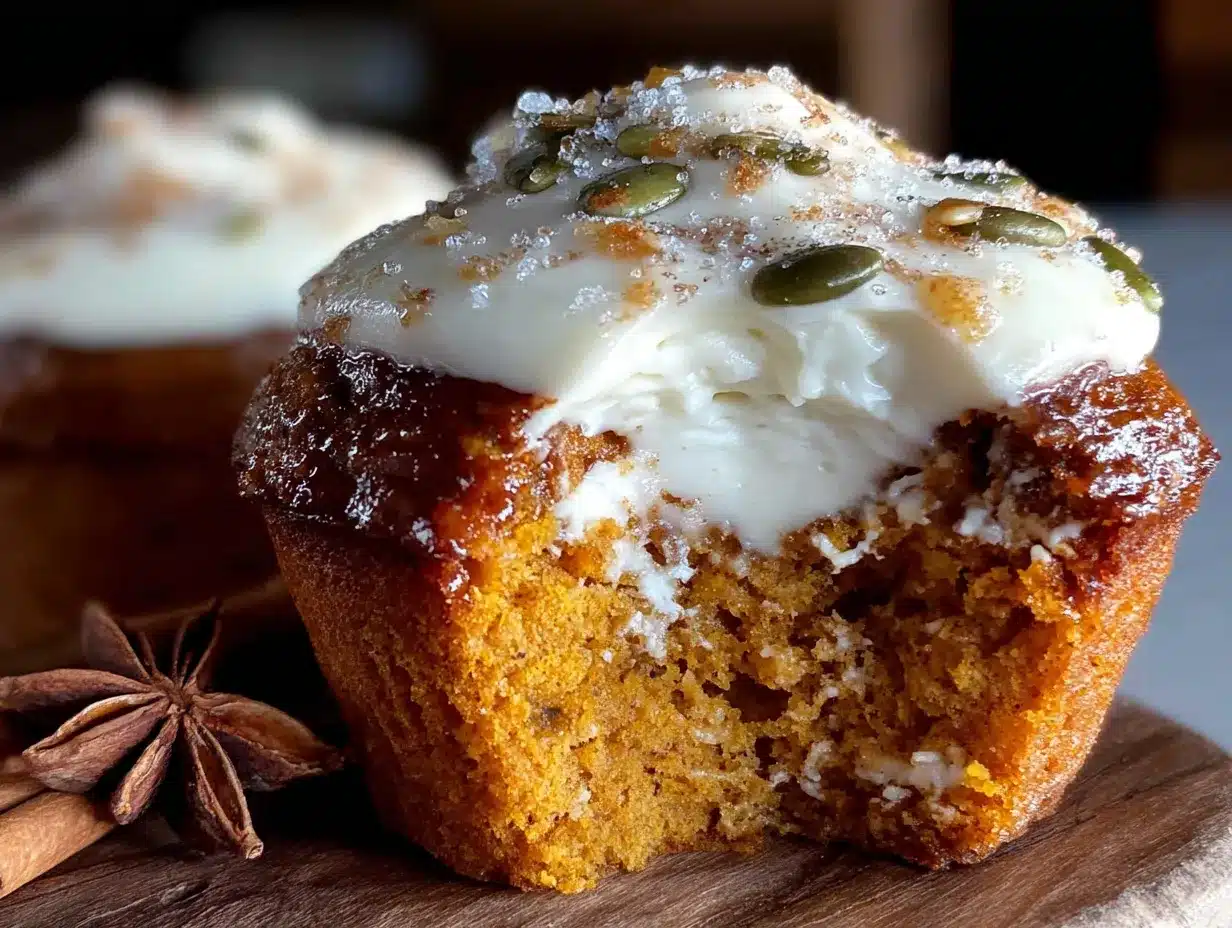
- Better than the bakery : The cream cheese filling stays right where you put it, creating that perfect tangy pocket in the middle of a spiced, tender muffin.
- No weird ingredients : You probably have everything in your pantry right now. No specialty flours, no hard-to-find extracts, just real butter, eggs, pumpkin, and cream cheese.
- That crunchy top : The secret is a light sprinkle of coarse sugar before they go into the oven. It creates that signature crackly crust that shatters when you bite into it.
- Freezes like a dream : Make a double batch and stash some in the freezer. They thaw overnight and taste just-baked the next morning.
- Weekend morning magic : These muffins turn a regular Saturday into something special. Pair them with coffee and you’ve got a moment, not just breakfast.
What makes this version different is the technique. Instead of just folding the cream cheese into the batter (which always disappears), you freeze the cream cheese mixture into small discs first. It sounds extra, but it’s the trick that guarantees every muffin gets that perfect pocket of tangy filling. No sinking, no dissolving, just pure cream cheese goodness in every bite.
What Ingredients You Will Need
This recipe uses simple, wholesome ingredients that come together to deliver that signature bakery flavor and texture. Most of these are pantry staples, which makes these muffins perfect for spontaneous fall baking.
For the Cream Cheese Filling
- 8 ounces cream cheese, softened (full-fat is best here—low-fat gets too watery)
- 1/4 cup granulated sugar
- 1 large egg yolk (the yolk adds richness and helps the filling set properly)
- 1/2 teaspoon vanilla extract
For the Muffin Batter
- 1 3/4 cups all-purpose flour (220 grams)
- 1 cup granulated sugar (200 grams)
- 1/2 cup packed light brown sugar (100 grams)
- 1 teaspoon baking soda
- 1/2 teaspoon baking powder
- 2 teaspoons pumpkin pie spice (store-bought or homemade—I use McCormick for consistency)
- 1 teaspoon ground cinnamon
- 1/2 teaspoon salt
- 2 large eggs, room temperature
- 1 cup pumpkin puree (not pumpkin pie filling—Libby’s is my go-to brand)
- 1/2 cup vegetable oil (or melted coconut oil for a slightly different flavor)
- 1/4 cup buttermilk, room temperature (or 1/4 cup milk mixed with 1 teaspoon lemon juice, let sit 5 minutes)
- 2 teaspoons vanilla extract
For the Topping
- 2 tablespoons coarse sugar (turbinado or demerara for that bakery crunch)
Ingredient Notes: Use canned pumpkin puree, not pumpkin pie filling which has added sugar and spices. For the cream cheese, I recommend Philadelphia brand for the smoothest texture. If you don’t have buttermilk, the lemon juice trick works perfectly. And please don’t skip the coarse sugar on top—it’s what gives these muffins that signature crackly crust.
Equipment Needed
You don’t need a professional bakery setup for these, but a few specific tools make the process smoother. A standard 12-cup muffin tin is essential—I use a non-stick one from Wilshire that I’ve had for years. Paper liners are non-negotiable here; the cream cheese filling can stick to the pan otherwise. I prefer the foil-lined parchment ones for easy release.
A stand mixer or hand mixer works for the cream cheese filling, but you can absolutely do it by hand with a bowl and a sturdy spoon. For the muffin batter, a large mixing bowl and a whisk are all you need—no need to overmix with a machine. A small cookie scoop helps portion the batter evenly, and a piping bag or zip-top bag makes filling the muffins with cream cheese much cleaner. A kitchen scale is helpful for accuracy, but I’ve included cup measurements too.
Budget-friendly tip: If you don’t have a piping bag, just snip the corner off a zip-top bag. Works the same and costs nothing.
Preparation Method
This method has a few extra steps, but each one serves a purpose. Trust the process—especially the part about freezing the cream cheese discs. It makes all the difference.
Step 1: Make the Cream Cheese Filling
In a small bowl, beat the softened cream cheese and granulated sugar together until smooth. Add the egg yolk and vanilla extract, then mix until fully combined. Don’t overbeat—you want it smooth, not airy. Transfer the mixture to a piping bag or a zip-top bag and set aside.
Step 2: Freeze the Filling Discs
Line a small baking sheet or plate with parchment paper. Snip the tip off your piping bag and pipe 12 small discs of cream cheese mixture onto the parchment, each about the size of a quarter. They don’t need to be perfect circles. Pop the tray into the freezer for at least 20 minutes. This step is crucial—frozen discs won’t sink into the batter while baking.
Step 3: Preheat and Prep
Preheat your oven to 425°F (220°C). Line your muffin tin with paper liners. The high initial temperature gives the muffins that tall, domed top.
Step 4: Mix the Dry Ingredients
In a large bowl, whisk together the flour, granulated sugar, brown sugar, baking soda, baking powder, pumpkin pie spice, cinnamon, and salt. Make sure there are no lumps of brown sugar.
Step 5: Mix the Wet Ingredients
In a separate medium bowl, whisk the eggs until smooth. Add the pumpkin puree, vegetable oil, buttermilk, and vanilla extract. Whisk until everything is well combined and smooth. The mixture should look glossy and smell incredibly fragrant.
Step 6: Combine Wet and Dry
Pour the wet ingredients into the dry ingredients. Gently fold together with a rubber spatula until just combined. A few streaks of flour are okay—overmixing will make the muffins tough. The batter will be thick and slightly lumpy, which is exactly what you want.
Step 7: Fill the Muffin Cups
Spoon a heaping tablespoon of batter into each liner, filling them about one-third full. Take the frozen cream cheese discs out of the freezer and place one disc in the center of each muffin cup, pressing it down slightly. Divide the remaining batter evenly over the cream cheese discs, making sure to cover them completely. The liners should be about three-quarters full.
Step 8: Add the Topping
Sprinkle the coarse sugar generously over the top of each muffin. Don’t be shy—this is what creates that bakery-style crunchy top.
Step 9: Bake
Bake at 425°F for 5 minutes, then reduce the oven temperature to 350°F (175°C) without opening the door. Bake for an additional 15-18 minutes, or until a toothpick inserted into the muffin part (not the cream cheese center) comes out clean. The tops should be golden brown and spring back when lightly touched.
Step 10: Cool
Let the muffins cool in the pan for 5 minutes, then transfer them to a wire rack to cool completely. The cream cheese filling will be molten hot right out of the oven, so give them time to set. If you try to eat one too soon, you’ll burn your tongue. (I speak from experience.)
Cooking Tips & Techniques
Getting these muffins right comes down to a few key techniques I learned the hard way. The first time I made them, I skipped freezing the cream cheese, and it all sank to the bottom. The muffins were still tasty, but they didn’t have that signature swirl. Freezing the filling for at least 20 minutes is non-negotiable.
The two-temperature baking method is another game-changer. Starting at 425°F gives the muffins a quick burst of heat that creates a tall, domed top. Dropping to 350°F finishes the bake without burning the tops. Don’t open the oven door during the temperature change—the sudden rush of cold air can deflate the muffins.
One mistake I made early on was overmixing the batter. Pumpkin muffins are forgiving, but if you stir too much, the gluten develops and you end up with dense, hockey-puck muffins. Mix until you don’t see big streaks of flour, then stop. A few lumps are fine.
For consistent results, use room temperature eggs and buttermilk. Cold ingredients don’t emulsify as well, which can lead to a greasy texture. Take them out of the fridge about 30 minutes before you start baking.
If your muffins stick to the liners (it happens sometimes, especially with the cream cheese), try using foil-lined parchment liners next time. They peel away much cleaner than standard paper liners.
Variations & Adaptations
These muffins are surprisingly flexible. Here are a few ways to make them your own:
Gluten-Free Version
Swap the all-purpose flour with a 1:1 gluten-free baking flour blend. I’ve tested this with Bob’s Red Mill 1:1 Baking Flour and it worked beautifully. The texture is slightly more tender, but the flavor is spot on.
Dairy-Free Adaptation
Use dairy-free cream cheese (Kite Hill or Tofutti work well) and substitute the buttermilk with almond milk mixed with a teaspoon of lemon juice. Use melted coconut oil instead of butter. The filling won’t be as thick, so freeze the discs for a full 30 minutes.
Extra Spiced Version
Add 1/4 teaspoon ground ginger, 1/4 teaspoon ground cloves, and a pinch of nutmeg to the dry ingredients. This gives the muffins a deeper, more complex spice profile that’s perfect for the holidays.
Chocolate Chip Pumpkin Muffins
Fold 1/2 cup of chocolate chips into the batter before filling the muffin cups. The combination of pumpkin spice and chocolate is surprisingly good—think pumpkin spice hot chocolate in muffin form.
Mini Muffin Version
Use a mini muffin tin and reduce the baking time. Bake at 425°F for 3 minutes, then 350°F for 8-10 minutes. Use smaller cream cheese discs (about the size of a dime) and fill the cups only halfway.
I personally love the extra spiced version during the fall. It fills the kitchen with the most incredible aroma, and honestly, it makes the whole house feel cozy.
Serving & Storage Suggestions
These muffins are best served slightly warm, when the cream cheese filling is still soft and the tops are perfectly crunchy. Let them cool for at least 10 minutes after baking, then enjoy with a hot cup of coffee or a glass of cold milk. They’re fantastic for breakfast, brunch, or an afternoon treat.
For presentation, arrange the muffins on a rustic wooden board or a simple white platter. A dusting of powdered sugar over the top adds a pretty finish, though it’s completely optional. If you’re serving them for a fall gathering, place them next to a bowl of cinnamon-spiced apples or a pumpkin butter spread. They also pair wonderfully with a crispy chicken parmesan for a cozy dinner—savory and sweet, the perfect combo.
Storage: Keep the muffins in an airtight container at room temperature for up to 3 days. The tops will lose some of their crunch over time, but the muffins will stay moist. If you want to keep them longer, refrigerate for up to 5 days. Let them come to room temperature before serving, or warm them in the microwave for 10-15 seconds.
Freezing: These muffins freeze beautifully. Wrap each muffin individually in plastic wrap, then place them in a zip-top freezer bag. They’ll keep for up to 3 months. To thaw, leave them on the counter overnight or microwave for 30 seconds straight from the freezer.
The flavors actually develop and deepen after a day or two. I’ve found that day-old muffins taste even better than fresh-baked ones, with the spices mellowing into something more complex.
Nutritional Information & Benefits
Here’s the honest truth: these are indulgent muffins. They’re not health food, but they’re made with real ingredients, which counts for something. Each muffin (based on 12 servings) contains approximately:
- Calories: 320-350
- Fat: 18g
- Carbohydrates: 40g
- Protein: 5g
- Fiber: 2g
- Sugar: 28g
Pumpkin is the star ingredient here, and it brings some real benefits. It’s packed with vitamin A (great for eye health), fiber (helps with digestion), and antioxidants. The cream cheese adds calcium and protein, though it also brings the fat content up. If you’re watching your sugar intake, you can reduce the granulated sugar to 3/4 cup without affecting the texture too much.
These muffins are not gluten-free, dairy-free, or low-carb in their standard form, but the variations section above has options for most dietary needs. They do contain eggs, dairy, and gluten, so they’re not suitable for those with allergies to those ingredients.
Conclusion
These Perfect Starbucks Copycat Pumpkin Cream Cheese Muffins are the kind of recipe that makes you feel like you’ve cracked a code. They taste exactly like the bakery version—maybe even better—and they come together in your own kitchen with ingredients you actually recognize. The cream cheese filling stays put, the tops get that perfect crunch, and the pumpkin spice flavor is warm and comforting without being overwhelming.
I’ve made these for fall brunches, holiday breakfasts, and random Tuesday mornings when I just needed something cozy. Every time, they disappear fast. People always ask for the recipe, and I always share it. (Though I keep the freezing-the-cream-cheese trick to myself until after they’ve tried them.)
I’d love to hear how yours turn out. Did you try any variations? Did the cream cheese filling stay put? Drop a comment below and let me know. And if you’re in the mood for more cozy baking, you might enjoy this crispy BBQ chicken pizza for a savory twist, or these crispy chicken quesadillas for something quick and satisfying. Happy baking, friends!
Frequently Asked Questions
Can I use fresh pumpkin instead of canned?
Yes, you can use fresh pumpkin puree, but you’ll need to cook and strain it first. Fresh pumpkin has more water content than canned, so roast it until tender, then blend and strain through cheesecloth to remove excess liquid. Canned pumpkin is more consistent and easier, which is why I recommend it.
Why did my cream cheese filling sink to the bottom?
This usually happens when the cream cheese mixture isn’t frozen long enough, or the batter is too thin. Make sure your cream cheese discs are frozen solid (at least 20 minutes) and that your muffin batter is thick enough to support them. If your batter looks too runny, add an extra tablespoon of flour.
Can I make these muffins ahead of time?
Absolutely. You can make the cream cheese filling and freeze the discs up to a week in advance. The muffin batter should be made fresh, but the assembled muffins can be baked the day before you plan to serve them. They actually taste better on day two.
How do I get the tops to be crunchy like Starbucks?
The secret is the coarse sugar topping. Turbinado or demerara sugar creates that bakery-style crunch because the large crystals don’t dissolve fully during baking. Don’t skip this step, and don’t be shy with the sugar. The high initial oven temperature also helps create that crackly top.
Can I double this recipe?
Yes, this recipe doubles beautifully. Just make sure you have enough freezer space for the cream cheese discs and two muffin tins. If you only have one tin, bake the batches one at a time and let the second batch of batter sit at room temperature while the first one bakes.
Pin This Recipe!
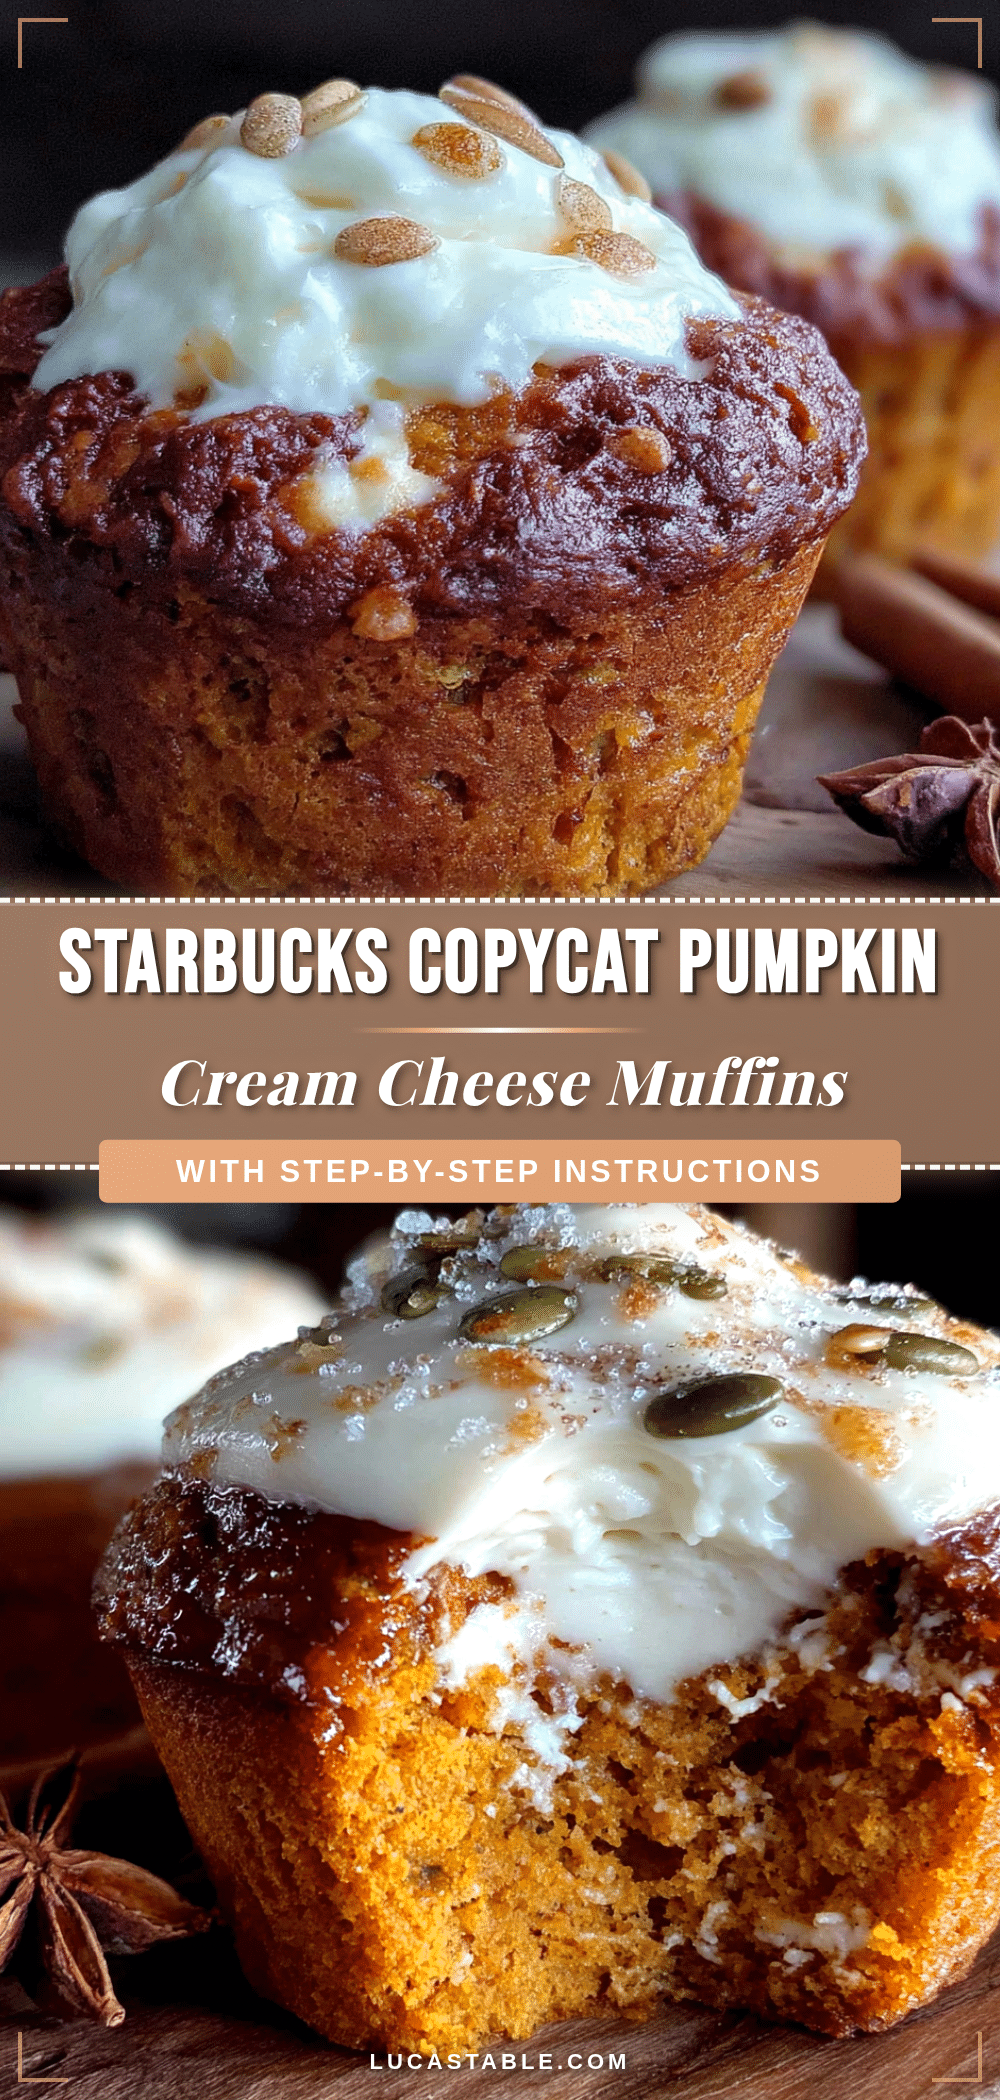
Perfect Starbucks Pumpkin Cream Cheese Muffins Recipe
These copycat Starbucks pumpkin cream cheese muffins are moist, spiced, and feature a tangy cream cheese filling that stays right in the center. With a crunchy sugar top and simple pantry ingredients, they’re better than the bakery version.
- Prep Time: 20 minutes
- Cook Time: 20 minutes
- Total Time: 40 minutes
- Yield: 12 servings 1x
- Category: Dessert
- Cuisine: American
Ingredients
- 8 ounces cream cheese, softened (full-fat recommended)
- 1/4 cup granulated sugar
- 1 large egg yolk
- 1/2 teaspoon vanilla extract
- 1 3/4 cups all-purpose flour (220 grams)
- 1 cup granulated sugar (200 grams)
- 1/2 cup packed light brown sugar (100 grams)
- 1 teaspoon baking soda
- 1/2 teaspoon baking powder
- 2 teaspoons pumpkin pie spice
- 1 teaspoon ground cinnamon
- 1/2 teaspoon salt
- 2 large eggs, room temperature
- 1 cup pumpkin puree (not pumpkin pie filling; Libby’s recommended)
- 1/2 cup vegetable oil (or melted coconut oil)
- 1/4 cup buttermilk, room temperature (or 1/4 cup milk mixed with 1 teaspoon lemon juice, let sit 5 minutes)
- 2 teaspoons vanilla extract
- 2 tablespoons coarse sugar (turbinado or demerara)
Instructions
- Make the cream cheese filling: In a small bowl, beat softened cream cheese and 1/4 cup granulated sugar until smooth. Add egg yolk and 1/2 teaspoon vanilla extract; mix until fully combined. Transfer to a piping bag or zip-top bag.
- Freeze the filling discs: Line a small baking sheet or plate with parchment paper. Pipe 12 small discs of cream cheese mixture onto the parchment, each about the size of a quarter. Freeze for at least 20 minutes.
- Preheat and prep: Preheat oven to 425°F (220°C). Line a 12-cup muffin tin with paper liners.
- Mix dry ingredients: In a large bowl, whisk together flour, 1 cup granulated sugar, brown sugar, baking soda, baking powder, pumpkin pie spice, cinnamon, and salt until no lumps remain.
- Mix wet ingredients: In a separate medium bowl, whisk eggs until smooth. Add pumpkin puree, vegetable oil, buttermilk, and 2 teaspoons vanilla extract; whisk until well combined and glossy.
- Combine wet and dry: Pour wet ingredients into dry ingredients. Gently fold with a rubber spatula until just combined (a few streaks of flour are okay; do not overmix).
- Fill muffin cups: Spoon a heaping tablespoon of batter into each liner (about 1/3 full). Place one frozen cream cheese disc in the center of each cup, pressing down slightly. Divide remaining batter evenly over the discs, covering them completely (liners should be about 3/4 full).
- Add topping: Sprinkle coarse sugar generously over the top of each muffin.
- Bake: Bake at 425°F for 5 minutes, then reduce oven temperature to 350°F (175°C) without opening the door. Bake for an additional 15-18 minutes, or until a toothpick inserted into the muffin part (not the cream cheese center) comes out clean and tops are golden brown.
- Cool: Let muffins cool in the pan for 5 minutes, then transfer to a wire rack to cool completely before serving.
Notes
Freeze the cream cheese discs for at least 20 minutes to prevent sinking. Use the two-temperature baking method (425°F then 350°F) for tall, domed tops. Do not open the oven door during temperature change. Use room temperature eggs and buttermilk for best results. For gluten-free, use a 1:1 gluten-free baking flour blend. For dairy-free, use dairy-free cream cheese and almond milk with lemon juice. Muffins can be stored in an airtight container at room temperature for up to 3 days, refrigerated for up to 5 days, or frozen for up to 3 months.
Nutrition
- Serving Size: 1 muffin
- Calories: 335
- Sugar: 28
- Sodium: 320
- Fat: 18
- Saturated Fat: 6
- Carbohydrates: 40
- Fiber: 2
- Protein: 5
Keywords: pumpkin cream cheese muffins, Starbucks copycat, pumpkin muffins, fall baking, cream cheese filled muffins, bakery style muffins


