“Do we really need a cake this big?” my neighbor asked last summer as I hauled a towering, red-white-and-blue confection out to the picnic table. Honestly, I wasn’t sure myself. I’d only decided to try making this triple layer 4th of July cake on a whim after grabbing a few ingredients during a quick grocery run. The plan was simple: whip up something festive and fun without much fuss. But as the layers came together, I realized I might’ve bitten off more than I expected. The kitchen was a mess, frosting was everywhere (including on the dog), and I was questioning my sanity. Yet, when the first slice disappeared in seconds and folks started asking for the recipe, I quietly understood this cake was something special. It wasn’t just about the colors or the layers — it was the way that first bite felt like summer wrapped up in a sweet, fluffy package. Over the next week, I found myself making it again and again, tweaking the frosting here, the crumb there, until it landed just right. Now, it’s the highlight of every backyard barbecue and a little tradition I didn’t see coming. If you’re looking for a showstopper that’s as joyful to make as it is to eat, this perfect triple layer 4th of July cake might just become your new go-to.
Why You’ll Love This Recipe
This perfect triple layer 4th of July cake isn’t just festive—it’s a genuine crowd-pleaser that’s easy enough for any home baker to tackle. From my kitchen trials to backyard tastings, here’s why this cake stands out:
- Quick & Easy: Despite the triple layers, the batter comes together in about 20 minutes, making it a great pick for last-minute celebrations.
- Simple Ingredients: No specialty stores needed! Basic pantry staples with a few colorful additions make this a no-stress recipe.
- Perfect for Summer Celebrations: Whether it’s a neighborhood block party or a casual family cookout, this cake brings the festive spirit effortlessly.
- Crowd-Pleaser: Kids and adults alike rave about the moist crumb and the creamy, subtly sweet frosting that holds it all together.
- Unbelievably Delicious: The combination of light vanilla sponge with fresh whipped cream frosting and vibrant berry layers makes each bite a little celebration of its own.
What makes this recipe different? It’s the way the layers balance flavor and texture without being over-the-top sweet or dense. Instead of complicated fondant or heavy buttercream, the frosting is whipped to airy perfection, letting the cake’s natural flavors shine. Plus, I swap in fresh berries to add a juicy burst that feels perfectly at home on hot summer days. It’s the kind of cake that makes you close your eyes after the first bite and think, “Yep, that’s summer.”
What Ingredients You Will Need
This recipe uses simple, wholesome ingredients to deliver that bold, festive flavor and satisfying moist texture without the fuss. Most are pantry staples, and the fresh berries add a seasonal pop. Feel free to swap or adjust based on what you have handy.
- For the Cake Batter:
- 2 ½ cups (310g) all-purpose flour (I prefer King Arthur for consistent results)
- 1 tbsp baking powder
- ½ tsp salt
- 1 cup (225g) unsalted butter, softened (important for that tender crumb)
- 1 ¾ cups (350g) granulated sugar
- 4 large eggs, room temperature (helps the batter emulsify better)
- 1 tbsp pure vanilla extract
- 1 cup (240ml) whole milk, room temperature (you can use buttermilk for a tangier note)
- For the Frosting:
- 2 cups (480ml) heavy whipping cream, cold (cold cream whips best, trust me)
- ½ cup (60g) powdered sugar, sifted
- 1 tsp vanilla extract
- For the Filling and Decoration:
- 1 cup fresh strawberries, sliced (in summer, fresh is unbeatable; frozen works in a pinch)
- 1 cup fresh blueberries
- 1 cup fresh raspberries
- Optional: red and blue sprinkles or edible glitter for extra flair
If you want a gluten-free option, swapping in almond flour or a 1:1 gluten-free baking mix works well, though the texture will be slightly different. For dairy-free, coconut cream whipped with a touch of powdered sugar makes a lovely frosting substitute. I’ve tried both variations, and they still capture the celebratory vibe perfectly.
Equipment Needed
- Three 8-inch (20 cm) round cake pans — if you don’t have three, you can bake in batches but it takes longer.
- Electric mixer or stand mixer — whipping the cream by hand is doable but takes serious muscle and patience.
- Mixing bowls — at least two, one for batter and one for frosting.
- Measuring cups and spoons — for accuracy, especially with baking powder and sugar.
- Cooling racks — important to cool layers completely before frosting; no one likes a meltdown.
- Offset spatula or butter knife — makes frosting smoother and easier to spread.
- Optional: cake turntable — helpful for decorating but not necessary.
I’ve found that investing in good-quality non-stick cake pans makes the layer removal much smoother. If your pans tend to stick, lining with parchment paper circles helps a lot. And if you’re on a budget, a simple hand mixer paired with a sturdy bowl works just fine — no fancy gadgets needed to get a stunning result.
Preparation Method
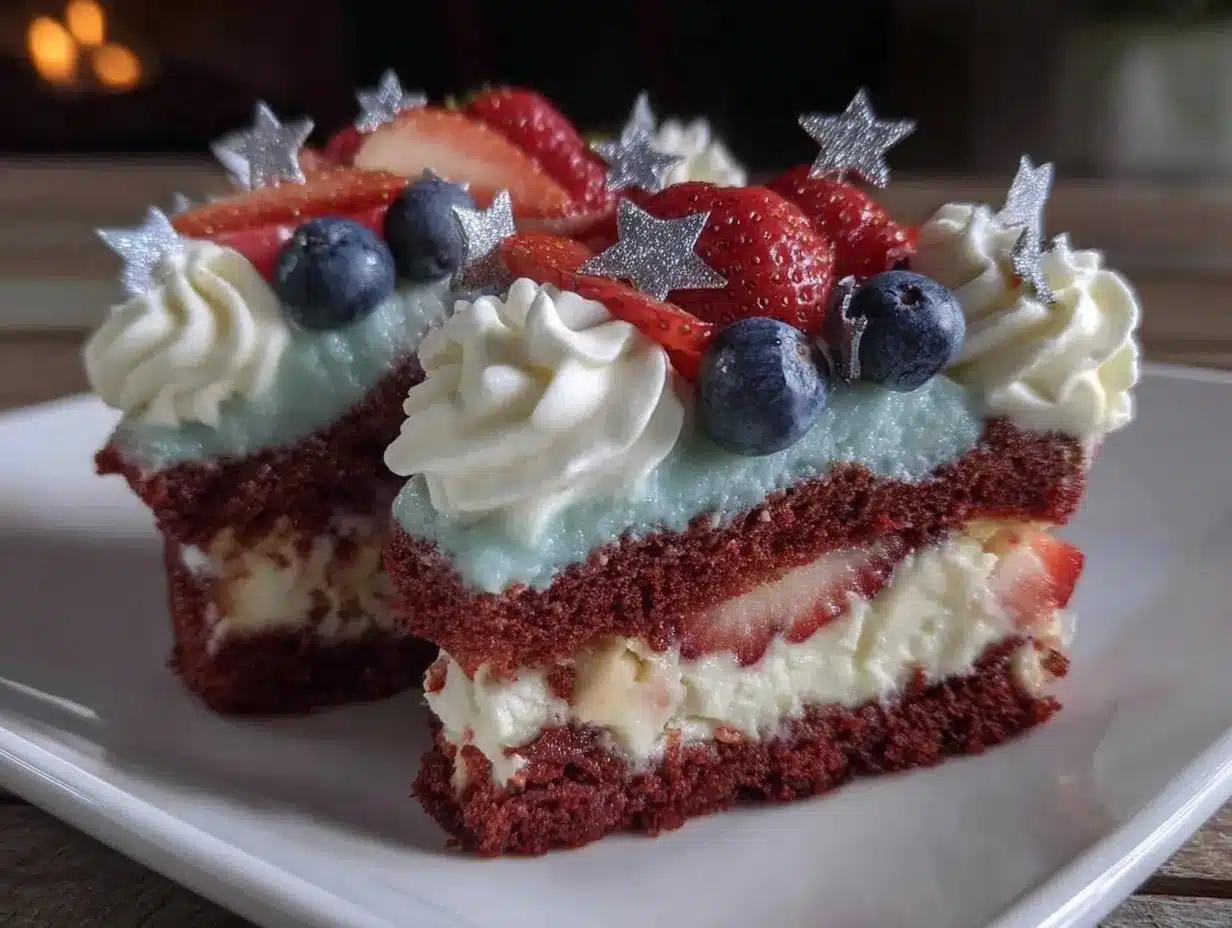
- Preheat your oven to 350°F (175°C). Grease the three 8-inch pans with butter or non-stick spray, then line the bottoms with parchment paper for easy release. This prep step saves you from a crumbly mess later.
- Mix dry ingredients: In a medium bowl, whisk together the flour, baking powder, and salt. Set aside. This keeps the leavening even throughout the batter.
- Cream butter and sugar: In a large bowl, use your mixer on medium speed to cream the softened butter and sugar until light and fluffy, about 3-4 minutes. You’ll know it’s ready when it’s pale and airy — this step builds the cake’s tender crumb.
- Add eggs and vanilla: Beat in eggs one at a time, mixing well after each addition. Stir in vanilla extract. The batter might look a little curdled here, but that’s totally normal.
- Alternate adding dry ingredients and milk: With the mixer on low, add the flour mixture in three additions, alternating with the milk in two additions. Begin and end with the flour. Mix just until combined — overmixing can toughen the cake.
- Divide batter evenly: Pour the batter evenly into the prepared pans. I like to use a kitchen scale for precision, but eyeballing works if you’re careful. Smooth the tops with a spatula.
- Bake for 25-30 minutes: Rotate pans halfway through baking to ensure even cooking. The cakes are done when a toothpick inserted in the center comes out clean or with a few moist crumbs.
- Cool layers: Let cakes cool in the pans for 10 minutes, then invert onto cooling racks to cool completely before frosting. Patience here makes frosting less messy.
- Prepare the frosting: In a chilled bowl, beat the heavy cream, powdered sugar, and vanilla until stiff peaks form. This can take 3-5 minutes, so keep an eye on the texture — it should hold shape but still be creamy and spreadable.
- Assemble the cake: Place the first cake layer on your serving plate. Spread about ⅓ of the whipped cream evenly on top, then scatter some sliced strawberries and raspberries. Repeat with the second layer and blueberries. Top with the final cake layer and cover the whole cake with the remaining whipped cream.
- Decorate: Garnish with the remaining fresh berries on top. Add sprinkles or edible glitter for that extra festive sparkle.
- Chill before serving: Refrigerate the cake for at least 1 hour to let the layers settle and flavors meld. This also helps the whipped cream frosting hold its shape.
If you find the whipped cream sighing or melting after a while, a quick tip is to add a teaspoon of cornstarch or use stabilized whipped cream to keep it firmer for outdoor parties.
Cooking Tips & Techniques
One thing I learned early on is that temperature control is your best friend here. Room temperature eggs and butter blend better, giving you that smooth, fluffy batter. Also, don’t rush folding in the flour — a gentle hand keeps the cake tender instead of dense.
Whipping the cream can be tricky if you’ve never done it before. Keep your bowl and beaters cold (pop them in the fridge or freezer for 15 minutes before starting). Stop whipping as soon as stiff peaks form; going beyond that turns your cream grainy and eventually into butter (which I’ve accidentally done more times than I’d admit!).
When assembling, a trick for neat layers is to chill the cake layers for 15 minutes before frosting. It firms them up and reduces crumbs mixing into the frosting. Speaking of crumbs, a thin crumb coat layer of whipped cream before the final frosting layer can help keep the presentation clean.
If you’re pressed for time but want a similar vibe, pairing this cake with a quick, zesty side like zesty lemon chicken makes the whole celebration feel balanced and fresh.
Variations & Adaptations
- Berry Swap: Change the berry lineup depending on what’s in season or what your guests like. Blackberries or cherries make delicious alternatives.
- Flavor Twist: Add a teaspoon of almond extract to the batter for a subtle nutty twist that pairs beautifully with the vanilla and berries.
- Frosting Switch: Try a cream cheese frosting for a tangier profile or a light lemon glaze drizzle for a brighter finish.
- Dietary Adaptations: Use coconut cream-based frosting for a dairy-free option, and gluten-free flour blends work well for the cake without losing much texture.
- Method Change: For a smaller crowd, bake two layers instead of three and adjust filling accordingly. You can also make this into cupcakes—same batter, just shorter bake time.
I once tried folding in a handful of mini chocolate chips into the batter for a subtle surprise, and it was a hit with the kids. Totally optional, but if you want to sneak in some extra fun, that’s one way to do it!
Serving & Storage Suggestions
This cake is best served chilled or at room temperature, depending on the weather. I like to bring it out about 30 minutes before serving so the whipped cream softens just enough for a melt-in-your-mouth feel.
Pair it with iced tea, lemonade, or something bubbly for a true summer celebration vibe. For a savory balance, dishes like quick creamy tuna pasta work surprisingly well at the same cookout.
Store leftovers covered tightly in the refrigerator for up to 3 days. The berries keep the cake moist but don’t wait too long or the whipped cream may start to weep. If you want to prepare layers ahead, wrap them well in plastic wrap and freeze for up to a month. Thaw completely before assembling and frosting.
Reheating isn’t really recommended for this cake since the whipped cream frosting doesn’t do well with heat. But chilling again after a few hours refreshes the textures nicely.
Nutritional Information & Benefits
Each slice of this triple layer cake (assuming 12 servings) contains roughly 350 calories, with moderate sugar and fat content coming mainly from butter and cream. Using fresh berries adds vitamins, antioxidants, and fiber, giving a little nutritional boost alongside the indulgence.
This recipe can be adapted for gluten-free or dairy-free diets, making it inclusive for many guests. The fresh fruit adds natural sweetness and a lighter feel compared to traditional heavy frostings.
From a wellness perspective, I appreciate that this cake balances indulgence with fresh ingredients, making it a treat that feels celebratory without being overwhelming. It’s a reminder that good food can be both joyful and thoughtful.
Conclusion
This perfect triple layer 4th of July cake has found a special place in my summer gatherings—partly because it’s stunning to look at, but mostly because it tastes like celebration in every bite. It’s a recipe that lets you enjoy the process without stressing over complicated steps, and that’s a rare find.
Feel free to make it your own, swapping berries or tweaking the frosting to suit your style. I’ll admit, I never thought I’d be the person who makes a three-layer cake for a casual backyard party, but here we are—and I wouldn’t have it any other way.
If you give it a try, I’d love to hear how it turns out or what fun twists you add. Sharing recipes and stories like this keeps the spirit of summer alive, one slice at a time.
FAQs About the Perfect Triple Layer 4th of July Cake
Can I make this cake ahead of time?
Yes! You can bake the layers up to 2 days in advance and keep them wrapped in the fridge. Assemble and frost just before serving for the freshest look and taste.
What if I don’t have fresh berries?
Frozen berries work in a pinch—just thaw and drain excess juice to avoid soggy layers. You can also use fruit preserves for a different texture.
How do I stabilize whipped cream frosting for hot weather?
Add 1 teaspoon of cornstarch or use a commercial whipped cream stabilizer. Keep the cake chilled until serving to help it hold up outdoors.
Can I double or halve this recipe?
Absolutely! Just adjust baking times slightly if you change pan sizes or quantities. For smaller batches, consider baking cupcakes.
Is there a dairy-free version of this cake?
Yes, swap dairy milk for almond or oat milk, and use coconut cream whipped with powdered sugar as the frosting. The cake texture remains moist and delicious.
Pin This Recipe!
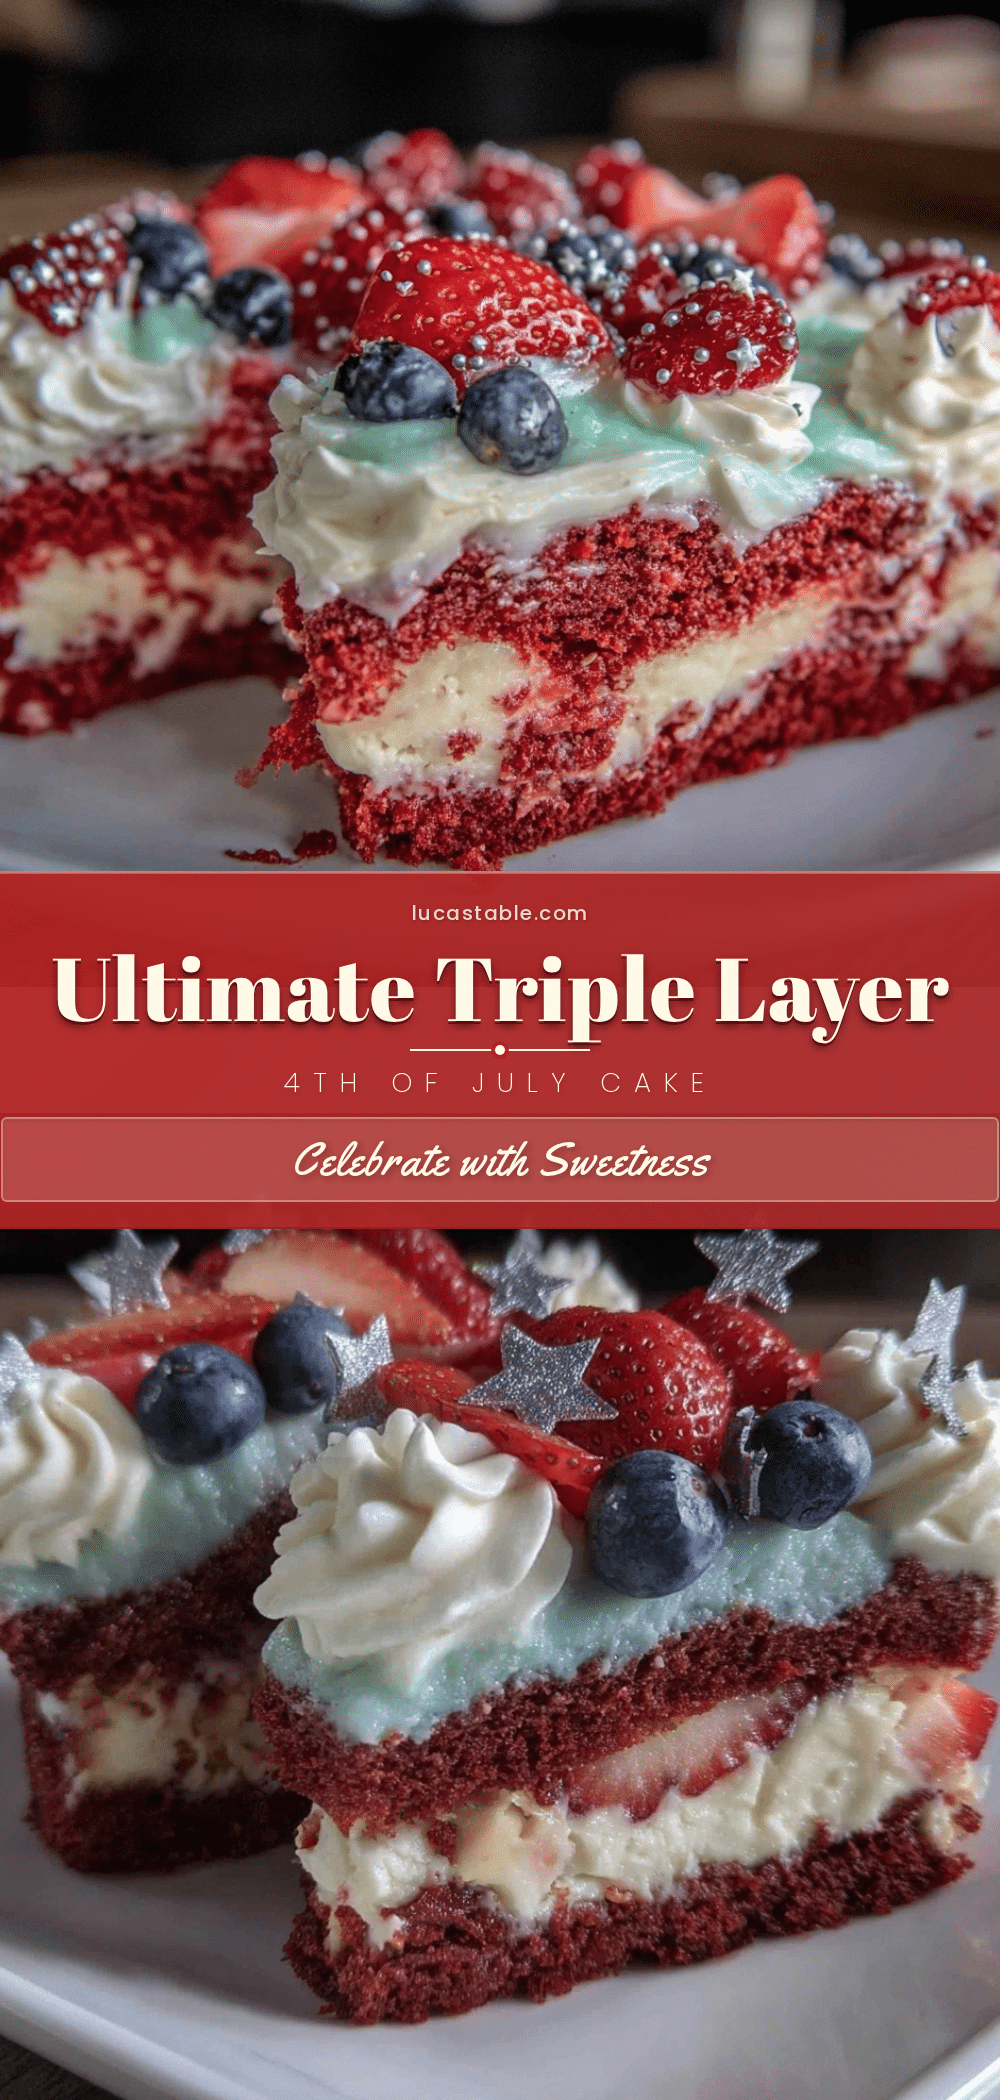
Perfect Triple Layer 4th of July Cake Recipe Easy for Summer Celebrations
A festive and easy-to-make triple layer cake featuring light vanilla sponge, fresh whipped cream frosting, and vibrant berry layers, perfect for summer celebrations and backyard barbecues.
- Prep Time: 20 minutes
- Cook Time: 25-30 minutes
- Total Time: 1 hour 50 minutes
- Yield: 12 servings 1x
- Category: Dessert
- Cuisine: American
Ingredients
- 2 ½ cups (310g) all-purpose flour
- 1 tbsp baking powder
- ½ tsp salt
- 1 cup (225g) unsalted butter, softened
- 1 ¾ cups (350g) granulated sugar
- 4 large eggs, room temperature
- 1 tbsp pure vanilla extract
- 1 cup (240ml) whole milk, room temperature
- 2 cups (480ml) heavy whipping cream, cold
- ½ cup (60g) powdered sugar, sifted
- 1 tsp vanilla extract
- 1 cup fresh strawberries, sliced
- 1 cup fresh blueberries
- 1 cup fresh raspberries
- Optional: red and blue sprinkles or edible glitter
Instructions
- Preheat your oven to 350°F (175°C). Grease three 8-inch pans with butter or non-stick spray, then line the bottoms with parchment paper.
- In a medium bowl, whisk together the flour, baking powder, and salt. Set aside.
- In a large bowl, cream the softened butter and sugar with a mixer on medium speed until light and fluffy, about 3-4 minutes.
- Beat in eggs one at a time, mixing well after each addition. Stir in vanilla extract.
- With the mixer on low, add the flour mixture in three additions, alternating with the milk in two additions, beginning and ending with the flour. Mix just until combined.
- Divide the batter evenly into the prepared pans and smooth the tops with a spatula.
- Bake for 25-30 minutes, rotating pans halfway through. Cakes are done when a toothpick inserted in the center comes out clean or with a few moist crumbs.
- Let cakes cool in the pans for 10 minutes, then invert onto cooling racks to cool completely.
- In a chilled bowl, beat the heavy cream, powdered sugar, and vanilla until stiff peaks form, about 3-5 minutes.
- Place the first cake layer on a serving plate. Spread about one-third of the whipped cream evenly on top, then scatter sliced strawberries and raspberries.
- Repeat with the second layer and blueberries. Top with the final cake layer and cover the whole cake with the remaining whipped cream.
- Garnish with remaining fresh berries and optional sprinkles or edible glitter.
- Refrigerate the cake for at least 1 hour before serving to let layers settle and flavors meld.
Notes
Use room temperature eggs and butter for better batter emulsification. Keep bowl and beaters cold when whipping cream. Chill cake layers before frosting to reduce crumbs. Add 1 teaspoon cornstarch to whipped cream to stabilize for hot weather. For gluten-free, substitute almond flour or gluten-free baking mix. For dairy-free, use coconut cream whipped with powdered sugar.
Nutrition
- Serving Size: 1 slice (1/12 of cak
- Calories: 350
- Sugar: 25
- Sodium: 180
- Fat: 22
- Saturated Fat: 13
- Carbohydrates: 38
- Fiber: 2
- Protein: 4
Keywords: 4th of July cake, triple layer cake, summer cake, vanilla sponge cake, whipped cream frosting, berry cake, patriotic dessert, easy cake recipe


