I was standing in the dairy aisle last Tuesday, just staring at a carton of eggnog. It wasn’t even the fancy stuff—just the store brand, half-gallon, the kind with the little plastic handle that always feels like it’s about to snap off. And suddenly, I was eight years old, sitting on a sticky vinyl stool at my Aunt Carol’s kitchen counter, watching her pour eggnog into a measuring cup with a shaky hand. She wasn’t old then, but she had this way of making everything feel sacred, like pouring milk was a ritual. I can still hear the clink of the glass against the metal bowl and the way she’d hum along to the radio, off-key. That memory hit me so hard I almost dropped my shopping basket. I grabbed the carton, not because I wanted eggnog, but because I wanted that feeling back. And honestly, that’s how these Quick Eggnog Cheesecake Bars with Nutmeg were born—a desperate attempt to bottle a Tuesday night from 1994 into something I could eat with a fork.
These bars are my shortcut to that memory. They’re not fancy, and they don’t pretend to be. They’re the kind of dessert you throw together when you’re tired, the kids are asking for a snack, and you need something that tastes like you tried without actually trying. Maybe you’ve been there, standing in your own kitchen, craving something that feels like a hug but only has fifteen minutes of prep time. That’s exactly what this is.
I’ve made these bars about a dozen times now, tweaking the ratios, testing the bake times, and once, forgetting the sugar entirely (don’t recommend that one). But every single time, that first bite—creamy, spiced, just sweet enough—takes me right back to Aunt Carol’s kitchen. It’s not perfect, but it’s close. And that’s why I keep making them.
Why You’ll Love This Recipe
Let me tell you why these Quick Eggnog Cheesecake Bars with Nutmeg have become my go-to for holiday parties, random weeknights, and everything in between. I’ve tested this recipe more times than I care to admit—burned a batch, underbaked another, once even used low-fat cream cheese (never again). So trust me when I say this version is the one.
- Quick & Easy: You’re looking at about 15 minutes of active prep time. Seriously. The hardest part is waiting for them to chill. Perfect for those nights when you need dessert but don’t have the energy for a production.
- Simple Ingredients: No hunting down obscure spices or specialty flours. You probably have most of this in your kitchen right now—cream cheese, sugar, eggs, and that carton of eggnog you impulse-bought.
- Perfect for Weeknights: These bars come together fast enough for a Tuesday night treat but look impressive enough to bring to a holiday potluck. They’re the ultimate multitasker.
- Crowd-Pleaser: I’ve served these to kids, adults, and my neighbor who “doesn’t really do dessert.” They disappear every single time. The eggnog flavor is familiar but not overwhelming, and that nutmeg on top just seals the deal.
- Unbelievably Delicious: The texture is what gets me every time—creamy, dense, with just a little bit of crumble from the crust. It’s comfort food in bar form, and it hits that sweet spot between indulgent and not-too-heavy.
What makes these bars different from every other cheesecake recipe out there is the technique. Instead of a water bath or a complicated mixing method, I use room-temperature ingredients and a simple press-in crust. No fuss, no stress, just a perfectly creamy bar that doesn’t crack. Plus, the eggnog adds a richness that regular cheesecake just can’t match. It’s like the holidays decided to live in your dessert bar, and honestly, that’s exactly what you need right now.
What Ingredients You Will Need
This recipe uses simple, wholesome ingredients to deliver that rich, spiced flavor without any fuss. Most of these are pantry staples or easy to find at any grocery store—no special trips required.
For the Crust
- Graham cracker crumbs (1 ½ cups, about 12 full sheets crushed) — I recommend using Honey Maid for that classic buttery flavor. You can crush them in a zip-top bag with a rolling pin or use a food processor for a finer texture.
- Unsalted butter (6 tablespoons, melted) — Adds richness and helps the crust hold together. If you only have salted butter, just reduce the added salt by a pinch.
- Granulated sugar (2 tablespoons) — Just enough to sweeten the crust without overpowering the filling.
- Ground nutmeg (½ teaspoon) — This little addition in the crust gives you a hint of spice in every bite. Freshly grated is best, but pre-ground works fine.
For the Cheesecake Filling
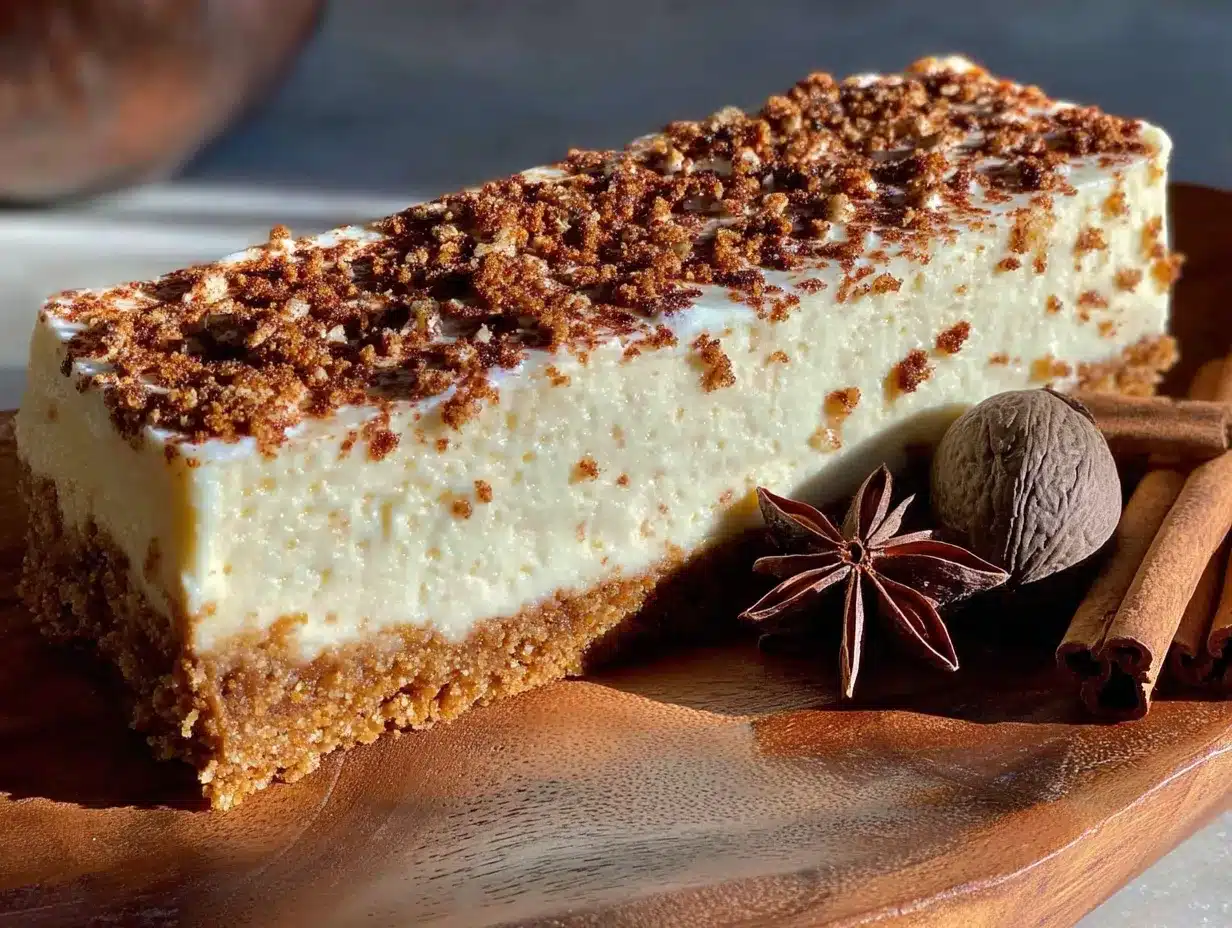
- Cream cheese (16 ounces, two 8-ounce blocks, softened) — Full-fat is non-negotiable here. Low-fat or Neufchâtel will make the filling less creamy and can cause cracking. I always use Philadelphia for the best texture.
- Granulated sugar (¾ cup) — Balances the tanginess of the cream cheese and the richness of the eggnog.
- Eggnog (1 cup) — The star of the show. Use store-bought or homemade, but make sure it’s full-fat for the creamiest results. I prefer Southern Comfort brand for its thick, custard-like texture.
- Large eggs (2, room temperature) — Room-temperature eggs blend more smoothly into the batter, giving you a silkier texture. Take them out of the fridge about 30 minutes before you start.
- All-purpose flour (2 tablespoons) — Helps stabilize the cheesecake and prevent cracking. Don’t skip this—it makes a difference.
- Vanilla extract (1 teaspoon) — Enhances the warm flavors of the eggnog and nutmeg. Pure vanilla is best, but imitation works in a pinch.
- Ground nutmeg (½ teaspoon, plus more for sprinkling) — Adds that signature holiday warmth. Freshly grated nutmeg has a more vibrant flavor, so if you have whole nutmeg and a microplane, go for it.
- Ground cinnamon (¼ teaspoon) — A subtle background note that complements the nutmeg without competing.
- Salt (¼ teaspoon) — Balances sweetness and enhances all the other flavors.
Ingredient Selection Tips
When choosing eggnog, look for one that’s thick and creamy—not watery. The thicker the eggnog, the richer your cheesecake will be. If you’re using a lighter version, your bars might turn out a bit softer. Also, make sure your cream cheese is truly softened to room temperature. Cold cream cheese creates lumps that no amount of mixing can fix. Trust me on this one—I learned the hard way when I tried to rush it and ended up with a grainy cheesecake.
For the graham cracker crust, you can use any brand, but I find that the honey-flavored ones give the best depth of flavor. If you’re gluten-free, use gluten-free graham crackers or crushed shortbread cookies. The crust is forgiving, so feel free to experiment.
Equipment Needed
You don’t need a professional kitchen to make these Quick Eggnog Cheesecake Bars with Nutmeg. Here’s what you’ll need:
- 9×9-inch baking pan — This is the perfect size for bars. If you only have an 8×8, the bars will be slightly thicker and may need a few extra minutes in the oven. A 9×13 will make thinner bars, so adjust the bake time down.
- Parchment paper — Lining your pan with parchment (with overhang on two sides) makes lifting the bars out a breeze. No fighting with stuck corners.
- Mixing bowls — One medium for the crust, one large for the filling. Glass or stainless steel works best.
- Electric hand mixer or stand mixer — You can mix by hand if you have strong arms, but a mixer makes the filling silky smooth with less effort. I’ve done both, and the mixer wins every time.
- Measuring cups and spoons — Standard set will do. For the graham cracker crumbs, a dry measuring cup is best.
- Rolling pin or food processor — For crushing the graham crackers. A food processor gives you a finer, more even crumb, but a rolling pin and a zip-top bag work just as well—plus, it’s a great way to release some stress.
- Spatula — For scraping every last bit of filling into the pan. A silicone spatula is my favorite because it doesn’t scratch your bowls.
- Cooling rack — Helps the bars cool evenly before you refrigerate them. If you don’t have one, just let them cool on the counter.
Budget-friendly tip: You don’t need a fancy springform pan for this recipe. A simple metal baking pan works perfectly. And if you don’t have parchment paper, you can grease the pan generously with butter—just be careful when cutting the first piece.
Preparation Method
Let’s get these bars made. I’ve broken everything down into simple steps, with time estimates and little notes from my own trial-and-error. Trust the process, and you’ll have a pan of creamy, spiced perfection.
- Preheat your oven to 325°F (160°C). Line your 9×9-inch baking pan with parchment paper, leaving about 2 inches of overhang on two opposite sides. This will be your “handle” to lift the bars out later. Lightly grease the parchment with cooking spray or butter.
- Make the crust. In a medium bowl, combine 1 ½ cups graham cracker crumbs, 2 tablespoons granulated sugar, and ½ teaspoon ground nutmeg. Pour in 6 tablespoons melted unsalted butter and stir with a fork until the mixture looks like wet sand and holds together when pressed. Press the mixture firmly into the bottom of your prepared pan. I use the bottom of a measuring cup to get it even and compact. Bake for 8 minutes, then set aside to cool slightly while you make the filling.
- Beat the cream cheese. In a large mixing bowl, beat 16 ounces of softened cream cheese with an electric mixer on medium speed until smooth and creamy—about 2 minutes. Scrape down the sides and bottom of the bowl with a spatula. You want no lumps here. If you see any, keep beating for another minute.
- Add the sugar and vanilla. Add ¾ cup granulated sugar, 1 teaspoon vanilla extract, and ¼ teaspoon salt. Beat on medium speed until combined, about 1 minute. Don’t overmix—you don’t want to incorporate too much air, which can cause cracks.
- Mix in the eggs. Add the 2 room-temperature eggs, one at a time, beating on low speed after each addition just until the yolk disappears. Overmixing at this stage is the number one cause of cracks, so go slow and gentle.
- Add the eggnog and dry ingredients. With the mixer on low, slowly pour in 1 cup of eggnog. Then add 2 tablespoons all-purpose flour, ½ teaspoon ground nutmeg, and ¼ teaspoon ground cinnamon. Mix until just combined—a few streaks are okay. Scrape the bowl one more time to make sure everything is incorporated.
- Pour the filling over the crust. Gently pour the cheesecake batter over the pre-baked crust. Use your spatula to spread it evenly. Tap the pan on the counter a few times to release any air bubbles. Sprinkle the top with a generous dusting of ground nutmeg—about ½ teaspoon, or more if you love that spice like I do.
- Bake. Place the pan in the preheated oven and bake for 35-40 minutes. The edges should look set and slightly puffed, but the center should still jiggle slightly when you gently shake the pan. That jiggle is your friend—it means the center will be perfectly creamy after chilling. If the center looks liquid, bake for 5 more minutes and check again.
- Cool completely. Place the pan on a cooling rack and let it cool to room temperature—about 1 hour. Don’t rush this step. If you put warm cheesecake in the fridge, condensation will form on top and make the surface soggy.
- Chill. Once cooled, cover the pan with plastic wrap or foil and refrigerate for at least 4 hours, but overnight is best. The bars need this time to set properly. I know it’s hard to wait, but trust me—the texture is worth it.
- Slice and serve. Use the parchment overhang to lift the entire block of cheesecake out of the pan. Place it on a cutting board and use a sharp knife to cut into 9 or 16 bars. For clean slices, wipe the knife with a damp paper towel between cuts. Sprinkle with a little extra nutmeg right before serving for that fresh spice aroma.
Cooking Tips & Techniques
After making these bars more times than I can count, I’ve picked up a few tricks that make a real difference. Here are my best tips for perfect results every time.
Room temperature is your secret weapon. I cannot stress this enough—let your cream cheese and eggs sit out for at least 30 minutes before you start. Cold ingredients don’t blend smoothly, and you’ll end up with lumps that no amount of mixing can fix. I once tried to microwave the cream cheese to speed things up, and it partially melted. The bars turned out grainy and weird. Learn from my mistake.
Don’t overmix the batter. Once you add the eggs, keep your mixer on low and stop as soon as everything comes together. Overmixing incorporates too much air, which creates bubbles that rise to the surface and cause cracks. You want a dense, creamy texture, not a fluffy one. If you see bubbles on top after pouring, tap the pan gently on the counter to release them.
The jiggle test is more reliable than time. Ovens vary wildly. My oven runs hot, so my bars are usually done at 35 minutes. Your oven might need 40 or even 45 minutes. Instead of relying on the clock, gently shake the pan. The edges should be set, and the center should wobble like Jell-O, not slosh like liquid. That jiggle is the sweet spot.
Chill overnight for the best texture. Four hours is the minimum, but overnight is where the magic happens. The flavors meld together, the texture firms up perfectly, and the bars become easier to slice. I’ve cut into them after just 3 hours, and they were still a little soft. Patience pays off here.
Use a wet knife for clean slices. Run your knife under hot water, wipe it dry, then make your cut. The heat helps the knife glide through the cheesecake without dragging. Wipe the blade clean between each cut for picture-perfect bars.
Variations & Adaptations
One of the best things about this recipe is how flexible it is. Here are some of my favorite ways to switch it up.
Boozy Eggnog Version: Add 1-2 tablespoons of dark rum, bourbon, or brandy to the filling along with the eggnog. It adds a warm, grown-up depth that’s perfect for holiday parties. Just reduce the eggnog by the same amount so the liquid ratio stays balanced. I tried this with spiced rum once, and it was a hit.
Gluten-Free Adaptation: Swap the graham cracker crust for gluten-free graham crackers or crushed gluten-free shortbread cookies. Use a gluten-free all-purpose flour blend (like Bob’s Red Mill 1-to-1) in place of the regular flour. The texture is slightly more delicate, but the flavor is just as good.
Dairy-Free Option: Use dairy-free cream cheese (like Kite Hill or Tofutti) and a dairy-free eggnog (many brands make one during the holidays). The texture will be slightly softer, so add an extra tablespoon of flour to help stabilize it. I tested this with oat milk eggnog, and while it wasn’t as rich, it was still delicious.
Spice It Up: If you’re a spice lover, add ¼ teaspoon of ground cloves or allspice to the filling. You can also swap the nutmeg topping for a sprinkle of cinnamon-sugar for a different flavor profile. I like to do a mix of nutmeg and cinnamon on top for that classic eggnog feel.
Individual Mini Bars: Use a mini muffin tin lined with paper liners for bite-sized treats. Press a small amount of crust into each cup, fill with batter, and bake for 15-18 minutes. These are perfect for parties or lunchbox surprises. Just watch the bake time—they’ll be done faster than a full pan.
Serving & Storage Suggestions
These Quick Eggnog Cheesecake Bars with Nutmeg are versatile enough for any occasion. Here’s how to serve and store them for the best experience.
Serving Temperature: I prefer these bars cold, straight from the fridge. The texture is firmer and more sliceable, and the flavors are clean and bright. If you like a softer, creamier bite, let them sit at room temperature for about 10 minutes before serving. Either way, they’re delicious.
Presentation Ideas: Dust the top with a little extra ground nutmeg or a light sprinkle of cinnamon before serving. For a fancier look, add a dollop of whipped cream and a tiny pinch of nutmeg on top. You can also drizzle with caramel sauce or a simple vanilla glaze for extra sweetness. I’ve served these on a platter with fresh cranberries and rosemary sprigs for a holiday table, and they looked stunning.
Complementary Pairings: These bars pair beautifully with a cup of hot coffee, spiced chai, or a glass of cold milk. For a dessert spread, serve them alongside gingerbread cookies, peppermint bark, or a simple fruit salad. The creamy, spiced flavor plays well with both rich and light accompaniments.
Storage Instructions: Store leftover bars in an airtight container in the refrigerator for up to 5 days. The flavor actually improves after a day or two as the spices meld. To freeze, wrap individual bars tightly in plastic wrap, then place them in a freezer-safe bag or container. They’ll keep for up to 3 months. Thaw in the refrigerator overnight before serving.
Reheating Tips: These bars are best served cold, so I don’t recommend microwaving them. If you want a slightly softer texture, let them sit at room temperature for 15-20 minutes. For a warm dessert, you can gently warm a slice in a 300°F oven for 5 minutes, but the texture will be less firm.
Nutritional Information & Benefits
While these bars are definitely a treat, they do have some redeeming qualities. Here’s a rough estimate per bar (based on 16 servings):
- Calories: Approximately 280-320
- Fat: 18-22g
- Carbohydrates: 25-30g
- Protein: 5-7g
- Sugar: 18-22g
Eggnog itself is a good source of calcium, vitamin A, and riboflavin from the milk and eggs. The cream cheese adds a bit of protein and calcium too. Of course, this isn’t a health food—it’s a holiday indulgence. But knowing what’s in it helps you enjoy it mindfully.
For those with dietary concerns: this recipe contains dairy, eggs, and gluten (from the graham crackers). If you’re lactose intolerant, try the dairy-free variation above. The gluten-free adaptation works well for those avoiding wheat. And if you’re watching your sugar intake, you can reduce the sugar in the filling to ½ cup—the bars will be less sweet but still delicious.
My personal philosophy? Life is short. Eat the cheesecake bar. Just maybe don’t eat the whole pan in one sitting. (I’ve done it. No regrets.)
Conclusion
These Quick Eggnog Cheesecake Bars with Nutmeg are more than just a dessert—they’re a little moment of holiday magic that you can make in under an hour. They’re creamy, spiced, and just sweet enough, with a buttery crust that holds everything together. And honestly, they’re the kind of recipe that makes you look like a hero without breaking a sweat.
I hope you give these bars a try. Make them for your family, your holiday party, or just for yourself on a quiet Tuesday night. Add your own twist—maybe a little extra nutmeg, a drizzle of caramel, or a splash of bourbon. That’s the beauty of this recipe; it’s a canvas for your own creativity.
When you make them, I’d love to hear how they turned out. Drop a comment below and let me know if you tried any variations or if they reminded you of someone special. And if you share a photo on Pinterest, tag me so I can see your beautiful creation. Happy baking, friend—you’ve got this!
Frequently Asked Questions
Can I use low-fat cream cheese for this recipe?
I don’t recommend it. Low-fat cream cheese has a higher water content, which can make the filling less creamy and more prone to cracking. Full-fat cream cheese gives you that rich, velvety texture that makes these bars so satisfying. If you’re trying to cut calories, you’re better off making a smaller batch and savoring every bite.
Can I make these bars ahead of time?
Absolutely! In fact, they taste even better the next day. The flavors have time to meld, and the texture firms up perfectly. You can make them up to 2 days in advance and keep them covered in the refrigerator. Just add the extra nutmeg sprinkle right before serving for the freshest flavor.
Why did my cheesecake crack?
Cracks usually happen for one of three reasons: overmixing the batter (which adds too much air), overbaking (which dries out the filling), or sudden temperature changes (like putting warm cheesecake in the fridge). To avoid cracks, mix gently, pull the bars out while the center still jiggles, and let them cool completely before refrigerating. If they do crack, don’t worry—a dusting of nutmeg or a dollop of whipped cream hides a multitude of sins.
Can I use homemade eggnog?
Yes, and it’s wonderful. Homemade eggnog tends to be thicker and more flavorful than store-bought, which will make your bars even richer. Just make sure it’s fully chilled before using, and note that the flavor might be a bit more pronounced. If your homemade eggnog is very thick, you may need to add an extra tablespoon of milk to thin it slightly.
How do I know when the bars are done baking?
The edges should look set and slightly puffed, and the center should jiggle like Jell-O when you gently shake the pan. If the center looks liquid or sloshes, bake for another 5 minutes and check again. Remember, the bars will continue to set as they cool, so it’s better to underbake slightly than to overbake. That jiggle is your friend.
Pin This Recipe!
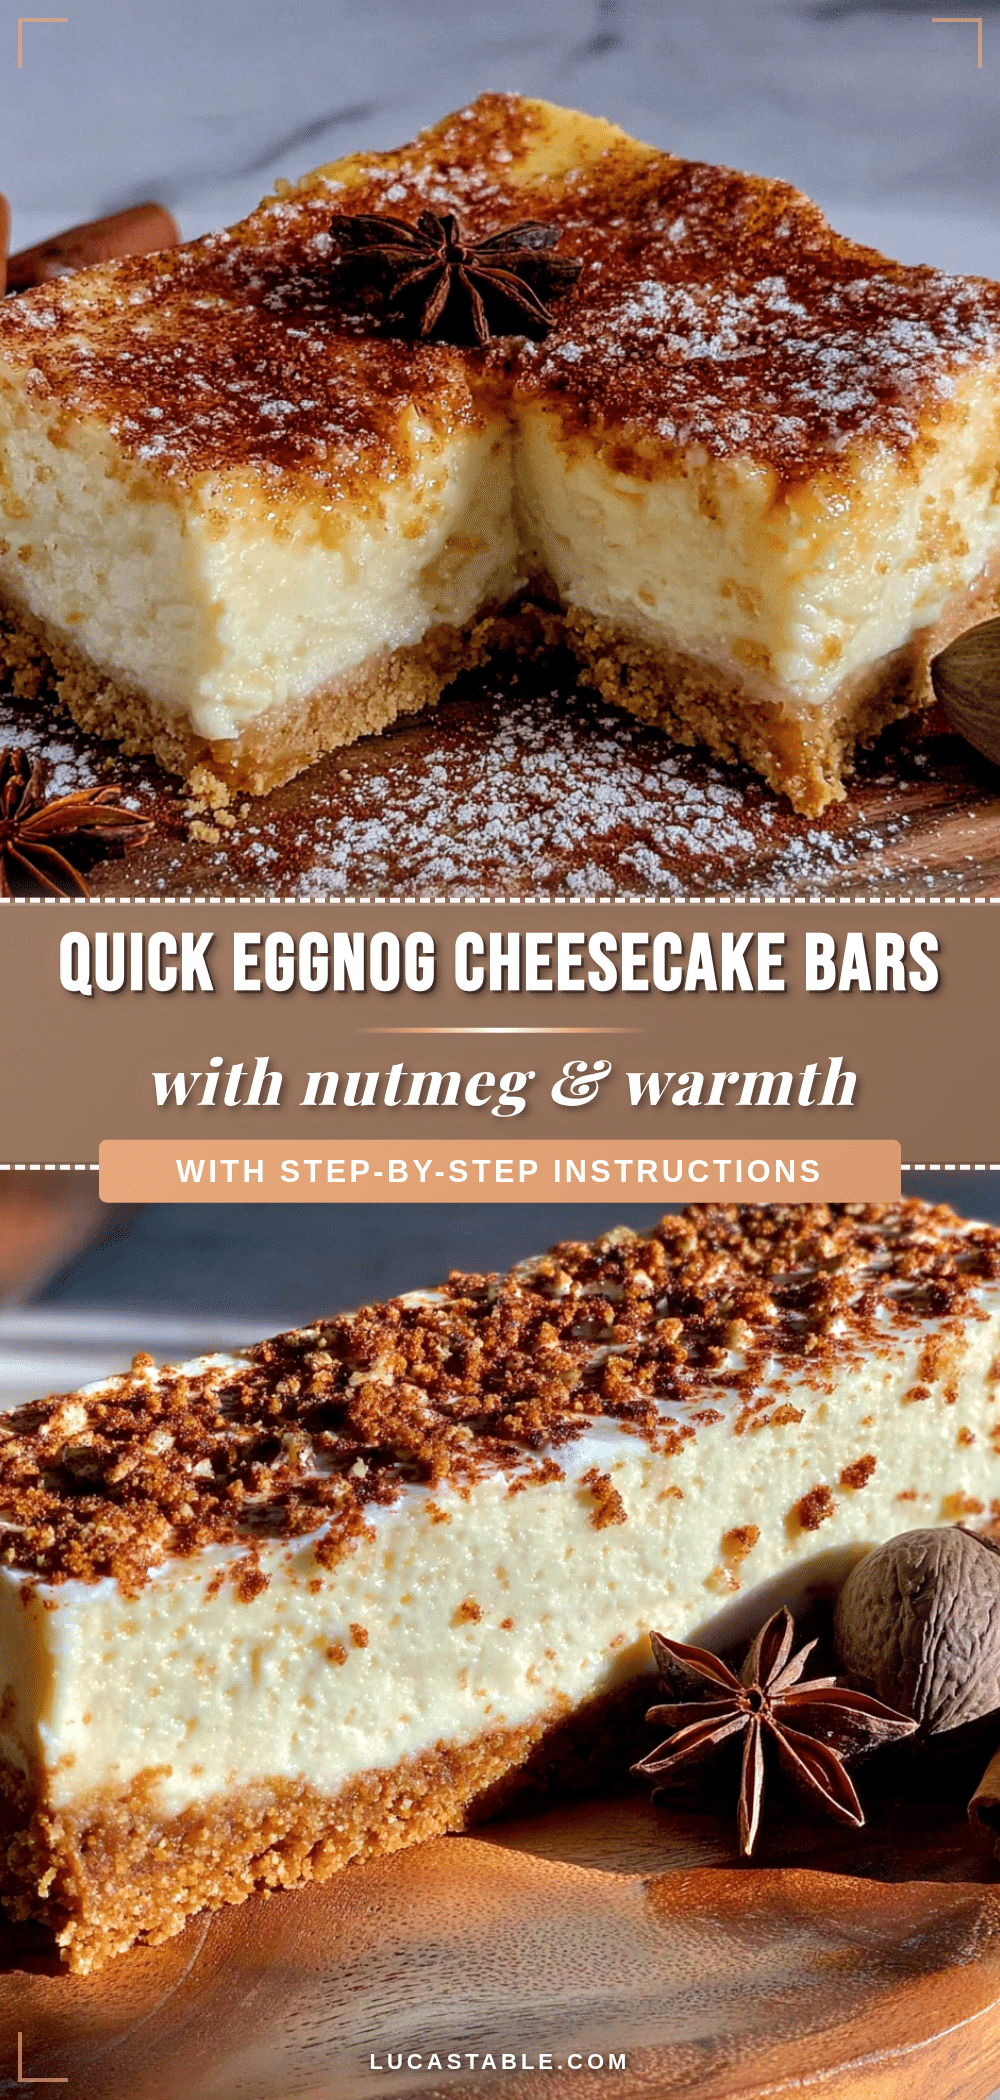
Quick Easy Eggnog Cheesecake Bars with Nutmeg
These Quick Eggnog Cheesecake Bars with Nutmeg are a creamy, spiced holiday dessert that comes together in just 15 minutes of prep. With a buttery graham cracker crust and a rich eggnog filling, they’re perfect for weeknight treats or holiday gatherings.
- Prep Time: 15 minutes
- Cook Time: 35-40 minutes
- Total Time: 4 hours 50 minutes (including chilling)
- Yield: 16 servings 1x
- Category: Dessert
- Cuisine: American
Ingredients
- 1 ½ cups graham cracker crumbs (about 12 full sheets crushed)
- 6 tablespoons unsalted butter, melted
- 2 tablespoons granulated sugar
- ½ teaspoon ground nutmeg
- 16 ounces cream cheese (two 8-ounce blocks), softened
- ¾ cup granulated sugar
- 1 cup eggnog (full-fat recommended)
- 2 large eggs, room temperature
- 2 tablespoons all-purpose flour
- 1 teaspoon vanilla extract
- ½ teaspoon ground nutmeg
- ¼ teaspoon ground cinnamon
- ¼ teaspoon salt
- Additional ground nutmeg for sprinkling
Instructions
- Preheat your oven to 325°F (160°C). Line a 9×9-inch baking pan with parchment paper, leaving about 2 inches of overhang on two opposite sides. Lightly grease the parchment with cooking spray or butter.
- Make the crust: In a medium bowl, combine 1 ½ cups graham cracker crumbs, 2 tablespoons granulated sugar, and ½ teaspoon ground nutmeg. Pour in 6 tablespoons melted unsalted butter and stir with a fork until the mixture looks like wet sand and holds together when pressed. Press the mixture firmly into the bottom of your prepared pan. Bake for 8 minutes, then set aside to cool slightly.
- Beat the cream cheese: In a large mixing bowl, beat 16 ounces of softened cream cheese with an electric mixer on medium speed until smooth and creamy—about 2 minutes. Scrape down the sides and bottom of the bowl with a spatula.
- Add the sugar and vanilla: Add ¾ cup granulated sugar, 1 teaspoon vanilla extract, and ¼ teaspoon salt. Beat on medium speed until combined, about 1 minute. Don’t overmix.
- Mix in the eggs: Add the 2 room-temperature eggs, one at a time, beating on low speed after each addition just until the yolk disappears.
- Add the eggnog and dry ingredients: With the mixer on low, slowly pour in 1 cup of eggnog. Then add 2 tablespoons all-purpose flour, ½ teaspoon ground nutmeg, and ¼ teaspoon ground cinnamon. Mix until just combined—a few streaks are okay. Scrape the bowl one more time.
- Pour the filling over the crust: Gently pour the cheesecake batter over the pre-baked crust. Use your spatula to spread it evenly. Tap the pan on the counter a few times to release any air bubbles. Sprinkle the top with a generous dusting of ground nutmeg—about ½ teaspoon.
- Bake: Place the pan in the preheated oven and bake for 35-40 minutes. The edges should look set and slightly puffed, but the center should still jiggle slightly when you gently shake the pan.
- Cool completely: Place the pan on a cooling rack and let it cool to room temperature—about 1 hour.
- Chill: Once cooled, cover the pan with plastic wrap or foil and refrigerate for at least 4 hours, but overnight is best.
- Slice and serve: Use the parchment overhang to lift the entire block of cheesecake out of the pan. Place it on a cutting board and use a sharp knife to cut into 9 or 16 bars. For clean slices, wipe the knife with a damp paper towel between cuts. Sprinkle with a little extra nutmeg right before serving.
Notes
Room temperature ingredients are key for a smooth texture. Don’t overmix the batter to avoid cracks. The jiggle test is more reliable than time—center should jiggle like Jell-O when done. Chill overnight for best texture. Use a wet knife for clean slices.
Nutrition
- Serving Size: 1 bar
- Calories: 300
- Sugar: 20
- Sodium: 250
- Fat: 20
- Saturated Fat: 12
- Carbohydrates: 28
- Fiber: 1
- Protein: 6
Keywords: eggnog cheesecake bars, holiday dessert, easy cheesecake, nutmeg, graham cracker crust, quick dessert


