There used to be a tiny wine bar tucked behind a vintage shop in my neighborhood that made this incredible charcuterie board. When they closed suddenly last spring — the owner moved back to Portugal — I literally stood outside the locked door reading the handwritten sign three times. After six attempts — some embarrassingly messy, a few that looked like a toddler arranged the meat — I finally got it. The secret wasn’t fancy ingredients or some imported cheese I couldn’t pronounce. It was the shape, honestly. The way everything curled and folded into this gorgeous wreath that made people stop mid-conversation and just stare. I mean, who knew a circle of prosciutto could cause that kind of reaction?
So when my friends texted me about doing Friendsgiving this year — “Potluck style, bring whatever, no pressure” — I knew exactly what I was showing up with. Not the sad veggie platter from the grocery store. Not another store-bought pie. This wreath. The one that made that little wine bar unforgettable. The one that took me six tries and one very stressed-out Saturday afternoon to perfect.
Here’s the thing about Friendsgiving — it’s supposed to be fun, not stressful. You’re gathering the people who’ve seen you cry over bad dates and helped you move apartments at 2 AM. They deserve something special, but you also deserve to show up without spending four hours in the kitchen. This quick Friendsgiving charcuterie wreath comes together in about 20 minutes flat, uses ingredients you can grab at any grocery store, and honestly looks like you spent way more effort than you actually did. And maybe you’ve been there — standing in the cheese aisle, phone in hand, wondering if anyone will notice if you just bring chips. I promise, this is better. And easier.
Why You’ll Love This Recipe
Let me tell you why this wreath has become my go-to for every gathering, and why it’ll probably become yours too. I’ve tested this through three Friendsgivings, two birthday parties, and one very chaotic New Year’s Eve — and it’s never let me down.
- Quick & Easy : Comes together in under 20 minutes, perfect for busy weeknights or last-minute holiday prep. No cooking required, no complicated techniques. Just assemble and go.
- Simple Ingredients : No fancy grocery trips needed. You likely already have most of these in your kitchen, or can grab everything in one quick stop. The ingredients are flexible too — swap what you have on hand.
- Perfect for Friendsgiving : Great for potlucks, casual gatherings, or as a stunning centerpiece that doubles as appetizer and decoration. It sets the holiday mood without the holiday stress.
- Crowd-Pleaser : Always gets rave reviews from everyone. I’ve watched people who “don’t like cheese” go back for thirds. The wreath shape makes it easy to grab and go, so nobody’s hovering awkwardly.
- Unbelievably Delicious : The combination of salty meats, creamy cheeses, tangy olives, and sweet dried fruit is next-level comfort food. Every bite hits a different note, and that’s what makes it so addictive.
What makes this recipe different from the rest? It’s the folding technique. Most charcuterie boards just pile things on a platter and call it done. But this wreath uses a simple folding method that creates texture and visual interest without any special skills. You don’t need to be a chef or a food stylist. You just need to know how to fold a slice of salami in half. That’s it.
This recipe isn’t just good — it’s the kind that makes people close their eyes after the first bite. It’s comfort food reimagined — faster, simpler, but with the same soul-soothing satisfaction. Perfect for impressing your friends without stressing yourself out, or turning a simple potluck contribution into something memorable.
What Ingredients You Will Need
This recipe uses simple, accessible ingredients to deliver bold flavor and satisfying texture without the fuss. Most of these are pantry staples or easy to find at any grocery store. Here’s what you need:
- For the meats:
- 8 ounces prosciutto, thinly sliced (look for the good stuff — I prefer Boar’s Head or Applegate for consistent quality)
- 8 ounces salami, thinly sliced (Genoa salami works great, but any hard salami will do)
- 6 ounces pepperoni, thinly sliced (adds a nice spicy kick)
- For the cheeses:
- 8 ounces sharp cheddar, cut into 1-inch cubes (aged cheddar adds more flavor)
- 8 ounces gouda, cut into 1-inch cubes (smoked gouda is amazing here)
- 4 ounces brie, cut into wedges (keep the rind on — it adds texture)
- 4 ounces goat cheese, crumbled (adds creamy tanginess)
- For the fruits and vegetables:
- 1 cup red grapes, washed and dried (seedless — nobody wants to spit seeds at a party)
- 1 cup green grapes, washed and dried (for color contrast)
- 1/2 cup dried apricots (adds sweetness and chewy texture)
- 1/2 cup dried cranberries (for that festive pop of red)
- For the garnishes:
- 1/2 cup mixed olives (kalamata and green are my favorites)
- 1/4 cup fresh rosemary sprigs (for the wreath look — and it smells amazing)
- 1/4 cup fresh thyme sprigs (adds earthy aroma)
- 1 tablespoon honey (for drizzling over the brie — trust me on this)
- For serving:
- Crackers or sliced baguette (enough for the crowd — I usually do 2 boxes of crackers)
- Small bowls for olives and honey (keeps things tidy)
You can absolutely mix and match based on what you have or what’s on sale. The beauty of this wreath is its flexibility. If you can’t find prosciutto, use more salami. If you hate goat cheese, swap in more cheddar. I’ve made versions with manchego, aged provolone, even leftover holiday ham. It always works.
A quick note on ingredient selection: look for firm, small-curd cheeses for best texture when cubing. For the meats, ask your deli counter to slice them thin — it makes folding much easier. And for the grapes, get the freshest ones you can find. Nobody likes sad, wrinkled grapes on a beautiful wreath.
Equipment Needed
You don’t need much for this recipe, which is part of the beauty. Here’s what you’ll need:
- Large round platter or cutting board — I use a 16-inch wooden cutting board, but any large round surface works. A pizza pan, a large dinner plate, even a clean baking sheet in a pinch. The round shape is important for the wreath effect.
- Small bowls — For holding olives, honey, and any loose ingredients. I use 3 small ramekins. Keeps things from rolling off the board.
- Cheese knife — For cutting the brie and any other soft cheeses. A regular knife works too, but a cheese knife makes cleaner cuts.
- Cutting board — Small one for cubing the cheese. Don’t use your nice platter for this — you’ll scratch it.
- Tongs — Optional, but helpful for arranging the meats without touching them too much. Your hands work fine too, just wash them first.
- Paper towels — For drying the grapes and herbs. Wet ingredients make the board soggy.
Budget-friendly tip: you don’t need a fancy charcuterie board. I used a $10 bamboo cutting board from Target for years. It worked perfectly. And if you don’t have small bowls, use ramekins or even small coffee cups. Nobody judges at Friendsgiving.
Preparation Method
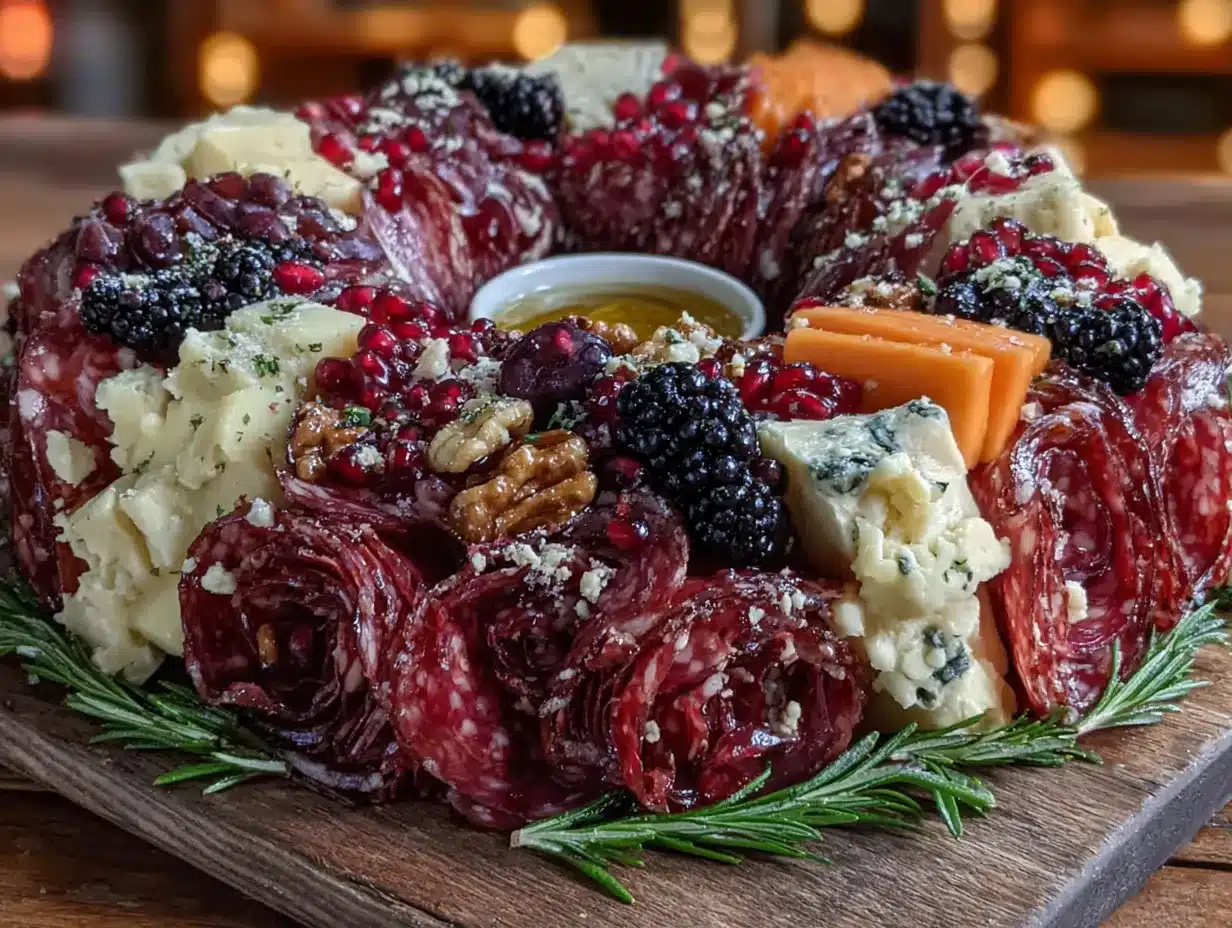
Let me walk you through this step by step. I’ve made this wreath so many times I could do it in my sleep, but I’ll break it down so you don’t make the same mistakes I did.
- Start with your platter. Place your large round board or platter on your work surface. Make sure it’s clean and dry. This is important — a wet board will make your ingredients slide around.
- Create the wreath base with fresh herbs. Arrange the rosemary and thyme sprigs in a circular pattern around the edge of the board. Think of it as drawing a green circle about 2 inches from the edge. This creates a fragrant base that also keeps your ingredients from sliding off. Don’t worry about perfection — overlapping is fine.
- Fold your meats. This is the trickiest part, but I promise it’s easy. Take a slice of prosciutto and fold it in half lengthwise, then fold it in half again. You’ll get a small, neat rectangle. Place it on the herb circle, slightly overlapping the edge. Repeat with all the prosciutto slices, placing them around the circle. Then do the same with the salami and pepperoni. Alternate the meats as you go — prosciutto, then salami, then pepperoni. This creates visual texture. The key is to place them close together so there are no gaps. Think of it like shingles on a roof — overlapping creates that lush, full look.
- Add the cheese cubes. Take your cubed cheddar and gouda and scatter them evenly around the wreath. Tuck them between the meat folds, not on top. You want them peeking out. Don’t pile them — spread them out so there’s cheese in every bite. I usually do about 2-3 cubes per section.
- Place the brie wedges. Arrange the brie wedges around the wreath, spacing them evenly. I like to put them at the “cardinal points” — north, south, east, west. This creates natural serving sections. Drizzle a little honey over each wedge. This is non-negotiable, honestly. The sweet honey with the creamy brie is what makes people close their eyes.
- Scatter the crumbled goat cheese. Sprinkle the goat cheese crumbles over the wreath. Don’t overdo it — you want little pops of white throughout. Think of it as adding snow to a winter scene.
- Add the grapes. Tuck the red and green grapes into the wreath, spacing them out. I cluster them in groups of 3-4 grapes together. This creates visual interest and makes them easy to grab. Place them near the edges so they’re accessible.
- Add the dried fruit. Scatter the dried apricots and cranberries around the wreath. The apricots add a beautiful orange pop, and the cranberries add that festive red. Tuck them in between the meats and cheeses.
- Place the olives in small bowls. Put the mixed olives in your small bowls and place them in the center of the wreath. The center should be empty — that’s where the bowls go. This creates a natural focal point and keeps the olives from rolling everywhere.
- Fill in any gaps. Step back and look at your wreath. Any bare spots? Add more grapes, more cheese, or tuck in another fold of meat. The goal is a lush, full circle with no empty spaces. This is where you can get creative — add some nuts if you have them, or extra dried fruit.
- Add the crackers or baguette slices. Arrange the crackers or baguette slices around the outside edge of the wreath, like rays of the sun. This makes them easy to grab and creates a beautiful frame. Don’t put them on top of the wreath — keep them on the outside.
- Final touch. Drizzle a little more honey over the entire wreath if you’re feeling fancy. Not too much — just a light drizzle. It adds shine and a hint of sweetness that ties everything together.
A quick note on timing: you can assemble this up to 2 hours before serving. Just cover it loosely with plastic wrap and keep it in the fridge. Take it out 30 minutes before serving to let the cheeses come to room temperature. That’s when they taste best.
Cooking Tips & Techniques
After making this wreath more times than I care to count, I’ve learned a few things the hard way. Here are my best tips:
The folding technique matters. I learned this after my first attempt looked like a pile of sad, flat meat. The key is to fold each slice in half lengthwise first, then fold it in half again. This creates a small, sturdy piece that stands up on the board. If you just lay the slices flat, they’ll look limp and unappetizing. Trust me on this — I’ve made both versions.
Don’t overcrowd the center. The center of the wreath should be empty — that’s where your dipping bowls go. I made the mistake of piling everything into the middle once, and it looked like a chaotic mess. The wreath shape works because it’s organized. Keep the center clear.
Use room temperature cheese. Cold cheese doesn’t have as much flavor. Take your cheeses out of the fridge about 30 minutes before you start assembling. They’ll be easier to cut and taste so much better. I learned this from a cheesemonger at my local grocery store, and it was a game-changer.
Balance your flavors. You want a mix of salty, sweet, creamy, and tangy. If all your meats are salty and all your cheeses are sharp, it’ll be overwhelming. That’s why I include the honey-drizzled brie and the sweet grapes — they balance everything out. Think of it as a flavor journey, not a flavor assault.
Prep everything before you start. Cube your cheese, wash your grapes, fold your meats — do all the prep work before you start arranging. Once you start building the wreath, you don’t want to stop and wash grapes. I learned this the hard way when I had wet hands and tried to fold prosciutto. It was a disaster.
Don’t be afraid to adjust. If something doesn’t look right, move it. The beauty of a charcuterie board is that it’s meant to be organic. Nothing is permanent. I’ve rearranged entire sections because I didn’t like the color balance. It’s your wreath — make it yours.
Variations & Adaptations
One of the best things about this wreath is how adaptable it is. Here are some variations I’ve tried and loved:
Vegetarian version: Skip the meats entirely and double up on the cheeses. Add more fruits and vegetables — sliced bell peppers, cherry tomatoes, cucumber rounds, and roasted red peppers all work beautifully. I made this for a vegetarian friend last year, and she said it was the best charcuterie board she’d ever had. The key is to add more texture — nuts, seeds, and crunchy vegetables fill the gap left by the meats.
Gluten-free version: Use gluten-free crackers or skip the crackers entirely and use sliced vegetables like cucumber rounds or bell pepper strips for dipping. Most cheeses and meats are naturally gluten-free, so this is an easy adaptation. Just check your labels on any pre-marinated items.
Sweet version: For a dessert-style wreath, swap the meats for more fruits and add chocolate. Use dark chocolate chunks, white chocolate chips, and fresh berries. Drizzle with melted chocolate instead of honey. I made this for a holiday party once, and it was gone in 20 minutes. The combination of sweet and salty from the cheese is incredible.
Spicy version: Add jalapeño cheddar, spicy salami, and pepper jack cheese. Include pickled jalapeños and a spicy honey drizzle. This is my personal favorite for game day gatherings. The heat cuts through the richness of the cheese perfectly.
Seasonal version: In the fall, add sliced apples, pears, and figs. In the spring, add fresh strawberries and edible flowers. In the summer, add fresh peaches and basil. The wreath adapts to whatever’s in season, which keeps it interesting all year round.
Dairy-free version: Use dairy-free cheeses (there are some great options now) or skip the cheese entirely and focus on meats, fruits, and vegetables. Add hummus or a dairy-free dip in the center bowl. I’ve tested this with a friend who’s lactose intolerant, and it worked beautifully.
Serving & Storage Suggestions
This wreath is best served at room temperature, so take it out of the fridge about 30 minutes before your guests arrive. The flavors are much more pronounced when the cheese isn’t ice-cold. I usually assemble it, cover it loosely with plastic wrap, and let it sit on the counter while I finish other prep work.
For presentation, place the wreath in the center of your table. It doubles as both appetizer and decoration. I like to add a few extra rosemary sprigs around the edge for that festive look. Candles nearby add a nice touch too — just keep them away from the food.
As for what to serve alongside, this wreath pairs beautifully with:
- A crisp white wine like Sauvignon Blanc or Pinot Grigio
- A light red like Pinot Noir or Beaujolais
- Sparkling water with lemon for non-drinkers
- A simple salad with vinaigrette to balance the richness
- Roasted nuts or spiced almonds on the side
Storage: If you have leftovers (honestly, that’s rare), store the components separately. The meats and cheeses can be wrapped and refrigerated for up to 3 days. The grapes and dried fruit can be stored in airtight containers. Don’t try to save the assembled wreath — the herbs will wilt and the crackers will get soggy. Just take it apart and enjoy the leftovers in lunches or snacks.
Reheating: You don’t need to reheat anything, but if you want the brie to be extra gooey, pop it in the microwave for 15 seconds. I’ve done this, and it’s delicious. Just don’t overdo it — melted brie is amazing, but liquid brie is a mess.
Nutritional Information & Benefits
While this wreath is definitely a treat, it does offer some nutritional benefits. Here’s a rough estimate per serving (based on 10 servings):
- Calories: approximately 350-400 per serving
- Protein: 15-20 grams (from the meats and cheeses)
- Fat: 25-30 grams (mostly healthy fats from cheese and olive oil)
- Carbohydrates: 15-20 grams (from the fruit and crackers)
- Fiber: 2-3 grams (from the grapes and dried fruit)
Health benefits: The cheeses provide calcium and protein, which are great for bone health and muscle repair. The grapes are packed with antioxidants and vitamin C. The dried fruit offers fiber and natural sweetness without refined sugar. And the olive oil in the olives provides heart-healthy monounsaturated fats. It’s not a health food, but it’s certainly not the worst thing you could eat at a party.
Dietary considerations: This recipe contains dairy and gluten (from the crackers). It’s naturally low-carb if you skip the crackers. For a keto-friendly version, focus on the meats and cheeses and skip the fruit. For a lower-sodium option, choose low-sodium meats and cheeses.
My personal perspective? Life is about balance. This wreath is for celebrations and gatherings — it’s not an everyday meal. Enjoy it, savor it, and don’t stress about the numbers. Your friends and family will thank you.
FAQs
Can I make this wreath ahead of time?
Yes, you can assemble it up to 2 hours before serving. Just cover it loosely with plastic wrap and refrigerate. Take it out 30 minutes before serving to let the cheeses come to room temperature. Any longer than 2 hours, and the crackers might get soft.
What if I can’t find prosciutto?
No problem! You can substitute with more salami, capicola, or even thinly sliced ham. The wreath is very forgiving. I’ve made it with all salami before, and it was still delicious. Just make sure whatever you use is thinly sliced so it folds easily.
How do I keep the wreath from falling apart?
The key is to start with a solid herb base and overlap your ingredients. Think of it like building a puzzle — each piece supports the next. If you’re worried, you can use a little cream cheese or goat cheese as “glue” to hold things in place. I’ve done this, and it works perfectly.
Can I use frozen grapes?
I wouldn’t recommend it. Frozen grapes release water as they thaw, which will make your wreath soggy. Stick with fresh grapes for the best texture and appearance. If you want a cold element, you can freeze the cheese cubes for 10 minutes before assembling — that works great.
What’s the best way to transport this wreath?
Assemble it on a sturdy board or platter, then cover it tightly with plastic wrap. Place it in a large, flat container or on the floor of your car (not the seat — it’ll slide). I’ve transported this to multiple Friendsgivings without any issues. Just drive carefully and avoid sharp turns!
Conclusion
This quick Friendsgiving charcuterie wreath has become my signature dish, and I’m honestly a little proud of that. It’s the recipe that started with a closed wine bar and a moment of culinary obsession, and ended with a dish that brings people together. Every time I make it, I think about that little shop and the owner who moved back to Portugal. I hope she’s making her own wreaths over there.
What I love most about this recipe is how it makes people feel. When you set this wreath down on the table, people stop. They take pictures. They ask where you bought it. And when you say you made it yourself in 20 minutes, they look at you like you’re some kind of kitchen wizard. That feeling never gets old.
So go ahead — give it a try. Customize it with your favorite ingredients, make it your own, and bring it to your next Friendsgiving. Your friends will thank you. And honestly? You’ll thank yourself for not spending hours in the kitchen. I’d love to hear how it turns out — drop a comment below and tell me about your version. What cheeses did you use? What fruits? Did anyone ask for the recipe? Share your story, and let’s keep this tradition going.
Happy Friendsgiving, friends. You’ve got this.
Pin This Recipe!
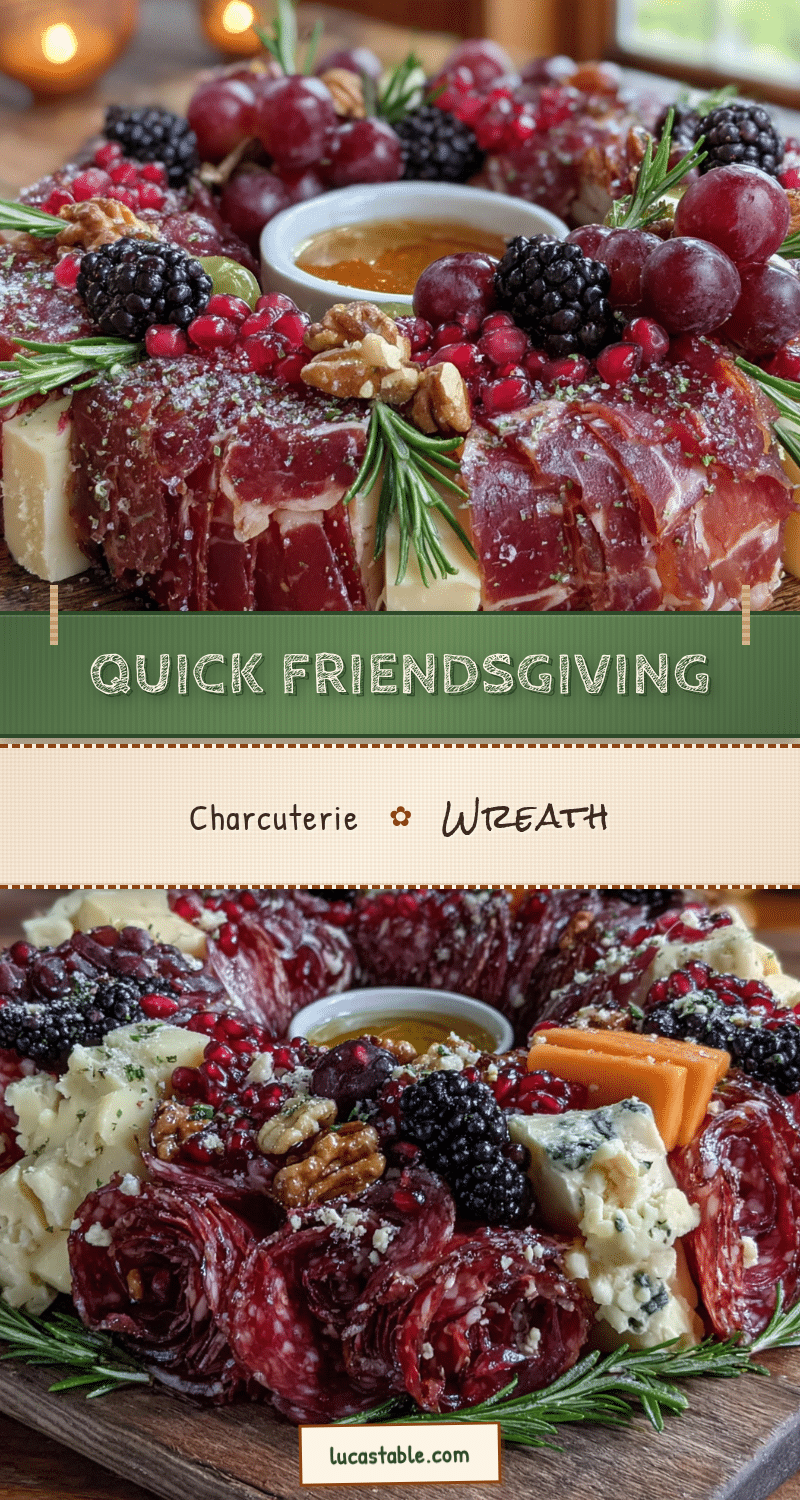
Quick Friendsgiving Charcuterie Wreath: Easy Holiday Appetizer

A stunning 20-minute charcuterie wreath that looks like you spent hours but comes together effortlessly. Perfect for Friendsgiving, potlucks, or any holiday gathering, this wreath features a beautiful arrangement of cured meats, cheeses, fruits, and herbs that doubles as both appetizer and centerpiece.
- Prep Time: 20 minutes
- Cook Time: 0 minutes
- Total Time: 20 minutes
- Yield: 10 servings 1x
- Category: Appetizer
- Cuisine: American
Ingredients
- 8 ounces prosciutto, thinly sliced
- 8 ounces salami, thinly sliced
- 6 ounces pepperoni, thinly sliced
- 8 ounces sharp cheddar, cut into 1-inch cubes
- 8 ounces gouda, cut into 1-inch cubes
- 4 ounces brie, cut into wedges
- 4 ounces goat cheese, crumbled
- 1 cup red grapes, washed and dried
- 1 cup green grapes, washed and dried
- 1/2 cup dried apricots
- 1/2 cup dried cranberries
- 1/2 cup mixed olives (kalamata and green)
- 1/4 cup fresh rosemary sprigs
- 1/4 cup fresh thyme sprigs
- 1 tablespoon honey
- Crackers or sliced baguette for serving
Instructions
- Place your large round board or platter on a clean, dry work surface.
- Arrange rosemary and thyme sprigs in a circular pattern around the edge of the board, about 2 inches from the edge, to create a fragrant base.
- Fold each slice of prosciutto in half lengthwise, then in half again to create small rectangles. Place them on the herb circle, slightly overlapping the edge. Repeat with salami and pepperoni, alternating meats as you go around the circle, placing them close together like shingles on a roof.
- Scatter cubed cheddar and gouda evenly around the wreath, tucking them between the meat folds so they peek out.
- Arrange brie wedges evenly around the wreath at cardinal points (north, south, east, west). Drizzle a little honey over each wedge.
- Sprinkle crumbled goat cheese over the wreath in small amounts for pops of white throughout.
- Tuck red and green grapes into the wreath in small clusters of 3-4 grapes, spacing them out near the edges.
- Scatter dried apricots and cranberries around the wreath, tucking them between meats and cheeses.
- Place mixed olives in small bowls and set them in the center of the wreath.
- Step back and fill any gaps with additional grapes, cheese, or meat folds until the wreath looks lush and full with no empty spaces.
- Arrange crackers or baguette slices around the outside edge of the wreath like rays of the sun.
- For a final touch, drizzle a little more honey over the entire wreath for shine and sweetness.
Notes
Can be assembled up to 2 hours before serving. Cover loosely with plastic wrap and refrigerate. Remove from fridge 30 minutes before serving to let cheeses come to room temperature for best flavor. The folding technique is key: fold each meat slice in half lengthwise, then in half again for sturdy pieces that stand up. Keep the center of the wreath empty for dipping bowls. Use room temperature cheese for easier cutting and better flavor. Prep all ingredients before starting assembly.
Nutrition
- Serving Size: 1 serving (approxima
- Calories: 375
- Sugar: 12
- Sodium: 820
- Fat: 28
- Saturated Fat: 14
- Carbohydrates: 18
- Fiber: 2
- Protein: 18
Keywords: charcuterie wreath, Friendsgiving appetizer, holiday appetizer, easy charcuterie board, no-cook appetizer, party platter, cheese board, meat and cheese wreath


