The company potluck was in twelve hours and I’d completely forgotten. I mean, I’d known about it for weeks, but somewhere between the Tuesday night soccer practice and the Thursday deadline at work, it had slipped my mind completely. At 9 PM, I was staring into my pantry like it held the answers to the universe. Everyone else would be bringing elaborate casseroles and those fancy charcuterie boards that look like they belong in a magazine. I had a can of pumpkin puree, some butter, and a bag of flour. Honestly, I almost just grabbed a store-bought pie on the way in. But then I remembered my grandmother’s voice saying, “Real pie is never as hard as you think, honey.” So, with a deep breath and a prayer to the baking gods, I decided to make a Quick Homemade Pumpkin Pie with Flaky Crust from scratch.
Let me tell you, the pressure was real. I was rolling out dough at 10 PM, my dog watching me from the kitchen rug, probably wondering why I was covered in flour and muttering to myself. I dropped the rolling pin once. I got butter on my sleeve. It was not a pretty process. But that’s the thing about this recipe—it doesn’t need to be pretty to work. I threw it together, blind-baked the crust while I mixed the filling, and slid it into the oven just before midnight. The next day, I walked into that potluck feeling like a fraud next to the three-tiered chocolate cake someone had brought. But you know what happened? That pie was the first thing to disappear. People were asking for the recipe before they even finished their slice. I stood there, a little sheepish, explaining that it took me less than an hour of active time. That’s the secret weapon of this pie—it looks like you spent all day in the kitchen, but really, you just outsmarted the clock.
Maybe you’ve been there, scrambling for a dessert that feels special but doesn’t require a culinary degree. This is that recipe. It’s the one I keep coming back to, not just because it’s fast, but because the flaky crust and the silky, spiced filling are genuinely perfect together. It’s the kind of pie that makes you close your eyes after the first bite, even if you’re eating it standing up in a crowded break room.
Why You’ll Love This Quick Homemade Pumpkin Pie with Flaky Crust
This isn’t just another pumpkin pie recipe. It’s the one that solves your weeknight dessert problem once and for all. I’ve tested this version more times than I can count, tweaking the butter temperature and the spice blend until it was just right. Here’s why it works for real people with real schedules:
- Quick & Easy: From pantry to oven in under 30 minutes of active work. No complicated steps or fancy equipment needed. The filling comes together in one bowl while the crust chills.
- Simple Ingredients: You probably have 90% of these in your kitchen right now. No need for a special trip to a gourmet store—just butter, flour, pumpkin, and basic spices.
- Perfect for Last-Minute Gatherings: Whether it’s a surprise Thanksgiving invite, a fall potluck, or just a Tuesday night craving, this pie has your back. It’s my go-to for those “I need dessert now” moments.
- Crowd-Pleaser: I’ve served this to kids, in-laws, and my pickiest foodie friends. The texture is creamy without being heavy, and the crust is flaky enough to win over even the store-bought crust loyalists.
- Unbelievably Delicious: The secret is in the technique—using ice-cold butter for the crust and a touch of maple syrup in the filling. It creates a depth of flavor that tastes like you fussed, even when you didn’t.
What makes this different from every other pumpkin pie recipe out there? It’s the balance. The crust is forgiving enough for a beginner but flaky enough for a pro. The filling is spiced just right—not too sweet, not too heavy. It’s comfort food that respects your time.
What Ingredients You Will Need
This recipe uses simple, honest ingredients to deliver that classic pumpkin pie flavor without any fuss. Most of these are pantry staples, which makes this the perfect “I have nothing for dessert” solution.
For the Flaky Crust
- All-purpose flour, 1 ¼ cups (150g) – I use Gold Medal for consistent results, but any brand works. Spoon and level it for accuracy.
- Unsalted butter, ½ cup (113g), very cold and cut into small cubes – This is non-negotiable for flakiness. Pop it in the freezer for 10 minutes before you start.
- Ice water, 4-6 tablespoons (60-90ml) – Start with 4 and add more only if needed. The dough should just hold together.
- Salt, ½ teaspoon – Balances the sweetness of the filling.
- Sugar, 1 teaspoon – Just a touch to help the crust brown.
For the Pumpkin Filling
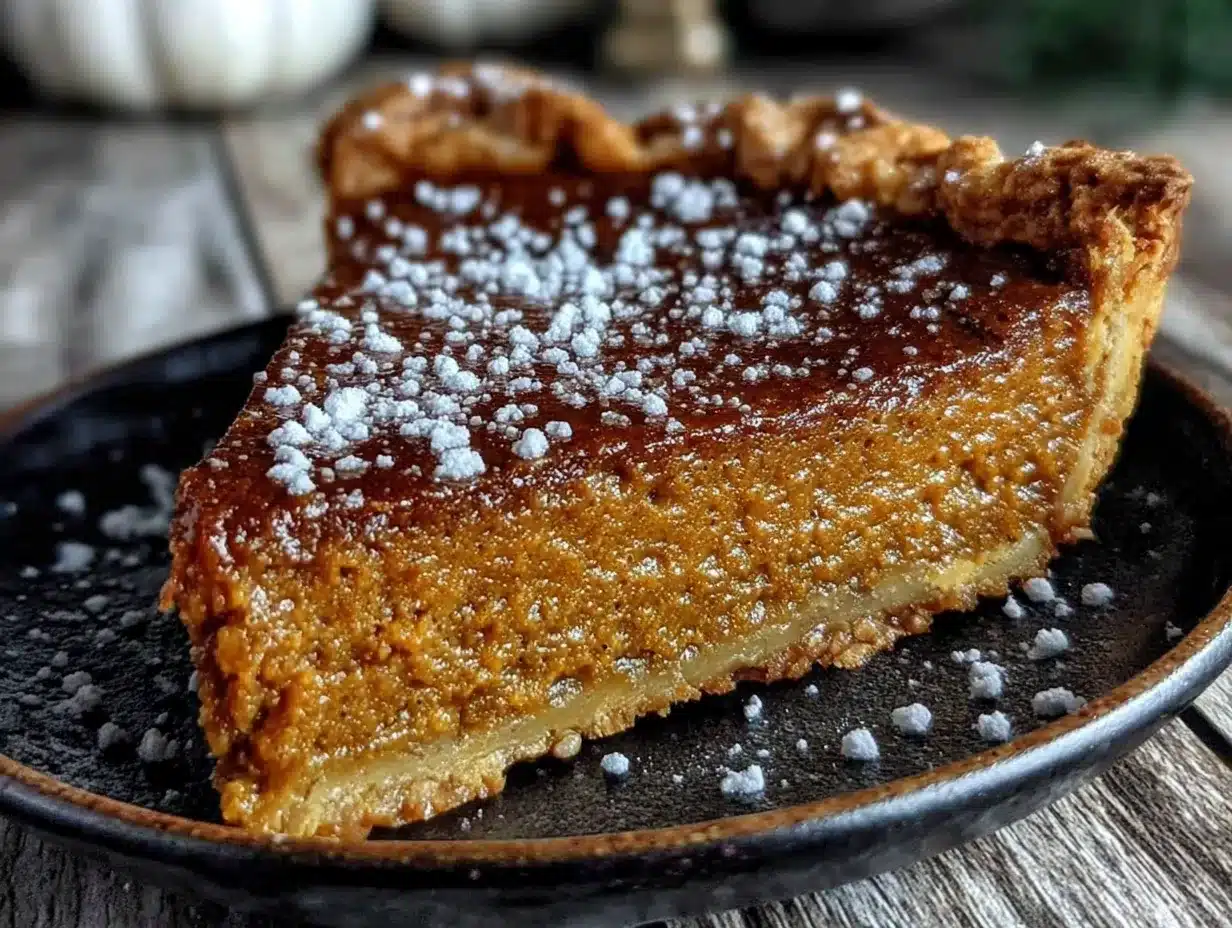
- Pumpkin puree, 1 can (15 oz or 425g) – Make sure it’s 100% pumpkin puree, not pumpkin pie filling. Libby’s is my trusted brand for consistent texture.
- Sweetened condensed milk, 1 can (14 oz or 397g) – This is the shortcut that makes the filling silky without extra steps. No need to heat or temper anything.
- Large eggs, 2, at room temperature – Cold eggs can seize the mixture. Let them sit on the counter for 15 minutes.
- Vanilla extract, 1 teaspoon – Pure vanilla adds warmth. Imitation works in a pinch.
- Ground cinnamon, 1 ½ teaspoons – The backbone of the spice blend.
- Ground ginger, ½ teaspoon – Adds a little zing.
- Ground nutmeg, ¼ teaspoon – Freshly grated is amazing, but pre-ground is fine.
- Ground cloves, ⅛ teaspoon – A tiny pinch goes a long way. Don’t skip it.
- Salt, ¼ teaspoon – Enhances all the other flavors.
Pro tip: For a deeper flavor, swap 2 tablespoons of the sweetened condensed milk for maple syrup. It adds a subtle complexity that makes people ask, “What’s your secret?”
Equipment Needed
You don’t need a professional bakery setup for this. Here’s what I use every time:
- 9-inch pie dish – Glass or ceramic works best for even baking. I prefer a deep-dish glass one so I can see the crust browning.
- Mixing bowls – One large for the filling, one medium for the crust.
- Pastry cutter or two forks – For cutting butter into flour. You can also use your fingertips, just work quickly so the butter stays cold.
- Rolling pin – A standard one is fine. If you don’t have one, a clean wine bottle works in a pinch (I’ve done it).
- Plastic wrap – For chilling the dough.
- Pie weights or dried beans – For blind baking the crust. I keep a bag of cheap dried beans just for this purpose.
- Whisk – For smoothing out the filling.
- Measuring cups and spoons – Accuracy matters in baking, even for a quick recipe.
I’ve made this pie with a $10 thrift store pie plate and a mismatched set of measuring cups. The results were still fantastic. Don’t let missing equipment stop you.
Preparation Method
Let’s get baking. I’ll walk you through this step by step, including the little things I’ve learned from making this pie more times than I can count.
Step 1: Make the Crust
In a medium bowl, whisk together the flour, salt, and sugar. Add the cold butter cubes. Using a pastry cutter or two forks, cut the butter into the flour until it looks like coarse meal with some pea-sized butter pieces remaining. This takes about 2 minutes. The lumps of butter are what create those flaky layers, so don’t overwork it. Drizzle 4 tablespoons of ice water over the mixture and stir with a fork until the dough just comes together. It should look shaggy, not smooth. If it’s too dry, add another tablespoon of water. Gather the dough into a ball, flatten it into a disk, wrap it in plastic wrap, and refrigerate for at least 30 minutes. Don’t skip the chill time—it relaxes the gluten and keeps the butter solid, which is the whole secret to flakiness.
Step 2: Roll Out the Dough
Lightly flour your work surface and rolling pin. Unwrap the chilled dough and place it in the center. Roll from the center outward, turning the dough a quarter turn after each roll to maintain a round shape. Aim for a 12-inch circle, about ⅛-inch thick. If the edges crack, just pinch them back together—it’s rustic, and that’s fine. Carefully transfer the dough to your pie dish by rolling it loosely around the rolling pin, then unrolling it over the dish. Gently press it into the bottom and sides, trimming the overhang to about ½ inch. Fold the edges under and crimp with your fingers or a fork. Prick the bottom of the crust all over with a fork (this prevents air bubbles). Pop it back in the fridge for 15 minutes while you preheat the oven to 375°F (190°C).
Step 3: Blind Bake the Crust
Line the chilled crust with a piece of parchment paper or foil, making sure it covers the edges. Fill it with pie weights or dried beans, spreading them evenly. Bake for 15 minutes. Then carefully remove the parchment and weights, and bake for another 5-7 minutes until the bottom looks dry and just lightly golden. Set aside to cool slightly while you make the filling. This step prevents a soggy bottom—trust me, it’s worth the extra 20 minutes.
Step 4: Make the Filling
In a large bowl, whisk the eggs until they’re broken up and slightly frothy. Add the pumpkin puree, sweetened condensed milk, vanilla extract, and all the spices—cinnamon, ginger, nutmeg, cloves, and salt. Whisk until everything is completely smooth and uniform. The mixture should be thick but pourable, like a thick milkshake. Give it a taste (yes, it’s safe with the eggs—just a tiny lick on a spoon). Adjust spices if you like it bolder. I sometimes add an extra pinch of cinnamon here.
Step 5: Assemble and Bake
Pour the filling into the warm pre-baked crust. It will fill it right to the top—that’s perfect. Place the pie on the middle rack of the oven. Bake at 375°F (190°C) for 45-55 minutes. The edges of the filling should be set, and the center should jiggle slightly when you gently shake the pan. Don’t overbake it—the center will continue to set as it cools. If the crust edges are browning too quickly, loosely cover them with a strip of foil or a pie shield ring after about 30 minutes.
Step 6: Cool and Serve
Transfer the pie to a wire rack and let it cool completely at room temperature—this takes about 2 hours. The filling will firm up as it cools. For the cleanest slices, refrigerate the pie for another 2 hours before serving. Serve with a dollop of whipped cream or a scoop of vanilla ice cream. The contrast of the cold, creamy topping against the spiced pie is pure magic.
Cooking Tips & Techniques
I’ve made plenty of mistakes with this pie so you don’t have to. Here’s what I’ve learned the hard way:
- Keep everything cold for the crust. The first time I made this, I used room-temperature butter because I was in a hurry. The crust turned out tough and greasy. Cold butter is the only way to get those flaky layers. If your kitchen is warm, chill your bowl and flour too.
- Don’t overmix the filling. Whisk until just combined. Over-whisking incorporates too much air, which can cause cracks on the surface of your baked pie. A few tiny bubbles are fine.
- Watch for the jiggle. The biggest mistake people make is overbaking pumpkin pie. The center should have a slight wobble when you take it out of the oven—like Jell-O that’s almost set. It will finish cooking from the residual heat.
- Use a pie shield for the edges. I lost a few crusts to burning before I started using a silicone pie shield. If you don’t have one, strips of foil work perfectly. Just check the crust at the 30-minute mark.
- Let it rest overnight. Honestly, this pie tastes even better the next day. The spices meld together and the texture becomes perfectly creamy. Make it a day ahead if you can.
Variations & Adaptations
This Quick Homemade Pumpkin Pie with Flaky Crust is a great base for experimentation. Here are some ways I’ve adapted it for different occasions:
- Gluten-Free Version: Swap the all-purpose flour for a 1:1 gluten-free baking flour blend. I’ve used Bob’s Red Mill with great success. Add ¼ teaspoon of xanthan gum if your blend doesn’t already include it. The crust will be a bit more delicate, so handle it gently.
- Dairy-Free Option: Use cold coconut oil or vegan butter in the crust instead of regular butter. For the filling, replace the sweetened condensed milk with a can of full-fat coconut milk sweetened with ⅓ cup of maple syrup. The texture is slightly less firm but still delicious.
- Spice It Up: Add ¼ teaspoon of ground cardamom or a pinch of cayenne pepper to the filling for a warm, unexpected kick. I tried this for a fall dinner party, and it was a hit with the adventurous eaters.
- Mini Pies: Use a muffin tin instead of a pie dish. Divide the crust dough into 12 portions, press them into greased muffin cups, blind bake for 10 minutes, then fill and bake for 20-25 minutes. Perfect for portion control or parties.
- Maple Pecan Twist: Sprinkle ½ cup of chopped pecans over the bottom of the crust before pouring in the filling. Drizzle 2 tablespoons of maple syrup over the top before baking. The pecans add a lovely crunch.
Serving & Storage Suggestions
This pie is best served slightly chilled or at room temperature. I prefer it straight from the fridge with a generous cloud of lightly sweetened whipped cream. For a fancy touch, dust the top with a little cinnamon or nutmeg before serving.
Complementary dishes: This pie pairs beautifully with a cup of strong black coffee or a spiced chai latte. For a full fall spread, serve it alongside roasted butternut squash soup as a starter or a apple cider braised pork main dish. The sweetness of the pie balances savory flavors perfectly.
Storage: Cover the pie loosely with plastic wrap or foil and store it in the refrigerator for up to 4 days. The crust will stay flaky for the first 2 days, then soften slightly—still delicious, just different. To freeze, wrap the fully cooled pie (without toppings) tightly in plastic wrap, then a layer of foil. Freeze for up to 3 months. Thaw overnight in the refrigerator before serving. The texture remains surprisingly good.
Reheating: If you prefer warm pie, reheat individual slices in the microwave for 15-20 seconds. For the whole pie, place it in a 300°F (150°C) oven for 10-15 minutes. Watch the crust—it can brown quickly.
Nutritional Information & Benefits
Here’s an approximate nutritional breakdown per slice (based on 8 servings):
| Nutrient | Amount per Slice |
|---|---|
| Calories | 320 |
| Total Fat | 14g |
| Saturated Fat | 8g |
| Cholesterol | 65mg |
| Sodium | 280mg |
| Total Carbohydrates | 45g |
| Dietary Fiber | 3g |
| Sugars | 28g |
| Protein | 6g |
| Vitamin A | 180% DV |
| Calcium | 15% DV |
| Iron | 8% DV |
Pumpkin is packed with Vitamin A, which supports eye health and immune function. The fiber from the pumpkin and the flour helps with digestion. While this is a treat, it’s one that offers a little nutritional value compared to other desserts. For a lower-sugar option, use a sugar substitute in the filling and skip the sweetened condensed milk—though the texture will be slightly different.
This recipe contains gluten, dairy, and eggs. It is not suitable for vegans or those with celiac disease without the substitutions listed above.
Conclusion
This Quick Homemade Pumpkin Pie with Flaky Crust has saved me more times than I can count. From last-minute potlucks to surprise dinner guests, it’s the recipe I turn to when I need something that looks and tastes like I spent hours in the kitchen—but really, I just worked smarter. The flaky crust, the creamy spiced filling, the way it fills your house with that cozy autumn smell—it’s everything a pumpkin pie should be, without the stress.
I love this recipe because it proves that you don’t need all day to make something from scratch. You just need a little confidence and a good game plan. So go ahead, give it a try. Make it your own—add extra cinnamon, swap in a different crust, serve it with ice cream instead of whipped cream. Whatever you do, I hope it becomes your go-to too.
I’d love to hear how it turns out for you. Drop a comment below and let me know—did you add any twists? Did it disappear as fast as mine always does? Share your photos and tag me, I live for that stuff. Happy baking, friends!
Frequently Asked Questions
Can I use a store-bought crust to save even more time?
Absolutely. If you’re really short on time, a good quality refrigerated pie crust works fine. Just blind bake it according to the package directions before adding the filling. The texture won’t be as flaky as homemade, but the filling will still be delicious.
Why did my pumpkin pie crack on top?
Cracks usually happen from overbaking or sudden temperature changes. Make sure you take the pie out while the center still has a slight jiggle. Also, let it cool gradually on a wire rack—don’t put it in the fridge while it’s still hot.
Can I make this pie ahead of time for Thanksgiving?
Yes! This pie is actually better when made a day ahead. Bake it, cool it completely, then refrigerate it uncovered for an hour before wrapping it loosely. The flavors meld beautifully overnight.
How do I know when the crust is fully blind baked?
The bottom of the crust should look dry and lightly golden, with no raw, doughy spots. If it still looks pale and soft, bake it for another 2-3 minutes. The edges should be a light golden brown.
Can I use fresh pumpkin instead of canned?
You can, but you’ll need to roast and puree the pumpkin first, then drain off any excess liquid. Canned pumpkin is more consistent in texture and moisture content, which is why I recommend it for this quick recipe. If using fresh, expect a slightly looser filling.
Pin This Recipe!
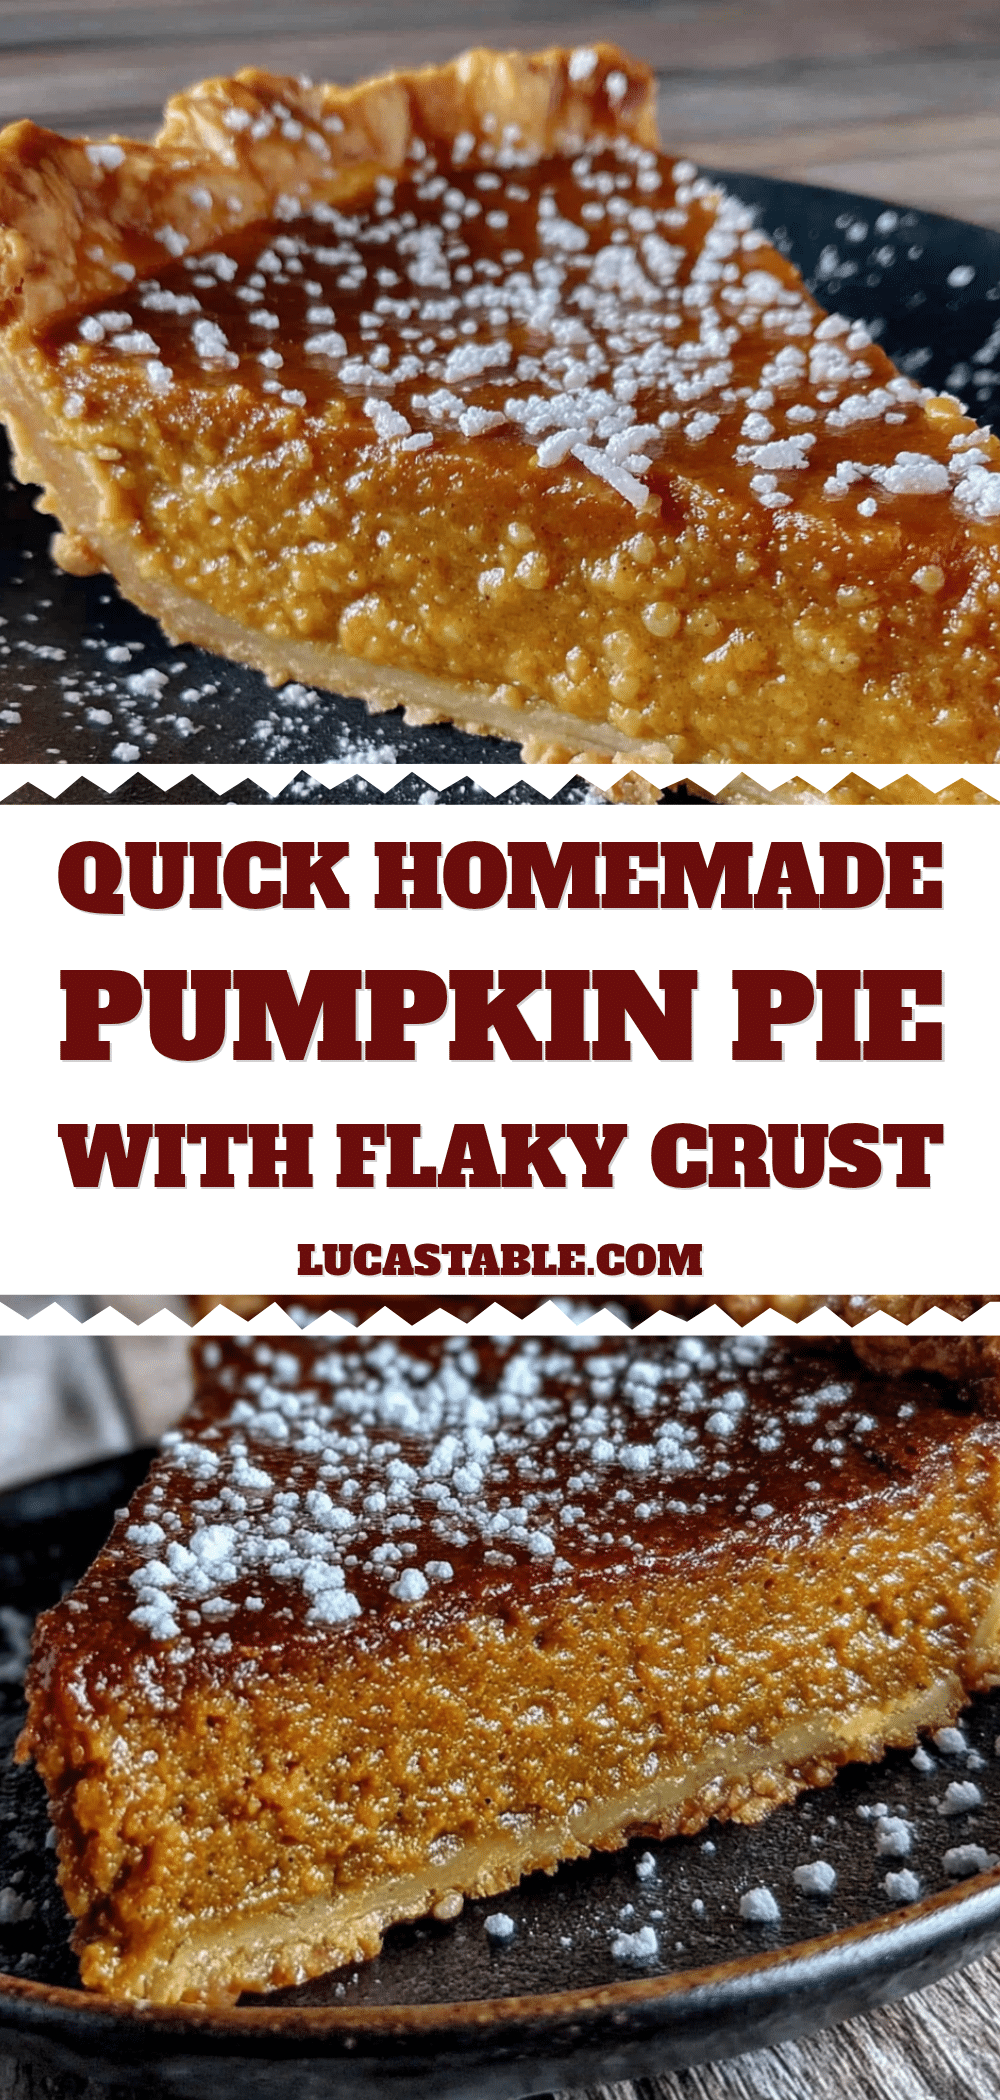
Quick Homemade Pumpkin Pie with Flaky Crust
A quick and easy pumpkin pie recipe with a flaky homemade crust and silky spiced filling, perfect for last-minute gatherings or weeknight desserts. Ready in under 30 minutes of active time, this crowd-pleaser tastes like you spent all day in the kitchen.
- Prep Time: 30 minutes
- Cook Time: 55 minutes
- Total Time: 2 hours 30 minutes (including cooling)
- Yield: 8 servings
- Category: Dessert
- Cuisine: American
Ingredients
- All-purpose flour, 1 ¼ cups (150g)
- Unsalted butter, ½ cup (113g), very cold and cut into small cubes
- Ice water, 4-6 tablespoons (60-90ml)
- Salt, ½ teaspoon (for crust)
- Sugar, 1 teaspoon (for crust)
- Pumpkin puree, 1 can (15 oz or 425g)
- Sweetened condensed milk, 1 can (14 oz or 397g)
- Large eggs, 2, at room temperature
- Vanilla extract, 1 teaspoon
- Ground cinnamon, 1 ½ teaspoons
- Ground ginger, ½ teaspoon
- Ground nutmeg, ¼ teaspoon
- Ground cloves, ⅛ teaspoon
- Salt, ¼ teaspoon (for filling)
Instructions
- Make the crust: In a medium bowl, whisk together flour, salt, and sugar. Add cold butter cubes. Using a pastry cutter or two forks, cut butter into flour until it resembles coarse meal with some pea-sized butter pieces. Drizzle 4 tablespoons ice water over mixture and stir with a fork until dough just comes together. If too dry, add another tablespoon water. Gather dough into a ball, flatten into a disk, wrap in plastic wrap, and refrigerate for at least 30 minutes.
- Roll out the dough: Lightly flour work surface and rolling pin. Roll chilled dough from center outward, turning a quarter turn after each roll, to a 12-inch circle about ⅛-inch thick. Transfer to 9-inch pie dish, press into bottom and sides, trim overhang to ½ inch, fold edges under and crimp. Prick bottom with fork. Refrigerate 15 minutes while preheating oven to 375°F (190°C).
- Blind bake the crust: Line chilled crust with parchment paper or foil, fill with pie weights or dried beans. Bake 15 minutes. Remove parchment and weights, bake another 5-7 minutes until bottom looks dry and lightly golden. Set aside to cool slightly.
- Make the filling: In a large bowl, whisk eggs until broken up and slightly frothy. Add pumpkin puree, sweetened condensed milk, vanilla extract, cinnamon, ginger, nutmeg, cloves, and salt. Whisk until completely smooth and uniform.
- Assemble and bake: Pour filling into warm pre-baked crust. Bake at 375°F (190°C) for 45-55 minutes. Edges should be set, center should jiggle slightly when shaken. If crust edges brown too quickly, cover with foil after 30 minutes.
- Cool and serve: Transfer to wire rack and cool completely at room temperature (about 2 hours). For cleanest slices, refrigerate another 2 hours before serving. Serve with whipped cream or vanilla ice cream.
Notes
For deeper flavor, swap 2 tablespoons sweetened condensed milk for maple syrup. Pie tastes even better the next day. Keep all crust ingredients cold for flakiness. Don’t overbake—center should jiggle slightly when removed from oven. For gluten-free, use 1:1 gluten-free flour blend with ¼ tsp xanthan gum. For dairy-free, use cold coconut oil or vegan butter in crust and replace sweetened condensed milk with full-fat coconut milk sweetened with ⅓ cup maple syrup.
Nutrition
- Serving Size: 1 slice (1/8 of pie)
- Calories: 320
- Sugar: 28
- Sodium: 280
- Fat: 14
- Saturated Fat: 8
- Carbohydrates: 45
- Fiber: 3
- Protein: 6
Keywords: pumpkin pie, quick pumpkin pie, homemade pumpkin pie, flaky crust, easy pumpkin pie, fall dessert, Thanksgiving pie, last-minute dessert


