I did not trust pumpkin in a snickerdoodle. There, I said it. It felt like one of those trendy internet mashups that sounds clever on paper but leaves you staring at a flat, cakey disc wondering where all the cinnamon went. For years, I stuck to the classic—butter, sugar, a heavy hand with the cinnamon-sugar coating, and a chewy center that took me right back to my grandmother’s kitchen. Then a friend dropped off a batch of these at my doorstep last October, still warm, wrapped in foil like a little bribe. I ate one standing over the sink, completely prepared to be polite about it. Instead, I found myself texting her for the recipe before I’d even finished the second one (which I definitely did not plan on eating, but here we are). The secret, as it turns out, is brown sugar. It changes everything—adds this deep, almost caramel-like warmth that plays off the pumpkin without letting it turn the cookie into a muffin. These are soft, they are chewy, and they have that signature crackled top we all fight over. I have made them four times since that day, and I am only slightly embarrassed to admit that I have the ingredient list memorized. If you have ever been burned by a pumpkin cookie that promised the world and delivered a sad, spongey letdown, I get it. But these? These are different. Let me show you why.
Why You’ll Love This Recipe
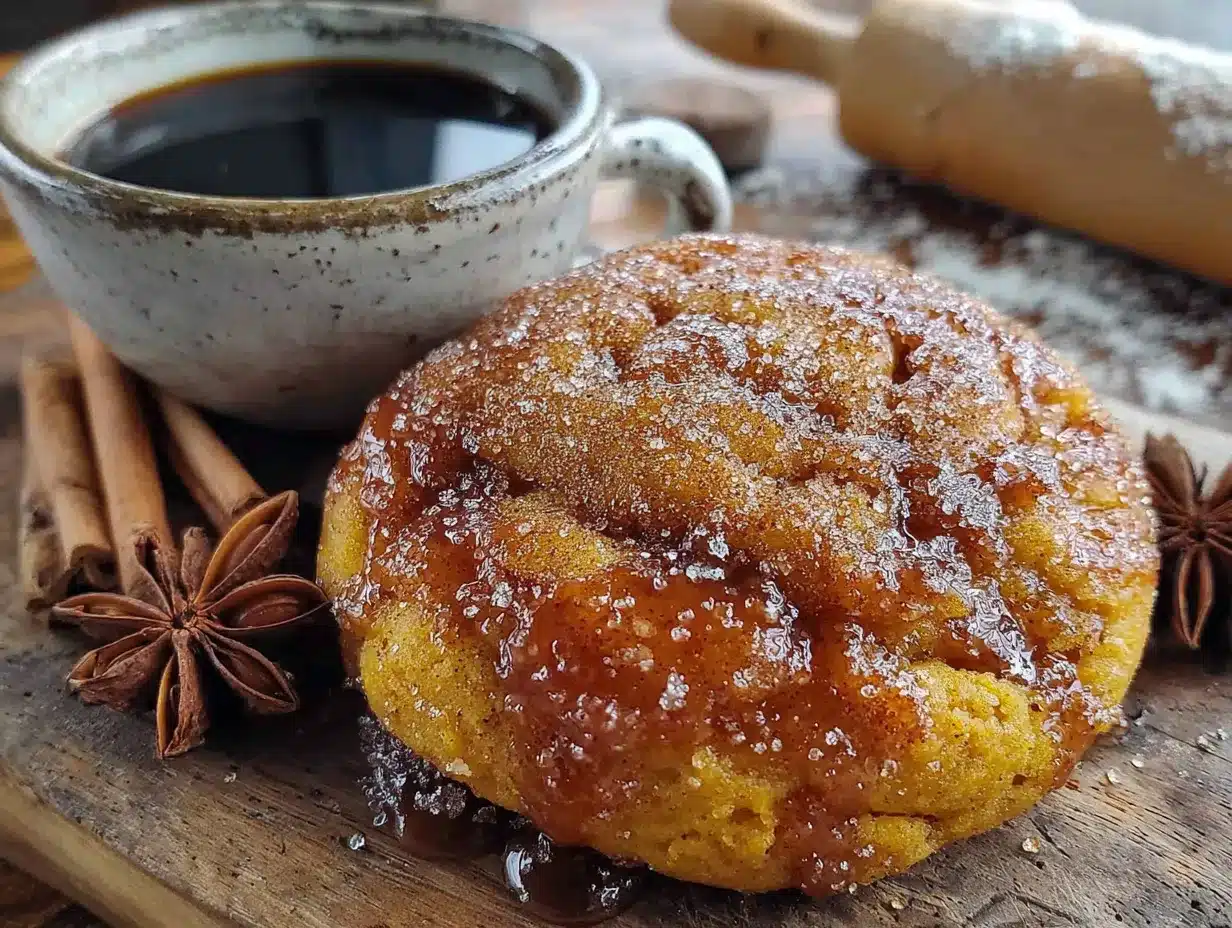
These soft baked brown sugar pumpkin snickerdoodle cookies are the kind of recipe you will make on repeat all season long, and not just because they taste like autumn in a single bite. I have tested this recipe more times than I care to count, tweaking the flour ratio, the pumpkin percentage, and the baking time until the texture was exactly right—soft in the center, slightly chewy at the edges, and perfectly domed on top.
- Quick & Easy : From start to finish, these cookies come together in about 30 minutes. No chilling required. Yes, you read that correctly. You can have warm cookies in your hand faster than you can debate whether to turn on the oven.
- Simple Ingredients : You probably already have most of these in your pantry. Pumpkin puree, brown sugar, butter, flour, eggs, and cinnamon. No weird specialty items that force you to hunt down a specific store.
- Perfect for Fall Baking : Whether it is for a casual weekend bake, a Thanksgiving dessert table, or a bake sale that needs a showstopper, these cookies deliver. They also freeze beautifully, so you can stock up for the holiday chaos.
- Crowd-Pleaser : I have served these to kids, adults, and that one friend who swears they do not like pumpkin-flavored desserts. Every single one of them reached for a second cookie. They are approachable, familiar, and just different enough to feel special.
- Unbelievably Delicious : The brown sugar deepens the flavor in a way white sugar simply cannot. Combined with the warm cinnamon-sugar coating and the subtle pumpkin undertone, every bite is pure comfort.
What makes this recipe different from the rest? It is the technique of blotting the pumpkin puree before mixing. That one small step prevents the cookies from turning into puffy, cake-like disasters and keeps them soft, dense, and perfectly snickerdoodle-like. I learned this the hard way after my first batch spread into sad little pancakes. Trust me on this one.
These cookies are not just good—they are the kind that make you close your eyes after the first bite. It is comfort food reimagined, healthier in spirit (well, sort of), and guaranteed to make your kitchen smell like a candle shop, but better.
What Ingredients You Will Need
This recipe uses simple, wholesome ingredients to deliver bold flavor and satisfying texture without the fuss. Most of these are pantry staples, which means you can whip up a batch on a whim without a special grocery trip.
For the Cookies
- 1/2 cup unsalted butter, softened (I prefer Kerrygold for its rich flavor, but any good-quality butter works)
- 1 cup packed light brown sugar (dark brown sugar works too, but it will make the cookies slightly more molasses-forward)
- 1/4 cup granulated sugar
- 1 large egg, room temperature
- 1 teaspoon vanilla extract
- 1/2 cup pumpkin puree (not pumpkin pie filling—make sure it is 100% pure pumpkin. I use Libby’s, but store brands are fine as long as they are not seasoned)
- 2 cups all-purpose flour (spooned and leveled for accuracy)
- 1 teaspoon baking soda
- 1/2 teaspoon baking powder
- 1/2 teaspoon salt
- 1 teaspoon ground cinnamon
- 1/2 teaspoon ground nutmeg
- 1/4 teaspoon ground ginger
- 1/4 teaspoon ground cloves
For the Cinnamon-Sugar Coating
- 1/4 cup granulated sugar
- 2 teaspoons ground cinnamon
Ingredient Tips: Blotting the pumpkin puree is non-negotiable. Spread it on a paper towel-lined plate, place another paper towel on top, and press gently to remove excess moisture. This step prevents the cookies from spreading too much and keeps them thick and soft. For the best texture, make sure your butter is truly softened—not melted, not rock hard. You want it to give slightly when you press it with your finger. If you are out of brown sugar, you can substitute with 1 cup white sugar plus 2 tablespoons molasses, but honestly, the brown sugar is what makes these cookies special. Do not skip it.
Equipment Needed
- Large mixing bowls (at least two—one for wet ingredients, one for dry)
- Electric hand mixer or stand mixer (a whisk and some elbow grease work, but a mixer makes creaming the butter and sugar much easier)
- Baking sheets (I recommend rimmed baking sheets for even heat distribution. My go-to are Nordic Ware aluminum sheets)
- Parchment paper or silicone baking mats (parchment paper gives the crispiest bottoms, but silicone mats work well too)
- Cookie scoop (a 1.5-tablespoon scoop ensures uniform cookies. If you do not have one, use two spoons—it just takes a little more patience)
- Cooling rack (wire racks let air circulate so the bottoms do not get soggy)
- Paper towels (for blotting the pumpkin—do not skip this)
- Small bowl (for the cinnamon-sugar coating)
If you do not have a stand mixer, a hand mixer works perfectly. I actually prefer my hand mixer for cookies because it is easier to scrape down the sides. Budget-friendly tip: dollar store baking sheets work fine as long as you line them with parchment. Just keep an eye on the bottoms to prevent over-browning.
Preparation Method
Preheat your oven to 350°F (175°C) and line two baking sheets with parchment paper. This is a good time to grab your ingredients and let that butter soften if you forgot to take it out earlier. No judgment—I have been there.
- Blot the pumpkin puree. Spread the 1/2 cup of pumpkin puree onto a plate lined with a few layers of paper towels. Place another paper towel on top and press down gently. Let it sit for about 5 minutes while you gather the rest of your ingredients. This step is the difference between a cookie that holds its shape and a cookie that turns into a flat disc. Trust me, I learned the hard way.
- Cream the butter and sugars. In a large mixing bowl, beat the softened butter, brown sugar, and granulated sugar together on medium speed until light and fluffy, about 2-3 minutes. Scrape down the sides of the bowl with a spatula halfway through. The mixture should look pale and slightly aerated.
- Add the wet ingredients. Beat in the egg and vanilla extract until well combined, about 30 seconds. Then add the blotted pumpkin puree and mix on low speed until just incorporated. Do not overmix here—you do not want to incorporate too much air. The batter will look slightly curdled at this point, and that is totally normal.
- Whisk the dry ingredients. In a separate bowl, whisk together the all-purpose flour, baking soda, baking powder, salt, cinnamon, nutmeg, ginger, and cloves. Whisking ensures the spices and leavening agents are evenly distributed so you do not end up with one cookie that tastes like straight cloves and another that tastes like nothing.
- Combine wet and dry. Gradually add the dry ingredients to the wet mixture, mixing on low speed until just combined. You want to see no more streaks of flour, but do not keep mixing. Overworking the dough will make the cookies tough. The dough will be soft and slightly sticky—that is exactly what you want.
- Prepare the cinnamon-sugar coating. In a small bowl, mix the 1/4 cup granulated sugar with the 2 teaspoons of cinnamon until well combined.
- Scoop and coat. Using a 1.5-tablespoon cookie scoop (or two spoons), portion out the dough and roll each ball between your palms to smooth it out. Roll each ball generously in the cinnamon-sugar mixture, making sure it is fully coated. Place the coated dough balls on the prepared baking sheets, spacing them about 2 inches apart. They will spread a little, but not too much.
- Bake. Bake for 10-12 minutes, or until the edges are set and the tops look slightly crackled. The centers will still look soft and slightly underdone—that is good. Do not overbake, or you will lose that soft, chewy texture. I usually pull mine at the 11-minute mark for perfectly soft centers.
- Cool. Let the cookies cool on the baking sheet for 5 minutes. This step is crucial because they are very delicate when they come out of the oven. After 5 minutes, transfer them to a wire rack to cool completely. If you try to move them too soon, they will fall apart. I speak from experience.
Sensory cues: When the cookies are done, the edges should be lightly golden, and the tops should have that beautiful crackled look. The kitchen will smell like a fall candle—cinnamon, nutmeg, and warm brown sugar. You will want to eat one immediately, but wait those 5 minutes. It is worth it.
Cooking Tips & Techniques
I have made these cookies at least a dozen times, and I have made every mistake in the book so you do not have to. Here are the tips that actually matter.
Do not skip blotting the pumpkin. I cannot stress this enough. Pumpkin puree is mostly water, and if you add it directly to the dough without blotting, the extra moisture will cause the cookies to spread into thin, crispy discs. You want soft, thick cookies, not pumpkin-flavored lace cookies. I learned this the hard way when my first batch looked more like pancake batter than cookie dough.
Use room temperature ingredients. Cold butter does not cream properly, and cold egg can seize the batter. If you forgot to take the egg out ahead of time, place it in a bowl of warm water for 5 minutes. It is a game-changer.
Do not overmix the dough. Once you add the flour, mix just until you do not see any white streaks. Overmixing develops gluten, which makes cookies tough and dense. You want them soft and tender, so stop as soon as the flour disappears.
Chill the dough if you have time. While this recipe does not require chilling, if you can let the dough rest in the fridge for 30 minutes, the cookies will be even thicker and the flavors will meld together beautifully. If you are in a rush, skip it—they will still be amazing.
Use a cookie scoop for uniform size. This is not just about aesthetics. Uniform cookies bake evenly, meaning you will not end up with some burnt and some underdone. A cookie scoop is a $10 investment that pays for itself in consistent results.
Let them cool on the baking sheet. I know it is tempting to move them immediately, but those 5 minutes of resting time allow the cookies to set properly. If you move them too soon, they will crumble. Be patient—I promise the wait is worth it.
Variations & Adaptations
One of the best things about this recipe is how easy it is to adapt. I have tried several variations over the past few months, and here are the ones that actually worked.
Gluten-Free Version: Substitute the all-purpose flour with a 1:1 gluten-free baking flour blend. I have tested this with Bob’s Red Mill 1-to-1 Baking Flour, and the cookies turned out just as soft and chewy. Add an extra tablespoon of flour if the dough feels too sticky.
Dairy-Free Version: Swap the butter with a high-quality vegan butter stick (not the spreadable kind in a tub). I have used Earth Balance Buttery Sticks, and they worked beautifully. The cookies spread slightly more, but the flavor was almost identical.
Spice It Up: If you love a stronger spice profile, add 1/4 teaspoon of cardamom or allspice to the dry ingredients. I tried cardamom in one batch, and it added this lovely floral warmth that paired perfectly with the brown sugar.
Add Mix-Ins: Fold in 1/2 cup of white chocolate chips or chopped pecans after combining the wet and dry ingredients. White chocolate and pumpkin are a classic combo, and the crunch from pecans adds a nice texture contrast. I made a batch with toasted pecans for Thanksgiving, and they disappeared before the turkey even hit the table.
Make Them Vegan: Use a flax egg (1 tablespoon ground flaxseed mixed with 3 tablespoons water, let sit for 5 minutes) and vegan butter. The texture will be slightly less tender, but still very good. I tested this for a friend who is vegan, and she said they were the best pumpkin cookies she had ever had.
Serving & Storage Suggestions
These cookies are best served slightly warm, when the edges are still a little soft and the cinnamon-sugar coating is perfectly crunchy. I like to serve them with a tall glass of cold milk or a warm chai latte. They also pair beautifully with a scoop of vanilla ice cream for a simple dessert that feels fancy.
If you are serving them at a gathering, arrange them on a rustic wooden board or a simple white platter. The orange-brown tones of the cookies against a neutral background make for a gorgeous presentation. Sprinkle a little extra cinnamon on top for visual appeal.
Storage: Store the cookies in an airtight container at room temperature for up to 5 days. Place a slice of bread in the container to keep them soft—the bread absorbs excess moisture and releases it slowly, keeping the cookies from drying out. Replace the bread slice every other day.
Freezer Instructions: These cookies freeze beautifully. You can freeze the baked cookies in a single layer on a baking sheet, then transfer them to a freezer-safe bag for up to 3 months. To thaw, leave them at room temperature for about 30 minutes. You can also freeze the unbaked dough balls. Roll them in the cinnamon-sugar mixture, place them on a baking sheet, and freeze until solid. Transfer to a freezer bag and bake directly from frozen, adding 2-3 minutes to the baking time.
Reheating: To bring back that fresh-from-the-oven texture, microwave a cookie for 10-15 seconds. If you are reheating multiple cookies, pop them in a 300°F (150°C) oven for 5 minutes. The flavors actually deepen after a day or two, so do not be surprised if they taste even better on day two.
Nutritional Information & Benefits
Per cookie (based on 24 cookies): approximately 145 calories, 6g fat, 22g carbohydrates, 1g fiber, 13g sugar, 2g protein.
While these are definitely a treat, there are a few nutritional bright spots. Pumpkin puree is packed with vitamin A, which supports eye health and immune function. It also adds fiber and moisture without a ton of calories. Brown sugar, while still sugar, contains trace amounts of molasses, which provides small amounts of calcium, potassium, and iron. The cinnamon in the coating has anti-inflammatory properties and can help regulate blood sugar levels.
Dietary Considerations: This recipe contains gluten, dairy, and eggs. For gluten-free and dairy-free options, see the variations section above. These cookies are nut-free as written, making them a safe option for school bake sales or parties where allergies are a concern.
I am not here to pretend cookies are health food, but I do feel better knowing that these have a little more nutritional value than your average sugar bomb. Plus, the portion control is built in—one cookie is satisfying enough that you do not need to eat half the batch in one sitting. Usually.
Conclusion
These soft baked brown sugar pumpkin snickerdoodle cookies are everything I want in a fall dessert—warm, spiced, soft, and just sweet enough without being overwhelming. They have that nostalgic snickerdoodle vibe we all grew up loving, but the brown sugar and pumpkin take them to a whole new level. I have made these for my family, my neighbors, and even my skeptical coworker who claimed she did not like pumpkin desserts. She asked for the recipe the next day.
I love that this recipe is forgiving enough for a beginner baker but special enough to impress at a holiday gathering. You can customize the spices, add mix-ins, or keep it classic—it works every time. If you try these cookies, I would love to hear how they turned out. Did you add anything extra? Did you manage to save any for the next day? Drop a comment below and let me know. And if you are looking for more easy weeknight inspiration, you might enjoy this honey mustard chicken for a savory fall meal, or these crispy chicken quesadillas for a quick dinner that pairs perfectly with a warm cookie for dessert.
Happy baking, friends. May your kitchen smell like cinnamon and your cookies always be soft.
Frequently Asked Questions
Can I use pumpkin pie filling instead of pumpkin puree?
No, please do not. Pumpkin pie filling is pre-sweetened and spiced, which will throw off the sugar and spice balance in this recipe. Stick with 100% pure pumpkin puree for the best results. If you accidentally bought the wrong one, save it for making a quick pie later.
Why did my cookies turn out flat?
Flat cookies usually mean one of three things: you did not blot the pumpkin puree enough, your butter was too soft or melted, or you overmixed the dough. Make sure to blot the pumpkin thoroughly and use softened butter, not melted. Also, check that your baking soda and baking powder are fresh—they lose potency over time.
Can I make the dough ahead of time?
Absolutely. You can prepare the dough, roll it into balls, and store it in the refrigerator for up to 48 hours. Coat the dough balls in the cinnamon-sugar mixture just before baking. Chilling the dough actually improves the texture, so feel free to plan ahead.
How do I know when the cookies are done baking?
The edges should be set and lightly golden, while the centers still look soft and slightly underdone. They will continue to bake on the hot baking sheet as they cool. If you wait until the centers look fully baked, they will be overbaked and dry. Trust the soft centers.
Can I double this recipe?
Yes, this recipe doubles beautifully. Just make sure you have enough baking sheets and space in your oven. If you are baking multiple batches, let the baking sheets cool completely between batches, or the dough will start to spread before it hits the oven. I usually rotate my pans halfway through baking for even results.
Pin This Recipe!
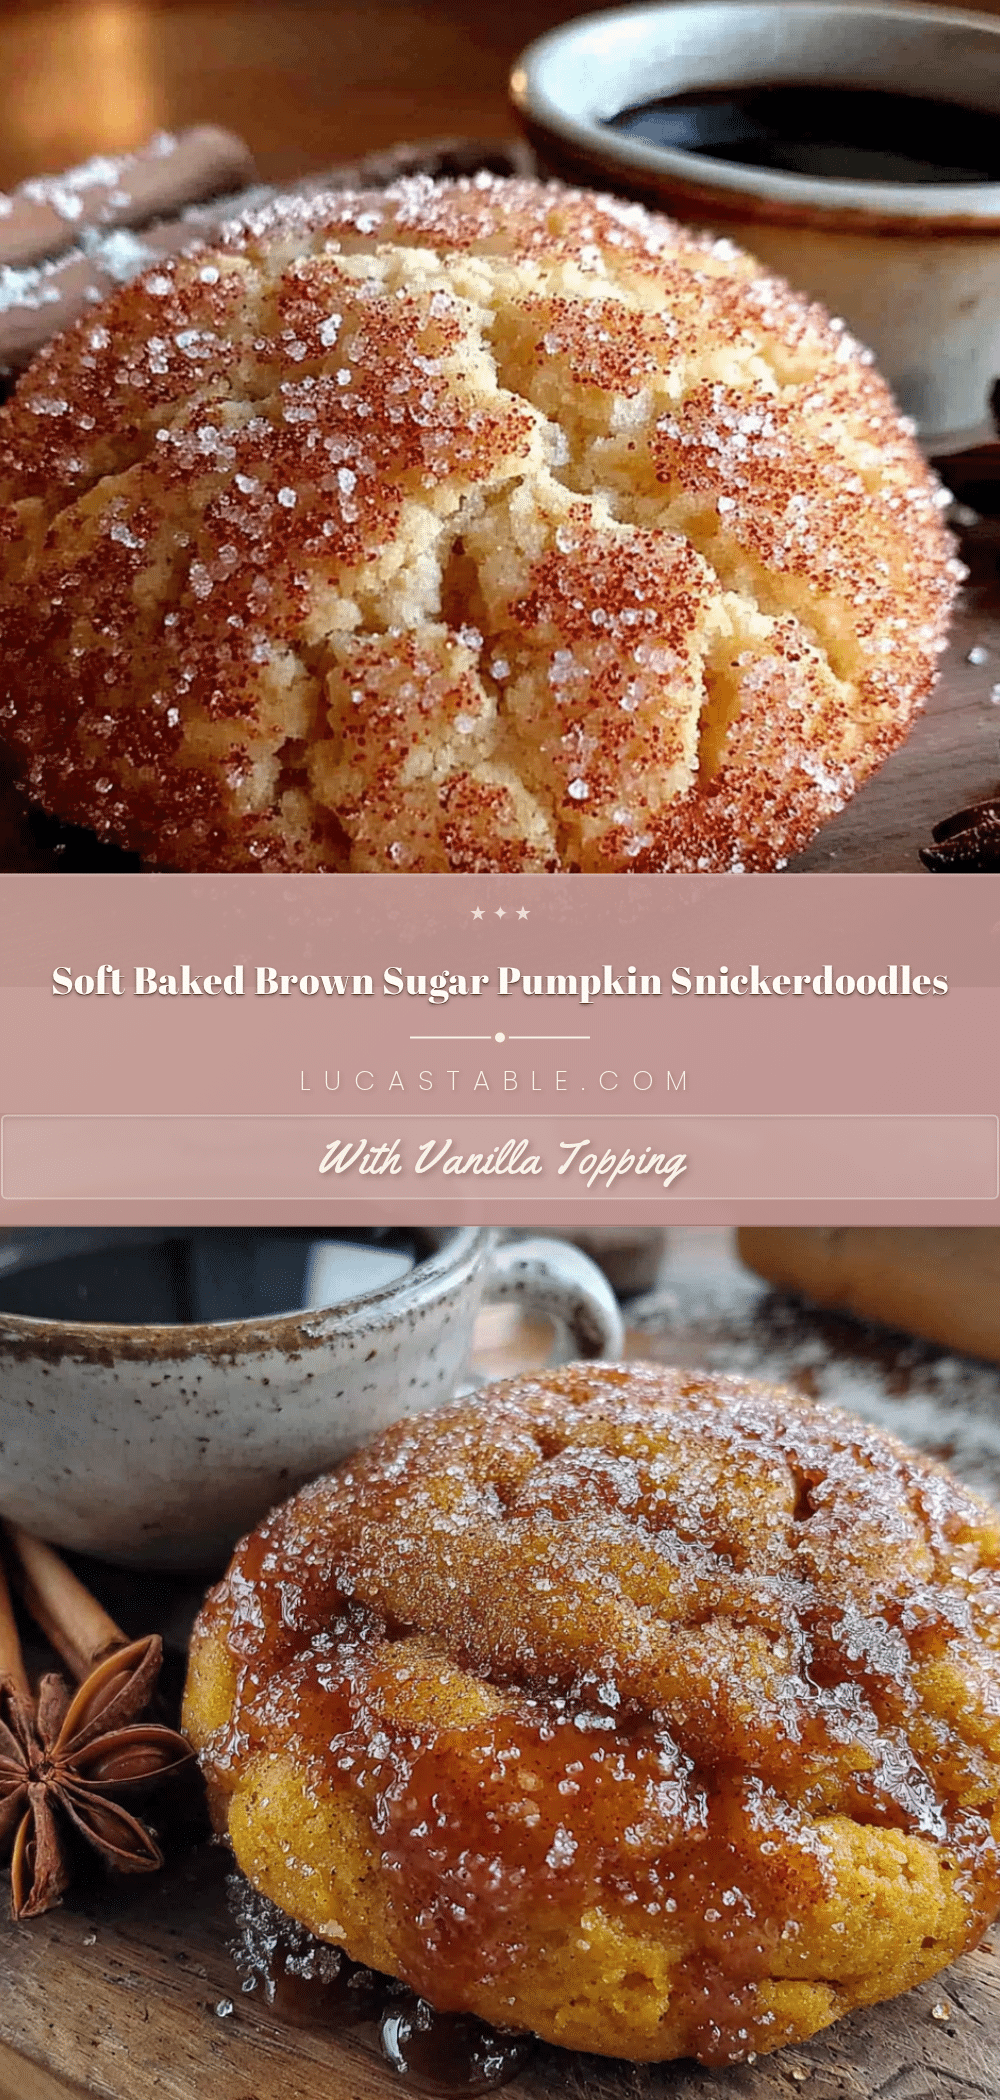
Soft Baked Brown Sugar Pumpkin Snickerdoodle Cookies: Easy Fall Recipe
These soft baked brown sugar pumpkin snickerdoodle cookies are the perfect fall dessert—warm, spiced, soft, and just sweet enough. The secret is brown sugar and blotting the pumpkin puree for a chewy, crackled-top cookie that will win over even pumpkin skeptics.
- Prep Time: 15 minutes
- Cook Time: 12 minutes
- Total Time: 27 minutes
- Yield: 24 cookies 1x
- Category: Dessert
- Cuisine: American
Ingredients
- 1/2 cup unsalted butter, softened
- 1 cup packed light brown sugar
- 1/4 cup granulated sugar
- 1 large egg, room temperature
- 1 teaspoon vanilla extract
- 1/2 cup pumpkin puree (not pumpkin pie filling)
- 2 cups all-purpose flour, spooned and leveled
- 1 teaspoon baking soda
- 1/2 teaspoon baking powder
- 1/2 teaspoon salt
- 1 teaspoon ground cinnamon
- 1/2 teaspoon ground nutmeg
- 1/4 teaspoon ground ginger
- 1/4 teaspoon ground cloves
- 1/4 cup granulated sugar (for coating)
- 2 teaspoons ground cinnamon (for coating)
Instructions
- Preheat oven to 350°F (175°C) and line two baking sheets with parchment paper.
- Blot the pumpkin puree: Spread 1/2 cup pumpkin puree onto a plate lined with paper towels, place another paper towel on top, and press gently. Let sit for 5 minutes.
- Cream the butter and sugars: In a large bowl, beat softened butter, brown sugar, and granulated sugar on medium speed until light and fluffy, about 2-3 minutes. Scrape down sides.
- Add wet ingredients: Beat in egg and vanilla extract until combined, about 30 seconds. Add blotted pumpkin puree and mix on low until just incorporated (batter may look slightly curdled).
- Whisk dry ingredients: In a separate bowl, whisk together flour, baking soda, baking powder, salt, cinnamon, nutmeg, ginger, and cloves.
- Combine wet and dry: Gradually add dry ingredients to wet mixture, mixing on low until just combined. Dough will be soft and slightly sticky.
- Prepare cinnamon-sugar coating: In a small bowl, mix 1/4 cup granulated sugar with 2 teaspoons cinnamon.
- Scoop and coat: Using a 1.5-tablespoon cookie scoop, portion dough and roll into balls. Roll each ball generously in cinnamon-sugar mixture. Place on prepared baking sheets, spacing 2 inches apart.
- Bake for 10-12 minutes, until edges are set and tops are crackled. Centers should still look soft.
- Cool on baking sheet for 5 minutes, then transfer to a wire rack to cool completely.
Notes
Blotting the pumpkin puree is essential to prevent flat cookies. Use room temperature ingredients for best results. Do not overmix the dough. For thicker cookies, chill dough for 30 minutes. Let cookies cool on baking sheet for 5 minutes before moving.
Nutrition
- Serving Size: 1 cookie
- Calories: 145
- Sugar: 13
- Sodium: 120
- Fat: 6
- Saturated Fat: 3.5
- Carbohydrates: 22
- Fiber: 1
- Protein: 2
Keywords: pumpkin snickerdoodle, brown sugar cookies, fall cookies, soft baked cookies, pumpkin dessert, easy cookie recipe


