I figured these deviled eggs would be just another Halloween novelty — cute, sure, but probably more about looks than actual taste. It took about one bite of the first batch for that assumption to completely fall apart. My nephew had requested “monster eyeballs” for his Halloween party, and I was stuck trying to make deviled eggs that actually looked like creepy, bloodshot eyeballs without sacrificing the creamy, tangy filling we all love.
The first attempt was a disaster. The paprika bled into the whites, the olive “pupils” kept sliding off, and honestly, they looked more like sad, melting frogs than monsters. But I’m stubborn when it comes to party food. So I went back to the basics — perfect hard-boiled eggs, a silky yolk mixture, and a bit of food coloring magic. After three test batches (and one very patient family who ate them all), these spooky monster eyeball deviled eggs were born.
These aren’t just for kids, either. I’ve watched grown adults hesitate before grabbing one at a party, then immediately reach for a second. There’s something deeply satisfying about creating food that makes people do a double-take. And when that double-take turns into a genuine “wow, these are actually delicious,” you know you’ve got a winner. Let me show you how to make these creepy little guys.
Why You’ll Love This Recipe
Look, I’ve made a lot of deviled eggs in my day — classic, spicy, even one with pickled beets that turned out… interesting. But these monster eyeball deviled eggs are different. They’re the kind of appetizer that disappears before anything else on the table, and people always ask for the recipe.
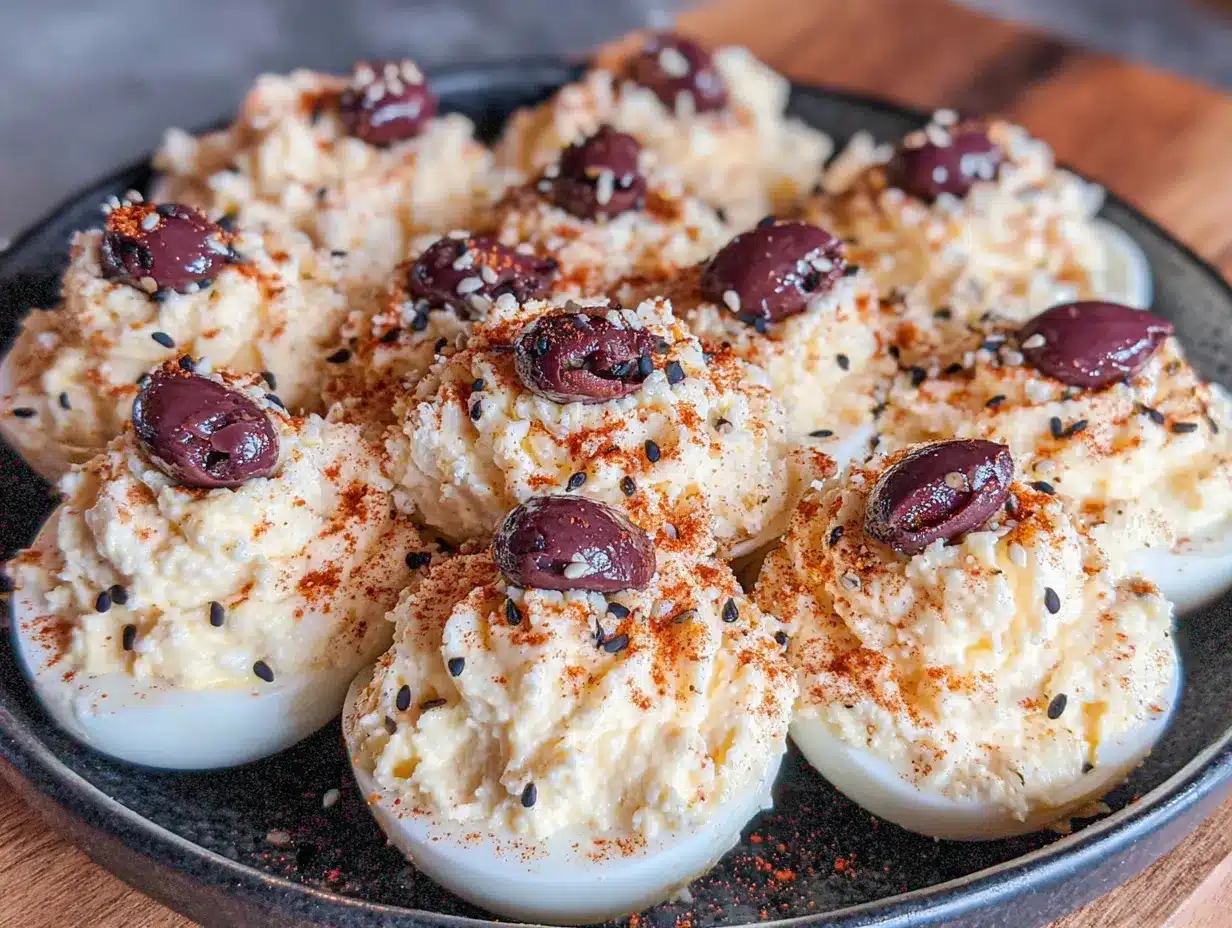
- Show-Stopping Presentation : These look genuinely creepy in the best way possible. The bloodshot veins and olive pupils create a realistic eyeball effect that’s perfect for Halloween parties, spooky movie nights, or even just to surprise your family.
- Simple Ingredients : You probably already have everything you need in your kitchen. Eggs, mayo, mustard, and olives — that’s the whole list. No weird specialty items required.
- Make-Ahead Friendly : You can prep these a day in advance and just add the final touches before serving. This is a lifesaver when you’re hosting a party and have a million other things to do.
- Kid-Approved (and Adult-Approved) : Kids love the creepy factor, and adults love the classic deviled egg taste. I’ve seen 8-year-olds and 80-year-olds both reach for these.
- Naturally Gluten-Free : No need to worry about dietary restrictions — these are naturally free of gluten and can easily be made dairy-free.
What makes these different from other Halloween deviled eggs is the technique. I figured out how to create those realistic bloodshot veins using a simple trick with red food coloring and a toothpick. It sounds fancy, but I promise it’s easy. And the flavor? That creamy, tangy filling with a hint of mustard and a pop of briny olive — it’s the same classic deviled egg taste you already love, just dressed up for a party.
What Ingredients You Will Need
This recipe uses simple, everyday ingredients to create something that looks complicated but really isn’t. Most of these are pantry staples, so you might not even need a grocery run.
For the Eggs
- 12 large eggs — Use eggs that are at least a week old for easier peeling. Fresh eggs are harder to peel, so plan ahead if you can.
- Ice water bath — A large bowl filled with ice and cold water for shocking the eggs after boiling.
For the Filling
- 1/3 cup mayonnaise — I prefer Duke’s or Hellmann’s for the right balance of creaminess and tang. Avoid Miracle Whip — it’s too sweet for this.
- 1 tablespoon yellow mustard — Adds that classic deviled egg tang and a bit of color. You can use Dijon for a sharper flavor.
- 1 teaspoon white vinegar — Just a touch to brighten everything up.
- 1/4 teaspoon salt — Fine sea salt works best.
- 1/8 teaspoon black pepper — Freshly ground if you have it.
- Pinch of paprika — For garnish and a hint of smoky flavor.
For the Monster Eyeball Decoration
- 12 pitted black olives — These become the pupils. Look for large, firm olives — they’re easier to slice and place.
- Red food coloring — Gel or liquid both work. Gel gives you more control over the intensity.
- Small squeeze bottle or toothpicks — For creating the bloodshot veins.
Ingredient Tips
I’ve learned a few things the hard way. First, don’t use neon-green food coloring for the veins — it looks unnatural and honestly kind of gross in a bad way. Stick with classic red for that realistic bloodshot effect. Second, the olives matter more than you’d think. I’ve tried using sliced black olives from a can, and they’re too flimsy. Get whole pitted olives and slice them yourself — they hold their shape much better.
If you’re serving these to a crowd with dietary restrictions, the good news is this recipe is naturally gluten-free and can easily be made dairy-free. Just double-check your mayonnaise label to be sure.
Equipment Needed
You don’t need much for this recipe, which is part of why I love it. Here’s what you’ll want on hand:
- Large saucepan or pot — Big enough to hold 12 eggs in a single layer without crowding.
- Slotted spoon — For gently lowering the eggs into the boiling water and fishing them out.
- Large bowl for ice bath — This stops the cooking process and helps with peeling.
- Sharp knife and cutting board — A sharp knife makes clean cuts through the eggs and olives.
- Small mixing bowl — For combining the yolk mixture.
- Fork or potato masher — For mashing the yolks to a smooth consistency.
- Piping bag or zip-top bag — For filling the egg whites neatly. A zip-top bag with the corner snipped off works perfectly if you don’t have a piping bag.
- Toothpicks or small squeeze bottle — For applying the red food coloring veins.
- Serving platter — A white platter makes the eyeballs pop visually.
I’ve made these with just a fork and a sandwich bag before, so don’t stress if you don’t have fancy equipment. The piping bag just makes things cleaner, but a spoon works too.
Preparation Method
Let’s get into the actual process. I’ll walk you through every step so you don’t end up with sad, peeling disasters like my first batch.
Step 1: Perfect Hard-Boiled Eggs
Place your eggs in a single layer in a large saucepan. Cover them with cold water by about an inch. Bring the water to a rolling boil over high heat — you’ll see big, vigorous bubbles. Once it’s boiling, turn off the heat, cover the pot, and let it sit for exactly 12 minutes. This method gives you fully cooked yolks without that weird green ring around the outside.
While the eggs are cooking, prepare your ice bath. Fill a large bowl with ice and cold water. After 12 minutes, use a slotted spoon to transfer the eggs immediately into the ice bath. Let them sit for at least 10 minutes. This shocking process stops the cooking and makes peeling way easier.
Step 2: Peel and Halve the Eggs
Here’s where patience pays off. Gently tap each egg on the counter to crack the shell all over, then roll it between your palms to loosen the shell. Start peeling from the wider end — there’s usually an air pocket there that makes it easier. Rinse the peeled eggs under cold water to remove any tiny shell fragments.
Once all 12 eggs are peeled, slice each one in half lengthwise with a sharp knife. Carefully pop the yolks out into a small mixing bowl. Arrange the white halves on your serving platter, cut side up. You should have 24 white “cups” ready for filling.
Step 3: Make the Filling
Add the mayonnaise, yellow mustard, white vinegar, salt, and pepper to the bowl with the yolks. Mash everything together with a fork until it’s smooth and creamy. I like to press the mixture through a fine-mesh sieve for an ultra-smooth texture, but that’s optional. Taste it and adjust the seasoning — maybe a bit more salt or an extra splash of vinegar if you like it tangier.
Step 4: Fill the Egg Whites
Spoon the yolk mixture into a piping bag or a zip-top bag with a small corner snipped off. Pipe the filling into each egg white half, mounding it slightly above the edge. You want a nice rounded shape that looks like an eyeball. Don’t overfill, though — you need room for the olive pupil on top.
Step 5: Create the Pupils
Slice your pitted black olives crosswise into rounds about 1/4-inch thick. You’ll need one olive round per deviled egg. Gently press an olive slice into the center of each filled egg white, flat side down. The olive should sit right in the middle, looking like a dark pupil staring back at you.
Step 6: Add the Bloodshot Veins
This is the fun part. Put a few drops of red food coloring into a small dish. Dip the tip of a toothpick into the coloring, then carefully drag it from the olive outward toward the edge of the egg white. Create 3-4 thin lines radiating from each pupil. The lines don’t have to be perfect — in fact, slightly messy lines look more realistic. You want them to look like broken blood vessels, not careful artwork.
If you’re using a small squeeze bottle, dilute the food coloring with a drop of water and apply it the same way. Just go slowly — you can always add more, but you can’t take it away.
Step 7: Garnish and Serve
Lightly dust the finished deviled eggs with a pinch of paprika. This adds a bit of color contrast and a subtle smoky flavor. Serve immediately or refrigerate until ready to serve.
Cooking Tips & Techniques
I’ve made plenty of mistakes so you don’t have to. Here’s what I’ve learned:
Use older eggs for easier peeling. Fresh eggs are a nightmare to peel — the shells stick like glue. Eggs that have been in your fridge for a week or two peel much more cleanly. If you’re planning ahead, buy your eggs a week before you need them.
Don’t overcook the eggs. That 12-minute rest method is foolproof. If you boil them too long, the yolks get that gray-green ring and a weird sulfur smell. Trust the timing.
Pat the egg whites dry. After peeling and halving, use a paper towel to gently pat the inside of each egg white. Excess moisture will make the filling slide around and the food coloring bleed.
Work in batches if needed. If you’re making a double batch, don’t try to boil all the eggs at once. Overcrowding the pot leads to uneven cooking. Stick with 12 eggs per batch.
Let the filling sit for a few minutes. After mixing the filling, let it rest for 5 minutes. The flavors meld together and the texture becomes creamier. I learned this after impatiently filling my first batch and wondering why it tasted flat.
Use gel food coloring for better control. Liquid food coloring is thinner and tends to spread more than you want. Gel coloring gives you thicker, more defined lines. If you only have liquid, mix it with a tiny bit of cornstarch to thicken it up.
Variations & Adaptations
One of the best things about this recipe is how easy it is to customize. Here are some variations I’ve tried:
Spicy Monster Eyeballs : Add 1/2 teaspoon of sriracha or your favorite hot sauce to the yolk mixture. The heat pairs surprisingly well with the cool, creamy filling and briny olive. I made these for a Halloween party and they were gone in minutes.
Green Monster Eyeballs : Add a few drops of green food coloring to the yolk mixture for a truly monstrous look. The filling turns a sickly green that’s perfect for zombie or alien-themed parties. The taste is the same, but the visual is completely different.
Smoked Paprika Eyeballs : Swap the regular paprika for smoked paprika in the filling and as a garnish. It adds a deeper, earthier flavor that works beautifully with the mustard and vinegar.
Dairy-Free Version : Use a vegan mayonnaise — I’ve tried Follow Your Heart and it works perfectly. The texture is slightly different but still creamy and delicious.
Keto-Friendly : These are already low-carb and keto-friendly as written. Just skip the paprika dusting if you’re being strict about carb counts.
Different Pupils : If you’re not an olive fan, try using sliced green olives with pimento for a different look, or even small capers for tiny, creepy pupils. I’ve also used sliced cherry tomatoes for a red-eyed monster effect.
Serving & Storage Suggestions
These monster eyeball deviled eggs are best served chilled, right out of the fridge. The cold temperature keeps the filling firm and the food coloring from bleeding. Arrange them on a white platter for maximum visual impact — the contrast makes the red veins and dark pupils really pop.
For a Halloween party spread, I like to serve these alongside other spooky snacks. They pair well with crispy chicken quesadillas cut into tombstone shapes or savory Mongolian beef served in mini cups. The contrast between the creamy deviled eggs and something crunchy or savory makes for a great appetizer spread.
Storage: Store any leftovers in an airtight container in the refrigerator for up to 2 days. Don’t freeze them — the texture will be ruined. If you’re making these ahead, prepare everything up to step 5 (adding the olive pupils) and refrigerate. Add the food coloring veins right before serving for the freshest look.
Reheating: These are served cold, so no reheating needed. Just take them out of the fridge about 15 minutes before serving to take the chill off slightly — this brings out the flavor of the filling.
One thing I’ve noticed: the flavors actually get better after a few hours in the fridge. The mustard and vinegar meld with the yolks, and the olive flavor seeps into the filling just slightly. If you can, make these the morning of your event and let them rest in the fridge until party time.
Nutritional Information & Benefits
Per serving (2 deviled eggs):
- Calories: 180
- Protein: 11g
- Fat: 14g
- Carbohydrates: 2g
- Fiber: 0g
- Sugar: 1g
These deviled eggs are packed with protein from the eggs, making them a satisfying appetizer that won’t leave your guests hungry. Eggs are also a great source of choline, which supports brain health, and vitamin D for bone health. The olives add healthy monounsaturated fats and antioxidants.
This recipe is naturally gluten-free, low-carb, and keto-friendly. If you’re watching your cholesterol, you can use a combination of whole eggs and egg whites — just adjust the filling accordingly. The mayonnaise adds creaminess without being overly heavy, especially if you use a lighter mayo option.
I love that these are a healthier option for Halloween parties. Instead of loading up on candy and sugar, guests can grab a couple of these protein-packed bites and feel good about it. Plus, they’re so fun to look at that people forget they’re actually eating something nutritious.
Conclusion
These spooky monster eyeball deviled eggs are everything you want in a Halloween appetizer — creepy-looking, incredibly tasty, and surprisingly easy to make. I’ve taken them to three different Halloween parties now, and every single time, people ask for the recipe. The bloodshot veins and olive pupils create that perfect “eww, that’s gross… wait, can I have another?” reaction that makes party food so much fun.
Don’t be afraid to play around with the decorations. Maybe you want zombie-green pupils or extra bloody veins. Maybe you want to add a tiny piece of red bell pepper for a scarier look. This recipe is forgiving and customizable, so make it your own. That’s the beauty of cooking — you get to decide what “monster” means to you.
I’d love to hear how yours turn out! Drop a comment below and let me know if your family screamed (in a good way) when they saw these. And if you come up with a fun variation, share it — I’m always looking for new monster ideas. Happy Halloween, and happy cooking!
Frequently Asked Questions
Can I make these monster eyeball deviled eggs a day ahead?
Absolutely! Prepare the eggs and filling, assemble them with the olive pupils, and refrigerate. Add the red food coloring veins right before serving for the freshest look. The flavors actually improve after a few hours in the fridge.
How do I get the food coloring veins to look realistic?
Use a toothpick dipped in red gel food coloring. Drag it from the olive outward in thin, slightly wobbly lines. Don’t try to make them perfect — slightly messy lines look more like real blood vessels. If the color is too intense, dilute it with a drop of water.
Can I use something other than olives for the pupils?
Yes! Sliced green olives with pimento, capers, or even small slices of cherry tomato work great. For a truly creepy look, try using black sesame seeds for tiny pupils or sliced radishes for a red-eyed monster effect.
My eggs are hard to peel. What am I doing wrong?
Use eggs that are at least a week old — fresh eggs are notoriously difficult to peel. Also, make sure you’re shocking them in an ice bath immediately after cooking. This stops the cooking process and helps separate the shell from the egg white.
How long do these keep in the refrigerator?
Store them in an airtight container for up to 2 days. Don’t freeze them — the texture will become watery and unappetizing. If you’re making them for a party, aim to serve them within 24 hours for the best taste and appearance.
Pin This Recipe!
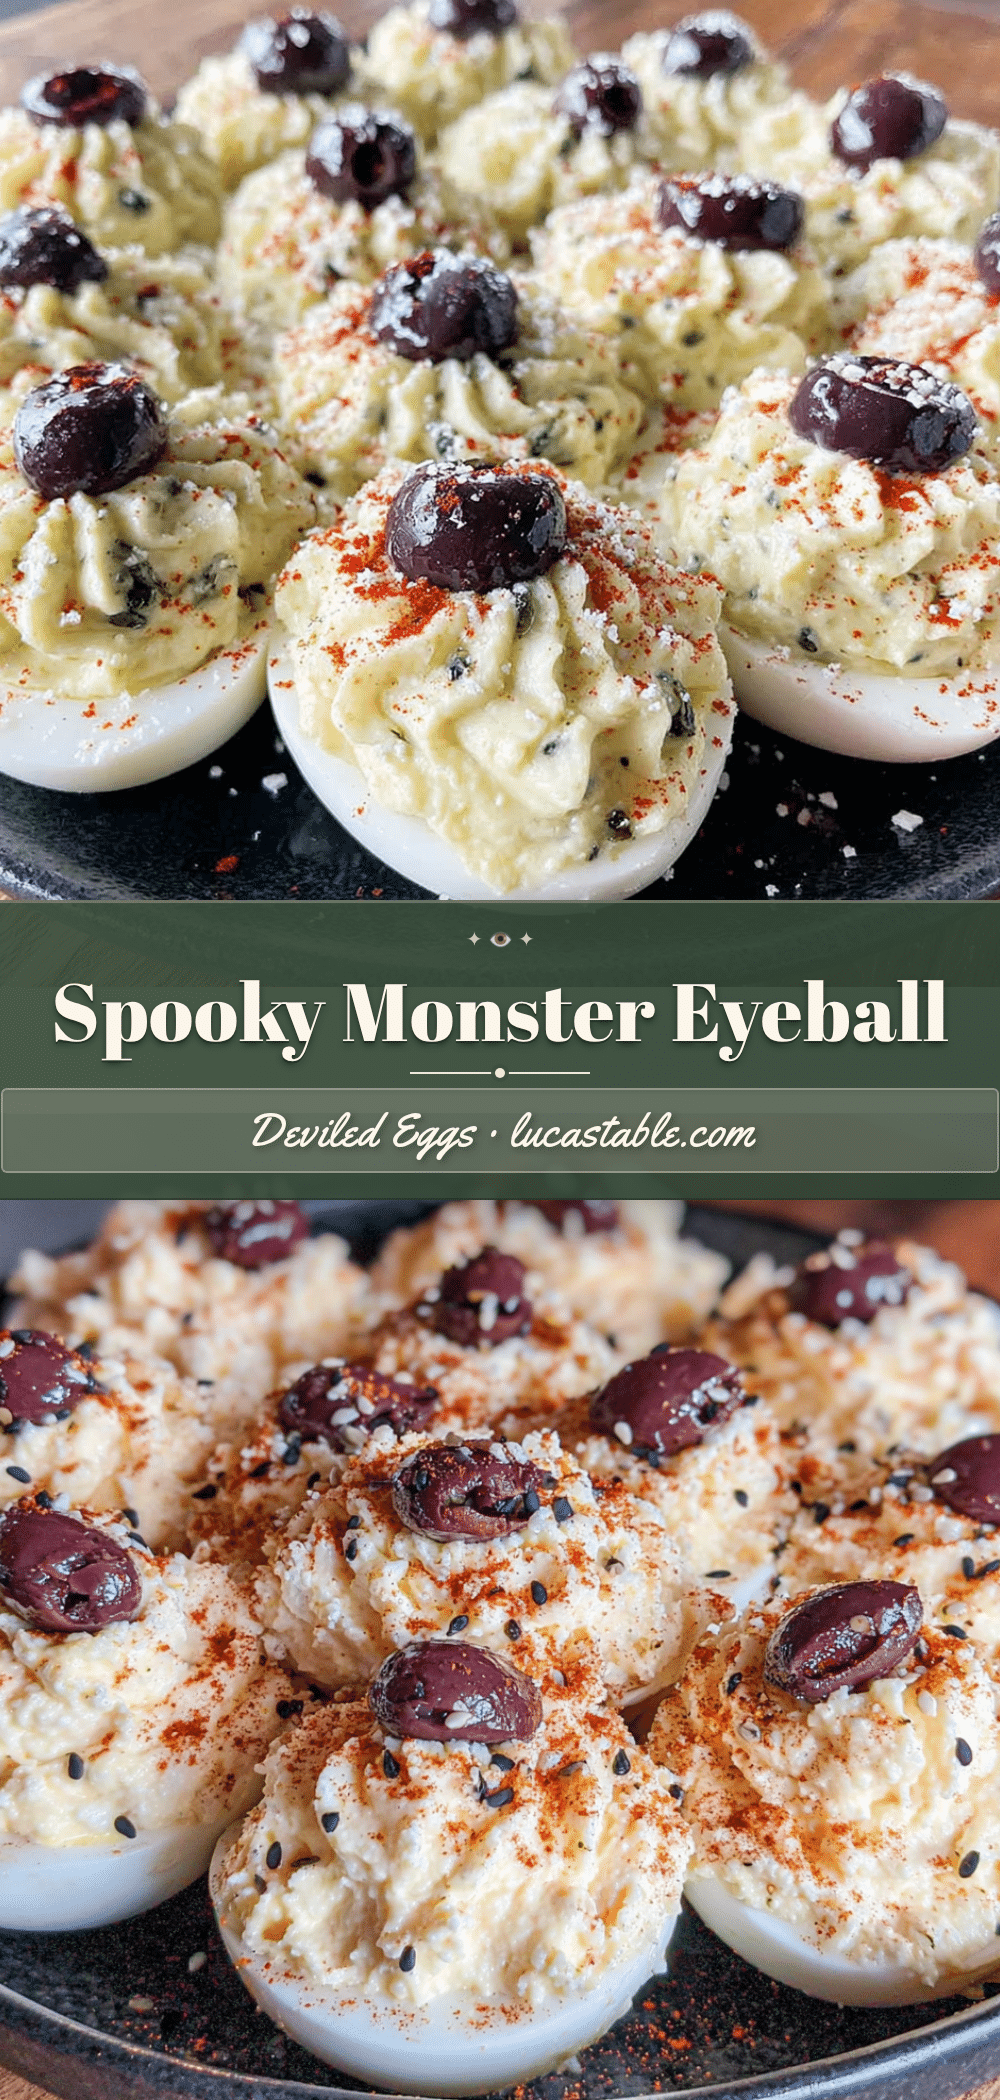
Spooky Monster Eyeball Deviled Eggs: Easy Halloween Recipe
These spooky monster eyeball deviled eggs are everything you want in a Halloween appetizer — creepy-looking, incredibly tasty, and surprisingly easy to make. The bloodshot veins and olive pupils create that perfect ‘eww, that’s gross… wait, can I have another?’ reaction that makes party food so much fun.
- Prep Time: 20 minutes
- Cook Time: 12 minutes
- Total Time: 42 minutes
- Yield: 24 deviled eggs (12 servings of 2 each) 1x
- Category: Appetizer
- Cuisine: American
Ingredients
- 12 large eggs
- Ice water bath (ice and cold water)
- 1/3 cup mayonnaise
- 1 tablespoon yellow mustard
- 1 teaspoon white vinegar
- 1/4 teaspoon salt
- 1/8 teaspoon black pepper
- Pinch of paprika
- 12 pitted black olives
- Red food coloring (gel or liquid)
- Small squeeze bottle or toothpicks
Instructions
- Place eggs in a single layer in a large saucepan. Cover with cold water by about an inch. Bring to a rolling boil over high heat. Once boiling, turn off heat, cover, and let sit for exactly 12 minutes.
- While eggs cook, prepare an ice bath with ice and cold water. After 12 minutes, transfer eggs to ice bath using a slotted spoon. Let sit for at least 10 minutes.
- Gently tap each egg to crack the shell, roll between palms to loosen, and peel starting from the wider end. Rinse under cold water.
- Slice each peeled egg in half lengthwise. Pop yolks into a small mixing bowl. Arrange white halves on a serving platter, cut side up.
- Add mayonnaise, yellow mustard, white vinegar, salt, and pepper to the yolks. Mash with a fork until smooth and creamy. Taste and adjust seasoning.
- Spoon yolk mixture into a piping bag or zip-top bag with a small corner snipped off. Pipe filling into each egg white half, mounding slightly above the edge.
- Slice pitted black olives crosswise into 1/4-inch rounds. Gently press one olive round into the center of each filled egg white, flat side down.
- Put a few drops of red food coloring into a small dish. Dip a toothpick into the coloring and drag from the olive outward toward the edge of the egg white, creating 3-4 thin lines radiating from each pupil.
- Lightly dust finished deviled eggs with a pinch of paprika. Serve immediately or refrigerate until ready to serve.
Notes
Use older eggs (at least a week old) for easier peeling. Pat egg whites dry after peeling to prevent filling from sliding. Let filling rest for 5 minutes after mixing for better flavor. Use gel food coloring for better control of veins. Make ahead up to adding olive pupils, then add veins just before serving. Store in airtight container in refrigerator for up to 2 days. Do not freeze.
Nutrition
- Serving Size: 2 deviled eggs
- Calories: 180
- Sugar: 1
- Sodium: 320
- Fat: 14
- Saturated Fat: 3
- Carbohydrates: 2
- Protein: 11
Keywords: Halloween deviled eggs, monster eyeball deviled eggs, spooky deviled eggs, Halloween appetizer, deviled eggs recipe, easy Halloween recipe, gluten-free appetizer, keto deviled eggs


