The crumble—that is the whole point. Not the apples underneath, not the scoop of vanilla ice cream melting on the side, but that specific, buttery, oat-and-pecan blanket that shatters under your spoon and then dissolves into something almost sandy against your tongue. I made this homemade apple crisp for the first time on a Tuesday that felt like a Monday, with a bag of slightly bruised Honeycrisps I bought on impulse and a half-empty jar of pecans left over from holiday baking. Everything else was secondary.
I had no grand plan. I just wanted something warm, something that would fill the kitchen with the kind of smell that makes you stop what you are doing and just stand there for a second. You know that feeling? When the cinnamon and butter hit the hot oven, and suddenly your whole apartment feels like a hug. Honestly, that is why this recipe stuck. Not because it is fancy (it is not), but because it does exactly what you need it to do without asking for much in return.
The apples soften into this jammy, slightly tart layer that holds its own against the sweet, crunchy topping. And that topping—oh, that topping. It is the part I look forward to most. The oats toast up golden, the pecans get all roasty and fragrant, and the brown sugar caramelizes into little clusters that are dangerously snackable straight off the baking dish. I have been known to pick at them before even scooping out the apples. No regrets.
This is the kind of dessert that does not need a special occasion. It just needs a little time and the willingness to let your kitchen smell like fall, even if it is technically spring outside. Trust me on this one.
Why You Will Love This Recipe
I have tested this homemade apple crisp more times than I care to admit. My family has been the unwilling (but well-fed) taste testers for every single batch. So when I say this version is the best, I mean it. Here is why this one is different from all the others.
- Quick & Easy: From start to oven in about 20 minutes. No pie crust rolling, no complicated steps. Just chop, mix, and bake.
- Simple Ingredients: You probably have most of these in your pantry right now. Apples, oats, flour, butter, sugar, pecans. That is it.
- Perfect for Any Occasion: Weeknight dessert, Thanksgiving potluck, Sunday brunch—it fits everywhere without being fussy.
- Crowd-Pleaser: I have served this to kids who usually push their plates away and adults who ask for seconds. It disappears fast.
- Unbelievably Delicious: The contrast between the soft, tangy apples and the crunchy, buttery oat pecan crumble is next-level comfort food.
What makes this recipe different is the technique. I pre-cook the apple filling just slightly on the stovetop before baking. This might sound like an extra step, but trust me—it prevents that dreaded gap between the apples and the topping. You know, when you cut into your crisp and there is a sad, empty space where the fruit shrunk down? Not here. The apples stay thick and juicy, and the crumble stays right on top where it belongs.
This is comfort food reimagined. It is simpler than a pie, faster than a cobbler, and somehow more satisfying than both. The kind of dessert that makes you close your eyes after the first bite and forget about everything else for a minute. That is what I wanted when I made it on that Tuesday, and that is what you will get here.
What Ingredients You Will Need
This recipe uses simple, wholesome ingredients to deliver big flavor without the fuss. Most of these are pantry staples, which makes this the perfect last-minute dessert. Here is everything you need and why each ingredient matters.
For the Apple Filling
- Apples (6 medium, about 2.5 pounds): I use a mix of Honeycrisp and Granny Smith. The Honeycrisp bring sweetness and a firm texture that holds up during baking, while the Granny Smith adds that necessary tang. You can also use Fuji, Braeburn, or Pink Lady. Avoid Red Delicious—they turn into mush too quickly.
- Granulated Sugar (1/4 cup): Just enough to sweeten the apples without overpowering their natural flavor. If your apples are very sweet, you can cut this down to 3 tablespoons.
- Light Brown Sugar (2 tablespoons): Adds a hint of molasses depth that complements the cinnamon and pecans. Pack it firmly when measuring.
- Lemon Juice (1 tablespoon): Freshly squeezed is best. It prevents the apples from browning and brightens up all the flavors. Bottled lemon juice works in a pinch, but fresh really does taste better here.
- Cornstarch (1 tablespoon): This thickens the juices that release from the apples as they bake. Without it, you end up with a soupy mess. You can substitute arrowroot powder if you prefer.
- Ground Cinnamon (1 teaspoon): The backbone of any good apple dessert. I use Ceylon cinnamon when I have it—it is milder and more floral than the standard Cassia variety.
- Ground Nutmeg (1/4 teaspoon): Just a pinch. It adds warmth without screaming for attention. Freshly grated nutmeg is a game-changer if you have a whole nut sitting around.
- Salt (1/4 teaspoon): Do not skip this. Salt makes the sweetness pop and balances the tartness of the apples.
For the Oat Pecan Crumble Topping
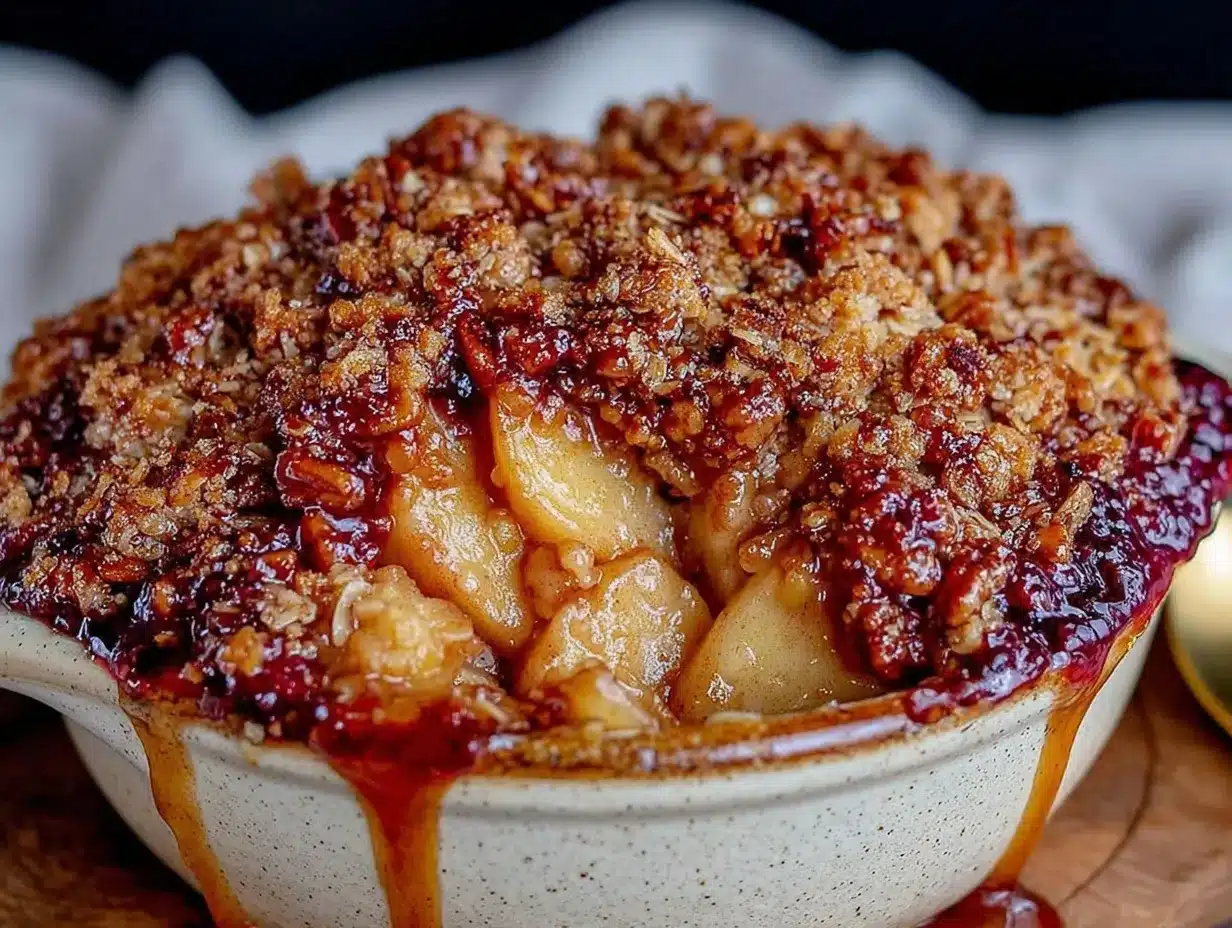
- Rolled Oats (1 cup): Old-fashioned rolled oats give the best texture. They get chewy and toasted in the oven. Do not use quick oats—they turn into paste. Steel-cut oats are too hard and will not cook through in time.
- All-Purpose Flour (3/4 cup): Provides structure to the crumble. For a gluten-free version, use a 1:1 gluten-free baking flour blend. I have tested it with Bob’s Red Mill and it works beautifully.
- Chopped Pecans (1/2 cup): Toast them lightly before adding to the crumble for extra depth. I buy pecan halves and chop them myself—pre-chopped nuts tend to be drier and less flavorful. Walnuts also work great here if that is what you have.
- Light Brown Sugar (1/2 cup, packed): This is where most of the sweetness in the topping comes from. The brown sugar caramelizes as it bakes, creating those irresistible crunchy clusters.
- Granulated Sugar (2 tablespoons): A little extra sweetness to balance the oats and nuts.
- Ground Cinnamon (1/2 teaspoon): More cinnamon in the topping reinforces the flavor from the filling. It is not overpowering, just cozy.
- Salt (1/4 teaspoon): Essential for the topping. It keeps the sweetness in check and makes the butter flavor sing.
- Unsalted Butter (1/2 cup, cold): Cut into small cubes. Cold butter is key—it creates those craggy, uneven pieces that bake into a perfect crumble. If the butter is too soft, you will end up with a paste instead of a crumble. I use Kerrygold for the best flavor, but any good-quality unsalted butter works.
Ingredient Note: I recommend using a good-quality vanilla ice cream for serving. It is not listed as an ingredient because it is optional, but honestly? It is not really optional. The way the cold, creamy ice cream melts into the warm, crunchy crisp is pure magic. Do yourself a favor and scoop some on top.
Equipment Needed
You do not need a fancy kitchen to make this homemade apple crisp. Here is what you will need and a few tips from my personal experience.
- 9×13-inch Baking Dish: This is the perfect size for a standard batch. You can also use an 8×8-inch dish for a thicker crisp, but you will need to increase the baking time by about 10 minutes. I have also used a 10-inch cast iron skillet, which gives the edges a lovely caramelized crust.
- Large Mixing Bowls: One for the apples and one for the crumble. Stainless steel or glass works best—plastic bowls can retain odors and oils.
- Chef’s Knife and Cutting Board: A sharp knife makes chopping apples so much easier. I use my 8-inch Wusthof for everything. Dull knives are dangerous—they slip more easily.
- Pastry Cutter or Two Forks: For cutting the cold butter into the dry ingredients. You can also use your fingertips, but work quickly so the butter does not warm up. A food processor works too, but pulse carefully—you want pea-sized pieces, not dust.
- Wooden Spoon or Silicone Spatula: For mixing the apple filling and folding everything together gently.
- Measuring Cups and Spoons: Accurate measurements matter in baking. I use dry measuring cups for the dry ingredients and a liquid measuring cup for the lemon juice.
- Parchment Paper (Optional): Lining the dish makes cleanup easier, but it is not necessary. If you do use it, make sure it overhangs the edges so you can lift the crisp out if needed.
Budget-Friendly Tip: Do not have a pastry cutter? Use two forks or even your hands. I have made this crisp countless times using just my fingers to rub the butter into the flour. It works perfectly and saves you from buying another gadget.
Preparation Method
This method breaks down every step so you get a perfect result every time. I have included timing estimates and sensory cues so you know exactly what to look for.
Step 1: Preheat and Prep (5 minutes)
Preheat your oven to 350°F (175°C). Position the rack in the center of the oven. Lightly grease your 9×13-inch baking dish with butter or non-stick spray. Set it aside while you prepare the filling.
Step 2: Prepare the Apple Filling (10 minutes)
Peel, core, and slice the apples into 1/4-inch thick pieces. I like to slice them into uniform pieces so they cook evenly. You should have about 6 cups of sliced apples. Place them in a large mixing bowl.
Add the granulated sugar, brown sugar, lemon juice, cornstarch, cinnamon, nutmeg, and salt to the apples. Toss everything together with a wooden spoon until the apples are evenly coated. The cornstarch will look a little dusty at first, but it dissolves as the apples release their juices.
Here is the trick: transfer the apple mixture to a large skillet or saucepan and cook over medium heat for 5 to 7 minutes, stirring occasionally. You are not trying to cook the apples through—just warm them enough to start releasing their juices and activate the cornstarch. You will know it is ready when the liquid at the bottom of the pan thickens slightly and the apples look glossy. This step prevents that gap between the filling and the topping. Trust me on this.
Pour the warm apple mixture into your prepared baking dish and spread it into an even layer.
Step 3: Make the Oat Pecan Crumble Topping (5 minutes)
In a separate medium bowl, whisk together the rolled oats, all-purpose flour, chopped pecans, brown sugar, granulated sugar, cinnamon, and salt. Make sure there are no clumps of brown sugar—break them up with your fingers if needed.
Add the cold, cubed butter to the dry ingredients. Use a pastry cutter, two forks, or your fingertips to cut the butter into the mixture. You want the butter to be broken down into pea-sized pieces coated in the oat mixture. It should look like coarse sand with some slightly larger chunks. Do not overwork it—you want those uneven pieces for the best texture. If the mixture starts to feel warm, pop it in the fridge for 5 minutes.
Step 4: Assemble and Bake (40 to 45 minutes)
Sprinkle the crumble topping evenly over the apple filling. Do not press it down—just let it fall naturally into an even layer. Some apples might peek through, and that is perfectly fine.
Place the dish on a baking sheet to catch any drips (trust me, this saves you from a smoky oven). Bake for 40 to 45 minutes, until the topping is golden brown and the filling is bubbling up around the edges. You will know it is done when you see those thick, syrupy bubbles breaking through the crumble. If the topping is browning too quickly but the filling is not bubbling yet, tent the dish loosely with foil for the last 10 minutes.
Step 5: Cool and Serve (10 minutes)
Remove the crisp from the oven and let it cool on a wire rack for at least 10 minutes. This allows the filling to set up slightly so it does not run all over your plate. I know it is tempting to dig in immediately, but those 10 minutes make a difference.
Scoop into bowls and top with a generous scoop of vanilla ice cream or a drizzle of heavy cream. The contrast between the warm, spiced apples and the cold, creamy ice cream is the whole point. Enjoy every single bite.
Cooking Tips & Techniques
I have made this homemade apple crisp more times than I can count, and I have definitely learned a few things the hard way. Here are my best tips to help you avoid my mistakes.
Do not skip the stovetop step. I know it seems like an extra hassle, but it is the single most important tip I can give you. Pre-cooking the apples ensures they are tender and the filling is thick, not watery. The first time I made this, I skipped it and ended up with a crisp that was swimming in liquid. Never again.
Use cold butter for the crumble. This is non-negotiable. Warm butter will create a dense, pasty topping instead of a light, crunchy one. If your kitchen is warm, stick the butter in the freezer for 10 minutes before cubing it. I have even frozen the entire bowl of dry ingredients with the butter for 15 minutes before baking. It works wonders.
Toast your pecans. This takes just 3 to 4 minutes in a dry skillet over medium heat, and it makes a huge difference. Toasted pecans have a deeper, nuttier flavor that elevates the entire crisp. Watch them closely—they burn fast. You want them fragrant and slightly darkened, not blackened.
Let it rest before serving. I know the smell is intoxicating, but cutting into the crisp too soon will result in a soupy mess. The filling needs time to set. Ten minutes is the minimum, but 20 is even better. Use that time to scoop the ice cream and set the table.
Make it ahead of time. You can assemble the entire crisp up to 24 hours in advance. Just cover it with plastic wrap and store it in the refrigerator. When you are ready to bake, add about 10 minutes to the baking time since you are starting from cold. The topping might not be as crunchy, but it is still delicious.
Watch your oven. Every oven runs a little differently. Start checking your crisp at the 35-minute mark. If the topping is getting too dark but the filling is not bubbling, tent it with foil. If the filling is bubbling but the topping is pale, give it a few more minutes uncovered.
Variations & Adaptations
This recipe is incredibly flexible. Here are some of my favorite ways to change it up, all tested in my own kitchen.
Gluten-Free Version: Substitute the all-purpose flour with a 1:1 gluten-free baking blend. I have used both Bob’s Red Mill and King Arthur Measure for Measure with great results. Make sure your oats are certified gluten-free if you are sensitive. The texture is slightly more crumbly, but the flavor is just as good.
Dairy-Free Version: Use cold coconut oil or vegan butter in place of the butter. I prefer using a stick of vegan butter (like Miyoko’s) for the best texture. Coconut oil works too, but it adds a subtle coconut flavor that pairs surprisingly well with the apples and cinnamon.
Nut-Free Version: Skip the pecans entirely and add an extra 1/4 cup of rolled oats and 1/4 cup of all-purpose flour to the topping. You can also use sunflower seeds or pumpkin seeds for a similar crunch. Just make sure to toast them lightly first.
Seasonal Variations: In the fall, add 1/2 cup of fresh or frozen cranberries to the apple filling for a tart twist. In the summer, swap half the apples for sliced peaches or nectarines. In the winter, add a tablespoon of bourbon or apple brandy to the filling for a warm, boozy kick. I have tried all three, and each one is wonderful in its own way.
Spice It Up: If you love warm spices, add 1/4 teaspoon of ground ginger and a pinch of ground cloves to the filling. You can also swap the cinnamon for pumpkin pie spice for a different flavor profile. I have done this for Thanksgiving and it was a hit.
Individual Servings: Divide the apple filling and topping among 6 to 8 ramekins. Place them on a baking sheet and bake for 25 to 30 minutes, until bubbly and golden. These are perfect for dinner parties—everyone gets their own little dish of warm, crunchy goodness.
Serving & Storage Suggestions
This homemade apple crisp is best served warm, straight from the oven. But here is everything you need to know about serving and storing it.
Serving Temperature: Warm is non-negotiable. The contrast between the hot, spiced apples and cold ice cream is what makes this dessert so special. If you have leftovers, reheat individual portions in the microwave for 30 to 45 seconds, or in a 350°F oven for 10 minutes.
What to Serve With It: Vanilla ice cream is the classic pairing, and for good reason. But do not stop there. A drizzle of heavy cream, a dollop of whipped cream, or a spoonful of Greek yogurt all work beautifully. For a boozy twist, try a scoop of bourbon vanilla ice cream or a drizzle of salted caramel sauce. I have also served it with a side of warm custard, and that was a game-changer.
Storage Instructions: Cover the baking dish tightly with plastic wrap or aluminum foil and store it in the refrigerator for up to 4 days. The topping will lose some of its crunch over time, but the flavor will still be wonderful. To refresh the crispiness, reheat it in the oven instead of the microwave.
Freezing Instructions: You can freeze the assembled but unbaked crisp for up to 3 months. Wrap the dish tightly in plastic wrap, then a layer of foil. When you are ready to bake, thaw it in the refrigerator overnight, then bake as directed, adding about 10 minutes to the baking time. Baked crisp also freezes well—just let it cool completely, wrap it tightly, and freeze. Thaw in the fridge and reheat in the oven.
How Flavors Develop: This is one of those desserts that tastes even better the next day. The apples continue to absorb the spices and sugar, and the flavors meld together beautifully. If you can resist eating it all in one sitting, you will be rewarded with an even more delicious crisp the next day.
Nutritional Information & Benefits
While this is certainly a dessert, it does have some redeeming qualities. Here is a rough estimate of the nutritional information per serving, based on 8 servings.
- Calories: Approximately 420 per serving
- Fat: 18g (mostly from the butter and pecans)
- Carbohydrates: 62g
- Fiber: 6g (thanks to the apples and oats)
- Sugar: 38g
- Protein: 5g
Health Benefits: Apples are packed with fiber and vitamin C, and the skin (if you leave it on) contains antioxidants. Oats are a great source of soluble fiber, which is good for heart health. Pecans provide healthy fats and magnesium. So while this is not a health food, it is not the worst thing you could eat for dessert either.
Dietary Considerations: This recipe can be made gluten-free and dairy-free with the substitutions mentioned above. It is naturally vegetarian. If you are watching your sugar intake, you can reduce the sugar in the filling by half—the apples provide plenty of natural sweetness.
Allergens: This recipe contains gluten, dairy, and tree nuts (pecans). Adjust accordingly for your dietary needs.
Personal Perspective: I believe in balance. I eat my vegetables, I exercise, and I also enjoy a bowl of warm apple crisp with ice cream on a regular Tuesday. Life is too short to skip dessert. This recipe uses real, whole ingredients, and that matters more to me than counting every gram of sugar.
Conclusion
This homemade apple crisp with oat pecan crumble topping is everything a dessert should be—warm, comforting, and utterly satisfying. It is the kind of recipe that makes you look forward to fall, but honestly, it works any time of year. The apples are tender and spiced, the topping is crunchy and buttery, and together they create something truly special.
I love this recipe because it does not try to be anything it is not. It is simple, honest, and delicious. It is the dessert I turn to when I need a little comfort, when I want to fill my kitchen with that incredible cinnamon-and-apple smell, or when I just need to use up some apples before they go bad. It has never let me down.
Now I want to hear from you. Did you try this recipe? Did you add your own twist? Did you eat it straight out of the baking dish with a spoon (no judgment here)? Drop a comment below and let me know how it turned out. Share your photos, your questions, your successes, and even your failures. I read every single comment and I love hearing about your kitchen adventures.
And if you loved this recipe, do me a favor and share it with a friend. Pin it on Pinterest, post it on Instagram, or just text the link to someone who needs a little sweetness in their life. Happy baking, friend.
Frequently Asked Questions
Can I use quick oats instead of rolled oats?
I do not recommend it. Quick oats are more finely processed and will turn into a mushy, pasty topping instead of a crunchy, textured one. Rolled oats hold their shape much better and give you that satisfying chew. Stick with old-fashioned rolled oats for the best results.
Do I have to peel the apples?
Not necessarily. If you like the texture and color of apple peels, you can leave them on. Just make sure to wash the apples thoroughly. The peels add extra fiber and a bit of color, but they can also be slightly tough. I prefer peeling them for a smoother, more uniform texture, but it is entirely up to you.
Can I make this in a cast iron skillet?
Absolutely. A 10-inch cast iron skillet works perfectly for this recipe. The even heat distribution helps the apples cook evenly, and the edges get a lovely caramelized crust. Just make sure your skillet is well-seasoned so the apples do not stick. You can even serve it directly from the skillet for a rustic presentation.
Why did my topping turn out soggy?
Soggy topping is usually caused by one of two things: either the butter was too warm when you mixed it into the dry ingredients, or the filling was too watery. Make sure your butter is cold, and do not skip the stovetop step for the apples. That step helps thicken the juices so they do not soak into the crumble. Also, make sure your topping is spread evenly and not pressed down.
Can I double this recipe?
Yes, you can easily double this recipe. Use a larger baking dish (like a 9×13-inch is fine for a single batch, so for a double batch, use a 12×17-inch or two 9×13-inch dishes). You may need to increase the baking time by 5 to 10 minutes since there is more volume. Keep an eye on the topping and tent with foil if it browns too quickly.
Pin This Recipe!
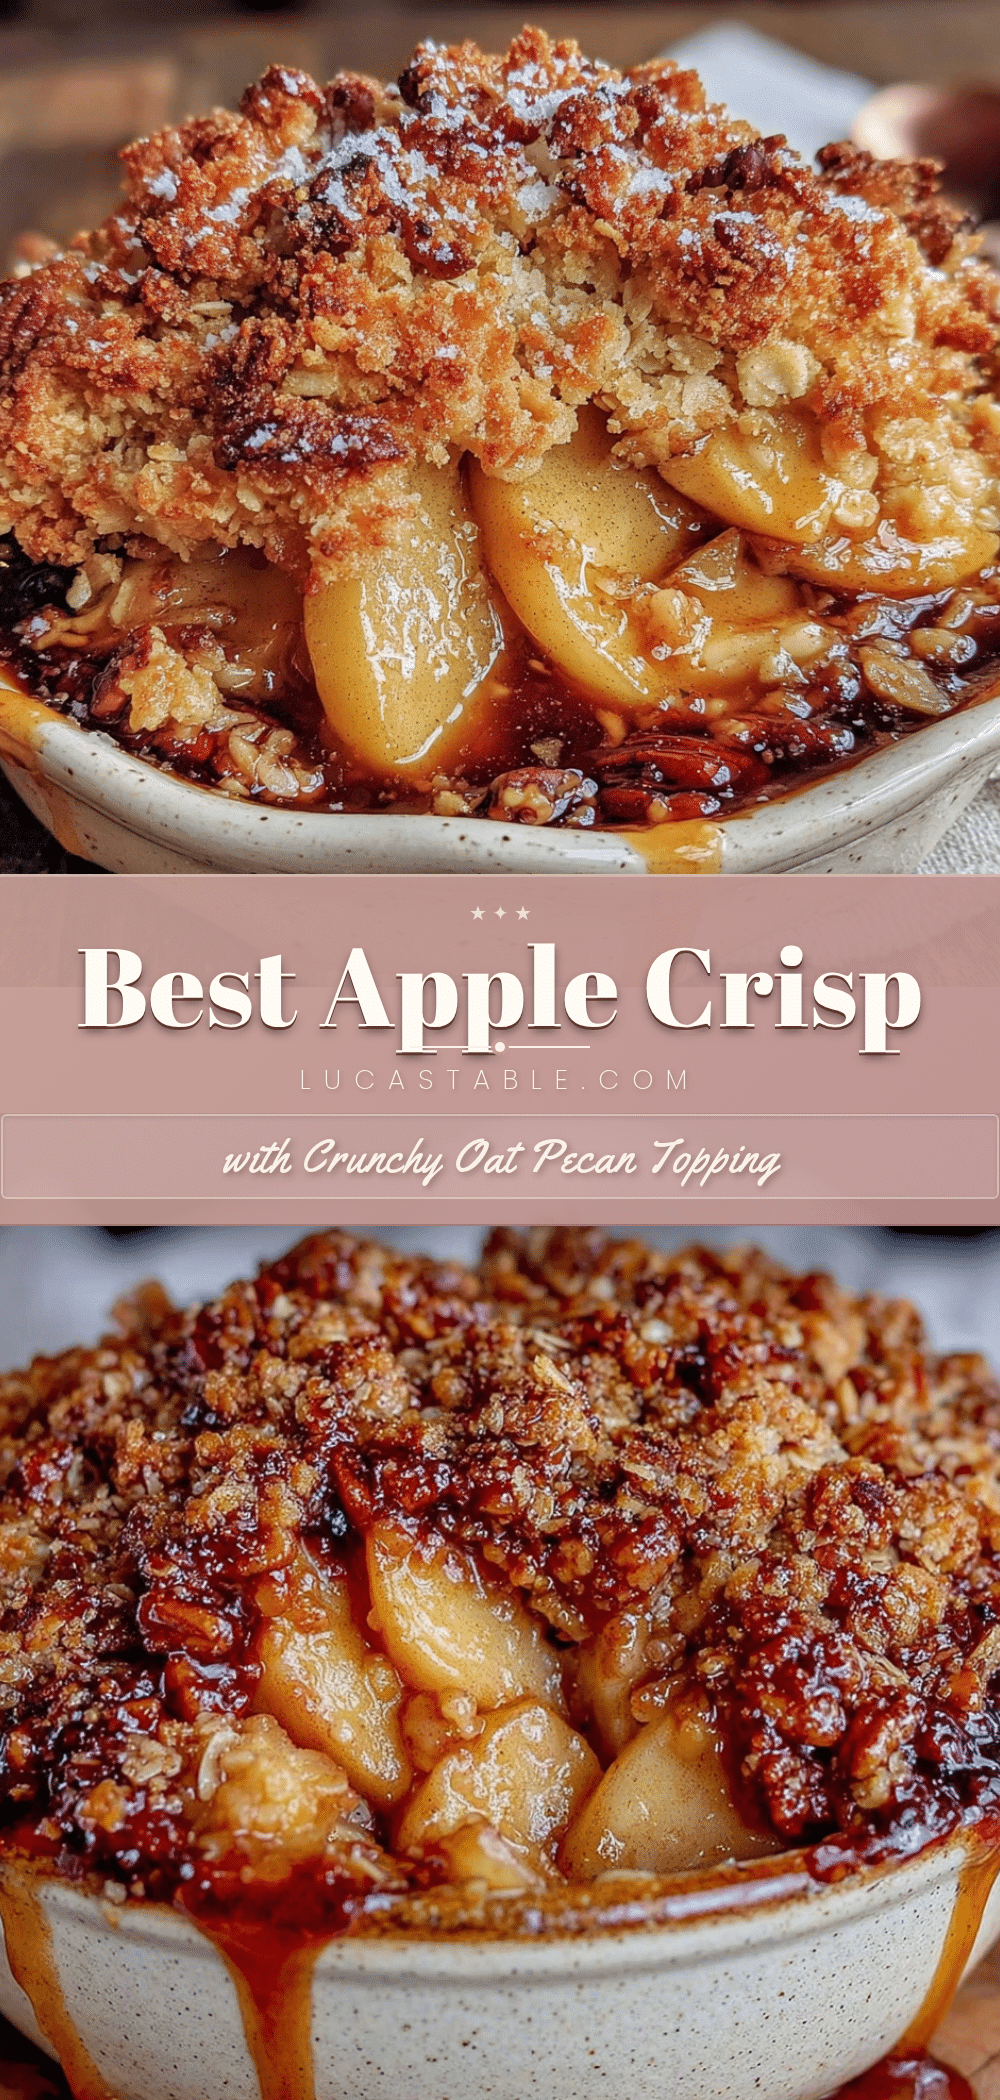
Best Homemade Apple Crisp with Oat Pecan Crumble

This homemade apple crisp features a buttery oat and pecan crumble topping over tender, spiced apples. It’s a simple, comforting dessert that’s perfect for any occasion and comes together in about an hour.
- Prep Time: 20 minutes
- Cook Time: 45 minutes
- Total Time: 1 hour 5 minutes
- Yield: 8 servings 1x
- Category: Dessert
- Cuisine: American
Ingredients
- 6 medium apples (about 2.5 pounds), a mix of Honeycrisp and Granny Smith
- 1/4 cup granulated sugar
- 2 tablespoons light brown sugar, packed
- 1 tablespoon lemon juice, freshly squeezed
- 1 tablespoon cornstarch
- 1 teaspoon ground cinnamon
- 1/4 teaspoon ground nutmeg
- 1/4 teaspoon salt
- 1 cup rolled oats (old-fashioned)
- 3/4 cup all-purpose flour
- 1/2 cup chopped pecans
- 1/2 cup light brown sugar, packed
- 2 tablespoons granulated sugar
- 1/2 teaspoon ground cinnamon
- 1/4 teaspoon salt
- 1/2 cup unsalted butter, cold and cubed
Instructions
- Preheat oven to 350°F (175°C). Lightly grease a 9×13-inch baking dish.
- Peel, core, and slice apples into 1/4-inch thick pieces. Place in a large bowl.
- Add granulated sugar, 2 tablespoons brown sugar, lemon juice, cornstarch, 1 teaspoon cinnamon, nutmeg, and 1/4 teaspoon salt to apples. Toss to coat.
- Transfer apple mixture to a large skillet or saucepan. Cook over medium heat for 5-7 minutes, stirring occasionally, until juices thicken and apples look glossy.
- Pour warm apple mixture into prepared baking dish and spread evenly.
- In a separate bowl, whisk together rolled oats, flour, chopped pecans, 1/2 cup brown sugar, 2 tablespoons granulated sugar, 1/2 teaspoon cinnamon, and 1/4 teaspoon salt.
- Add cold cubed butter to dry ingredients. Use a pastry cutter, two forks, or fingertips to cut butter into mixture until it resembles coarse sand with pea-sized pieces.
- Sprinkle crumble topping evenly over apple filling. Do not press down.
- Place dish on a baking sheet. Bake for 40-45 minutes, until topping is golden brown and filling is bubbling around edges. If topping browns too quickly, tent with foil for last 10 minutes.
- Remove from oven and cool on a wire rack for at least 10 minutes before serving.
- Serve warm with vanilla ice cream or a drizzle of heavy cream.
Notes
Do not skip the stovetop step for the apples—it prevents a gap between filling and topping. Use cold butter for the crumble. Toast pecans for deeper flavor. Let crisp rest 10 minutes before serving for best texture. Can be assembled up to 24 hours in advance and refrigerated.
Nutrition
- Serving Size: 1 serving
- Calories: 420
- Sugar: 38
- Sodium: 280
- Fat: 18
- Saturated Fat: 8
- Carbohydrates: 62
- Fiber: 6
- Protein: 5
Keywords: apple crisp, homemade apple crisp, oat pecan crumble, easy apple dessert, fall dessert, apple crisp recipe


