“You really should bring that charcuterie board again!” my neighbor’s voice floated over the fence, the afternoon sun warming the garden. Honestly, I was just throwing together scraps from the farmers market, not expecting much. A few peaches here, some sharp cheddar there, a chunk of honeycomb that caught my eye more for its novelty than anything else.
It was one of those unplanned gatherings after a long, hectic week where I just needed something easy but a little special. No fancy recipes, no fuss, just a board assembled with the kind of care that happens when you’re half paying attention and half daydreaming about the weekend. And yet, that simple combination—the crunch of nuts, the burst of juicy berries, the slow sweetness of honeycomb—ended up being the highlight of the evening.
What stuck with me isn’t just how effortless it was, but how the flavors and textures felt like a little celebration of summer itself. That first taste of honeycomb melting over creamy goat cheese beside a slice of ripe plum—honestly, it made me pause and just savor the moment. This charcuterie board isn’t just food; it’s a quiet invitation to slow down and enjoy the season.
Over the weeks, I found myself making this board again and again, tweaking it a little each time. It’s become my go-to for those spontaneous get-togethers or even a solo afternoon treat. There’s a kind of magic in the way seasonal fruits and honeycomb come together that feels both indulgent and grounded. So here’s my take on the perfect summer charcuterie board with seasonal fruits and honeycomb, a little tradition born out of a simple, sweet surprise.
Why You’ll Love This Perfect Summer Charcuterie Board Recipe with Seasonal Fruits and Honeycomb
This recipe has been tested in real life—by friends, family, and more than a few random neighbors—and it always delivers on flavor and ease. Whether you’re new to putting together a charcuterie board or consider yourself a seasoned pro, this setup offers something fresh and approachable.
- Quick & Easy: You can assemble this board in under 20 minutes, making it perfect for last-minute entertaining or a relaxed weekend snack.
- Simple Ingredients: Most of what you need comes from your local market or pantry staples, no specialty stores required.
- Perfect for Summer Gatherings: The seasonal fruits bring brightness and freshness ideal for warm weather get-togethers, from casual picnics to elegant backyard parties.
- Crowd-Pleaser: The mix of sweet honeycomb, creamy cheeses, savory meats, and crunchy nuts gets rave reviews from both kids and adults alike.
- Unbelievably Delicious Texture Combo: The honeycomb adds a unique, chewy sweetness that pairs beautifully with the juicy fruits and rich cheeses, making every bite an experience.
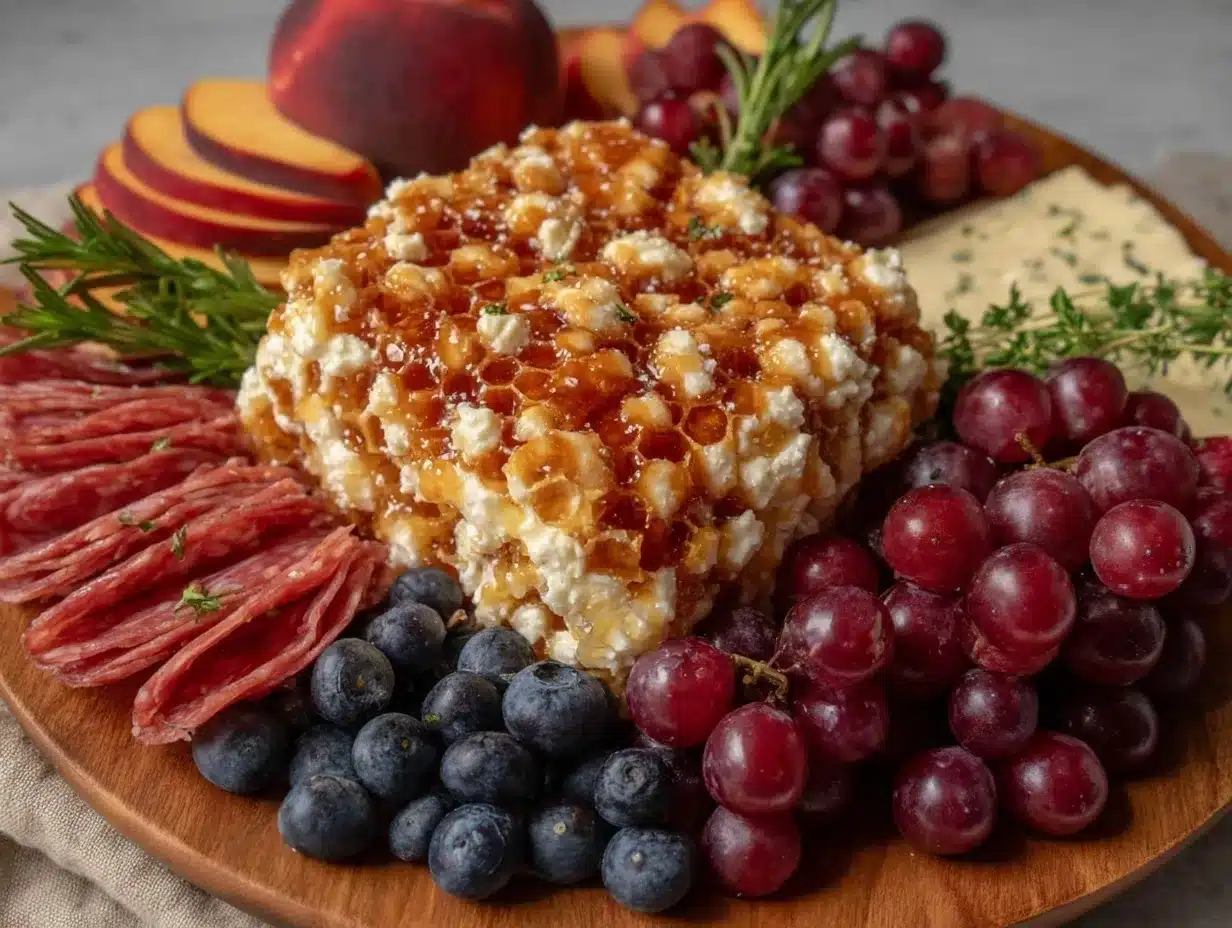
What sets this board apart is the honeycomb—not just as a garnish but as a star player. It’s not every day you see honeycomb on a platter, and honestly, it brings a rustic elegance that feels natural and unpretentious. The way it drips golden sweetness over fresh peaches or tart berries is a small detail that makes this board feel like more than just food; it’s a little edible celebration of the season.
Plus, by choosing seasonal fruits like ripe figs, plums, or berries, you’re not only supporting local growers but also getting the best flavor at its peak. This recipe has become my secret weapon when I want to impress guests without stress—or just treat myself to something that feels a bit special on a regular day.
What Ingredients You Will Need
This perfect summer charcuterie board recipe uses simple, wholesome ingredients to deliver bold flavor and satisfying texture without any complicated steps. Most items are pantry staples or easy to find at your local market, with seasonal fruits adding that fresh, vibrant touch.
- Cheeses:
- Goat cheese, creamy and spreadable (I prefer Cypress Grove for its tang)
- Aged cheddar, sharp and crumbly
- Brie or Camembert, soft and buttery
- Meats:
- Prosciutto slices, thinly cut
- Soppressata or spicy salami
- Seasonal Fruits:
- Fresh peaches, sliced (ripe but firm)
- Red and green grapes, washed and dried
- Figs, halved (if in season)
- Plums or nectarines, sliced
- Mixed berries like blueberries and raspberries
- Honeycomb:
- Raw honeycomb chunks (look for local, unpasteurized honeycomb for best texture and flavor)
- Nuts & Extras:
- Marcona almonds or toasted walnuts
- Olives, preferably Castelvetrano or Kalamata
- Crackers or sliced baguette (I love Raincoast Crisps for crunch)
- Fresh herbs like rosemary or thyme for garnish
- Optional Accents:
- Fig jam or apricot preserves
- Dark chocolate squares for a hint of indulgence
Substitutions are easy here: if you prefer dairy-free, swap cheeses with nut-based alternatives or skip entirely and add more fruits and nuts. Gluten-free crackers work perfectly if you’re avoiding gluten. If honeycomb isn’t available, a drizzle of high-quality raw honey can also do the trick, although it lacks the chewy texture that makes this recipe special.
Equipment Needed
This charcuterie board recipe doesn’t call for anything fancy — just some basics you probably already have. A sturdy wooden cutting board or a large serving platter works best to showcase all the ingredients elegantly.
- Large wooden or marble board (something with a bit of texture adds rustic charm)
- Small bowls or ramekins for nuts, olives, and jams
- Sharp knife for slicing fruits and cheeses
- Cheese knives or spreaders for soft cheeses like goat cheese and brie
- Serving tongs or small forks for easy grabbing
Personally, I find that a good quality cheese knife makes a big difference when cutting soft cheeses without squishing them. If you don’t have a fancy board, a large white ceramic plate or even a clean wooden tray will work just fine. Just avoid anything too slippery so the items don’t slide around when carrying to the table.
Preparation Method
- Prepare the Fruits (10 minutes): Wash all fresh fruits gently and pat them dry. Slice peaches, plums, and figs into bite-sized pieces or halves. Arrange grapes in small clusters to keep them looking fresh and vibrant.
- Slice Cheeses and Meats (5 minutes): Cut your aged cheddar into thin slices or small chunks. Slice brie or Camembert into wedges, and crumble or spread goat cheese onto small pieces of parchment or leave in a small bowl for easy serving. Arrange prosciutto and salami slices in loose folds or rolls for a pretty presentation.
- Arrange the Board (10-15 minutes): Start by placing the cheeses spaced evenly on the board. Fill in gaps with fruit clusters, meat slices, and small bowls of olives or nuts. Put honeycomb chunks strategically where they won’t get squished but remain accessible. Scatter fresh herbs like rosemary sprigs for a lovely aroma and visual appeal.
- Add Crackers and Extras (2 minutes): Place crackers or sliced baguette around the edges or in a separate basket. Add optional fig jam or chocolate squares if using.
- Final Touches (2 minutes): Lightly drizzle a bit of raw honey over the goat cheese or fruit if desired for extra sweetness. Check for balance and color, adjusting as needed.
Pro tip: Don’t overcrowd the board—leave breathing room so each item shines, and guests can easily grab what they want. The goal is inviting and approachable, not overwhelming.
Cooking Tips & Techniques
Putting together a charcuterie board is more about the art of assembling than cooking, but there are some tricks I’ve picked up that make a big difference.
- Choosing the Right Fruits: Pick fruits that are ripe but not mushy. Overripe peaches or figs can get messy and overpower the board. If you want a little tang, a squeeze of lemon juice on cut fruits helps prevent browning.
- Cheese Temperature Matters: Bring cheeses to room temperature before serving. Cold cheese can mute flavors and be harder to slice or spread.
- Honeycomb Handling: Honeycomb can be sticky and fragile—use a small knife to carefully cut chunks and avoid breaking the waxy cells too much. It’s best placed last on the board to avoid smushing.
- Balance Flavors and Textures: Think sweet, salty, creamy, crunchy. The nuts and crackers provide crunch, the honeycomb and fruit bring sweetness, and cheeses/meats offer savory depth.
- Multitasking Tip: While fruits are washing and drying, slice cheeses and meats so you’re not scrambling at the last minute.
Once, I tried packing everything too tightly on a smaller board and it felt cramped and less inviting. Since then, I always imagine guests reaching across the board easily without knocking things over. That little space makes the difference between a good board and a great one.
Variations & Adaptations
This charcuterie board is incredibly flexible, so you can tailor it to your tastes or dietary needs.
- Seasonal Swaps: In cooler months, swap summer fruits for pears, apples, and pomegranate seeds. Dried fruits like apricots also add sweetness.
- Dietary Adjustments: For a vegan-friendly board, replace cheeses with nut-based cheeses and add hummus or roasted veggies instead of meats.
- Flavor Twists: Try adding spicy elements like pepper jack cheese or pickled jalapeños for a kick. Or drizzle balsamic glaze over figs and honeycomb for a tangy contrast.
- Cooking Method Variations: Lightly toast nuts or warm crackers briefly in the oven for extra crunch and aroma.
- Personal Fave Variation: I once swapped out honeycomb for a dollop of whipped ricotta drizzled with honey and topped with fresh thyme—it was a creamy, fresh take that guests loved.
Serving & Storage Suggestions
This charcuterie board is best served immediately at room temperature so the flavors and textures can shine. The cheeses should be soft and aromatic, the fruits juicy and fresh, and the honeycomb tender.
Pair it with a crisp white wine like Sauvignon Blanc or a light rosé for a classic summer combo. If you’re serving a larger meal, this board makes a fantastic appetizer before dishes like quick zesty lemon chicken or a light pasta like spaghetti aglio olio.
To store leftovers, wrap cheeses tightly in parchment paper and keep fruits in an airtight container in the fridge. Honeycomb can be stored at room temperature in a sealed container. When reheating, bring cheeses back to room temperature before serving again. Keep in mind, fresh fruits may lose some brightness if stored too long, so best to enjoy within a day or two.
Flavors often deepen slightly after a few hours, especially if you drizzle honey or preserve on the board, so prepping a little ahead and letting it sit covered in the fridge can be helpful for parties.
Nutritional Information & Benefits
This summer charcuterie board offers a balanced mix of nutrients from its varied components. Cheeses provide protein and calcium, while seasonal fruits supply vitamins, antioxidants, and fiber. Honeycomb adds natural sweetness along with trace minerals and antioxidants from raw honey.
Estimated per serving (depends on portions): approximately 300-400 calories, with a good balance of fats, carbohydrates, and protein. This recipe can fit well into low-carb or gluten-free diets if you choose appropriate crackers or skip them.
Be mindful of potential allergens like nuts, dairy, and gluten if you’re serving guests with sensitivities. Substitutions like gluten-free crackers and nut-free options can easily be made.
From a wellness perspective, this board feels indulgent but not heavy, offering a treat that’s as nourishing as it is satisfying. The natural sugars in fruit and honeycomb are a sweet contrast to the savory cheeses and meats, making it a smart choice for mindful eating without sacrificing flavor.
Conclusion
The perfect summer charcuterie board with seasonal fruits and honeycomb is one of those rare recipes that feels both effortless and thoughtful. It’s a little bit fancy but doesn’t require fuss or stress—just good ingredients and a bit of care putting it all together. I love how it turns simple summer fruit into something memorable, with honeycomb adding a special touch that keeps people coming back for more.
Whether you’re hosting friends, enjoying a quiet evening, or need a quick snack that feels like a treat, this board fits the bill. Feel free to mix and match ingredients based on what’s fresh and what you love. I’d love to hear how you put your own spin on it—after all, food tastes best when it reflects you.
Give it a try next time you want to impress without the stress, and maybe pair it with a zesty dish like the quick creamy tuna pasta for a full meal that’s both simple and satisfying.
Enjoy every bite and the moments that come with it.
Frequently Asked Questions
What is the best way to store leftover honeycomb?
Store honeycomb in an airtight container at room temperature away from direct sunlight. It keeps well for several weeks, but avoid refrigeration to prevent hardening.
Can I make this charcuterie board ahead of time?
You can prep most components a few hours before serving, but assemble the board just before guests arrive to keep fruits fresh and cheeses at the ideal temperature.
What are some good alternatives if I can’t find honeycomb?
Use raw liquid honey drizzled over the board as a substitute, though you’ll miss the chewy texture. Another option is a sweet fruit preserve like fig or apricot jam.
Which fruits work best for a summer charcuterie board?
Look for ripe peaches, plums, figs, berries, and grapes. These fruits are juicy and flavorful without being too watery or mushy.
How do I prevent crackers from getting soggy on the board?
Place crackers just before serving and keep them separate from moist items. Using a few small bowls or separate plates for crackers helps keep them crisp.
Pin This Recipe!
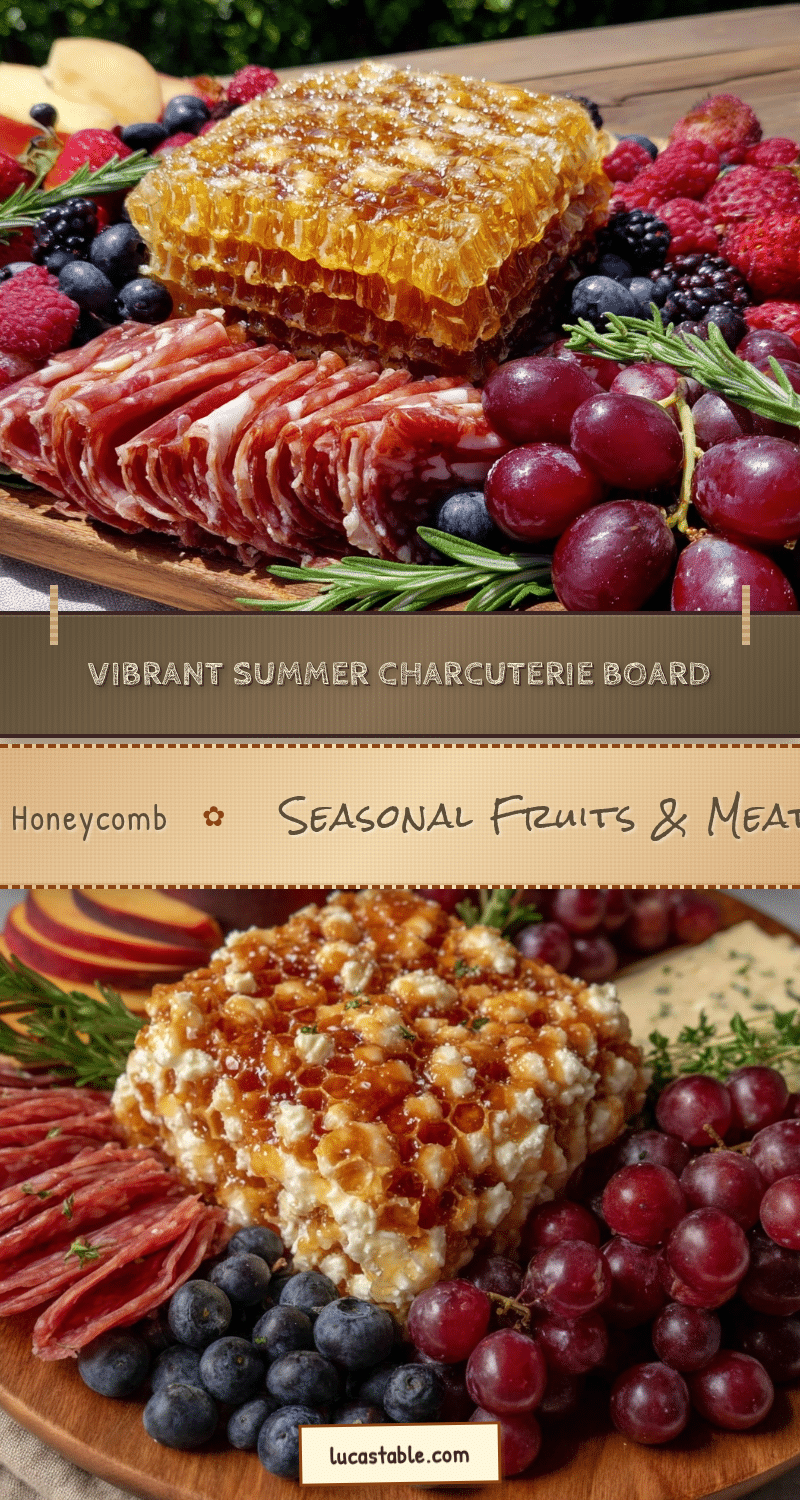
Perfect Summer Charcuterie Board Recipe with Seasonal Fruits and Honeycomb for Easy Entertaining

A simple yet elegant charcuterie board featuring seasonal fruits, creamy cheeses, savory meats, crunchy nuts, and unique honeycomb for a perfect summer gathering or solo treat.
- Prep Time: 15 minutes
- Cook Time: 0 minutes
- Total Time: 15 minutes
- Yield: 4 servings
- Category: Appetizer
- Cuisine: American
Ingredients
- Goat cheese, creamy and spreadable
- Aged cheddar, sharp and crumbly
- Brie or Camembert, soft and buttery
- Prosciutto slices, thinly cut
- Soppressata or spicy salami
- Fresh peaches, sliced (ripe but firm)
- Red and green grapes, washed and dried
- Figs, halved (if in season)
- Plums or nectarines, sliced
- Mixed berries like blueberries and raspberries
- Raw honeycomb chunks (local, unpasteurized preferred)
- Marcona almonds or toasted walnuts
- Olives, preferably Castelvetrano or Kalamata
- Crackers or sliced baguette
- Fresh herbs like rosemary or thyme for garnish
- Optional: Fig jam or apricot preserves
- Optional: Dark chocolate squares
Instructions
- Prepare the Fruits (10 minutes): Wash all fresh fruits gently and pat them dry. Slice peaches, plums, and figs into bite-sized pieces or halves. Arrange grapes in small clusters to keep them looking fresh and vibrant.
- Slice Cheeses and Meats (5 minutes): Cut aged cheddar into thin slices or small chunks. Slice brie or Camembert into wedges, and crumble or spread goat cheese onto small pieces of parchment or leave in a small bowl for easy serving. Arrange prosciutto and salami slices in loose folds or rolls for a pretty presentation.
- Arrange the Board (10-15 minutes): Place cheeses spaced evenly on the board. Fill in gaps with fruit clusters, meat slices, and small bowls of olives or nuts. Put honeycomb chunks strategically where they won’t get squished but remain accessible. Scatter fresh herbs like rosemary sprigs for aroma and visual appeal.
- Add Crackers and Extras (2 minutes): Place crackers or sliced baguette around the edges or in a separate basket. Add optional fig jam or chocolate squares if using.
- Final Touches (2 minutes): Lightly drizzle a bit of raw honey over the goat cheese or fruit if desired for extra sweetness. Check for balance and color, adjusting as needed.
Notes
Bring cheeses to room temperature before serving for best flavor and ease of slicing. Use a small knife to carefully cut honeycomb chunks to avoid breaking. Avoid overcrowding the board to keep it inviting and easy to serve. Store leftovers properly: cheeses wrapped in parchment, fruits in airtight containers, honeycomb at room temperature sealed. Prepare most components ahead but assemble just before serving to keep freshness.
Nutrition
- Serving Size: Approximately 1/4 of
- Calories: 350
- Sugar: 15
- Sodium: 400
- Fat: 25
- Saturated Fat: 10
- Carbohydrates: 20
- Fiber: 3
- Protein: 10
Keywords: charcuterie board, summer recipe, seasonal fruits, honeycomb, easy entertaining, appetizer, cheese board, picnic food